Northwest Stamper

Author: Jennifer

  • Last Day to get Paper Pumpkin in March!

    Last Day to get Paper Pumpkin in March!

    Imagine feeling in the mood to get crafty and being able to make something cute without pulling out all your supplies!  Or being able to make something different and not needing to have a bunch of different supplies?

    That is what My Paper Pumpkin is all about.  It is a project kit sent to your house each month that gives you a fun project in a box, with all the supplies included and pre-cut for you.  That means you get:

    • Stamps
    • Ink
    • Paper
    • Ribbon (if need)
    • Die cuts
    • Embellishments
    • Stampin’ Dimensionals (foam dots)

    The only thing you need to have is some adhesive (like a Snail tape runner) and possibly some scissors.  All for only $19.95/month plus tax.  Yup!  Shipping is included!

    Stampin’ Up recently improved the kits so they give you more finished projects and useful projects too!  The first updated kit came out this month and the next one (which I am super excited about) comes out this month.

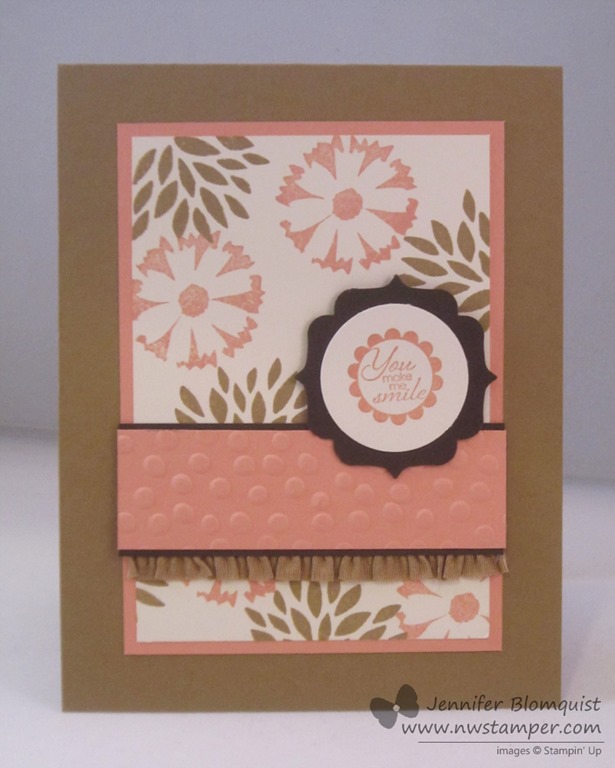
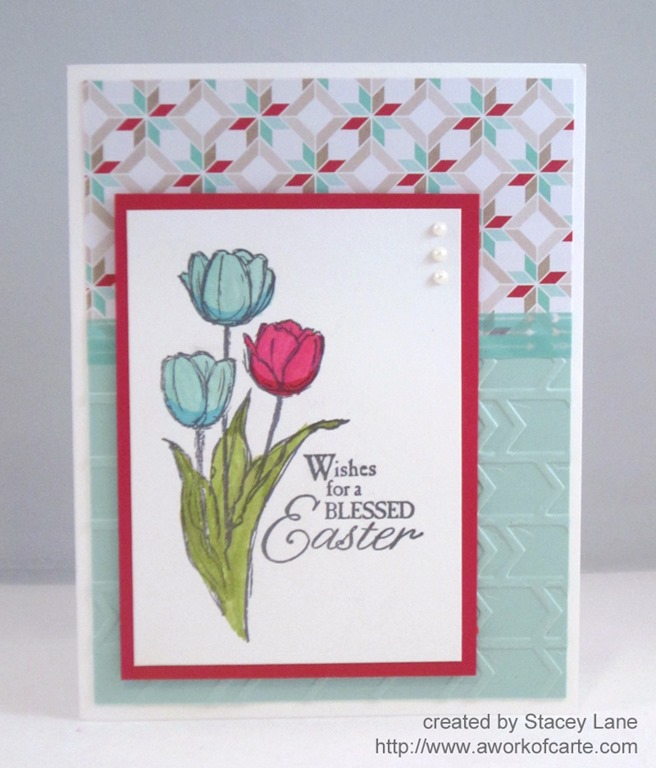
    Here is a peek at what was delivered this month.  I can’t wait to give customized gift bags out. Smile  Maybe I’ll use them for my team Stamp and Share event later this month!

    PLUS – They are giving anyone who signs up by the end of the month a free pack of markers with your first Welcome Kit!  SWEET!

    If you sign up TODAY you will get a kit this month, which mean you’ll get the welcome kit this month with the FREE markers and then next month start getting the new updated kits!  If you try it out and want to skip a month or don’t like it, you can pause or cancel at anytime and keep your markers and stamps from the first kit. Smile

    Give Paper Pumpkin a try and get your free markers here

    Also, if you sign up today but want to get in on March’s kit, let me know by 10pm TODAY and I can order you an extra March kit for you and ship it your way when it comes in!  Email me at jennifer@nwstamper.com for more details.

    Have a great day!

    spaced shop now sig bar

    March Online Stamp Club Hostess CodeXEWP4DFD
    Use this code to get free exclusive tutorials & project kit!
    Learn more

  • Sweet Sunday Card with People Like You

    Sweet Sunday Card with People Like You

    Happy Sunday and “SPRING FORWARD” day! Smile  Did you set your clocks ahead yet?  Its funny, I always use to hate this time change because of losing an hour, but now as a parent of toddlers, I love that it means that bedtime is a little bit earlier today.  ha ha.

    Also, if you haven’t been by my Facebook page recently, you may want to visit today!  I have a giveaway up today where I’ll be drawing someone to send some of my extra ribbon to.  All you have to do is visit this post and leave a comment and you are entered!  Tag a friend and if they are drawn, I’ll send you both some ribbon from my stash!

    I didn’t want to go too long without sharing another fun card idea with you.  This time, I have a great idea brought to you courtesy of Liz Mitchell who created this beauty –

    Some of the great ideas she shared with this card:

    • Use vellum cardstock with the Tulip Frame embossing folder to create a soft accent around the edge of your card.  Pair that up with layering over a bold color like Melon Mambo and it really stands out without being over the top!
    • Try some Naturals white cardstock for a unique look.  It’s a little hard to see in the picture, but she used the Naturals cardstock and that get the base paper a pretty lightly speckled look.  It really is a nice change from white or vanilla cardstock.
    • After you punch out the sentiment, use a marker to create a line around the inside of the punchout.  It creates a pretty border that is perfectly matched to the rest of your card.

    And really, I just love the sentiment with this stamp.  The whole image (including the sentiment) is one stamp, but the sentiment is perfectly sized to punch out with the Decorative Label punch.

    So grab your embossing folders and punch and give some of these ideas a try.  Happy Sunday!

    spaced shop now sig bar

    March Online Stamp Club Hostess CodeXEWP4DFD
    Use this code to get free exclusive tutorials & project kit!
    Learn more

    Stampin’ Up Supplies Used

  • A Pretty Idea for Petal Parade

    A Pretty Idea for Petal Parade

    I will admit, when I saw the catalog image for the Petal Parade stamp set that is available as part of Sale-a-Bration (you know, get it free with a $50 order!), I thought it looked kind of boring.  Some abstract flower images and that was it.  But then – like usual – I saw some samples and realized how pretty this set can be… especially for creating your own backgrounds like in a card that I found by Erna Logtenberg that I just had to CASE:

    This card has a little bit of everything in it:  stamping, embossing, ribbons, punches…I guess I just needed to fit in a die cut in there and I’d have the whole package! Smile

    But I loved this color combination and thought it worked so well with this stamp set.  I used:

    • Baked Brown Sugar
    • Crisp Canteloupe
    • Early Espresso
    • Whisper White

    It’s a pretty and elegant combination don’t you think?

    For the sentiment, I switched things up and pulled out my long neglected Round Array stamp set and instead of punching it out using the 7/8” scallop punch, I used a bigger circle punch instead (1-1/4”).  I thought the extra white space helped the sentiment not get lost.

    Did you see that two of the colors of the stretch ruffle ribbon are on sale this week as part of the weekly deals?  The Coastal Cabana and Strawberry Slush colors.. and you could use this same layout and design and just switch up the colors to match what is on sale.  Like Strawberry Slush, Baked Brown Sugar, and Early Espresso… or Coastal Cabana, Smoky Slate, and Silver glitter paper!

    In fact, now I’m off to try out the different color combinations because I think they are going to look awesome! Smile

    spaced shop now sig bar

    March Online Stamp Club Hostess CodeXEWP4DFD
    Use this code to get free exclusive tutorials & project kit!
    Learn more

    Stampin’ Up supplies used:

  • Tuesday Updates and Specials

    Tuesday Updates and Specials

    Tuesday is the day for Stampin’ Up to put out new releases and promotions and so I wanted to put them in one place to keep you in the know. Smile 

    New Weekly Deals

    As usual, there is a new set of crafting supplies up for 25% off.  I love the stretch ruffle ribbons (they are awesome for adding a fun frill around circles or ovals in your projects!)  Perfect colors for Easter projects too.

    image

    Shop all the weekly deals online here

    These sale prices are only available from March 4 – 10th, so pick them up this week if your favorite is on sale!

    New Digital Downloads

    I haven’t been very good in the past about posting digital projects and the digital downloads, but I know there are a lot of folks out there who enjoy digital or hybrid cards and scrapbooks so I wanted to share that new downloads have been added – many are digital versions of Occasions Catalog stamps and accessories – and are up on the site today.

    image

    See all the new downloads here

    If you are new to digital scrapbooking, keep in mind that these downloads work in any program that accepts image files, so you can use them in Microsoft Office programs, Adobe Photoshop, etc. 

    But to get the full use and easy control with some of the templates and images, give My Digital Studio a try!  You can try it FREE for 30 days with their trial option and then decide if you want to keep going or go back to non-digital crafting.

    Free Markers when you try My Paper Pumpkin

    Just a reminder that the deal was extended and if you decide to give Paper Pumpkin a try and get a project kit a month mailed to you, you’ll also get a free set of 2012-2014 In Color markers with your first box!  They’ve been improving the kits and I’m excited to see what they come out with next.

    image

    Learn more details here

    You have to be subscribed by March 10th to get the Welcome kit this month and then in April you’ll start getting the new, Improved kits!  Want to see some ideas for what you can make with the Welcome Kit?  I have a set of 5 cards I created using the just the supplies in the Welcome Kit posted here.

    Get Free Stamps and more with Sale-a-Bration

    Don’t forget, we are in the last few weeks of Sale-a-Bration and so you have until the end of the month to get your free goodies as part of this promotion!  Once the month is over, these stamps and paper will no longer be available and won’t come back in a future catalog. 

    image

    You can view the Sale-a-Bration catalog here to get all the details or check out the flyer below to see everything that is available for free with a $50 order!

    Sale-a-Bration 2014

    Or don’t forget about the $30 in bonus hostess rewards if you host a party or place a $300 order during Sale-a-Bration. 

    Want to join the fun Stampin’ Up! community as a demonstrator?  Get an extra $25 in your choice of product to be added to your Starter Kit free, so that is $150 in product for only $99!  Not too bad a deal, I think. Smile  Learn more about the perks of being a demonstrator here.

    spaced shop now sig bar

    March Online Stamp Club Hostess CodeXEWP4DFD
    Use this code to get free exclusive tutorials & project kit!
    Learn more

  • A Rugged Thank You Card

    A Rugged Thank You Card

    As I was working on Thank You cards recently, I decided to take a break from all the flowers and pinks that I seemed to be using lately and try to come up with a card that could be useful for a guy or a girl.  I wanted to use my new Starburst Sayings stamp set and framelits and so I grabbed a few stamps and ink colors and started mixing and matching.

    Turns out, I really liked the combination of Elegant Eggplant, Garden Green, So Saffron, and Island Indigo…. what do you think?

    I stamped and cut out two of the images and then cut out an extra piece of cardstock with a bigger starburst shape.  And just to add a bit of something to the cardstock piece, I decided to grab my Chalk pen to add a some faux stitching.

    Oh and my favorite accessory for more masculine cards – Burlap Ribbon!  I love the rugged texture it provides.  So glad it got carried over from the holiday catalog!

    Are you part of the club?
    Did you hear that I’ve started an online stamping club?

    I’ve been running my stamp clubs locally each month and I decided to expand it to my stamping friends who are not able to attend in person.  How does it work, you ask?

    1. Place an order in my Online Store that is at least $25 by the 25th of the month.
    2. Make sure you use the Virtual Club hostess code when you check out (I’ll post the code each month at the bottom of my blog posts)
    3. Within 48hrs, I will send you the password for an exclusive club page with links for PDF tutorials for the 2-3 projects we are making in Stamp club that month with full supply lists for all of the projects.
    4. If your order is $40 or more, then I will mail you a free class kit packet for the club projects so you can make them at home!  Class kits will start going out by the 2nd Thursday of the month.
    5. PLUS – every time you spend $40 you also are getting a punch towards a free stamp set with my Northwest Stamper Rewards program!

    There is no commitment and you can participate one month and skip the next!

    And if you’ve been in the club at any time in the prior 4 months when a new catalog comes out, you will be sure to get one in the mail from me for free!

    If you have questions, shoot me an email at jennifer@nwstamper.com.

    Ready to go? Shop online and use the hostess code XEWP4DFD

    spaced shop now sig bar

    March Online Stamp Club Hostess CodeXEWP4DFD
    Use this code to get free exclusive tutorials & project kit!
    Learn more

    Stampin’ Supplies Used:

  • Sweet & Simple No-Layer Card

    Sweet & Simple No-Layer Card

    Well, I totally forgot that today was Oscars day…. but given that my son has given me another head cold, today seems like the perfect day for laying on the couch and watching some TV.  So, if you are following along with the Oscars with me, don’t miss out on my Winners Predictions Contest over on my Northwest Stamper facebook page for a chance to win some prizes!

    In the meantime, I thought I’d share a very quick and easy card that is perfect when you don’t have a lot of time or are just feeling a bit icky like I am today.  Look…. no layers at all!

    All I needed was a couple stamp sets:  Happy Watercolor and Perfect Pennants, two ink pads, a marker, and my Simply Scored.

    After stamping each of the flower images, I went back over them and added some yellow to the centers of the flowers for an extra sweet touch.

    Also, I used my favorite trick for keeping no-layer cards interesting…. SCORING!

    Sometimes I make scored lines in a box shape to frame my image, but in this case I kept it even simpler than that and scored two lines along the top of my card.  The first link is about 3/8” from the crease of the card, then I scored a second line 1/8” further down from the first line to add emphasis.

    spaced shop now sig bar

    March Online Stamp Club Hostess CodeXEWP4DFD
    Use this code to get free exclusive tutorials & project kit!
    Learn more


  • Beautiful Effects with Markers for an Easter Card

    Beautiful Effects with Markers for an Easter Card

    I had one more card to share with you this week from my Occasions Catalog swapl  This time it is a gorgeous card from Stacey Lane who never fails to stun me with her creations.  In this case, there are so many great touches but I was actually stuck admiring her awesome coloring of the tulips.

    But first up, here is her card:

    See, so much cute going on from the embossed cardstock to the hint of washi tape and just a few pearls for an elegant touch!

    But like I mentioned before, check out the flowers!

    I’ll admit, the reason I like stamping is because I’m not an artist that knows how to draw or paint.  But I can combine colored stamp images to make something cute.  However, I am going to have to give this two toned coloring a try!

    I know once we get the Blendabilities alcohol markers, this will be piece of cake… but I realized that I can even do something like this with my markers or blender pens that I have now!

    All you need to do is pick out 2 complimentary colors and start by coloring in the lighter color throughout the whole image.  Then use the darker color to highlight or shade parts of your image (in this case the bottoms of the tulips and some of the tips of the leaves).  Just a little goes a long way to an amazing effect.  Don’t you agree?

    So, hopefully you’ve been enjoying the posts all week with some of the great inspiration from the Fun n’ Crafty gals!  I love seeing what they create and share each month and we would love to have you join us!  Don’t forget that during Sale-a-Bration, the Stampin’ Up! starter kit comes with a bonus of an EXTRA $25 in anything you want in the kit!  So, for only $99, you can pick out $150 in supplies to start creating with!  Whether you are looking for a great way to connect with others who love this hobby and get a discount on all your orders or would love to find a way to earn some extra money to support your habit or pay some bills, we’d love to have you join us!

    Learn more about the benefits of getting started!


    spaced shop now sig bar

    Virtual Stamp Club Hostess CodeBNDDMDVU
    Use this code to get free exclusive tutorials & project kit! Learn more

  • Quick Cards with Kaleidoscope Designer Paper

    Quick Cards with Kaleidoscope Designer Paper

    Continuing on the theme of sharing some fun ideas from my Occasions Catalog swap with my Fun n’ Crafty gals.  Today I’m sharing a couple more cards that use the Kaleidoscope designer paper.  As I mentioned when I shared my Vivid Vases card earlier this week, this is a pack of paper that I loved the colors but have a hard time visualizing how to use the patterns.  So, I love when I get some good ideas for how to us it!  This is what the paper looks like:

    image

    And here are some quick cards that give you some ideas for how you could use the paper.

    You could use just a little bit of the patterns like Pamela Wu did:

    And I love the little touches she added to the word bubble… with the mini brad and the stitched satin ribbon.  See…. Summer Starfruit isn’t so bad. Smile 

    Or you can do like Elise Hamilton did and go BIG!  She used the polka dot pattern for her background and then grabbed her On Film Framelits to add some flair and accents to the cards. 

    And if you are a scrapbooker, I will say, these framelits are FABULOUS!  I need to pick them up so I can use that filmstrip die to make a fun strip for a scrapbook page. Smile Can I just say, this year’s spring catalog is killing me with so many great stamp/framelit/punch bundles?!  Anyone with me?

    spaced shop now sig bar

    Virtual Stamp Club Hostess CodeBNDDMDVU
    Use this code to get free exclusive tutorials & project kit! Learn more

  • Guest Designers–Fun Cards with Fresh Prints, Banners, and more

    Guest Designers–Fun Cards with Fresh Prints, Banners, and more

    This week I’m sharing some of the great cards I got from my team’s Occasion Catalog card swap.  They came up with such fabulous cards that I wanted to share the inspiration with everyone! 

    Today’s cards show some cute ways to use the patterns in the Fresh Prints designer paper stack to add a touch of pattern to your cards…plus I just realized they use the exact same color combination too! Winning combo I think.

    image

    Card 1 – Perfect Pennants w/ Colored Rhinestones

    This first card was created by the talented Angela McCormack and is a great clean and simple card that uses the pattern of the designer paper to compliment the shape of the sentiment. (I REALLY need to get out my pennant framelits and start using them… love how this looks layered like this).

    Plus, if you look, those red spots in the corners are actually rhinestones that she colored with a sharpie to fit in perfectly!

    Card 2 – Banners for a Birthday

    Next up was this fun Birthday card created by Sara Grafton that is another clean and simple card but has so many fun touches that it packs a lot of punch! Smile 

    The Happy Birthday to You image is from one stamp and she did an awesome job coloring it in before stamping.  Then the touches of the popped up cupcake and the set of banners using the new Banner punch from the Sale-a-Bration catalog is a great addition.

    Aren’t they so talented?  I love that both cards as so fun to look at, yet are something I could do at home easily enough.  Thanks, Ladies, for sharing your wonderful ideas and inspiration!

    spaced shop now sig bar

    Virtual Stamp Club Hostess CodeBNDDMDVU
    Use this code to get free exclusive tutorials & project kit! Learn more

  • Fun with Vivid Vases

    Fun with Vivid Vases

    This week, I thought I’d share some inspiration for some of the fun new stamps from the Spring Catalog.  In my downline group (the demonstrators in my Fun n’ Crafty group) all created some amazing cards and I wanted to make sure everyone got a chance to be inspired by them!

    Today, I wanted to share a stamp that I LOVE that is also great because it is a single stamp, so it doesn’t take up much space, is inexpensive, and can be used a number of ways (even in ways that may surprise you).  For now, though, I thought I would share a couple ideas to get you started!  I’m talking about Vivid Vases.

    This was a make & take from Leadership this year and I loved how they used the geometric paper because I sometimes have a hard time figuring out how to use bold patterns but I loved this as a basic black and white striking background for the card.

    But really, the main thing we got to play with for this card is watercoloring the flowers and vases.

    When you want to do watercoloring like this, it works best when you start by

    1. Stamp your image with Stazon ink on watercolor paper.  By using watercolor paper, it lets you use extra moisture to get the mottled and diffused look without it tearing or pilling up your paper.
      Plus it gives your cards a fun texture because the watercolor paper is thicker and textured.
    2. Squeeze your desired ink pad while it’s closed so a little bit of the ink transfers to the top of the ink pad.  Use that like a paint pallet and pick up the ink with an Aqua Pen.
    3. Color your image with the pen like you would with a marker.  Add more color if you need.
    4. When you are done with that color, scribble your pen on a piece of scrap paper until no more color shows on the paper.  Then you can move on to your next color.

    Cute, right?

    Or get more fun colors by using paper piecing like my friend, Liz Mitchell!  Check out her great idea with this stamp set.

    I love how she took contrasting designer paper patterns (in this case from the Gingham Gardens paper pack) and made a mat for her card base and then cut out a smaller piece that she cut an oval out with the Oval framelit.

    Doesn’t it make a perfect picture frame?

    Then to add an extra pop of color with the vases, she stamped the stamp image again on scraps of patterned paper and then just cut out the individual vases.  Then you just glue them down to your main stamped image on a piece of white paper!

    Color in the flower buds with markers and you have a bright cheery card!

    spaced shop now sig bar

    Virtual Stamp Club Hostess CodeBNDDMDVU
    Use this code to get free exclusive tutorials & project kit! Learn more

    Stampin’ Up! Supplies Used
    Stamps – Vivid Vases
    Ink – Stazon, Melon Mambo, Daffodil Delight, Pumpkin Pie, Tempting Turquoise
    Paper – Watercolor paper, Daffodil Delight, Tempting Turquoise cardstock, kaleidoscope designer paper
    Accessories – Scallop edge punch, Aqua Pen

  • Quick and Easy Sweet Sorbet Birthday Card

    Quick and Easy Sweet Sorbet Birthday Card

    Today over on the Stylin’ Stampin’ Inkspiration blog, the design team girls have been putting together some quick and easy cards to share.  This is one that I put together recently to play with some of the free items from the Sale-a-Bration catalog.  I think it took me all of like 5 minutes to make…. and that is WITH die cutting and embossing! 🙂

    Sweet sorbet birthday card

    The card is your straightforward designer paper (isn’t that Sweet Sorbet so fun?!) matted with black cardstock… a piece of ribbon trimmed and sticking out from the back of a die cut piece.  Which was the only place I got fancy with the card…. remember, quick and easy!

    see ya later embossed birthday close up

    I stamped the sentiment from the See Ya Later stamp set (one of the free options when you place a $50 order) using versamark ink and then coated it in white embossing powder.  Heat it up… and it looks oh so nice.

    Then I cut that puppy out using my Deco Label framelits… sponged the edge… pop up on dimensionals… DONE!

    So, grab a fabulous designer paper, and really cute sentiment and you can be on your way to a great card in no time.  (Though if you want to grab this cute stamp set and designer paper, make sure you shop and order soon, because these won’t be around for that much longer!)

    spaced shop now sig bar

    Virtual Stamp Club Hostess Code – BNDDMDVU
    Use this code to get free exclusive tutorials & project kit! Learn more

    Sweet sorbet birthday cardStampin’ Up! Supplies Used
    Stamps – See Ya Later (**)
    Ink – Versamark, Sahara Sand
    Paper – Pistachio Pudding, Basic Black, Sahara Sand, Sweet Sorbet designer paper (**)
    Accessories – Big Shot, Deco Label Framelits, Chevron ribbon (Pear Pizzazz), Sponge Dauber, Heat gun, White embossing powder, embossing buddy
    ** FREE with a $50 order

  • Getting Ready for a Card Bonanza!

    I stayed up last night to start sorting out my card kits for my upcoming Card Bonanza this weekend.  On Saturday, I’m hosting the event at my house and it is an All-You-Can-Stamp crafting event!

    I was shocked to discover that I have over 130 card kits ready to go based on over 50 card designs!  See, this event is what I do to use up all my extra card kits left over from my technique nights, card classes, swaps, and events.  I deeply discount the kits and invite everyone over to make as many cards as they want.

    Here is the scoop:

    • Come and stamp for only $1.50/card
    • Come and stamp as many cards as you want for $10  (you just have to let me know when you get started)
    • Pick up a premade card with envelope from my big stash for only $2

    Can’t attend in person?

    • Get a set of 5 card kits for $11 mailed to you to make at home
      (note – due to Stampin’ Up policy, kits will not include stamped images, but they will include all paper and accessories precut and portioned)

    Either way, that is WAY LESS than Hallmark for some really fun and cute cards!

    Here is a small sample of some of the cards available to make:

    Fun, right?!

    So, check your calendar and if you are free this Saturday (2/22) between 1pm- 5pm, let me know and plan on coming over for this fun event!  RSVP here

    Can’t attend in person but would love some kits?  Email me at jennifer@nwstamper.com or order here and I’ll get you hooked up with some cute card kits!

    Card Kit Grab Bag – 5 card kits shipped w/in the US for ONLY $11!


    Now I’m off to finish pulling all the supplies needed for all the different cards – that is going to take me a while! But it will be fun and I can’t wait to see everyone creating on Saturday.

    spaced shop now sig bar

    Virtual Stamp Club Hostess CodeBNDDMDVU
    Use this code to get free exclusive tutorials & project kit! Learn more