Northwest Stamper

Tag: simple cards

  • Last Day to Save on the Butterfly Thinlets or Bundle

    Last Day to Save on the Butterfly Thinlets or Bundle

    We all are loving the Butterfly Thinlits and I will say, the Butterfly Basics stamp set too.  Now, I’ve told you before, I wasn’t quite sure what I thought about the Butterfly Basics stamp set when I first saw it… I loved the dies but the stamp set let me wondering what I would make with it.

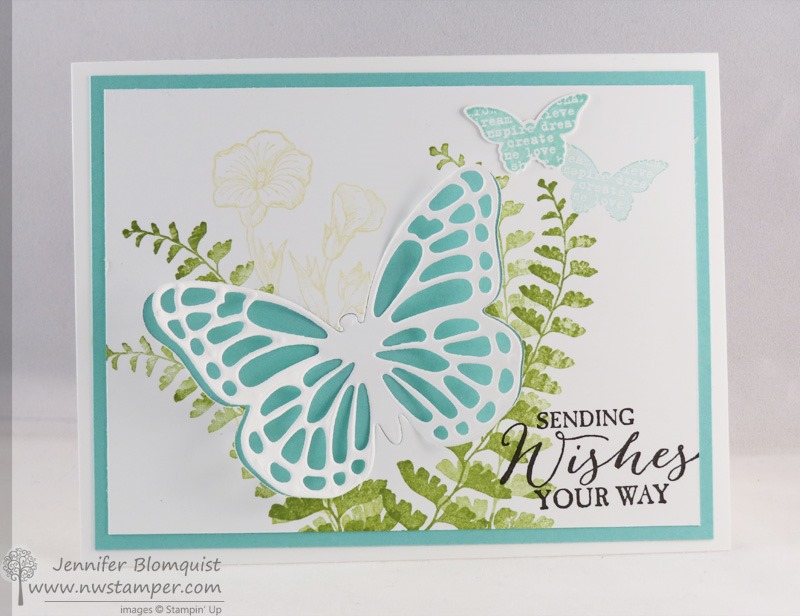
    I shouldn’t have been so worried!  I decided to just go for it since they had the 15% off bundle, and boy am I glad I did.  It make it so easy to make this card:

    I’ll have the project tips below, but first…

    DON’T FORGET!! 
    TODAY is the last day to get this awesome deal on these items:

    Here is where you can find them in the online store:

    137360
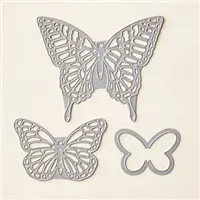
Butterflies Thinlits DiesPrice: $24.95 $21.20138865
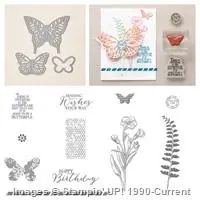
Butterfly Basics Photopolymer Bundle w/free product bonus
    Price: $41.50
    139323Butterfly Basics Clear Bundle w/free product bonus
    Price: $51.75
    139322Butterfly Basics Wood Bundle w/free product bonus
    Price: $61.95

    Tips for making this card:

    • Butterfly Basics turns out to be an awesome collaging set!  As in, you can take the stamps in the set and just start randomly mashing them together and 90% of the time, something super cool comes out!  I love a stamp set that doesn’t make me think too hard. Smile 
    • Use your medium butterfly thinlit to die cut completely out a butterfly from a piece of Whisper White paper.
    • THEN stamp your background images on the big white paper with the butterfly set aside.
    • THEN adhere your big piece of white paper to a slightly larger piece of colored cardstock (in this case, the lovely Coastal Cabana)
    • THEN adhere your butterfly back into the die cut hole, but only glueing down the central body of the butterfly.  This lets the wings be free to lift up from the page.

      Tip
      : Use 2 way glue pen for a quick adhesive that isn’t messy to glue your diecut down.
    • Fill in the corner by stamping the butterfly from the same stamp set on scrap paper to punch out, and then again (without reinking) onto your cardstock for a lighter matching butterfly.

    Ok – now I’m off to stalk the new Annual Catalog!  They are making it available for demonstrators to view the catalog online this morning and then start preordering new goodies May 5th!  So, I’m eager to check out all the new and start planning what I can show and teach.Want to get in on the excitement?  You can still join my team– get $125 in your choice of items for only $99 – PLUS see the catalog online right away and preorder along with me!  You will even get a discount on what you preorder.

    Join the excitement and sneak peek fun with the Fun n’ Crafty Stampers! NWstamper signature_thumb[9]order online button for sig 3_thumb[4]Project Supplies Used:
    Easy shopping anytime!  Click the images below to see the item in the online store.

    Supply List

    Built for Free Using:  My Stampin Blog

  • It’s Stampin’ Up! Convention Time!!

    I’ve been getting super excited over the last week as convention approached and I started getting exciting wondering what amazing ideas I’d see, what new products would be revealed, and have a chance to hang out and reconnect with some wonderful people.

    As I do each year I’ll be posting live updates to my Facebook page (as long as my battery holds out each day) and I’ll give you the full scoop and pictures each night here on the blog.  So even if you can’t be here in person, you can still participate in the excitement and get a feel for it with me.

    Travelling to Salt Lake City!

    So, today was my traveling day and I was very lucky to have 4 members of my group plus a great stamping friend traveling with me from Seattle to Salt Lake City.  We hopped on our plane last night and were treated to the most amazing sunset as we came in to land in SLC.

    salt lake city sunset

    We got our bags and a shuttle and headed to our homebase for the weekend – the Radisson at the convention center.  Check out the cool wall art about the nice beds:

    Convention 2013 Radisson hotel room

    And while I should really be sleeping in that bed right now (since breakfast comes waaay to early in the morning), I thought I’d show you some of the other fun things I brought with me to kick things off. Smile

    1.  My nametag & convention buttons!

    My first year at convention, I saw people with their lanyards full of pins and buttons and I realized that many people collect their convention pins and acheivement pins on their lanyard and I set out to start collecting mine.  It’s taken me 5 years, but I love that it is getting more full.  I know… its silly, but sometimes the little things make it more fun!

    convention 2013 name tag and lanyard

    Plus with 6,000 demos in attendance, they are checking badges this year and so I got to make it fun to look at!

    2.  Swaps!!

    What would a Stampin’ Up! event be without swaps?  I started out with making a ton of this Flower/Doily card… it was fun and easy to make a bunch.  But when I was done, I had made 76 cards and I decided a few days ago that a few more wouldn’t hurt and so I made the Christmas cards as well.

    Flower Shop Doily Card

    stampin up convention 2013 flower shop swap

    I used the new Flower Shop bundle to create the cute flowers and then just accented with one of the Whisper White doilies.

    I decided I needed a few more swaps and I thought of this fun way to use the new Christmas Collectibles stamp set.
    (psst – sneak peek alert!  New holiday catalog goodies including the new stamp set, punch, and embossing folder.)

    Christmas Collectibles Ornament Card

    stampin up convention 2013 christmas swap card


    3.  Fun n’ Crafty group gifts!

    And finally, I put together a little Convention Survival Kit for everyone in my group since it was the first convention for many of them.  Some people have the tradition of downline gifts and roommate gifts… I just was excited to have so many downline and friends going with me I wanted to put a little something together for them.

    Stampin up convention 2013 survival kit

    • I figured a few emergency snacks and mints would be nice.
    • Wet wipes for cleaning up after snacks or when you are stamping during make & takes and need a little extra clean up power.
    • Some tissue, because there is always some touching story or presentation that gets the whole room crying!
    • Chapstick – I swear, I always forget this and buy a new stick every year when I am here!
    • Band-aids were supposed to be in the bag, especially for when you are walking all day and your shoes start rubbing
    • …and of course a cute bag they can reuse each day to easily find their essentials.

    Today they get their handmade gift from me… but I’ll save that surprise for my next blog post!  Ooh, I can’t wait to give everyone theirs!

    So, today will be a day full of Stampin’ Up! home office tours, swapping, opening session, and a big party afterwards!  I’ll post as I go on my Facebook page and then back here later for the full report.

    I’m so excited!

    Now for a few hours sleep while I can….7:15am comes too early!

    spaced shop now sig bar

  • Stampin’ Up! Convention 2010 – Swaps, Shelli, and my new goal

    I really do have way too many pictures to share from convention, but I wanted to share a few more with you.

    On the last day, mom and I were able to meet the celebrity of the hour – Shelli Gardner, co-founder and CEO of Stampin’ Up!  I hadn’t realized that she had been spending almost all of the lunch break for 3 days sitting and taking pictures with one demonstrator after another.  Of course she was very sweet and was happy to chat with everyone who met her.IMG_4286 

    Like I said before, convention is not only a time for fun, friends, and fabulous ideas, but it is also a motivational time for me.  IMG_4172With a new baby and moving earlier this year, I’ve been slow to get moving on getting my Stampin’ Up! business rolling.  However, with the enthusiasm of convention and the announcement of a new awesome incentive trip – I’ve decided my goal is to work towards Disneyworld 2012.  That means I’ll be working on scheduling workshops and building my team over the next year.  Its an exciting time for me and I’d love to share that excitement with you.

    Oh, and I have to give a shout out to my dad as well.  He came along to Salt Lake City and ended up helping carry our Memento Mall haul and babysitting Nicholas for my make and take sessions.  Thanks Dad!  You’re the best!IMG_0863

    Finally, as promised, here are some of the amazing swaps I got while at convention.  I can’t wait to try them out myself now that I’m home.

    card by Sharlene Mitchell                             card by Teresa Payne-Neal

    card by Laura Tollander                                card by Kathy Thisted

    card by Janine Verster