Northwest Stamper

Tag: project life

  • Second Chance Sale-a-Bration

    Second Chance Sale-a-Bration

    second chance sale-a-bration


    After getting back from the amazing Northwest Crafty Escape Weekend, my craft room was a mess, and I desperately needed to get organized for my Craft Garage Sale next weekend… so I’ve been cleaning and organizing a lot. 

    In the process, I discovered a stash of awesome stamps from Sale-a-Bration and thought it would be fun to give them away to my amazing customers!  So, I’m holding – a Second Chance Sale-a-Bration!

    So if you missed a great stamp set, or just haven’t placed your new catalog order yet, NOW IS THE TIME!  Check out what is available and get yourself a little bonus gift as a thanks from me for helping me out!

    Displaying

    Get your pick of free goodies with your $50 Stampin’ Up purchase

    I found the following gems in my craft room that you can choose from as a thank you for your purchase:

    • Good Greetings Limited Edition Hostess Set (NEW, woodmount)
    • Lotus Blossom (NEW, photopolymer)
    • Lotus Blossom (gently used, photopolymer)
    • Best Day Ever (NEW, clearmount)
    • A Happy Thing (NEW, clearmount)
    • Big Day (NEW, clearmount)
    • You Brighten My Day (gently used, clearmount)
    • This Day Project Life mini card collection
    • (not pictured) NEW Go Wild 6″x6″ Designer Paper Stack from the new 2015-2016 Annual Catalog!

    Place any Stampin’ Up order using the hostess code ZKGTCW6U of $50 or more and you can select one of the items above to get for FREE! 
    The free items are FIRST COME, FIRST SERVE!  So, when you place your order, please email me with your selection so I can set it aside for you.

    Shop now

    then email me at jennifer@nwstamper.com to pick your free item!


    NWstamper signature_thumb[9]

    order online button for sig 3_thumb[4]

  • Scrapbooking Sunday: Using Project Life Cards on a Traditional Scrapbook Layout

    Scrapbooking Sunday: Using Project Life Cards on a Traditional Scrapbook Layout

    I was honored to be asked to create some projects for the Stampin’ Up official blog.  They were focusing on Project Life and so they asked me to put together some layouts using the Happiness Is card collection and accessory pack.  I created a pocket page 2-page layout using the cards and share that idea on this blog post.  But I also used my project life cards to show how easy it is to use them for your traditional layouts as well.  This is what I came up with:

    Happiness is traditional scrapbook layout copy

    Featured Retiring Products:

    Get them before they are gone in 2 DAYS!

    This layout is special to me because it is for my Aunt Sarah who was one of my best friends growing up and that adult in your life that you can always turn to when you are struggling, or hurt, or confused, or just need someone to talk to who is an adult but isn’t your parents.  Sadly, about 10 years ago she finished her struggle with Brain Cancer and so now I have scrapbook pages and pictures to help me remember and cherish her amazing life.

    happiness is traditional scrapbook layout close up

    Now, on to more of the fun stuff!  How about some insight into how I put this layout together!

    Tips for making this layout:

    • I love getting the Project Life by Stampin’ Up card kits and I ALWAYS get their matching Accessory Packs!  It makes it so so so easy to start creating because I have flair from the Accessory pack which I know will coordinate perfectly so I can just dump it out on my table, grab a card, and go!
    • Use your cards to create photo backgrounds and layering elements on your traditional layouts.  I used the following:
      – a card for a photo mat of the picture of Sarah and myself
      – a card for the title of the layout “such a lovely life”
      – a card for the strip of pattern that runs across the page… check it out:

      project life card as designer paper for scrapbook layoutT
      ake one of your cards and trim a 1/2″ – 1″ strip off one side, then glue that strip along one edge of your base paper.  Use a ruler or other straight edge to form a level line across your paper and then adhere the OTHER piece of your card to the opposite edge to make it look like you have one long piece of patterned paper on your layout!
    • Combine and layer your accent pieces for a cute collage effect.  The “love” arrows, actually came from the fact that I thought they were a single dimensional element at first because in the kit the sticker flags (like shaped post-it notes) were all stacked together.  It was only when I looked closely did I discover it was a WHOLE BUNCH of elements!

      happiness is sticker flags
    • Don’t hesitate to spruce up the cards from your kits either.  I used my Kinda Eclectic stamp set to add a sunburst to my title!

      creating a sunburst on a project life card
    • You can also spruce up your wooden elements too!  I used a sponge dauber and my Hello Honey ink to create a yellow heart for my layout.  I’ve shown it here on an uncolored wooden banner.

      coloring wooden elements with sponge daubers


    and just a reminder, that if you like this kit (or some of the other retiring kits) you can get them for 50% off through June 2nd before they are discontinued. Smile  Just saying… and ALWAYS get that accessory kit when you get the card kit!  You won’t be sorry!

    So snag them while you can in the online store!


    NWstamper signature_thumb[9]

    order online button for sig 3_thumb[4]

    Project Supplies Used:

  • Sharing Thanksgiving Memories with the Happiness Is Project Life Kit

    Yesterday was National Scrapbooking Day and while I normally like to celebrate by actually trying to catch up on some scrapbooking pages, this year I opted for some family time as my husband and I had both returned from business trips on Friday.  The kids had been with Grandma and so it was our turn to hang out and have fun with them. Smile

    But I did have the honor of getting to create a couple layouts using the Happiness Is kit for Stampin’ Up’s National Scrapbooking Day blog post and they were posted for you to see this weekend!  I’ll admit I got a little school girl excited when I saw my name in print on their blog.  Though, I discovered that the photos they shared were TINY!  So, since one of the coolest things about Project Life is how easy it is to add a little pizzazz to your quick and easy pages, I thought I’d share some up close photos of the details of my layout with you today.

    Happiness is Project Life 2 page layout ver 3

    Bear with me, I’m still trying to figure out the best way to photograph my layouts.  But the thing I love about Project Life is how easy it can be to put together layouts.  I grab a card kit & the matching accessory kit (seriously, this is the BEST THING EVER!) and lay them out on my table and just go.

    Happiness is accessory pack

    1. Pick a few photos you love
    2. Print them out wherever is most convenient for you
    3. Slide them into pocket pages (look! almost done!)
    4. Pick a Project Life card kit & matching Accessory pack

      image
    5. Grab some matching cards and write what is happening in the pictures – add embellishments if desired
    6. Put in your album and you are done!

    Here are a few of my favorite things about this layout:

    • Layer 3×4 cards onto 4×6 cards with Washi Tape (it’s included in your accessory pack!) for a quick title card.  I just had to add the year numbers (also in the accessory pack) and write in the dates!Happiness is project life embellished layout title card close up
    • Don’t feel like every card has to have writing on it! Sometimes just a couple embellishments or even just the way it is printed is perfect.
    • Bust out your “fancy” techniques like layering vellum over a 3×4 card and heat embossing the sentiment (in this case the “love” from the So You stamp set)Happiness is project life embellished layout right close up
    • Don’t forget you can stamp on your photos too!  It was hard to photograph, but I stamped the sun image on the bottom photo with the Metallic Gold ink and it was the perfect touch!Happiness is project life stamping on photos
    • The Happiness Is kit also comes with these little wood accents that are laser etched with images and words.

    Happiness is accessory pack wood embellishments

    A fun little bonus for your layout… especially with that adorable face, am I right?
    Happiness is accessory pack wood embellishment close up

    • I also liked taking multiple stamps and putting them on my clear block at the same time – like these hearts (also from the So You stamp set).   They are two separate stamps but I wanted to use them together. Position on your card, press onto the block, and then ink and stamp!
       So You stamps with Project Life on a journaling card So You stamps with Project Life

    So this layout had a lot of little touches and accents, but it took me way less time than a traditional scrapbook layout and still has all the personal & handmade touches.

    If you have photos on your computer, in your phone, printed out and sitting in those photo envelopes from the printer – why not give this a try?  Get those photos out where everyone can enjoy them and you don’t need a craft room of supplies to do it!  It’s fun, it’s easy, and your family will love it!

    Get a Great Deal with 50% off Retiring Project Life Kits

    Through June 2nd (or while supplies last) many of Stampin’ Up’s Project Life kits and accessory packs are on sale for 50% off as the patterns are being discontinued!  You have great sets for kits, baby, and everyday Including this cute Happiness Is card kit and accessory pack that I used.

    image

    So snag them while you can in the online store!


    NWstamper signature_thumb[9]
    order online button for sig 3_thumb[4]

    Project Supplies Used:
    Easy shopping anytime! Click the images below to see the item in the online store.

  • Stampin’ Up! Leadership 2015- Day 1 Recap

    Stampin’ Up! Leadership 2015- Day 1 Recap

    So, after going to bed Wednesday night/Thursday morning at 3:30am and then getting up at 7:30, I told myself I was going to go to bed by midnight tonight.  (I couldn’t really go to bed earlier than that because I had an event that didn’t get me home until 11pm)…. so, it is now 12:45am and I’m still wrapping up everything.  Seriously, someone teach me how to travel and actually GET sleep! Smile

    Today was the first day of the Leadership Conference here in Orlando for Stampin’ Up and it was FULL of information, tummy cramping laughter, great friends, and amazing project ideas!  I hope you don’t mind indulging me as I relive the day a little.  (and you can see ALL my pictures from today over on my Facebook page – Leadership Day 1 photo album)

    ———————————————————

    So after getting a late start we headed to the convention center to get our bag and say hello to new and old friends around the convention center!

    2015-01-29 08.30.21

    I was a total slacker, but my sweet friend Karina Chin gave me this amazing bag tag and notebook!

    2015-01-29 08.48.35

    I was so glad to have a few of my Fun n’ Crafty stampers and downline here with me, it made it so much fun to be able to share this with them!

    IMG_3814

    Even though we spent literally all morning and early afternoon going over compensation plan changes for demonstrators that are coming up in October.  I don’t mind math… but being tired and trying to do math is way harder! Smile

    We got a nice lunch

    2015-01-29 12.11.55

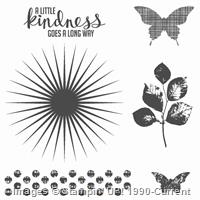
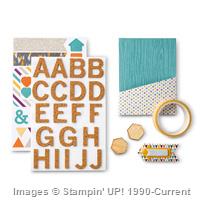
    Had an (unintentionally) hilarious stamping presentation by Shelli Gardner…

    2015-01-29 15.56.53

    2015-01-29 15.38.56

    IMG_3844

    2015-01-29 16.07.49

    2015-01-29 15.44.58

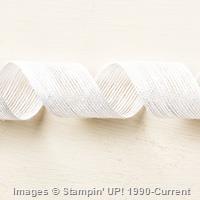
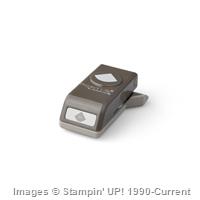
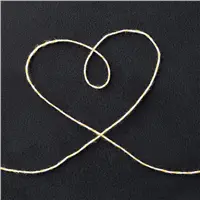
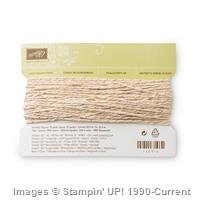
    See, when she was showing how to make these feathers using the new Cotton Twine and Washi Tape… she didn’t tell us she was making a feather at first and with the white stringy tail it looked like something a little different that had us all dying of laughter including Shelli when she realized  (think feminine product with a string ha ha)

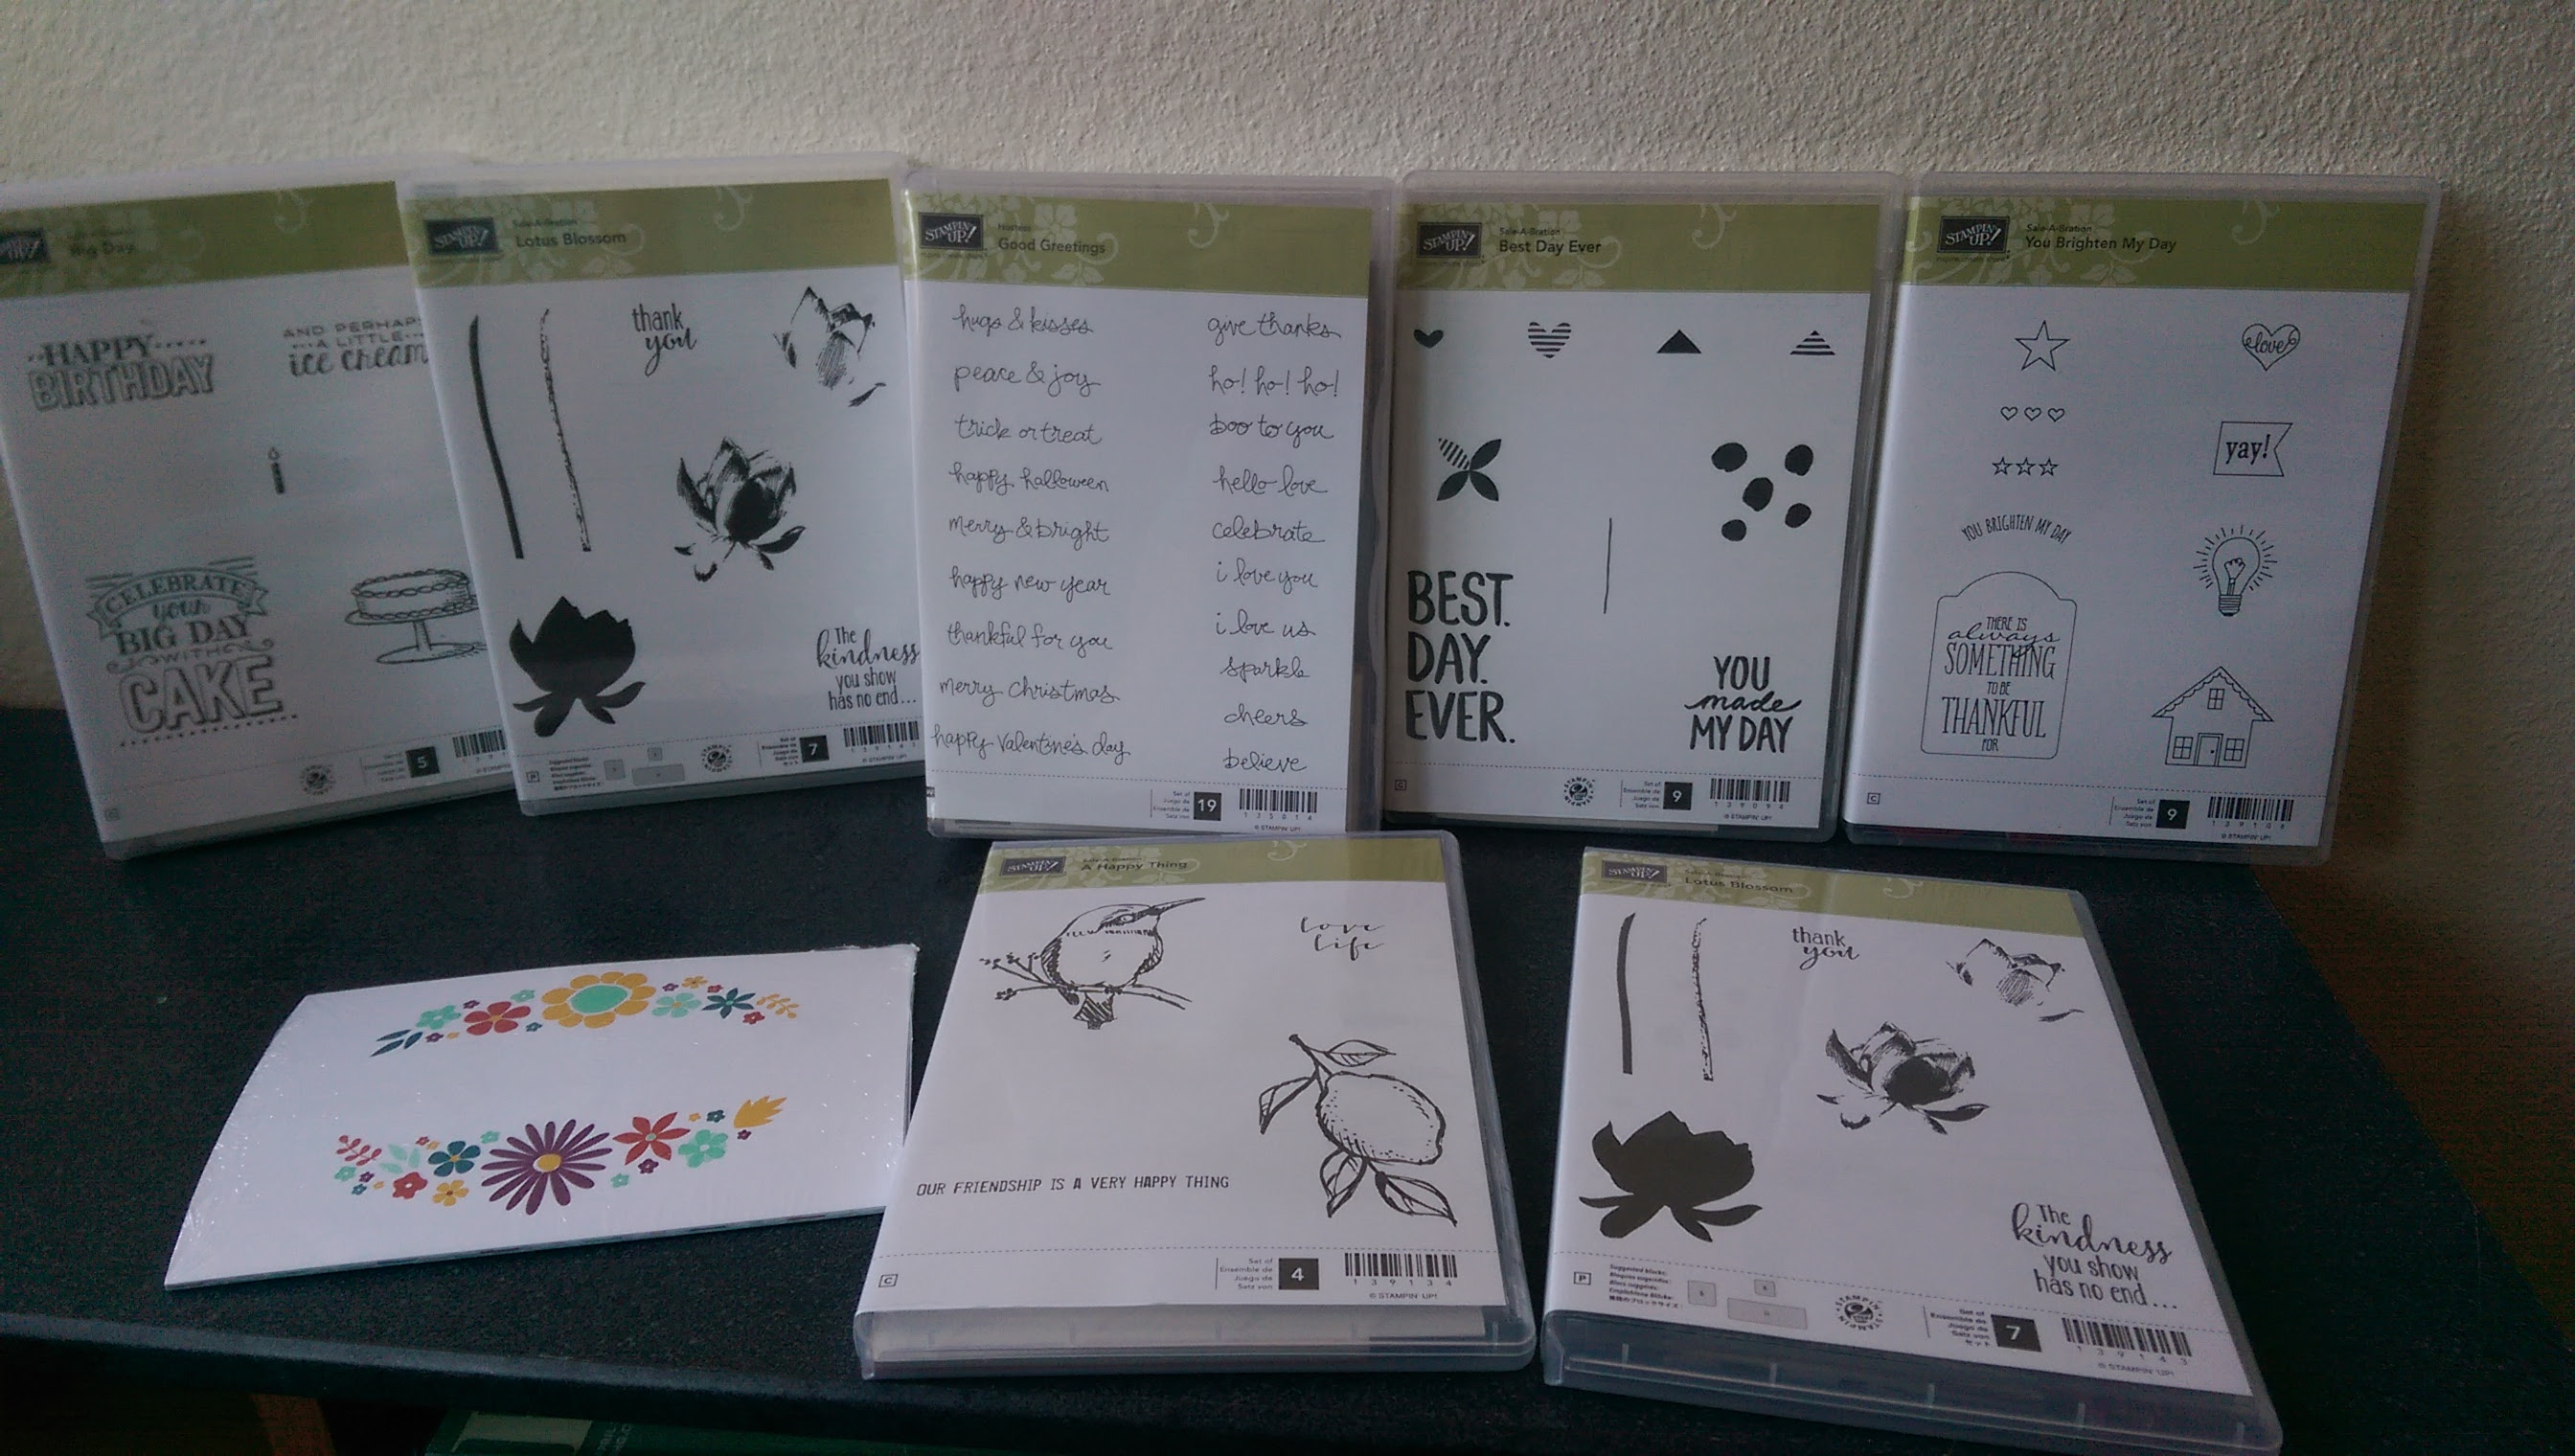
    They even gave us ALL a stamp set she was using! Smile

    2015-01-29 16.12.12

    I participated in a great card swap (so many cute samples to share later)

    2015-01-29 12.55.102015-01-29 12.33.11

    and loved seeing some old friends!  Including the adorable Andrea Withers2015-01-29 09.29.16

    Brandy Cox

    2015-01-29 11.48.11

    and my Stampin’ twin (when I cut my hair again) Julie Davison

    2015-01-29 22.17.46

    Then in the evening it was time to head to Manager’s Reception!  A fun night out for any demonstrator with the title Manager or above.  So Karina and I were ready to grab the bus and go!

    IMG_3953

    This year they rented out part of Disney’s Hollywood Studios and though it was a bit chilly, we had a chance to mingle….IMG_7268

    You know, me and my buddy Shelli Gardner Winking smile

    We also had a private showing of Fantasmic

    IMG_7277

    Photo ops with the Mickey Mouse and friends…

    IMG_7311

    Yummy desserts! Isn’t that cake pop adorable???

    IMG_7302

    And even a hot chocolate bar… care to guess how many scoops of marshmallows went into my cup? Don’t stop at just one! Smile

    IMG_7308

    So all in all, a great first day! Next up, more great sharing of business ideas from demonstrator speakers, more stamping demonstrations, more samples, and more playing with the latest products!

    See Even MORE Pictures and Samples from Day 1 here

    While you are visiting my Facebook page, make sure you have liked it so you can get updates as they come throughout the day tomorrow!


    Don’t Forget!  Get Double Your Rewards Points through Sunday!

    And while I’m away, get 2x the rewards through Sunday! My gift to you while I’m playing in Orlando.

    1. For every $40 you order = 1 punch 2 punches!, $80 = 2 punches 4 punches AND a Sale-a-Bration freebie…and so on!
    2. Any purchase from me in the last year counts towards accruing rewards punches!
    3. Got 10?  Email me and let me know what stamp set you want. Easy Peasy!

    Shop online with hostess code S7A2HN9W (enter it on the shopping cart page) and you are all set or email me at jennifer@nwstamper.com with your order.


    NWstamper signature_thumb[9]

    order online button for sig 3_thumb[4]

  • A Congratulations Card thanks to Project Life Everyday Adventure

    Ok, my brain is on Project Life and pocket page scrapbooking because I’m so stinkin’ excited for having finished up my complete December Daily album for 2014.  Yes! You heard me right… I actually finished a scrapbook LESS THAN A MONTH after the photos were taken!! What?!  I know, how crazy is that. Smile

    December Daily 2014 stampin up christmas scrapbook inside 2

    But it made me realize how super quick and easy getting your photos off of your computer and into a book can be.  Especially thanks to the accessory kits that Stampin’ Up has created to go along with the card kits.  Seriously, I can make my pages cute and not have to think very much because I just dump out all the supplies on my craft table and just pick from the pile for each page.

    But what if you have extra cards or you don’t feel making a scrapbook album?  How about a card!

    This card was inspired by the fabulous Erica Cerwin during one of the Artisan Blog Hops for Stampin’ Up!  (You can see her card and other great cards using Project Life journalling cards here.)

    Tips for making this card:

    • Pick a bold patterned 4×6 card (like this black and white patterned one from the Everyday Adventure card kit) and trim it down to a smaller size for your background paper.  This was cut down to 4”x5.25”.
    • Mat the card with a slightly larger cardstock piece (like this 4-1/8” x 5-3/8” piece of Basic Black) for a big impact.
    • Take a 3”x4” journaling card and don’t be afraid to turn it on it’s side or cut it down for your sentiment!  Then stamp away – like with this sentiment from the Bravo stamp set.
    • Add a simple accent with glue dots – like the Wooden Elements heart and then a bow out of the Gold Baker’s Twine and you are done!

    See more of my December Album over on my Facebook Page

    Or go check out all the options for Project Life cards and accessory kits (seriously, from now on I’m always getting the accessory kit when I buy a card kit!).  You can even get a special Project Life card kit for FREE as a choice during Sale-a-Bration with a $50 order. Smile  Sweet, right?!

    NWstamper signature_thumb[9]

    order online button for sig 3_thumb[4]

    Project Supplies Used for the Card:
    (if you are reading this in email, click here to see the list of supplies)

     Project Supplies Used for the Scrapbook Page:

  • Bright Banner Birthday Card using Project Life + Double Reward Points!

    Just popping in for a quick blog post because I wanted to share with you another bright and fun project.  How about a celebration card with lots of cheery colors?

    See that bright pattern I used for the big banner?  I was getting tricky and instead of using designer paper, I used a card from the Project Life Everyday Adventure set!  I die cut it using my Banner framelits and matted it with a Black banner.

    Then grab some coordinating Cardstock and punch some little banners using the Banner punch.  I topped it off with some twine and then it was time to get some sparkle on!  Courtesy of the 2013 In Color sequins.

    I even had to add a sequin to the sentiment from the Yippee Skippee Stamp set.  Can’t leave any part unblinged. 🙂

    Gratitude Month Week 3 Thank You Gift!

    All this week, get DOUBLE PUNCHES on your Northwest Stamper Reward card!  Yep!  All orders through Sunday are giving you a way to earn a free stamp set from me even faster!

    For every $40 you spend (before tax and shipping) earn 2 punches on your punch card.  At 10 you’ll get to pick a free stamp set to receive totally free!

    And just a reminder of the newest Weekly Deals:

    weekly deal 11-18-14

    Have a wonderful week and I’ll be back with more projects for you soon!

    NWstamper signature_thumb[9]

    order online button for sig 3_thumb[4]

    Project Supplies Used:
    (if you are reading this in email, click here to see the list of supplies)

  • A Quick Card Using Project Life Cards Plus Weekly Deals and a GIVEAWAY!

    Did you realize that the Project Life cards aren’t just for scrapbooking or memory keeping?  Yup! It’s true!  Check out how I used two of the cards to create a fun card that you can send to anyone – no stamping required!

    I cut my card base out of Bermuda Bay cardstock and then had to trim down one of the 4”x6” cards (the blue and white striped card).  There was a spot on the card where there some extra spacing of white that made sense when you were using it as a 4”x6” card but not so much when you were mounting it on a card.  So I trimmed it down to 4” x 5.25” and then took the extra 3/4” strip and added it over the white wide band to cover that up and add some extra fun striping (see the black arrow in the picture below to where I glued it).

    Then I used some black cardstock to mount my 3”x4” HI card from the Everyday Adventure card kit and added a bit of ribbon and rhinestones and mounted it to the front of my card.  Done and Done!

    Get this card kit and more for FREE with a new Giveaway that just launched today!

    Project Life giveaway

    Stampin’ Up! is doing a giveaway of either their entire Project Life line or 100 first prizes of your choice of card kit and accessory pack.  How awesome is that?  Plus, if you share it with your friends, you get extra chances to win.  And who doesn’t like free, right?  Maybe you AND your friends will win and can all get your photos organized together. Smile Its a easy and fun way to get those photos off your computer and into a cute photo album without the muss and fuss! Get entered here –http://bit.ly/1wz8yxu

    Weekly Deals

    Check out the latest deals that went live today!  You can click any image below to shop or get more details or see them all online here.

    NWstamper signature_thumb[9]

    order online button for sig 3_thumb[4]

    Card Supplies Used:
    (if you are reading this in email, click here to see the list of supplies)

  • Stamp Set Focus on Kinda Eclectic with the Stylin Stampin Girls

    Over at the Stylin Stampin’ Inkspiration blog, today they are doing a Stamp Set Focus – where everyone uses the same stamp set and creates something different with it.  Which is awesome because you get a bunch of ideas for one stamp set.  This time they are doing the Kinda Eclectic stamp set and if you’ve been following my blog at all, you know I’m kinda a fan…. ok, or maybe a big fan!  So, of course I was going to play along.

    This was a display board card I created but ended up not actually making it onto the boards  I know it’s not blow-you-away-amazing, but I thought there were some fun touches so I wanted to make sure to share them with you.  Who knows, maybe you’ll take one of these ideas and use them in an even better way on your own projects!  (Just be sure to send me the link so I can love on your project! Smile)

    Tips for creating this card

    • See that swoosh below the main stamped image?  Do you recognize it?  Look familiar?  It is my VERY FIRST use of my Ampersand embossing folder!  That is right, that is the left side of the ampersand embossed image.  Just because your stamp or embossing folder images look like one thing… doesn’t mean you can’t use them for completely different things!

    • Another thing along those lines is my sentiment – “life is good”.  This is from the Project Life Remember This stamp set.  Which makes you think you need to be a scrapper or someone digging in to Project Life to use.  Nope!  This set is fabulous for Project Life AND your everyday cards.  I think this card could be used for a congratulations card or a thinking of you card at a minimum, don’t you?
    • Use those sequins off that Gold Sequin trim.  Pull a couple off the end of the strand and adhere with a glue dot for a bit of understated bling.  Highlight your sentiment and add a little somethin’ to your butterfly while your at it.
    • Sometimes when I need that one-extra-touch to my cards… you know, those times when you sit back and go, “this needs something… nothing big… but something”.  One thing I look to is paper piercing.  And if you want it to be straight and event and all pretty looking, then you have to have the Essentials Paper Piercing Pack.  I swear, I use that card with the rows and rows of holes the most!  I use it to perfectly place brads in the corners as well as times like this when I want a row of holes and don’t want them to be all over the place.  Easy peasy!

    So don’t forget to check out what everyone else created for great inspiration.

    Then I’ll only have one question for you… have you got your copy of Kinda Eclectic yet?  Smile  If not, lets fix that shall we?  hee hee

    spaced shop now sig bar

    August Online Stamp Club Hostess Code – TT2NETD4
    Use this code to get free exclusive tutorials & project kit! Learn more

    Card Supplies Used:

  • Using Project Life Cards…for CARDS! Red & Gray Love Card

    Happy Monday! Today I thought I would share a super fast and simple card that I created using the Everyday Adventure Accessory pack from Project Life by Stampin’ Up!  As we were working on our projects for the convention display boards, we were sent a set of Project Life cards and accessories and invited to create some projects using the supplies in a “non-traditional” way.


    I saw the heart die-cut card from the accessory pack and thought it would be a fun core element to a card.  So I grabbed my Pictogram Punches stamp set and was excited to discover that the I <3 You stamp was an exact fit!

    Tips for making this card:

    • Cut a some glimmer paper 1/8” larger than your base paper (so in this case, the grey striped card was 3”x4”, so I cut my Real Red glimmer paper to 3-1/8” x 4-1/8”).  This gives you a very fine border around your main image and just a hit of sparkle to light it up.  It is a great way to add the sparkle without overwhelming the card with lots of bling!
    • Take a strip of scrap paper and turn it into a fun stripe for the background of your card.  In this case, I took a wide piece of Smoky Slate cardstock and glued it diagonally across the card front.  Then I flipped over my card and trimmed along the edges of the card base to cut off the extra paper that was hanging over the edge of the card.
    • Love those matching punches & stamp sets!!  The new Itty Bitty Accent Punch pack is a set of 3 punches for only $16.95 for all of them.  The heart and star are new sizes and all perfectly match with the Pictogram Punches stamp set.  The shapes are used in the sentiments for the set and so you can easily add a pop of color or glimmer to your project and no fussy cutting required!


    I have 1 spot left in my Project Life Night class tonight!
    If you’d like to come play more with Project Life with me, I’m running a class tonight and have 1 kit left so RSVP now and it is yours!  We’ll be making 2-3 cards, a 2 page scrapbook page, AND a giftable or two!  If you can’t make it in person but would like your kit to-go, I can do that too.  I’ll include a PDF of pictures of the projects and instructions along with a full set of Project Life cards for you to keep. Smile
    In person – 7/28 at Panera in Redmond from 7-9pm
    To – go – just email me at jennifer@nwstamper.com and I’ll get everything set up for you.

    Card Supplies Used:


    spaced shop now sig bar

    July Online Stamp Club Hostess Code – TT2NETD4
    Use this code to get free exclusive tutorials & project kit! Learn more

  • Project Life Cards Make Great Altered Picture Frames!

    Project Life Cards Make Great Altered Picture Frames!

    By now, You’ve probably heard of Project Life and know the cards in each kit are great for quick and easy scrapbooking (if you want to learn more about project life, I have a video about it here).  But when they gave a set to us to use for the 2014 Stampin’ Up Convention display boards and use in other ways, I found myself looking at them in a different light.  And thus, this altered picture frame came to be!

    I loved this project and even my non-crafty hubby liked it and said he wanted one for his desk at work!  Thankfully the frame is only $1 at Michaels and another set of Everyday Adventure Project Life by Stampin’ up is easy to come by!  So, I’ll be creating another one soon for him. 
    See all the cards in the kit here.

    The idea was to take this chunky frame and then start layering the cards around the edges to create a tiled design.  It all started with the Best Day Every card that is found in the Everyday Adventure Accessory Kit.  I thought it was cool because it is die cut so that you see through the card to whatever is behind it, so I thought it would look neat showing the wood of the frame through the letters.

    From there I started laying out other cards that I thought had cool complimentary colors and patterns to fill up the frame.  Once I had the plan, I could flip over the frame and trace the edges of the frame on the back of the Project Life card for any given spot.

    Then just trim off the extra paper and glue to your frame.  In my case, I ended up using the Tombow Liquid Glue.  And then finish up the seams by adding some embellishements from the Accessory kit (like those clear hearts) and other items in my craft room (like the rhinestones on the honeycomb card and the wooden accents such as the arrow and banner piece).

    It actually came together really quickly and easily.  And did you realize, that the Banner Punch actually is the same width and just a smidge shorter than the banners in the Wooden Accents?  Cool huh?

    Finally, I didn’t use it a lot, but I love the Remember This Project Life stamp set and it turned out to be perfect for stamping one of the stickers from the Accessory kit and balancing out everything on my frame!

    Its an easy and inexpensive idea for a great gift!

    Wanna Make This With Me?

    I’m running a Project Life Night class next Monday and RSVPs are closing first thing tomorrow morning!  We will be making lots of fun projects including:

    • 2 page pocket page scrapbook layout
    • 3 cards
    • 2 gift ables including a picture frame similar to the one I made in this post.

    You will get everything you need to make the projects plus have lots of extra Project Life cards to take home and keep!  All for only $25

    RSVP now to participate in this fun class!  RSVP here to join me in person at the Redmond Panera at 7pm on 7/28

    ~OR~

    Get the To-Go Kit!  You will get all the supplies you need to create the projects including basic adhesive for your picture frame, PDF pictures of all the projects, and instructions for how to make the projects.  Only $35 shipped anywhere in the US!


    Project Supplies Used

    So, think outside the Scrapbooking box and enjoy your Project Life cards in all kinds of new ways. Smile 

    spaced shop now sig bar

    July Online Stamp Club Hostess Code – 7RDHVEKR
    Use this code to get free exclusive tutorials & project kit! Learn more

  • Project Life by Stampin’ Up & the Everyday Adventure kits

    Project Life by Stampin’ Up & the Everyday Adventure kits

    project-life-by-stampin-up-kit.jpg

    This blog post is a looong time coming!  I actually recorded a video about the basics of Project Life, an intro into the differences between Project Life by Stampin’ Up (#plxsu), and about putting together your own project life layout.

    Then the video sat on my computer unedited for a long time.  Oops!  🙂 So, today I thought I would get it off of my computer and share them with you.

    About Project Life and How Project Life by Stampin’ Up is Different

    When Project Life by Stampin’ Up came out, I had customers, downline, and demonstrator friends who had all heard of Project Life or pocket page scrapbooking but didn’t really understand what it was all about.  So I found myself sharing all about it because I had become a fan not too long before it was announced Stampin’ Up was partnering with Becky Higgins to create exclusive Project Life card kits and accessories.  I thought it might be useful to share with others as well, so I did a little video about it as well sharing what PL is all about and how Stampin’ Up card kits are different than what you have gotten before.  (if you are reading this in email the video below won’t show up, so click here to view the blog post w/ videos)

    In a nutshell:

    • The Stampin’ Up cards (by Becky Higgins) have square corners instead of round
    • You get 1 card of each design instead of a bajillion multiples
    • The core kits give you 4×6, 3×4, AND 4×4 cards
    • The accessory packs are a combination of specialty cards, embellishments, stickers, and washi tape!

    Putting Together a Project Life Scrapbook Page

    The thing I really like about Project Life and all the pocket page albums, is that it makes scrapbooking really fast.  So, I like the idea that I’ll actually get some of my pictures off of the computer and into an album where I will ACTUALLY LOOK at them.  Plus maybe even have notes about the events. 🙂 I have way too many photos printed waiting to be scrapped and even more sitting on my computer.  My goal is to get the photos in albums and then I can take my time to make bigger, fancier layouts of the special moments and photos.

    See, I don’t know about you, but I tend to take a ton of pictures at any given event or time and then when I look at them, I have like 20 photos I want to keep and enjoy.  Unfortunately, that gets really hard to put in a scrapbook page nicely unless you have the time to edit them all to be much smaller pictures.  I figure this way I can print and save them and enjoy them.

    Here is the first layout I created using the Everyday Adventure Project Life card kit and accessory pack:

    I walk through actually putting it together in the following video:

    Wanna See ALL the Everyday Adventure Cards?

    The one problem I have with many of the Project Life kits, no matter who the manufacturer is that it is hard to tell what you are going to get in the card kits.  You see a few samples and so you can get the general color scheme, but you take a leap of faith you will like the different designs.  So I thought I would take a picture and share ALL of the designs for the Everyday Adventure Project Life Card Kit so you could see for yourself. 🙂   Just click any picture to see the zoomed in image of the cards.

    Everyday Adventures 4×6 Cards (front side)

    Everyday Adventure 4x6 cards

    Everyday Adventures 4×6 Cards (back side)Everyday-Adventure-4x6-cards-backs.jpg

    Everyday Adventures 4×4 Cards (front side)

    Everyday-Adventure-4x4-cards-front.jpg

    Everyday Adventures 4×4 Cards (back side)

    Everyday-Adventure-4x4-cards-back.jpg

    Everyday Adventures 3×4 Cards (front side) – group 1

    Everyday-Adventure-3x4-cards-set-1-front.jpg

    Everyday Adventures 3×4 Cards (back side) – group 1

    Everyday-Adventure-3x4-cards-set-1-back.jpg

    Everyday Adventures 3×4 Cards (front side) – group 2

    Everyday-Adventure-3x4-cards-set-2-front.jpg

    Everyday Adventures 3×4 Cards (back side) – group 2

    Everyday-Adventure-3x4-cards-set-2-back.jpg

    Everyday Adventures Accessory Pack

    Everyday Adventure Accessory Pack by stampin up

    Whew!  That was a lot of cards!

    If you are interested in picking up your own packs, you can find them here:

    If you have any questions or would like to see more videos on creating with Project Life, let me know!  I’d be happy to share. 🙂

    spaced shop now sig bar

    July Online Stamp Club Hostess Code7RDHVEKR
    Use this code to get free exclusive tutorials & project kit!  Learn more

  • Trying out Project Life By Stampin’ Up – My First Layout

    I know by now it is old news that Becky Higgins (creator of Project Life) has partnered with Stampin’ Up to create exclusive lines of Project Life cards, accessories, and even a corner punch.  I had been just starting to get into Project Life when this announcement came out and I was stoked!  Especially because I would now be able to have cards that coordinated both in patterns and colors with stuff I already had in my stash! So, here is the first layout I put together using my new goodies: Everything in this layout is from the Everyday Adventure kit and accessory pack.  Can I just say I LOVE, LOVE, LOVE the idea of an accessory kit!  Maybe someone else does it out there, but I haven’t seen it with the Becky Higgins kits and We R Memory Keepers card sets.  Why do I love them?  They give me a little bit of lots of awesome bits to embellish up my cards and I don’t have to think about what I have that would match.  See? image

    Everyday Adventure Accessory Pack

    (Do you notice a theme?  I love kits and don’t like having to think about which things match. Smile  Seriously, I love scrapbooking kits that come with paper, embellishments, and die cuts because I know I have a little bit of everything to put my layouts together!) So anyway, for the most part, I just used the cards from the Everyday Adventure card kit and then I may add on or two little accents to a handful of them.  Like in the close up below, you see that card in the upper right?  It looked exactly like that (minus my journaling of course) and I just added a bit of the blue washi tape along the top as a bit of trim. And then, of course, the green arrow and black letters that spell “maple classroom” are stickers from the accessory pack. Oh and that bit of orange at the bottom of the green card?  That is a little acetate (think window sheet) colored piece from the accessory pack.  The doodling look on that card?  Totally printed on, thank goodness! Smile And as my last trick, I used some of that same blue washi tape again to layer a 3×4 PLxSU card  (I’m just going to use the PLxSU to make it less typing when I’m trying to say Project Life by Stampin’ Up… sound ok?  Ok, cool!)  Anyway, I layered a 3×4 PLxSU card on top of a 4×6” PLxSU card and stuck with Washi Tape for a fun layered look.  And if you can’t read it, the quote says “Everyday is a new Adventure” which I thought was PERFECT for this layout because it was about Nicholas being a in a new class at school.  His new adventure. Stampin’ Up! Supplies Used

    And let me say, I’ve been using these cards for MORE than scrapbooking as well.  I made some cards and other fun non-scrapbooking/non-card projects using them for the display boards for convention… so I can’t share them until July, but I’m SO EXCITED to be able to share them then!

    –>>  Plus, stop by the Stylin Stampin Inkspiration blog for even more great ideas for the PLxSU kits (there are 5 different ones available!)  See all the great ideas here

    I hope this gave you some ideas and you can give it a shot yourself!

    spaced shop now sig bar

    June Online Stamp Club Hostess CodeACANDKB4 Use this code to get free exclusive tutorials & project kit!  Learn more