I know, I normally try to share one project in a post at a time, but today I had 3 projects that all used the retiring (and discounted!) Season of Cheer designer paper and since it was going away in a couple days, I figured why not share them all so you could see some different ways to use the paper in that pack! You see, I tend to get into the trap of thinking a paper is just for the holiday it is sold for; so when I discover all-year ideas, I get really excited. I think this paper pack especially lends itself to the all-year idea and so that is extra awesome.

So, for example, this card…change out the sentiment and it could be thinking of you, thank you, miss you… absolutely anything you want!
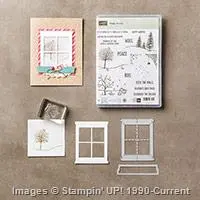
Missed the Woodland Embossing folder? It’s coming back!
And while we are here talking about retiring items. I wanted to do a quick PSA about the Woodland Embossing folder… Stampin’ Up heard us, they realized this embossing folder was so stinkin popular and not everyone had a chance to get it before it sold out. So they are working with their manufacturer and the embossing folder WILL BE BACK with the Annual Catalog in June. So, don’t pay obscene amounts on Ebay for it. Just hang tight and you will be able to get it again soon!
Ok, now back to the card… ![]()
I love this technique with the Woodland embossing folder – brayer ink on the side of the folder where the trees are indented, then BEFORE you run through your Big Shot, stamp your background image on that same side. THEN run your paper through the embossing folder. It gives you color behind the trees along with pretty background images peeking through.

Retiring (and discounted) products in this card:
- Woodland Embossing Folder
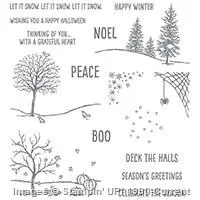
- Happy Scenes stamp set
- Gold & White Glitter Ribbon
- Season of Cheer designer paper
Colors used:
- Very Vanilla
- Soft Sky
- Pear Pizzazz
- Early Espresso
Now, the next question is… what to do with the definitely holiday/seasonal themed papers in the pack now that December is pretty much gone. Well, I shared this card in class a couple days ago to share the idea that you can still use them – turn them into holiday thank you cards!

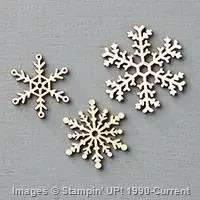
I really wanted to play with my love – the wooden snowflake elements – and I realized it fit really well in the Flower Medallion punch! So we punched out the flower from a 3 1/4” x 3 1/4” piece of Very Vanilla cardstock. And THEN punched out the flower shape using the 2 1/2” Circle punch.
You can layer this over a piece of Whisper White cardstock that has the Winter Wonderland washi tape stretched across for a cool peek-a-boo technique. Then just add your snowflake to the center using the Fine-Tip glue pen or a couple of glue dots. I especially love the added touch by my friend Tanya Cabral who added the White Perfect Accent to the center of the snowflake! Really centers it, don’t you think?

Retiring (and discounted) products in this card:
- Wooden Snowflake Elements
- Winter Wonderland Washi tape
- Season of Cheer designer paper
Colors used:
- Very Vanilla
- Whisper White
- Crumb Cake
- Night of Navy
Finally, what if you really don’t want to look at another holiday card for a long while? Like you’ve made and sent your tons of holiday cards and you are ready to move on? How about a birthday card?!

Yup, totally same paper pack! Just flip over some of those patterns to see great anytime designs. I used these to make a cheery birthday card that is great for any guy or gal in your life. We mixed the Tin of Cards stamp set for the sentiment with the Be the Star stamp set for the star accents. Then used the star punch to punch out the shapes, especially from the Gold Foil that is oh so snazzy.
Sponge your edges with Soft Suede and a sponge dauber; tie on some linen thread, and you have a fun pulled together card.

Colors used:
- Whisper White
- Crumb Cake
- Hello Honey
- Lost Lagoon
- Soft Suede (sponging)
- Early Espresso (cardstock)
So hopefully this gave you some ideas for this fun paper – whether you already have some in your stash or if you are doing one last run through the Year-End Clearance sale and are looking for a great deal!
![NWstamper signature_thumb[9]](https://i0.wp.com/www.nwstamper.com/wp-content/uploads/ad87b4046c1e_C9F6/NWstamper-signature_thumb9_thumb.png?resize=322%2C118 "NWstamper signature_thumb[9]")
![]()
Use Hostess Code BEFX37ZS at check out to get a special thank you from me!
NEW ITEMS ADDED – BIG Year-End Clearance Sale! See what is on sale here.
See all the tutorials & classes by mail here
Check out the Holiday Catalog Retiring List & Sold Out Updates


![NWstamper signature_thumb[9]](https://i0.wp.com/www.nwstamper.com/wp-content/uploads/ad87b4046c1e_C9F6/NWstamper-signature_thumb9.png "NWstamper signature_thumb[9]")