Northwest Stamper

Tag: glimmer paper

  • Very Vintage Butterfly Thank You (Convention CASE)

    Every year that I go to convention, I get caught up in swapping.  The idea of taking a bunch of card fronts with you to convention and then trading them with everyone else so that you can get new ideas to take home and share… or copy… or hang on your wall and drool over!

    Well, I’ve learned from the one year that I showed up with NO SWAPS, and proceeded to spend my first night there trying to make as many swaps as I could from the crafting supplies I happened to bring with me; that I LOVE swapping.  I love seeing an amazing card from across the room and running up and saying,”swapping?”  Its like the thrill of finding an amazing deal at the department store.

    But the problem is, I come home with 50-100 card fronts and proceed to take pictures of them and then they sit in a box forgotten until I’m cleaning my room and find them again.

    Which is very sad….

    So, I decided this year, that I would not only share them on my blog, but I’d also use them for inspiration in my classes as well.  (Which really is one of the main points for swapping anyway!)  So, for class this month, I CASE’d (copy and share everything) two fabulous swap cards and I just had to share this one with you!

    Card case’d from a design by Julie Leblanc

    There are a few reasons why I love this card…

    1.  The color combination (why do I always forget about Perfect Plum?)

    2.  The touch of sparkle with the Silver Glimmer Paper

    3.  The fact that this card uses NO WHITE PAPER at all!

    I know it is silly, but that last point was kind of profound to me.  I’m so used to stamping on Whisper White paper with a colored ink that I didn’t think of stamping on Crumb Cake paper.

    And then there is the really cute butterflies.  I had to change this up from the original because I didn’t have the Papillion Potpourri that she used,  Instead I used the Best of Butterflies stamp set and the Elegant Butterfly punch to make them.  They are stamped with Basic Black ink and then sponged on top with the Perfect Plum ink. Neat effect, huh?


    And in class, I had someone emboss a little bit higher up the page than they meant and so they left their first attempt behind and made a second card.  So, I finished out the card with her “boo-boo” and the rest of the supplies only this time I used the Lacy & Lovely stamp set for my sentiment and drew around it with a marker.  I think it turned out just fine! Smile

    So I hope you liked this card as much as I did and I will have another fun card that we case’d tomorrow using the lovely Flower Shop stamp set and punch!  See you tomorrow!


    spaced shop now sig bar

  • A Quinceanera Dancing Queen for CuteCardThursday!

    Oops! I’ve totally fallen behind on my blog posting this week.  I’ll let you in on a secret – I’m working on a design refresh for my blog – and I’ve gotten so caught up with that and my monthly Stampin’ Up! team meeting this week, that I completely got behind on blog posts.

    But, today is another challenge day at Cute Card Thursday, and so I have a fun card to share with you:

    The theme for the week is  Dancing Queen and when I saw the theme, I immediately thought of the Quinceanera stamp set.  Sure, the image is for a coming out party technically, but doesn’t that usually entail some kind of dancing at the party? Smile 

    The other thing that I thought of was disco balls and so all that Silver Glimmer paper I received during Sale-a-Bration this year got put to good use as a sparkly trim to my card.  Plus, with all that sparkle, I had to add some glitter to her crown too.  I couldn’t quite figure out how to make a disco ball for her to be dancing to… but now I feel the challenge coming on to come up with something!

    The one other detail that I just had to do was to add a Vellum overlay to the stamped image.  It gave her dress some dimension and softened the Strawberry Slush color that I used to color in the dress.  I used a dot of the Tombow liquid glue at the waist to help hold it in place and then let the rest of it float freely.

    Now, it you were paying attention and looking closely, you may have noticed some new Sneak Peek items in this card.  Smile

    • The card base and pink cardstock used in the card are from the new 2013-2015 In Color collection.  I used Baked Brown Sugar (this may be displacing Soft Suede as a go-to medium brown) and Strawberry Slush.  Everyone has been raving about this pink color and just looking at the sheet of paper I didn’t think it was all that special.  But once I started pairing it with other colors, I’m feeling the love.  Definitely not too bright while still being a rosy pink.
    • The sentiment is from a fun new stamp set called Really Good Greetings.  I think this will be a stamp set that is great for scrapbooking titles and accents as well as card making.  At least that is why I convinced myself I had to get it now.  hee hee .

    So, speaking of new products – I am getting ready to mail out the new 2013-2014 Annual Catalogs (you know, that 200+ page book of products and project ideas) and want to make sure everyone who wants a copy will get one!

    *** If you would like a copy of the new catalog mailed to you, shoot me a message at jennifer@nwstamper.com or fill out my catalog request form.

    Thanks for stopping by and don’t forget to visit Cute Card Thursday to enter your take on the Dancing Queen theme for the week.  I promise it is a fun one!


    To Order Stampin’ Up! Products Anytime, click here!

    See the Latest Availability & PDFs of all the retiring stamps and accessories here


    Supples Used
    Stamps
    – Quinceanera, Really Good Greetings
    Paper – Whisper White, Baked Brown Sugar, Silver Glimmer Paper, Strawberry Slush, Tea for Two designer paper**
    Ink – Cardstock Vellum, Early Espresso, Strawberry Slush, Blush Blossom marker**, Gumball Green marker
    Accessories – Tombow multipurpose liquid glue, 2-way glue pen, Dazzling Details glitter, Stampin’ Dimensionals
    **Retiring item

  • April Blog Hop – Silver Sparkle for Weddings or Anniversaries

    Its blog hop time!  This time, the theme is Weddings & Anniversaries.  Now, all I could remember when I started working on my projects was the challenge to use silver in honor of Stampin’ Up’s 25th anniversary.  So, my mind was stuck on my silver glimmer paper when I got started.

    However, I was lucky and got inspired and came up with not one but TWO cards using my glimmer paper that I’m pretty excited to share with you today.  So, hopefully you enjoy these cards too and they give you some fun new ideas to try out.


    Card 1:  Two Hearts Congratulations

    This was my first “big idea”.  I am slightly obsessed right now with the technique of punching out a shape and then accenting it with a decorative paper below it.  So, in this case, I decided to do two hearts and pop it up on dimensionals over Silver glimmer paper.

    I grabbed my Silver Dazzle pen and dashed out an outline around the holes to accent them and tie in to the silver theme.  Then I started with two small Razzleberry punched out hearts in the center of each larger heart, but I just really didn’t like how it looked.  But, put a flower from the Flower Trim ribbon on top of the Razzleberry hearts (so a little of the darker color shows through), and it looks great!

    Then I just added the simple “congratulations” sentiment across the top.
    (shhhh – want to know a secret?  I totally stamped a different sentiment directly on my base paper and it looked awful!  So, I had to go with plan B – the banner.  I think it works, don’t you?)

    Card 2 – Interlocking Wedding Rings

    So after finishing the first card, I had this idea that was itching in the back of my mind to do something that looked like two wedding rings.  I had no clue how I was going to do it, but I knew I just needed to try!

    The rings were created by punching a 1 1/4” circle out of a piece of Silver Glimmer paper.  Then lining up a 1 3/8” circle over the hole to create a slim ring of silver.  Then I used my Tombow liquid glue to adhere it to my card.  I used the 1 1/4” circles as accents to the left and right of the rings.

    And if you are curious about the base cardstock, I used Very Vanilla cardstock and spritzed with the Silver Smooches spritz.

    If you have any questions about any of these cards, leave me a comment and I’ll make sure to fill you in!  (Or just leave me a comment and let me know what you think because it always makes my day to get a comment on a blog post. Smile )


    And don’t miss more great wedding/anniversary inspiration at the other stops along the route –

    Blog Hop Participants:

    1. Shellie G. of Craft Smashup
    2. Pam S. of Stampin’ in the Sun!
    3. Nancy B. of Lady Stamps-A-Lot
    4. Tonya B. of Stampin’ with Tonya
    5. Dawn S. of Dawn’s Creative Chalet
    6. Darcy J. of DJ’s Stampin’ Place
    7. Pamela W. of Stinky Tofu
    8. Kim R. of Stamping with Kim
    9. Justin K. of JK Cards
    10. Jennifer B. of NW Stamper  —>  YOU ARE HERE
    11. Bree R. of Craft-somnia
    12. Diana E. of Stampin’ Fun with Diana

    Click here to shop online 24/7 and start earning your NW Stamper rewards!

    Don’t Forget!  RSVPs and mail order kit orders are due soon for the Print Poetry Class coming up on April 20th!
    Can’t make the party?  Class by mail and instruction only options are available – check it out here

    Print Poetry Camp & Class by Mail

  • Origami Double Pocket Treat Pouch

    Happy Valentine’s Day!

    If you are still looking for a quick love note or treat to share with someone you love today, here is a project we made at my Cool Cards and Sweet Treats class last weekend.  It is a fun and fast project to make any time of the year, plus it has the added bonus of being a great way to use up all that extra designer paper or 6×6 paper pads you may have lying around.

    I call it an “origami treat pouch” because it is all folds and takes no adhesive unless you want a little bit to tack down the top point of your treat.  But unlike some origami that is a ton of steps and little tiny complicated folds, this has 5 score lines and a couple quick folds and you are done (check out my video below for how to do it).

    Added bonus, it stands up on its own too!

    I filled my pockets with wrapped Ghirardelli squares which are a perfect fit but you can also make cute little love notes to go inside as well.  You can cut 8 of these card bases out of 1 sheet of cardstock.

    The card base is 2 3/4” x 4 1/4”, so once you score it, it is 2 1/8” x 2 3/4”.  I kept my card simple so that it could actually slide behind the chocolate treat I tucked in the pocket.  It uses the Oh Whale stamp set and just stamped the whale first and then the hearts and sentiment.  Add a little Dazzling Details to its eye and you have some cute sparkle to his eye.

    Want to see how it is done?

    I put together a quick video to show you how it scores and folds together.  So check it out and let me know what you think!


    Did you know?

    This goes together so fast using the Diagonal Scoring Plate for the Simply Scored and you can get that plate FREE during Sale-a-Bration!  With a $50 order, you can pick any one item for free and this is one of the things you can pick from.  Pretty sweet, huh?  Smile

    Get all the details on Sale-a-Bration here.

    To Order Stampin’ Up! Products Anytime, click here!

    Are you earning your Northwest Stamper Rewards?

    Every order gets you closer to your FREE stamp set!  Click here to learn more!


    Double Pocket Treat Pouch Recipe:
    Stamps: 
    Oh Whale
    Ink:  Crumb Cake, Pool Party, Primrose Petals, Basic Grey
    Paper: More Amore designer paper, Crumb Cake cs, Whisper White cs, Primrose Petals cs, Champagne glimmer paper
    Accessories:  Sticky Strip (for wrapping you candy), small heart punch, 1 1/4” scallop circle punch, 1” circle punch, Itty Bitty punch pack, Glue dots, Simply Scored, Diagonal scoring plate, Primrose Petals stitched satin ribbon, Dazzling details, sponge dauber

  • Holiday Blog Hop with the Stylin’ Stampin’ Squad!

    Last month I was honored to be asked to join a group of very talented guys and gals for a monthly blog hop showcasing fresh ideas using Stampin’ Up! goodies.  Given how it feels like the last couple months have been crazy busy, I figured having a deadline and a theme to work with would be fun to try, so I had to say yes!

    First up, I was asked to show a 3D item and since I had recently bought this alterable kit for a Christmas countdown, I thought it would be a fun place to start.

    I LOVE the Christmas season and it is the one time of year that I for sure pull out decorations and try to get in to the season.  So, when I saw this kit for a wood Christmas countdown tree, I couldn’t wait to get it and take it home to decorate!

    This is what it looked like when I got it home (well, after I cut apart the number tags):

    raw christmas countdown tree

    I do have to say, this project got me well over my fear of Exacto knives!  I used mine A LOT in cutting apart the tags and trimming my paper to my cut out shape.  Now if only Stampin’ Up! still sold those big grid self healing mats that I see 10 yr+ demos using, I would be set!

    Anyway, I used a few of my holiday catalog toys to decorate my tree this year.

    Candlelight Christmas dsp sampleI used pattern paper from the elegant Candlelight Christmas specialty designer paper for my tree and some Chocolate chip cardstock for the base (and you can kind of tell in the picture, but I grabbed my trusty sponge daubers and inked up the edges of the wood so it would blend in a bit better – like the Chocolate Chip ink on the piece that is pointed at the camera).

    I used a different pattern from the same pack to cover my numbers tags which hang from hooks on the front of the tree.

    After all the paper was stuck to the wood, I went ahead and mod podged the whole thing.  I figured that if I coated the paper layer, then if I wanted to change up the decorations over the years, I could do that and the base tree would still look nice.  We’ll see if that is how it works in practice though over the next few years!

    Then, to decorate, merry minis punch pack sampleI strung some Rhinestone strands and punched out lights using the cute Merry Minis punch pack.  I also used the star from this punch pack to make the star for the top of my tree.  I punched the star out of the Champagne Glimmer paper (such AWESOME paper) and then put it on a 3/4” circle which was then placed in a 1 1/4” scallop circle – also new from the Holiday catalog. Smile

    The circle ornaments are actually just punched designs from the same Candlelight Christmas paper pack and then sponged around the edges for some definition.

    Finally, one of the rules of the blog hop was to use current Stampin’ Up! products only.  And while I cheated a little because I accidentally used a retired Big Shot alphabet set for the numbers on my countdown tags (it was Timeless Type for those of you that are interested), I needed to figure out what to do for my “title” on my tree.

    I knew I wanted it to says “days til Christmas” but I didn’t have a stamp that said that and I was too lazy to go upstairs to my computer to find something I liked on My Digital Studio. Smile So, I improvised from the stamps in my craft room and replicated the tiny letter stickers you see in scrapbooking stores.

    IMG_1707

    I grabbed my Made for You stamp set and got to work inking it up with my marker and stamping a million times to get the letters I wanted.  Then I just cut them out and pieced them together at the bottom of my tree.  The “Christmas” sentiment was from a different stamp set – Petite Pairs – and again, was just inking up part of the stamp and cutting it out.

    made for you

    I thought it was kind of clever! Smile

    Alright, and I think I’m supposed to share a card as well… and I know this post is getting super long, so I’ll try to be fast!

    Ok, so this card was put together using the Christmas tree countdown as inspiration.  I used the same colors and elements to create a quick 4.25” x 4.25” holiday card.  Just layer a few punches and you are good to go!

    So, I hope you enjoyed the projects I have to share with you today and if you want even more ideas, hop along and check out the other great stuff my “Stylin’ Squad” buddies have in store for you!  Since I’m the last person on the tour, click the button below to head to the start of the tour and hop away.


    Blog Hop Participants:

    1. Shellie G. of Creative Electica
    2. Annie L. of Love Me Cards
    3. Pam S. of Stampin’ in the Sun!
    4. Nancy B. of Lady Stamps-A-Lot
    5. Rose C. of Stamp with Rose
    6. Tonya B. of Stampin’ with Tonya
    7. Dawn S. of Dawn’s Creative Chalet
    8. Darcy J. of DJ’s Stampin’ Place
    9. Kim R. of Stamping with Kim
    10. Terry B. of Goin’ Over the Edge
    11. Justin K. of JK Cards
    12. Heidi B. of Stuck on Stampin’
    13. Jennifer B. of Northwest Stamperthat’s me!

    To Order Stampin’ Up! Products Anytime, click here!

    Its INK-REDIBLE December!
    Get a FREE set of 10 ink pads with a qualifying order or party; or get them free when you join the Stampin’ Up! family! Learn more

    Are you earning your Northwest Stamper Rewards?
    Every order gets you closer to your FREE stamp set! Click here to learn more!

  • Scrapbooking Sunday: Sparkly Christmas Layout

    It all started with cleaning my craft table… I came across a 1/4” x 12” piece of designer series paper.  Being the paper hoarder I am, I thought, this is a great piece for a scrapbook page but I was afraid it would get crumpled if I stored it as a scrap.  So what did I do?  Why stopped everything and made a scrapbook layout of course! 🙂

    Sparkly Candlelight Christmas Scrapbook layout

    See that thin striped designer paper at the bottom edge of the green?  That was what got this whole page started!  It was from the Candlelight Christmas specialty designer series paper pack, so I started there.  Some of the colors in that paper pack are Real Red, Early Espresso, and Lucky Limeade.  So, I went with a Real Red 12×12 base and added a 2 3/4″ strip of the Flocked flourish transparency to the left side of the page for some subtle color and texture.  Then I started building up the center panel.

    I picked Lucky Limeade as my accent color and then added three panels from the Candlelight Christmas pack.  The dsp pieces are 6″ x 3 3/4″ and I figured I would use smaller 3×5 sized pictures or trimmed 4×6 pictures so that the pattern shows around the photo as matting.  I rounded the corners of the paper before glueing them down.

    Then it was time to add some sparkle! I started with a strip of Champagne Glimmer paper along the top and my 1/4″ scrap of designer series paper along the bottom.  But then I thought it needed more, so I grabbed my Tags til Christmas stamp set.  First was the little oval accent that I stamped in Lucky Limeade and punched out with the small oval punch.  Then I added some Cherry Cobbler Dazzling Details for the berries.  I popped them up on dimensionals so my photos could slide underneath if needed.

    Christmas scrapbook page oval close up

    Then I added one more tag – the decorative label punch Dec 25th tag from the Tags til Christmas set.  I stamped it with Early Espresso and punched it out.  Then I grabbed that same Cherry Cobbler Dazzling Details and outlined the oval portion.  Finally, I decided to add a tassel and took some Early Espresso baker’s twine and twisted it into a loop above the tag and then unraveled/frayed the ends to make my tassel.

    Dec 25th tag close up

    Now to just get some good Christmas pictures to put in this layout!  But I’m sure I’ll have more pictures than I know what to do with. 🙂

    And if you love this designer paper, just a reminder that there is only 1 month left of the Holiday catalog, and once we are into January, this paper will be gone as well.

    To Order Stampin’ Up! Products Anytime, click here!

    Its INK-REDIBLE November!
    Get a FREE set of 10 ink pads with a qualifying order or party; or get them free when you join the Stampin’ Up! family! Learn more

    Are you earning your Northwest Stamper Rewards?
    Every order gets you closer to your FREE stamp set! Click here to learn more!

    Tags Til Christmas Stamp set (#120847)
    Tags til Christmas Stamp Set - by Stampin' Up!

  • Setting Up for CKC + A Christmas Snowflake Card

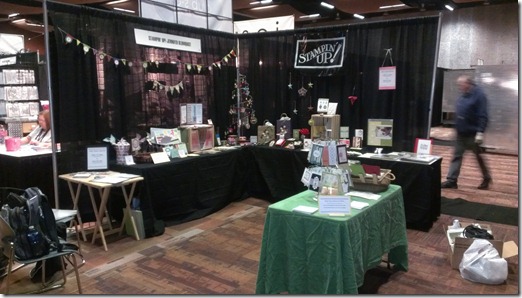
    Whew!  All the crazy planning, organizing, and prepping for the Creating Keepsakes convention finally has come to a head as we unloaded into the Meydenbauer convention center today to start our set up.  So, first, a big thank you to everyone for being so patient and supportive as my head was spinner over the last few weeks. 🙂

    But I thought I’d share some of the fun of today.

    First was arriving at the convention center and learning that our booth had been moved (turns out we got a better spot, yay!) and then looking at this scene and trying to make it into something a bit more cute.

    IMAG1198


    But after multiple hours of unloading boxes, organizing, and decorating, I think we are ready to go!  I love how it turned out and hope people love checking out all our cute samples and displays.

    IMAG1204


    Plus we are offering some great promotions for CKC attendees (a show special discount for orders, a gift for scheduling a private class or party, and of course door prizes!)

    I am super excited for tomorrow and to get a chance to chat with all the other crafty loving folks who wander through.  If you are in the area and come by, I’d love to have you stop by and say hello!

    And for those of you who aren’t able to attend, I thought I’d share a card that is up on display at the event.  It is a quick but very pretty card for the holidays.  Sadly, my photo box doesn’t do the glitter paper justice.  But just a stamp, some ribbon, and the Snowflake Bigz die and you have a card!

    Silver Glimmer Snowflake SAS card


    This card was one we made at one of the Christmas Card stamp-a-stack classes this year.  I have one more Stamp-a-Stack left, so if you are still looking to make some holiday cards.  Check out the details and let me know that you want a space!  I’d love to craft with you!


    To Order Stampin’ Up! Products Anytime, click here!

    Its INK-REDIBLE November!
    Get a FREE set of 10 ink pads with a qualifying order or party; or get them free when you join the Stampin’ Up! family! Learn more

    Are you earning your Northwest Stamper Rewards? Every order gets you closer to your FREE stamp set! Click here to learn more!

  • Quinceanera Treat Bag, Perfect For Any Princess

    Well, I hope you had as great of a weekend as I did!  I had relatives from the midwest and California in town for the weekend and so we did a lot of visiting and traveling around the Seattle area.  This was the first time my hubby’s Grandma, Aunt, and Uncle had met our daughter Caitlin; so that was cool as well!  Anyway, that kept me away from my computer and blogging a bit more than I was thinking – so, here I am trying to get caught back up. 🙂

    I thought I’d share this cute treat bag we made at the Hispanic Night event at Convention.  This is a free evening activity that is meant to help share some of the cultural differences that you sometimes see with Hispanic families and crafters here in the US.  Its always a very interesting night and there were some AMAZING stamping demonstrations!  And, then we got to stamp ourselves!

    So, here is the project we made:


    I loved the details like the paper pieced dress (we stamped the image a second time on Pool Party cardstock and then cut out the dress and glued it down onto the Whisper White image), the Silver glimmer paper behind the Apocathary Accents framelit piece, paper piercing the outline of the die cut shape using the matching Paper Piercing Pack, coloring with markers, and then the stamped and punched flowers on the bag!  Just a couple details, right? 🙂


    When we got to our table for the event that evening, this is what everyone had (so you can see the whole stamp set too!).  It was the make and take kit, the stamp set, and a bingo sheet.

    IMG_0225


    I have to admit I squealed out loud when I saw the stamp set because I had been eyeing this stamp set for a while because I loved the image of the girl and I thought that the Princess, the crown, and the flower stamps could be used by anyone – regardless of if they spoke Spanish or not.  I just didn’t know anyone who would need a Quinceanera card (for those of you who aren’t familiar with Quinceanera, it is like a cross between a sweet 16 party –only at 15, a coming out event, and at the scale like a wedding!  It’s a pretty big deal!).  Anyway, I was so thankful that Stampin’ Up! gave us this set.

    And then, to top off the evening, I got a bingo and won some Glimmer Paper, a Christmas stamp set, and some Stitched Satin Ribbon!  How cool is that?!  And if you can see, check out more of the amazing samples they had on display next to me on the display board.

    IMG_0461

    If you are going to convention next year, I totally recommend going to Hispanic Night.


    To Order Stampin’ Up! Products Anytime, click here!

    Check out the 2012 Holiday Catalog

    Are you earning your Northwest Stamper Rewards? Every order gets you closer to your FREE stamp set! Click here to learn more!

  • Quick and Easy Glimmer Hearts Valentine

    If you’ve read my newsletter, you got to hear me go on about how I love the new Glimmer paper and how I have all my fingers and toes crossed that we will see more of this in more colors!  Its true, I love this stuff!  So, I had to share it with others in my workshops so they could see it too.  I’ve seen so many cute projects with this paper but one of the techniques I think is so fun is this peek-a-boo design. 

    In this card, I cut a strip of the Real Red Glimmer paper at 1-1/4” x 3” and then cut a piece of Whisper White cardstock at 3/4” x 3”.  I then punched out three hearts from the Whisper White paper and then adhered it to my strip of Glimmer paper.  I free hand punched the hearts by punching the center heart first.  Then I lined up my punch along each short edge of the white strip and tried to horizontally align the hearts.  Add some Blushing Bride designer paper and a Basic Grey mat for a fun and quick card:

    Tip:  Due to the texture of the Glimmer Paper, glue stick does not hold very well to it.  So, for a project like this, I would use your tape runner or probably more easy would be a liquid glue like the Multipurpose Adhesive.  These stronger adhesives will hold up much better long term.

    Glimmer Hearts Valentine Recipe:
    Stamps: 
    Teeny Tiny Wishes
    Ink:  Real Red Classic
    Paper:  Real Red CS, Basic Grey CS, Whisper White CS, Real Red Glimmer Paper, Blushing Bride DSP (Hostess set)
    Accessories:  Small Heart Punch, Multipurpose Adhesive

    Want to make this card yourself?  Order the supplies online here!

  • Glittery Filled with Love Card

    Last night was another fun card night with the gals of my meetup group.  We made three cards and I thought I would share today one of the cards we did.  I knew I wanted to showcase the Filled with Love set and the Bitty Buttons you can get free with the bundle and so I started brainstorming ideas for a layout.  Then I saw a card created by Robin Merriman and thought it would be perfect to start from.  I changed it up a bit so that I could use the super fun new glimmer paper and add in the cute heart bitty button, plus simplify some of the layers to make it a bit faster for the class setting.

    I’ve had this stamp set for a while but have been so caught up with Christmas that I’ve been slow to start using it.  However, it is another stamp set that I am crossing my fingers will make it into the main catalog next year.  I love how versatile and modern it is!

    Tips for this Card –

    When stamping the big hearts on the left side of the card, start by stamping the heart in the middle.  Then you can more easily control how much is cut off on the top and bottom hearts as well as feel like you have reasonably centered layouts of your heart and layered love.

    Glue down all your layers before adding your heart Bitty Button.  It just makes it easier to get adhesive on your Love layers.

    Adhere your heart Bitty Button with Crystal Effects.  This clear lacquer also makes for excellent glue that actually dries super clear so you don’t get adhesive outlines or wiggly layers like you might with glue dots or double sided tape.  You don’t need very much, just a thin coating on the back of your button

    Oh, and the glimmer paper punches like a dream with your standard punches.

    So if you haven’t heard, this stamp set is only available until January 24th as part of a special bundle

    So, what is all included?

    • Filled With Love stamp set (only available until this promotion ends)
    • Love Patterns designer series paper pack – 12 sheets of 12×12 double sided paper.  6 of the sheets are patterns in Real Red and 6 of the sheets are Pretty in Pink
      This paper pack is exclusive to this promotion and is not in any of the catalogs
    • Free Bitty Buttons!

    Check out the flyer to see pictures of everything in the bundle

    Got to love free, right?  Especially when we are talking about something as cute as those bitty buttons. 🙂  Anyway, thanks for stopping by and happy stamping!

    Filled With Love Card recipe:
    Stamps:
    Filled with Love
    Ink: Real Red, Chocolate Chip
    Paper: Real Red Glimmer paper, Real Red CS, Whisper White CS, Chocolate Chip CS
    Accessories: Bitty Buttons, 3/4” Circle punch, Small Heart punch, Crystal Effects