Northwest Stamper

Tag: display boards

  • 2016 OnStage Display Board Samples–Mint Macaron!

    2016 OnStage Display Board Samples–Mint Macaron!

    display stamper

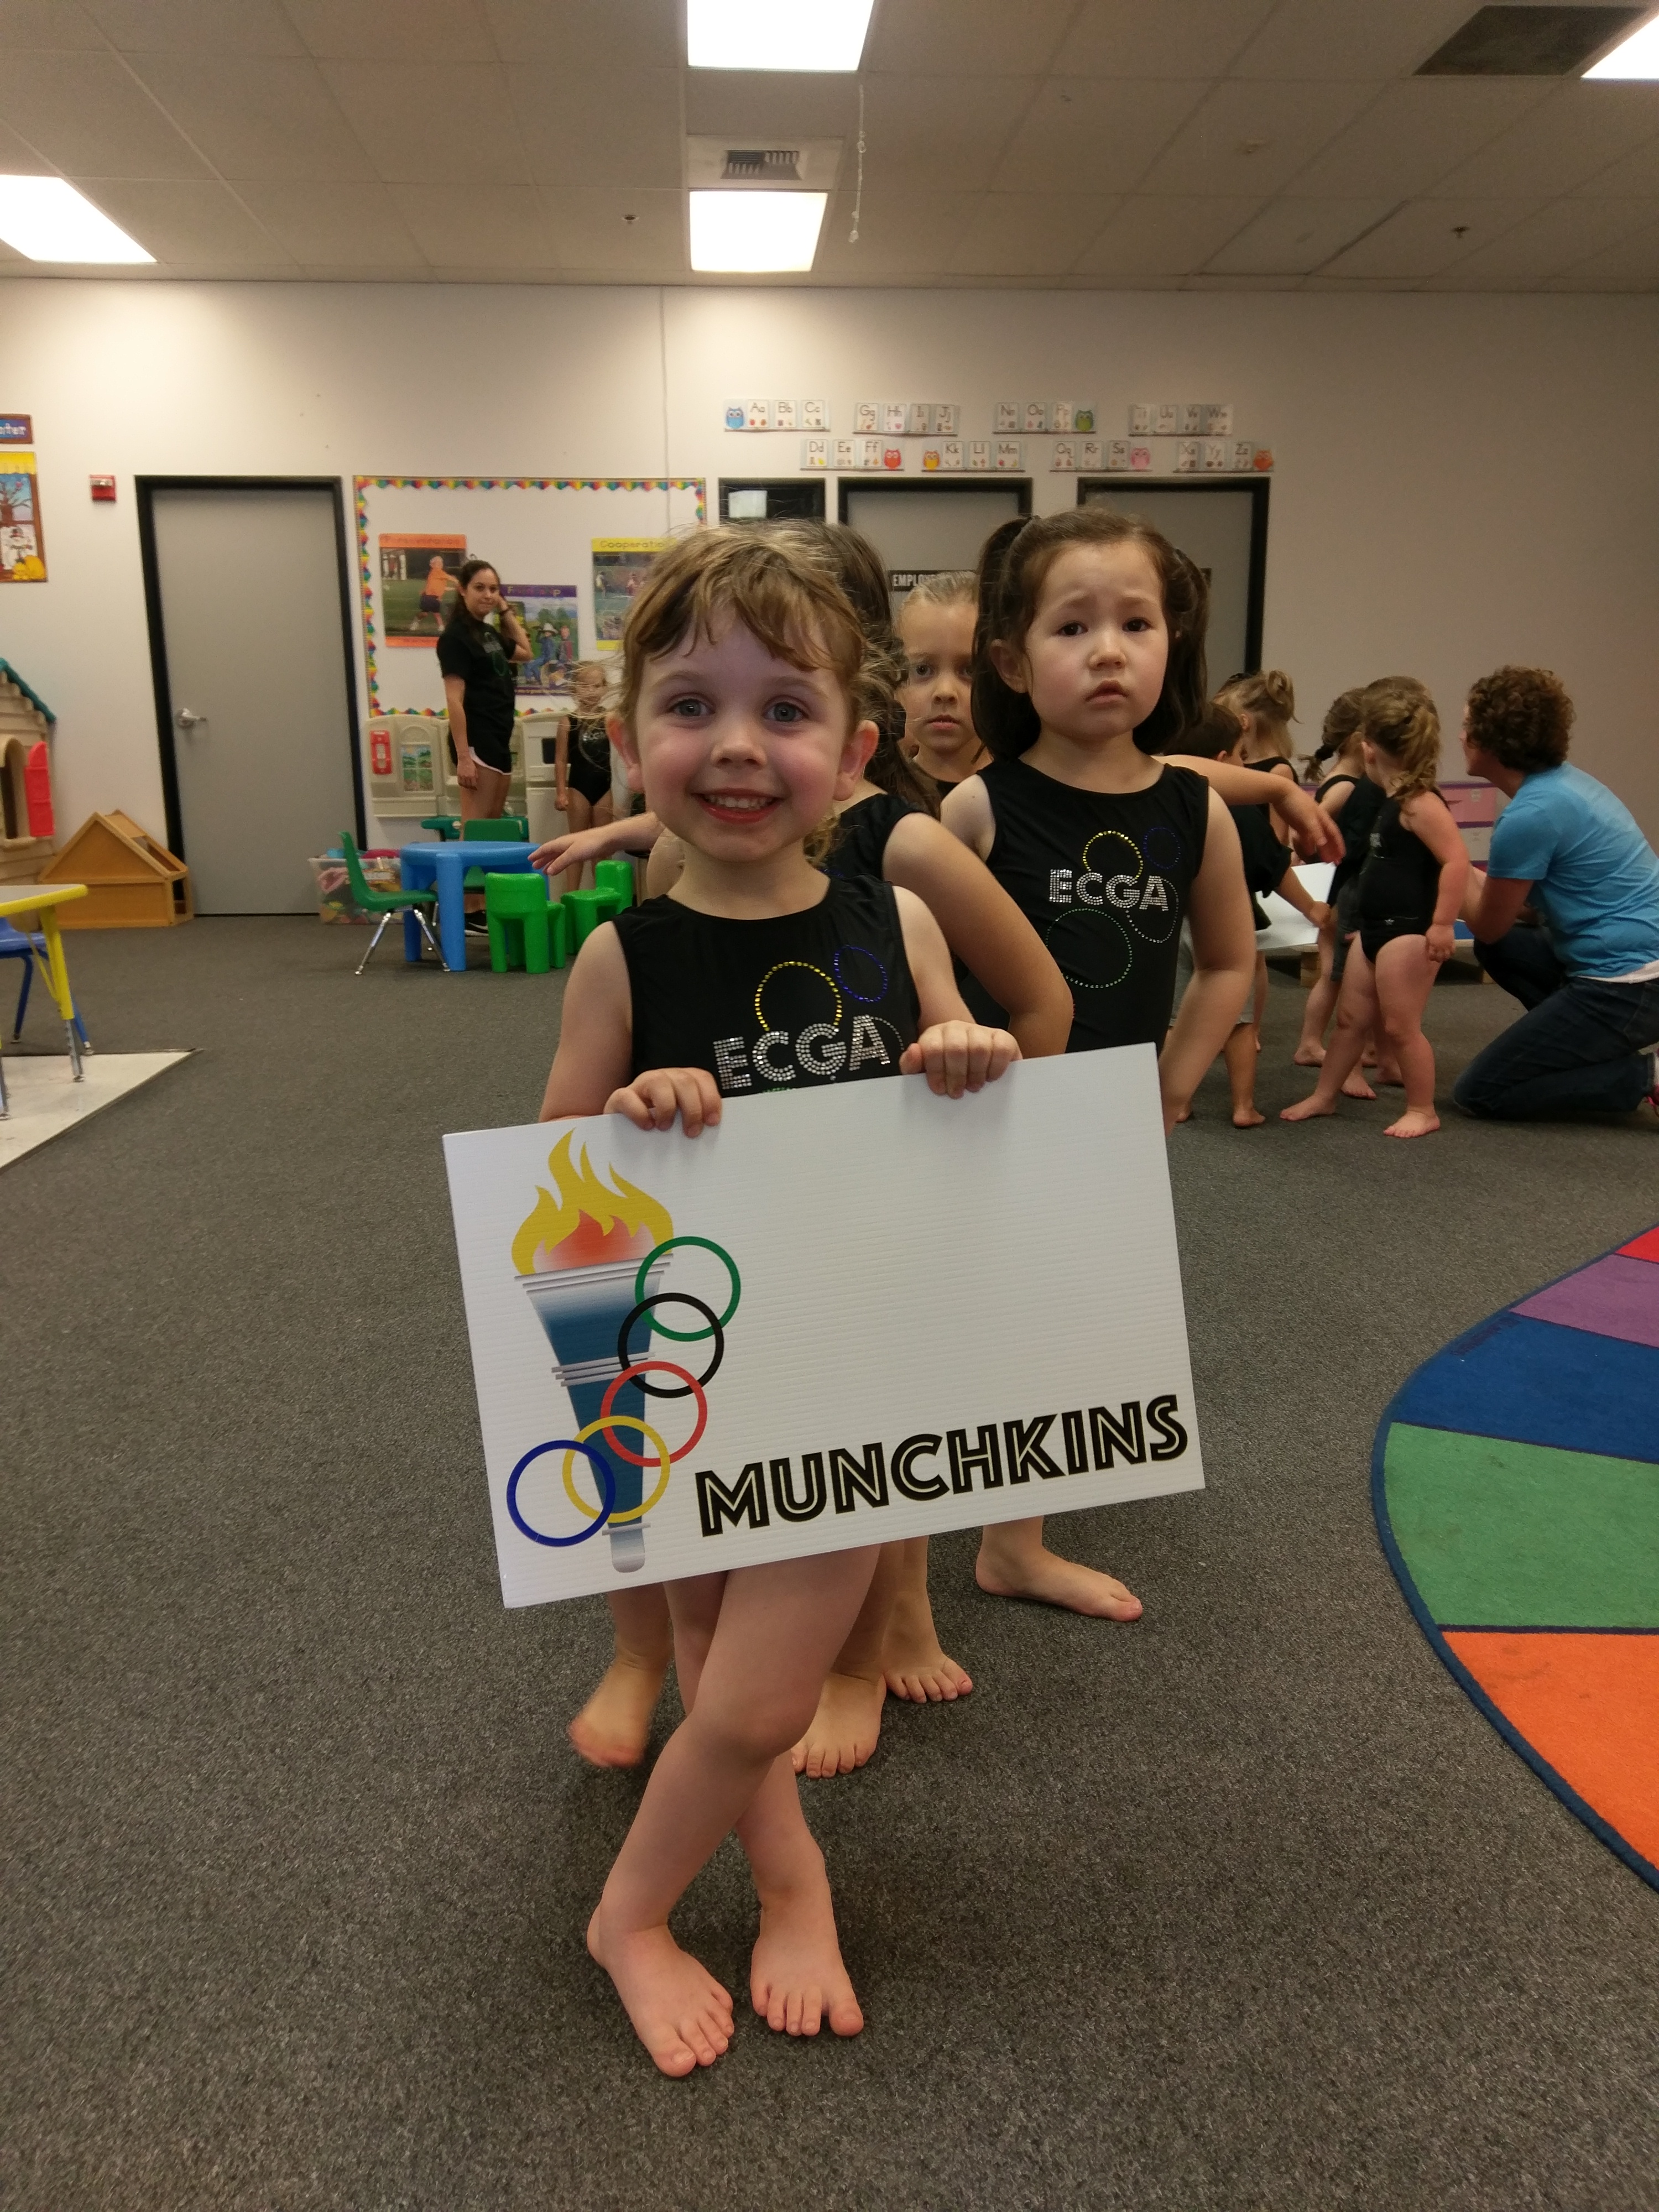
    Ok I’m finally getting the last set of projects up on the blog!  It’s been a busy week with Caitlin’s gymnastics show (or really, in her case, bouncing around the floor :))

    2016-06-06 15.58.16

    and then Nicholas’ kindergarten graduation and then HIS gymnastics performance on Saturday.  Then it is officially SUMMER!  I’m not sure whether to be excited because there is more flexibility in the day or scared because that means the quiet time in the middle of the day is going to be gone for 2 1/2 months!

    But the sun is shining and the kids are cute… so I’ll choose happy. 🙂

    And here are some Minty Fresh project ideas to get you going for summer too!

    A fun and simple card that is quick and easy to do using some of the In Color designer paper, Bold Butterfly thinlits, and the Bloomin’ Love stamp set.

    Or get a little fancier and bust out the vellum and Sunburst die to make a card like this:

    And if you are in a hurry, how about a simple birthday card using the Balloon Celebrations stamp set?

    I also had to create a scrapbook page for the display boards and just loved the fun of this picture from a Mommy & Me “spa” date.  It was a special treat for Caitlin and so the sentiment from the You’re So Sweet stamp set.

    So, if you missed any of my other Display Board projects you can check them out here:

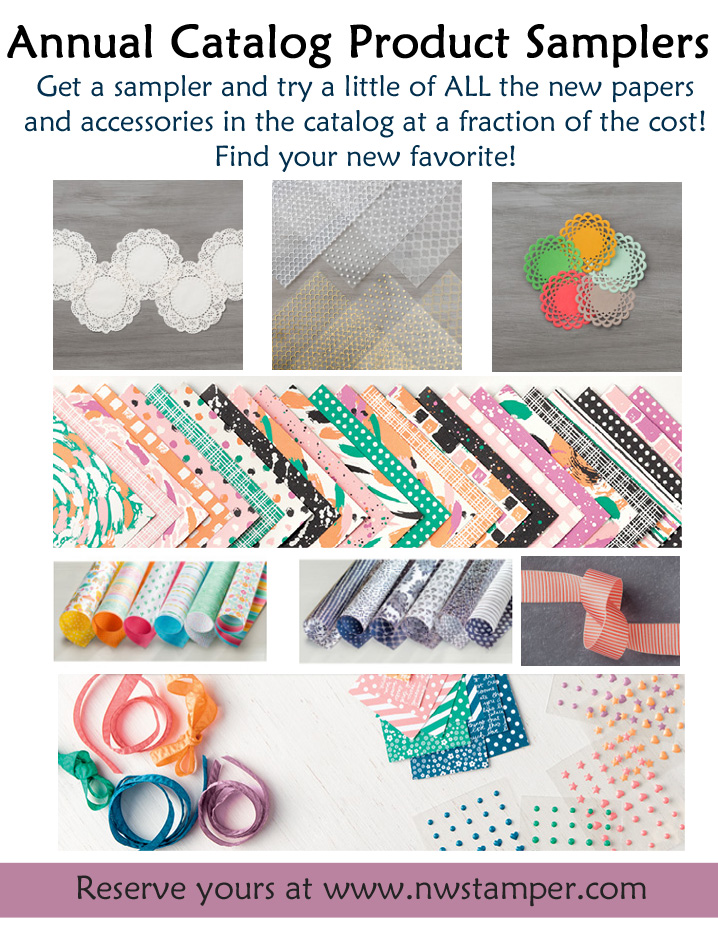
    Product Shares and Samplers – Reserve Yours!

    Just a reminder, I’m wrapping these up, so make sure to let me know if you want to take advantage of one of these samples:

    >>>Product Samplers Details and Sign Up<<<

    Product Samplers ad

    NWstamper signature_thumb[9]

    order online button for sig 3_thumb[4]

  • November OnStage Display Board Stamper Submission

    Oh my goodness!  I got back from my trip and learned they had opened up Display Stamper applications for the November OnStage demonstrator event.  Yes, I’m already getting excited for November!  Smile  Well I thought I would submit because I love the chance to focus on a smaller set of products and try to step up my game to make what I hope would be inspiration to some stampers. Smile  So, here are the projects I have to submit for my application:

    Cards

    Yes, that is on Vanilla Paper…. I just love this Moroccan stamp set as a background image!

    Man, this card sections was sooooo hard!  I had one more I wanted to share, so hopefully you enjoyed the 3 I picked! Smile 

    Scrapbook Page

    Sometimes a picture just calls for it’s very own scrapbook page… and this picture of my girly.  Yeah, totally called for a page of her own!

    And under that Hello You?  That is Gold Wink of Stella… yay for shimmer and shine!

    3D Projects

    First a mini-treat bag!

    And one more with something new… my FAVORITE!!!  Foxy Friends!

    So I hope you enjoyed these projects almost as much as I loved making them. Smile  And if I have a chance to be a Display Stamper, I would be so excited and love the opportunity.  

    NWstamper signature_thumb[9]

    order online button for sig 3_thumb[4]

  • 2016 OnStage Display Board Samples–Delightful Dijon!

    2016 OnStage Display Board Samples–Delightful Dijon!

    display stamper

    Oops!  While I was away on my trip, apparently I got the last two display stamper blog posts ready but didn’t actually get them published!  But some of my favorite samples were in these sets so I want to make sure to get them shared for you now.  🙂

    Today’s projects all highlight the Delightful Dijon color.  This was not one of my favorite colors when I saw it by itself and I thought for sure it would be my hardest color to work with…. NOPE!  Turns out it is a great color when mixed with neutrals and even some bright pops of color!

    For example, my favorite card I made for the boards using the new Swirly Bird stamp set:

    Or even as a base with Gold Foil and Mint Macaron.  And yes, that splatter is from the Swirly Bird set too along with the boat!  Great set, huh?

    And I couldn’t stop playing with gold and Delightful Dijon.  Check out how well they go together when paired with the Mini Treat Bag:


    And finally, the scrapbook layout that I promised my mom I’d do. 🙂  I needed to finish up scrapbook layouts for the boards and I was with my mom at the Mt. Vernon Tulip Festival.  I thought the tulips would make a great background for a photo and since she is a demonstrator and would be with me at OnStage in April, I had her pose with me in a photo and promised I’d scrap it as one of my display projects.  I totally wish I had gotten a photo of it up on the boards with me and mom there.  Such a fun little touch of personalization for an awesome trip to Salt Lake City!

    I used the Kinda Eclectic stamp set for my accents and some of the In Color designer paper stack.  Keeping it simple, was a perfect way to highlight the photo and the compact size is great for combining with your Project Life layouts in one of the 6×8 albums!

    So, see… even though colors that don’t seem as great on their own, often turn out awesome when you put them together with other colors.  Stick with the color families (so like the Stampin’ Up Brights, Regals, Subtles, etc) and you can be sure that the color tones and coordination will be great!


    Have you reserved your Product Sampler?

    With the new catalog officially here, make sure you have signed up for spot in my Product Shares!  Get a chance to try a little bit of ALL the new papers and accessories in a more manageable quantity and at a fraction of the cost!  It is a great way to find your new favorite and see what you love!

    Product Samplers ad

    >>> Get all the details and save your spot here <<<

    NWstamper signature_thumb[9]

    order online button for sig 3_thumb[4]

  • 2016 OnStage Display Board Samples–Cucumber Crush!

    2016 OnStage Display Board Samples–Cucumber Crush!

    It’s Day 3 of my display samples share!  Since Friday I’ve been sharing projects I created for the 2016 OnStage Display Boards in Salt Lake City.  We’ve done Watermelon Wonder, Tip Top Taupe, and so today I’m going to be sharing projects highlighting ways to use your Cucumber Crush!

    Now, I know some folks LOVE this color because they love the bright colors… love bright green for Christmas, or if you are my neighbor, it is perfect for Tinkerbell punch art and party decorations!  No seriously, I didn’t realize how perfect of a match it was until we put the Tinkerbell picture next to the cardstock.  Fabulous!

    But if you are like me, sometimes lots of bright green is hard to work with, so I had to put in at least one card that isn’t quite so bold.  Smile  So that was this card.  I played with the Swirly Bird stamp set and Affectionately Yours designer paper to create a card that lets you use bold colors and highlight your favorite pattern papers (plus it is a great way to use up scraps!)

    But if you like bold… let’s go bold!  I mixed bright colors with the much loved Celebrate Today stamp set.  Though this also taught me that I need a new firm foam Night of Navy ink pad!  I still was working with my old linen style pad and the coverage just isn’t the same on these large, solid photopolymer stamps.

    How about a fun gift box?  Plus more copper foiled paper from the Affectionately Yours designer paper pack!

    And then, if you are going to go bold, let’s go CRAZY BOLD!  Smile  I mixed In Color designer paper with the Affectionately Yours designer paper to make a super bright and cheery layout that was great for our Tulip trip.  PS – yep, that is Swirly Bird to make those tulips!  I was pretty proud of that discovery. ha ha ha.  Just exactly what I needed to finish out the layout.

    And with that we have 2 Days Left to get your favorites from the Stampin’ Up Retirement List and I’ll have 2 more days of display board samples to share. Smile  Don’t forget, you can take advantage of my May Shopping Special until May 31st. :

    NWstamper signature_thumb[9]

    order online button for sig 3_thumb[4]

  • 2016 OnStage Display Board Samples–Tip Top Taupe!

    2016 OnStage Display Board Samples–Tip Top Taupe!

    display stamper

    Welcome to Day 2 of my display stamper shares for the 2016 OnStage Display Boards in Salt Lake City!  Yesterday I kicked things off by sharing the samples I made with Watermelon Wonder and today I’m back with a little Tip Top Taupe for you.

    As I mentioned yesterday, the way it worked is they asked me to create 20 samples, approximately 4 each focused on each of the returning In Colors.  I did a mix of cards, 3D projects, and scrapbook pages – and I plan to have full blog posts for each project down the road, but I couldn’t wait to share them as a collection now… especially as we start getting excited for the new Annual catalog coming out on June 1st!

    Let’s kick things off with one of my more simple but such a pretty color combination card –

    I don’t know why it took me so long to discover Tip Top Taupe, Elegant Eggplant, and Whisper White as an amazing color combination!  Seriously, you have to give it a try!

    Or step away from the delicate and elegant style to a more contemporary, all occasion look.  See, the You’re So Sweet stamp set isn’t just for going on the Mini treat bag (even though it has been in a great discounted bundle together… they go together fabulously but don’t hesitate to separate them.  I promise, they can handle it! Winking smile)

    I made a fun little box.  This guy is 2”x2” and was simply made by scoring cardstock and using the Scalloped Tag Topper…. did you spot that Affectionately Yours designer paper again?

    And then, another case where I had photos begging to be scrapbooked!  This was from a trip with my guy on Valentine’s Day weekend to San Francisco.  I thought the boat from the Swirly Bird stamp set was a perfect touch to go with the photos.  I also love making my titles using the Epic Alphabet!  Yes, I stamped each letter, but it is easy and goes by quick because they are the clear photopolymer.  Sadly, I didn’t realize it was being discontinued at the end of May… you better believe this one is staying in my collection too. Smile

    Well, I hope you enjoyed these ideas today!  I really enjoyed creating them and with the different styles, there are options for everyone!

    Join me tomorrow as I have more display board samples to share!

    NWstamper signature_thumb[9]

    order online button for sig 3_thumb[4]

  • 2016 OnStage Display Board Samples–Watermelon Wonder!

    2016 OnStage Display Board Samples–Watermelon Wonder!

    display stamper

    Woo Hoo! Can you feel the excitement?  The new Annual catalog is only a few days away from releasing and with it some super duper awesome new stamps, dies, and accessories I can’t wait to get my hands on! 

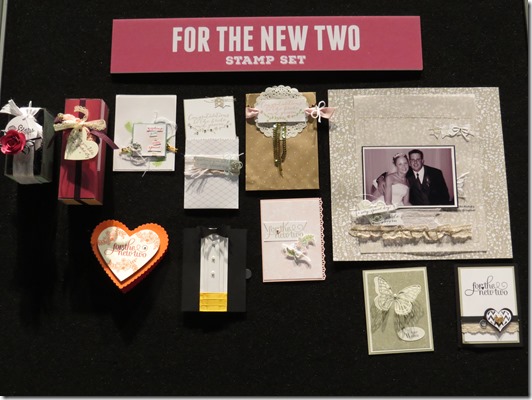
    I was lucky enough to be selected as a display stamper for the 2016 OnStage demonstrator event in Salt Lake City in April.  One of the big draws to these events is that you get to see tons of sneak peeks and even play with products from the upcoming catalog.  And to help that excitement, they put together big 8” display boards that show lots of ideas using some of those new products.  So as a display stamper, that meant I got to get some of the new sneak peek products early and got to create ideas to inspire my fellow crafters.

    Let me tell you… that is a bit of an intimidating challenge!  Sharing my style and hoping that it sparks inspiration in many talented crafters!  In the end, the display boards were AMAZING – you can see a photo album of all the display boards over on my Facebook page – http://facebook.com/nwstamper (just click on photos and you can find the display board album!).  But over the next 5 days, I’ll be sharing closer up photos of all of MY projects. Smile

    OnStage Display Board Samples – Watermelon Wonder


    So, I was asked to create 4 projects per returning In Color (so that is Watermelon Wonder, Delightful Dijon, Mint Macaron, Tip Top Taupe, and Cucumber Crush).  With a good mix of cards, 3D projects (ack! 3Ds… so hard for me!), and scrapbook layouts.  Today I’m sharing my Watermelon Wonder projects.  I’ll have follow up blog posts later with more project details for each one… but in the meantime, I hope this gives you some fun ideas to create with carry over and NEW SNEAK PEEK products!

    For example, this almost-no layer card using the new Swirly Bird stamp set and pretty striped In Color ribbon!

    I love the copper foiling in this Affectionately Yours designer paper that I used behind the butterflies for this luminary (just be sure you use one of those fake/electric tealights!)

    And I just LOVED this photo of Caitlin, so I had to work it into a scrapbook page. Smile  Plus it meant more playing with my Sunburst thinlit, Swirly bird stamp set, and that Affectionately Yours designer paper.

    I was always afraid of Watermelon Wonder because it was such a bright color, but it turns out that with the right mix of colors it can be oh so pretty!  Don’t you think?

    Want more of the Sunburst Thinlit?  The Class by Mail deadline is almost here!

    If you were thinking of trying out the Sunburst Sayings Class by mail or tutorial, just a quick reminder that I’m only going to accept registrations for the class by mail until May 31st (the tutorial will continue to be available after that).  So, make sure you’ve check it out and reserve your kit to learn and try out 5 different ideas using the Sunburst Thinlit die!

    Learn more about this fun Class by Mail!

    NWstamper signature_thumb[9]

    order online button for sig 3_thumb[4]

  • Wrapping up the Stampin’ Up Convention! Highlights, Display Boards, and More!

    It happens every year… the first night of a Stampin’ Up Convention or other event, I stay up late the first night socializing and then blogging/facebooking.  Then the second night, we are up late again… but more tired from the late night/early morning from the day before.  So I get a little less done.  Then by the last day… I’m just toast!  Smile  This year was worse than normal for me as my team had a blast staying up and having in-room “happy hour” as we chatted and some people had some wine.  But after coming home at midnight on Saturday and then spending time with the family before the hubby turned around for his turn to go on a business trip) I rested and am finally catching up on the last bit of sharing! 

    I wanted to give you the full experience, so WARNING! Lots of pictures ahead! Smile

    Stampin’ Up Convention 2015 – Day 2

    As always there are a ton of demonstrators gathered for Convention, but I love getting a chance to meet and mingle with everyone!  By day 2, my crew had a plan in place for snagging seats for our group.  I just had to sneak away for a minute to snap a quick pick of some of the crowd eagerly awaiting the chance to get in for day 2!

    IMG_0481

    I also love the chance to see and say hello to some of the amazing Stampin’ Up Home office staff who make these events and all the support for demonstrators so great throughout the year.  Like the lovely Miss Andrea Withers and the fabulous Bonnie Farley!

    2015-07-24 09.27.07

    2015-07-24 11.09.43

    Plus they always play fun music while we are waiting for the session to start so you have to stand up and dance a little!  See, even Tanya, Nicole, and Carla were getting into it. Smile

    2015-07-24 11.11.34

    There were awesome stamping demonstrations featuring new products like new Black Glimmer Paper, new stamps, and a new Pillow Box die!!

    2015-07-24 10.03.33

    And new spiderweb doilies, framelits, papers, and even new fall wood accents!

    2015-07-24 10.07.49

    2015-07-24 12.21.43

    Of course there was Prize Patrol!  Monica and I won the new Project Life stamp set coming in the Holiday Catalog.

    2015-07-24 18.28.11

    Then on to a workshop demonstration and Make & Takes!2015-07-24 14.32.05

    I totally meant to finish my projects… but I was chatting and getting way to excited about some of the new product I got to play with!

    FINE TIP GLUE!!!!!  With a pin in the cap so that the tip doesn’t get sealed up!

    2015-07-24 14.48.41

    And new Archival Ink in Basic Black and Basic Grey.

    2015-07-24 14.33.02

    The new ink pad stamps like a dream!  They use the old linen pads and are a new formula but they are AWESOME!  I fell totally in love when I was using it on the make & take… so imagine my excitement when they ended up giving the out to everyone at convention!  Yay!!

    2015-07-24 19.35.36

    As usual, there was lots of swapping

    2015-07-24 10.43.56

    And as you wandered around the Gathering Place, you could see lots of the new products as samples or to just play with… such as these edgelits (there are 3 in the pack! Trees, sleigh, and cottages)

    2015-07-24 15.01.39

    New embossing folder of birch trees

    2015-07-24 15.03.59

    And window/fireplace scene stamp set and framelit bundles!  There are two bundles… one all about the fireplace

    IMG_0515

    and one all about the window frame and scenery

    IMG_0517

    Then it was time for more classes and stamping presentations

    2015-07-24 14.47.33

    Let me just say this bird set is going to be HUGE this year!

    2015-07-24 19.17.37

    psst – new punch alert!!

    IMG_0500

    IMG_0555

    psst – another new punch alert!

    IMG_0557

    I even got to walk across the stage for earning the Grand Vacation – the Mediterranean Cruise – which was fun!

    IMG_0508

    And in addition to spoiling us at the event with great places to relax and chat and share with other demonstrators, prizes, and inspiration… for everyone who earned an annual award or had reached a milestone anniversary with the company, we had a little relaxation space that not only had some treats and drinks, but they also gave us this reuseable trash bin filled with lots of goodies!  I didn’t have that stamp set yet either – so super bonus score!

    annual award goodie bag

    Then we had the evening to ourselves so the crew headed to Olive Garden before heading back to the hotel for a dip in the Hot Tub and day 2 of “happy hour”.  I also got a chance to catch up with some other great friends, especially my great friend Sarah Naber

    2015-07-24 23.44.29

    I went to bed “early” as it was only 1am… not too bad for me on an event night! Smile

    Stampin Up Convention Day 3

    With the sun rising on Day 3, it was my last day in Salt Lake City.  The main convention event only went until lunch time, so there was a lot to get through in a little bit of time!

    2015-07-25 07.23.07

    … I always love having this view from my room!  Its my happy place!…

    I spent some time in the morning checking out the display boards… they were entirely filled with cards brought by other demonstrators this year and they were fantastic!  Like how stinkin’ adorable is this bird?

    IMG_0723

    *** See all the display board cards in pictures on my Facebook Page here ***

    IMG_0725

    Rich Judkins, the President of Stampin’ Up, came out and shared a great story on perspective and talked about how the company was doing both from a numbers perspective and from a morale perspective.  It was honest, and real… and great example of him sharing that the executive team really does hear how demonstrators are feeling, what we are concerned about, and CARES about us!  There is a lot of change this year and we all know it is tough, but they are trying to make things better for demonstrators and keep improving as they hear our feedback.  It was seriously great and reassuring to hear!

    We had more stamping demonstrations… so more cute ideas!

    2015-07-25 13.36.31

    and new product!  Must have this snowflake stamp set/punch bundle and those wood snowflakes!!

    2015-07-25 14.07.13

    and more cute stuff!

    2015-07-25 14.17.42

    Double wide pillow box using the new pillow box thinlit!

    IMG_0743

    And of course, more prize patrol!

    2015-07-25 13.39.32-1

    Plus something for everyone!  Hand painted holiday paper for all of us… thanks, Stampin’ Up!

    2015-07-25 14.28.50

    And with that, convention was over!  I had the opportunity to attend some additional leaders training in the afternoon.  I got to chat with Sara (seriously the most down to earth CEO there is!)

    2015-07-25 15.06.52

    And for those of you who have seen Brian Pilling bring Diet Coke to the presenters on stage at events before… he does it in real life too!  Isn’t he sweet for taking care of everyone!

    IMG_0787

    The training was a great way to review what I learned and think about how to make improvements to my business but also how to use it to help my team as well!  So much to get implementing for all my crew as the year goes on!

    2015-07-25 16.20.00

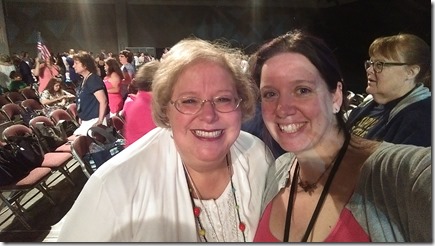
    Fun Fact!  My Mom and I have attended every Convention together since I joined and 2 leaderships.  So this was our 7th Convention together… .how cool is that?!?

    2015-07-25 14.47.19-2

    We celebrated the end of a great weekend with some Strawberry Shortcake before heading to the airport to say good-bye once again to Salt Lake City and back to our amazing, supportive families!

    2015-07-25 18.18.34

    So, I hope you enjoyed my recap.  Wish you were there (unless you were there – in which case, glad to celebrate with you!)  I’m already looking forward to the new On Stage events coming up starting in November.  I’d love to have you go with me.  All you have to do is let me know you want to go, snag the great deal that is the starter kit so you can become a member of my Fun n’ Crafty Stampers and then register!  We have an awesome group and you will have a blast!

    Give it a try!  Join the Fun and pick out your Starter Kit here

    2015-07-23 09.28.28

    Until next time… keep it fun and happy stamping!

    IMG_0783


    NWstamper signature_thumb[9]

    order online button for sig 3_thumb[4]

  • Stampin’ Up Leadership 2015 Display Boards

    As promised, I took pictures of the display boards at Leadership and wanted to share them with you.  There were fewer displays than in previous years because they were trying out a new idea to have demos who attended bring samples to be entered in contests for free stamp sets.  Lots of people brought samples, which was fun to see the different styles and ideas.

    Click any of the pictures below to see them bigger Smile 
    Want to make any of the projects?
      I’ll be running some of them in my upcoming classes, or schedule your own private class for you and your friends with me (local or even long distance!) and pick your favorites to create!  email me for details – jennifer@nwstamper.com

    IMG_7402

    IMG_7403

    IMG_7404

    IMG_7405

    IMG_7406

    IMG_7407

    IMG_7408

    IMG_7409

    IMG_7410

    IMG_7412

    IMG_7413

    IMG_7414

    IMG_7416

    IMG_7417

    IMG_7418

    IMG_7420

    IMG_7422

    IMG_7423

    IMG_7424

    IMG_7425

    IMG_7426

    IMG_7427

    IMG_7428

    IMG_7429

    IMG_7430

    IMG_7431

    IMG_7433

    IMG_7434

    IMG_7435

    IMG_7438

    order online button for sig 3_thumb[4]

  • Seasonally Scattered Valentine’s Box & NEW Product Shares!

    You’ve probably seen my projects and others using Seasonally Scattered and many of them were focused on the Thanks and Merry sentiments.  You know, because they fit so well for fall and for winter.  But before the stamp set disappears in a couple days (last day to snag it is Jan 5th!) I wanted to share this project I created for the Convention Display boards this summer.

    You may have seen this project on my blog from a long while back:

    Seasonally Scattered Love Card blog post

    And with that card I did heat embossing and sponging, but I had an idea to do something similar but wanted to really make the “LOVE” sentiment POP!  So I started working and I kept grabbing for things I hadn’t used in a while and this box came out:

    See?!  Now do you see why I can’t believe this set is not continuing on for Valentine’s Day?

    Anyway, I had lots of fun making this box and you could totally use bits and pieces from the box to make a card or make your own special box for someone you love.

    Tips for making this project:

    • Use the kraft gift boxes for your base.  They are very inexpensive easy to pop together, and very sturdy for your box.
    • Start by heat embossing your LOVE image onto a piece of Watercolor Paper using versamark and black embossing powder.
    • Use the Aqua Painter and your Real Red ink pad to color in the paper EXCEPT for the “LOVE” sentiment.
      NOTE – when picking up color with your Aqua Painter, make sure to pick up the color from your ink pad LID and not the surface of the pad itself to avoid diluting your ink pad in one spot.
    • Cut out the sentiment using the Oval framelits and then cut out a bigger Oval from the white crepe filter paper.  Fringe the edge of the larger oval and layer behind.
    • Stamp around the edges and heat emboss another piece of watercolor paper for your top using just the scatter design portion of the LOVE stamp.  This gives you the coordinating look on top.
    • Add a spiral flower using the Spiral Flower die (use glue dots or liquid glue to hold your flower together) and add some watercolored scraps of the filter paper to the middle of the flower for filler.

    • Did you know? You can color the Vintage Faceted buttons with your Blendabilities to make them custom fit your projects?  That is what I did here with my Cherry Cobbler blendabilities!

    And there you have it, a great little box for that special someone for Valentine’s Day or any time of the year.

    10885273_782080285173125_3511162684151308190_n

    Try it all out first with my Product Samplers!

    The details are up!  In 2 days (or as I get the shares filled), I’ll be placing the order for everyone’s samplers of the newest papers and accessories from the spring Occasions catalog!  This is a great way to try it all out without breaking the bank paying for full packs of everything.  Then once you see it in person, you can decide which items you love and which you are good with just a couple pieces. Smile  It’s a win-win!

    2015 Occasions Catalog Full Product Share

    BONUS – this year I’m offering a bonus to everyone who signs up for the “I Want it All” sampler and you get a bonus sampler of the coordinating Sale-a-Bration Paper, Ribbon, and Buttons!  That’s a whole lot of goodies for only $26 (plus shipping if needed).

    2015 Occasions Catalog Product Share Bonuses

    Check out my Product Shares page for more details

    Email me at jennifer@nwstamper.com to reserve your spot today!

    NWstamper signature_thumb[9]

    order online button for sig 3_thumb[4]

    Project Supplies Used:
    (if you are reading this in email, click here to see the list of supplies)

  • Quick and Easy Thank You card with Kinda Eclectic

    I hope you don’t mind one more card using Kinda Eclectic but I think this one is pretty different from a lot of the other cards I showed you.  I’m sharing it as part of the Stylin’ Stampin’ Squad’s Quick & Easy Cards post for today.  So check out my contribution:

    See, quick… easy… and just a little bling to keep it sparkly fun!  It was another display board card and I was sad to see it didn’t make it up on the boards this year… but I noticed another card that had a similar design so I can understand why they had to pick one.  So this is mine and if you order from me in the next month or two, don’t be surprised if one of these guys makes it to your mail box as a thank you for your order!

    Tips for making this card:

    • The green polka dots are the polka dot image from the Kinda Eclectic stamp set, stamped twice on the card front.  If you have the clear-mount version of the stamp set, you can “best guess” line up the images (which is what I did for this card… total eyeballing and luck!) or get precise by grabbing your Stamp-a-ma-jig (see it here).
    • Use In Color Sequins to add a little sparkle to your dots (and help cover up any that didn’t stamp perfectly!).  I used a glue dot to hold them down which gives you a little dimension as well!
    • Wrap some linen thread  around the inside edge of your card (right next to the red cardstock) to add some subtle texture and keep everything from blending together.

    As you can tell, this card comes together quick with very few layers (yeah, like 1 – ha ha) and just a few of those embellishments you get because they are so cute but you always forget to use!  Pull them out and enjoy them.  Smile

    LAST DAY for the Buy 3 Get 1 Free Paper promotion

    So, since I’m the one who is totally prone to remember a sale is ending the day after the sale is finished, I thought I would try to help you not be me and let you know that TODAY is the LAST DAY for this promotion.  You can check out Tuesday’s post where I shared my 3 favorite designer paper packs and card samples for each one.  So, check them out and you can pick them up before 11:59pm MST tonight using the following link:

    See all the paper on sale here

    Join me tomorrow when I promise to share a project that is NOT Kinda Eclectic or Amazing Birthday… you know, because I gotta keep mixing it up for you, right?  Winking smile  But I will tell you that they will help give you an idea for a new promotion starting tomorrow!!  (Lets just say if you’ve been wanting a BigShot, you are going to be getting a sweet package in the month of August!)

    spaced shop now sig bar

    July Online Stamp Club Hostess Code – TT2NETD4
    Use this code to get free exclusive tutorials & project kit! Learn more

    Card Supplies Used:

  • Birthday Banner Card with Amazing Birthday

    Alright, lets continue on the Convention Display Board sample roll…. you see, I have 24 projects that I want to share and so this is going to take us a while.  But that just means you know there will be fun projects on the horizon, right?!  Well, today I’m back with another of the Amazing Birthday stamp set cards.  For this one I stuck to the Birthday theme and instead played with the idea of lots of banners.

    See what I mean?  All Banners… All the Time… whabam!  Smile 

    I was having fun with the 2013-2015 In Colors (you know all those Strawberry Slush, Crisp Cantaloupe, Pistachio Pudding, etc ones) and trying to keep it really simple.  The only complicated thing – aside from having to use the Big Shot – is tying the knots onto the Gold Baker’s twine to highlight the sentiment in the center. 

    Tips for making this card:

    • The stamps in the Amazing Birthday stamp set are perfect matches for 1-1/4” Circle punch AND the Banner Framelits!  So, stamp to your hearts content knowing you don’t actually have to fussy cut everything by hand.
    • After cutting your stamped banner pieces, layer them on your card overlapping each other and starting at different heights.  The uneven-ness of the card will make it more visually interesting and will hide any imperfections you may have gotten when stamping or cutting out your banners.
    • Wrap your Gold Baker’s Twine around your card in straight lines first. THEN take a second (and third) piece of twine and tie them each in a knot.  Trim the ends and adhere over your long pieces of twine using glue dots. 
      Or you can tie your knot around one of the pieces of twine so that you don’t distort the straight line of the base baker’s twine, but also have something for your knot to hold onto.
    • I love the fact that the gold foil part of the twine is just wrapped around the more natural colored fiber.  That makes it easy when you are trimming your ends to UNWRAP some of the gold foil so you can leave it longer than the natural cotton twine.  This gives you some extra “tinsel” hanging out of your knot.

    This is a great card to do in a class or when you just want something that is fun but doesn’t require a lot of brain power or measuring to pull together.  Any time you can layer die cut pieces, the easier it is in my book! 

    Hope you enjoyed this card.  I’ll be back tomorrow with another quick and easy card, only this time using the Kinda Eclectic stamp set.  See you back here tomorrow!

    spaced shop now sig bar

    July Online Stamp Club Hostess Code – TT2NETD4
    Use this code to get free exclusive tutorials & project kit! Learn more

    Card Supplies Used:

    foo

  • Using Project Life Cards…for CARDS! Red & Gray Love Card

    Happy Monday! Today I thought I would share a super fast and simple card that I created using the Everyday Adventure Accessory pack from Project Life by Stampin’ Up!  As we were working on our projects for the convention display boards, we were sent a set of Project Life cards and accessories and invited to create some projects using the supplies in a “non-traditional” way.


    I saw the heart die-cut card from the accessory pack and thought it would be a fun core element to a card.  So I grabbed my Pictogram Punches stamp set and was excited to discover that the I <3 You stamp was an exact fit!

    Tips for making this card:

    • Cut a some glimmer paper 1/8” larger than your base paper (so in this case, the grey striped card was 3”x4”, so I cut my Real Red glimmer paper to 3-1/8” x 4-1/8”).  This gives you a very fine border around your main image and just a hit of sparkle to light it up.  It is a great way to add the sparkle without overwhelming the card with lots of bling!
    • Take a strip of scrap paper and turn it into a fun stripe for the background of your card.  In this case, I took a wide piece of Smoky Slate cardstock and glued it diagonally across the card front.  Then I flipped over my card and trimmed along the edges of the card base to cut off the extra paper that was hanging over the edge of the card.
    • Love those matching punches & stamp sets!!  The new Itty Bitty Accent Punch pack is a set of 3 punches for only $16.95 for all of them.  The heart and star are new sizes and all perfectly match with the Pictogram Punches stamp set.  The shapes are used in the sentiments for the set and so you can easily add a pop of color or glimmer to your project and no fussy cutting required!


    I have 1 spot left in my Project Life Night class tonight!
    If you’d like to come play more with Project Life with me, I’m running a class tonight and have 1 kit left so RSVP now and it is yours!  We’ll be making 2-3 cards, a 2 page scrapbook page, AND a giftable or two!  If you can’t make it in person but would like your kit to-go, I can do that too.  I’ll include a PDF of pictures of the projects and instructions along with a full set of Project Life cards for you to keep. Smile
    In person – 7/28 at Panera in Redmond from 7-9pm
    To – go – just email me at jennifer@nwstamper.com and I’ll get everything set up for you.

    Card Supplies Used:


    spaced shop now sig bar

    July Online Stamp Club Hostess Code – TT2NETD4
    Use this code to get free exclusive tutorials & project kit! Learn more