Northwest Stamper

Tag: coloring with blendabilities

  • Have You Used Daydream Medallion Lately?

    So, when the weekly deals came out this week, I saw the Floral Frames framelits were on sale and once again I smacked my head and thought “oh yeah!!  I totally forgot about those dies!”.  Anyone else with me? 

    So if you are in the same boat, I thought I’d share a card I did for a class a while back (but totally forgot to post) to help refresh your memory!

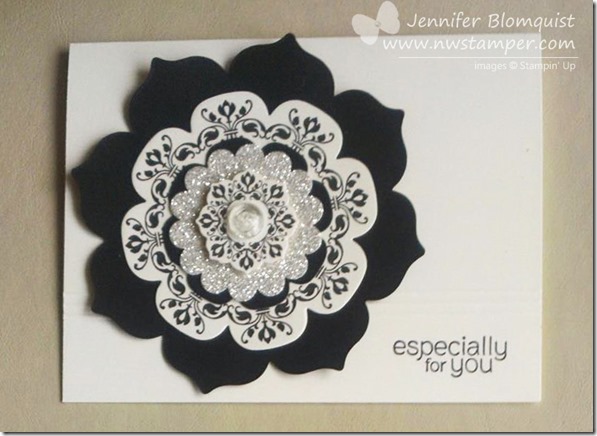
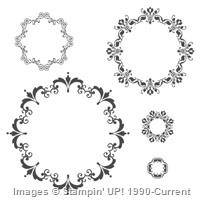
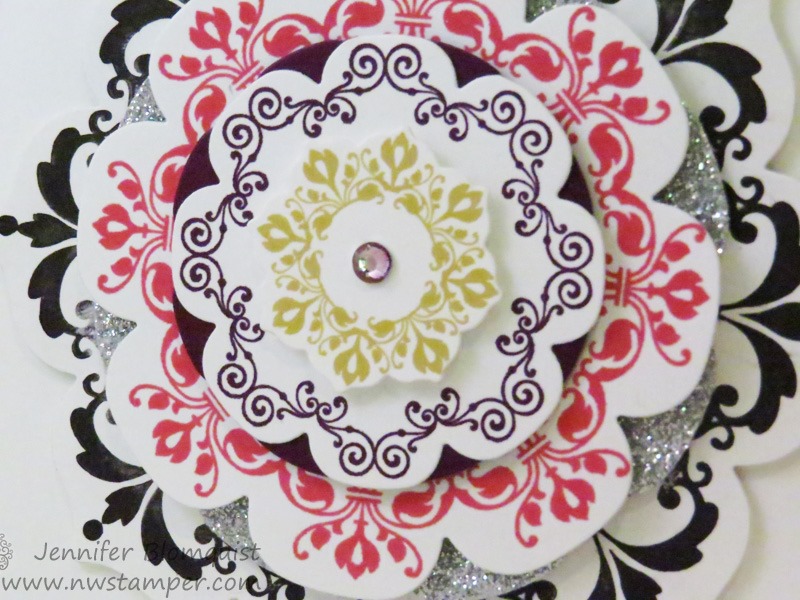
    Everything but the card base is a layer made using the Floral Frames framelits – don’t they layer so nicely – and of course stamping using the coordinating Daydream Medallions stamp set.

    Tips for making this card:

    • Keep it easy on yourself and mostly stick with white cardstock that you stamp with different color inks!  You can make it different everytime but it lets the intricate designs really stand out.
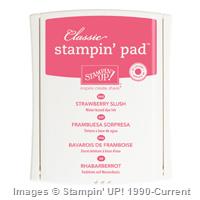
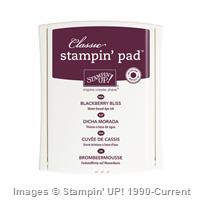
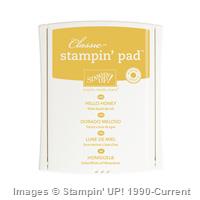
      In this case I used the following colors:  Basic Black, Strawberry Slush, Blackberry Bliss, Hello Honey

    • Add just a little bit of definition and flair by mixing in a few layers with Silver Glimmer Paper or coordinating cardstock (like the Blackberry Bliss).  I used the same die cut shape as the layer above my colored cardstock and just offset the flower petals so the color or glitter showed through but stayed subtle.
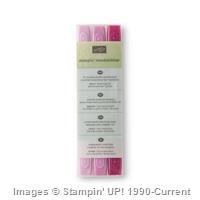
    • Color your rhinestone at the center of your flower with Blendabilities!  I used the darkest shade of Rich Razzleberry to get close to the Blackberry Bliss I used elsewhere.
    • Pop up your layers with dimensionals to really let your image come alive and off the page!

    • Then just stick it down on a plain white card base and stamp a simple sentiment like the “just because” from the Dozen Thoughts stamp set, and you are good to go!

    And just for fun, I thought I’d share my most favoritest card I’ve made with these framelits… clean, simple and oh so pretty!

    Just imagine it in your favorite color… fun, right?!

    NWstamper signature_thumb[9]

    order online button for sig 3_thumb[4]

    Project Supplies Used:
    Easy shopping anytime!  Click the images below to see the item in the online store.
    Use Hostess Code EGR29JBV to receive a free gift from me when you place your order!

    Supply List

    Built for Free Using:  My Stampin Blog

  • Seasonally Scattered Valentine’s Box & NEW Product Shares!

    You’ve probably seen my projects and others using Seasonally Scattered and many of them were focused on the Thanks and Merry sentiments.  You know, because they fit so well for fall and for winter.  But before the stamp set disappears in a couple days (last day to snag it is Jan 5th!) I wanted to share this project I created for the Convention Display boards this summer.

    You may have seen this project on my blog from a long while back:

    Seasonally Scattered Love Card blog post

    And with that card I did heat embossing and sponging, but I had an idea to do something similar but wanted to really make the “LOVE” sentiment POP!  So I started working and I kept grabbing for things I hadn’t used in a while and this box came out:

    See?!  Now do you see why I can’t believe this set is not continuing on for Valentine’s Day?

    Anyway, I had lots of fun making this box and you could totally use bits and pieces from the box to make a card or make your own special box for someone you love.

    Tips for making this project:

    • Use the kraft gift boxes for your base.  They are very inexpensive easy to pop together, and very sturdy for your box.
    • Start by heat embossing your LOVE image onto a piece of Watercolor Paper using versamark and black embossing powder.
    • Use the Aqua Painter and your Real Red ink pad to color in the paper EXCEPT for the “LOVE” sentiment.
      NOTE – when picking up color with your Aqua Painter, make sure to pick up the color from your ink pad LID and not the surface of the pad itself to avoid diluting your ink pad in one spot.
    • Cut out the sentiment using the Oval framelits and then cut out a bigger Oval from the white crepe filter paper.  Fringe the edge of the larger oval and layer behind.
    • Stamp around the edges and heat emboss another piece of watercolor paper for your top using just the scatter design portion of the LOVE stamp.  This gives you the coordinating look on top.
    • Add a spiral flower using the Spiral Flower die (use glue dots or liquid glue to hold your flower together) and add some watercolored scraps of the filter paper to the middle of the flower for filler.

    • Did you know? You can color the Vintage Faceted buttons with your Blendabilities to make them custom fit your projects?  That is what I did here with my Cherry Cobbler blendabilities!

    And there you have it, a great little box for that special someone for Valentine’s Day or any time of the year.

    10885273_782080285173125_3511162684151308190_n

    Try it all out first with my Product Samplers!

    The details are up!  In 2 days (or as I get the shares filled), I’ll be placing the order for everyone’s samplers of the newest papers and accessories from the spring Occasions catalog!  This is a great way to try it all out without breaking the bank paying for full packs of everything.  Then once you see it in person, you can decide which items you love and which you are good with just a couple pieces. Smile  It’s a win-win!

    2015 Occasions Catalog Full Product Share

    BONUS – this year I’m offering a bonus to everyone who signs up for the “I Want it All” sampler and you get a bonus sampler of the coordinating Sale-a-Bration Paper, Ribbon, and Buttons!  That’s a whole lot of goodies for only $26 (plus shipping if needed).

    2015 Occasions Catalog Product Share Bonuses

    Check out my Product Shares page for more details

    Email me at jennifer@nwstamper.com to reserve your spot today!

    NWstamper signature_thumb[9]

    order online button for sig 3_thumb[4]

    Project Supplies Used:
    (if you are reading this in email, click here to see the list of supplies)

  • Non-Christmas Partridge and Pears Card with NEW Sale-a-Bration stamp–Simply Wonderful

    When I first saw this Partridge and Pears stamp set, I knew I wanted to use my Blendabilities to color it – but it took until now to actually color the entire tree!  Turns out it is great for cards anytime of the year, don’t you think?

    I mixed and matched retiring stamps (Partridge and Pears) with upcoming stamps (Simply Wonderful from Sale-a-Bration).  Not at all Christmas-y!  Smile

    Tips for making this card:

    • Stamp the tree image from Partridge and Pears using Memento ink onto White cardstock.  Then color with blendabilities to match the colors and feel you want for your card.  In this case, I used:  Old Olive, Daffodil Delight, Calypso Coral, Crumb Cake, and the Skin Tones.
    • Stamp the sentiment from the Simply Wonderful stamp set to make this an anytime card (starting January 6, it will be FREE with a $50 order or if you join my Stampin’ Up team)!
    • Add the “hi” die cut from the Label Flipcard Thinlit for a fun touch to your sentiment, with a pearl for the dot of the “I”.
    • Use Stampin’ Dimensionals under the center of the sentiment to help make a rippling banner look.

    10885462_782080301839790_8262101909808401812_n

    Yay!  4 more days until the Sale-a-Bration promotion starts and the Occasions Catalog kicks off!  I have more projects to share each day and can’t wait to show you the entire catalog on the 6th!  If you have any questions, feel free to send them in now and I’ll not only answer you now but will make sure to include the answers in my upcoming video.

    Need a catalog?  I’m putting more in the mail and would be glad to send you a copy.  Just email me at jennifer@nwstamper.com and I’ll get you set up!

    NWstamper signature_thumb[9]

    order online button for sig 3_thumb[4]

    Project Supplies Used:
    (if you are reading this in email, click here to see the list of supplies)

  • Quick and Easy Card with a Little Help From My Blendabilities

    Today over on the Stylin’ Stampin’ Inkspiration blog, we are sharing some quick and easy cards for you.  So, I thought I’d share one of the cards I created for my Stamp Club this fall.

    I kept it quick to go together thanks to my handy Big Shot and the Scalloped Tag Topper punch, so that we could focus on playing with the Blendabilities!

    Tips for making this card

    • By using an embossing folder for your contrasting color of paper, it keeps your simple card interesting to look at without overwhelming the stamped image.
    • Dimensions for this card:
      Hello Honey cardstock – 8.5” x 5.5” folded in half
      Lost Lagoon cardstock – 5.5” x 1.75”, which is just right for two rows of the large polka dots on the Large Polka Dot Embossing folder
      Whisper White cardstock – 4.25” x 2”
    • Cut a piece of the Mossy Meadow ribbon and hold it in place by stapling it to the top of the tag
    • The flower images from the Bloom with Hope hostess stamp set are perfect for coloring with Blendabilities.  In this case, we use the Night of Navy trio!  Who knew the dark sounding color could be so light and pretty when you stick with the lightest color marker for most of your image?!

    Just a small amount of stamping, a little embossing, and a little coloring and you have a pretty card that is perfect for any occasion.

    Just a reminder, we are on week 3 of Gratitude Month and the special thank you gift this week is a bonus punch on your Northwest Stamper rewards card!  Get to your free stamp set even faster this week when you shop online & use hostess code UCJDBQH4.image

    Finally, next week will be the kick off for the Holiday Shopping Sale!  I’ll be getting details soon, but I know you’ll have the special Gratitude Month week 4 gift from me PLUS all the great deals from Stampin’ Up!  If you want to be one of the first to hear about the details, make sure you are on my mailing list as I’ll be sending out the details once I have them so you are ready to go. Smile 

    Get on the newsletter mailing list here

    NWstamper signature_thumb[9]

    order online button for sig 3_thumb[4]

    Project Supplies Used:
    (if you are reading this in email, click here to see the list of supplies)

  • From Scraps to Shiny Sweet

    Yesterday, I was trying to finally unbury my craft table…again!  I had everything piled up from the last two weeks, including all the odds & ends from my spare table that I used for prep work for my events that I took down over the weekend.  I was sooooo excited to be down to just all my scrap cardstock that was sorted and just needed to be put away in my file folders, so I thought I’d get it all wrapped up. 

    What is it about a clean craft table that makes you want to get crafting again?!

    As I was putting away scraps, I had this stamped strip of paper and the scrap strip of Gold Foil paper.  I thought,” why not make a banner out of the gold paper and glue them together?”  Then I grabbed the Vintage button I had colored for my Blendabilties class and stuck it on the end… grabbed some sequin trim scrap, some lace scrap, and cherry cobbler scrap… and things just started coming together!  Gotta love it when that happens. Smile

    Tips for making this card:

    • Take a regular ol’ white or vanilla button – like this Very Vintage Button – and color it with your Cherry Cobbler blendabilities!  Use the PEN TIP to color so you don’t risk messing up your brush tip.
    • Add a single sequin to the center with a glue dot for a complimentary bit of shine.

    • Did you know, this sentiment is from the Happy Hour stamp set and is 25% off with the weekly deals this week!  Love it!
    • Want to add a bit of shine to a corner of a card?  Staple a string of sequins for some not-too-overdone shine!  I used my Stampin’ Up mini stapler to staple the strand into a twist first and then stapled that onto my card.  (yes, I’m sure that made no sense, but if you just staple it to your card front, that works great too!)

    So, don’t forget to use those scraps!  You never know when they will come together just right. Smile

    spaced shop now sig bar

    Hostess Code:  C2HYWWQM Use this Hostess Code and receive a free gift!
    (Please do not use the Hostess Code if your order is $150 or more)

    Card Supplies Used:

  • A Little Bit of Love with Seasonally Scattered

    Wanna see the very first card I made of the convention display boards this year?  And the very first one I made with the new Seasonally Scattered?  Well, here you go!

    This card is pretty different from my usual style… in fact, I actually made it and then set it aside for a while to see if I liked it or not.  In the end, I decided I did like it and had fun with the mixture of patterns and textures!

    Tips for making this card:

    • The sentiments from the Seasonally Scattered stamp set are pretty big and the letters are part of the un-stamped image (meaning, when you ink up your stamp, where you see the letter “L” it does not get any ink on it).  But that gives you some fun other options, like heat embossing your image!
    • Once you emboss your image, sponge over the top of the embossed image for a varied saturation of color.

    • Tear off the edge of your embossed and sponged cardstock layer to give you a rough white edge since you’ll be ripping off the sponged surface and exposing inside of the white cardstock!
    • Color a pearl with your Cherry Cobbler blendabilities and then place it in the center of a Vintage button for a matching pop of color.


    Oh, and I tucked my chevron ribbon under my white cardstock layer, to make sure the torn edge showed up and to mute some of the boldness of the chevron.

    The nice thing about a card like this is that the big bold patterns and images give you a lot to look at when you look at the card but its actually super easy to put together.  Smile

    Join me for some stamping fun!

    My class calendar has been updated for the rest of the year!  As you heard, I have my Too Cute Curvy Keepsake box class coming up in a couple weeks; but I also have card nights, technique nights, and more.  Make sure you check out my calendar online or join my meetup to RSVP or stay in the know.

    And YES! You can get my classes by mail as well!  Just let me know if you are interested in that option.

    spaced shop now sig bar
    Hostess Code:  C2HYWWQM Use this Hostess Code and receive a free gift! (Please do not use the Hostess Code if your order is $150 or more)

    Need a Holiday Catalog?  Check it out online or email me at jennifer@nwstamper.com to get your copy!


    Card Supplies Needed:


    Heat Tool

    $29.95