Northwest Stamper

Tag: butterfly basics

  • Making Kites on Cards with the Swirly Bird stamp set

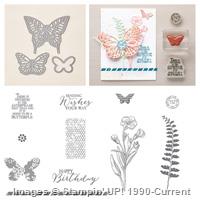
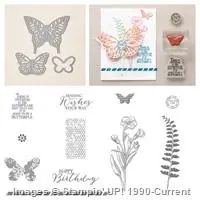
    If you have seen the Swirly Bird stamp set in the Stampin’ Up catalog, you may have thought to yourself that it didn’t look like much… or, like I did, what the heck am I going to do with these shapes?!

    But the amazing thing you’ll see if you start looking at cards using this set, is that you end up seeing so many different options and opportunities!  Kind of like life, right?  You look at the jumble of people and situations and wonder how it all comes together and yet, usually you end up being pleasantly surprised by some of the cool and unexpected ways things come together!  So, today I thought I’d share one of the first cards I made with the Swirly Bird stamp set… did you see those weird triangle shapes in the stamp image above?  Check it out… they turn into kites when used together!!!

    Tips for making this card:

    • Two stamps means lots of opportunity to play with color – Mix and match your colors for the striped part of the kite and the solid part.  I was focusing on Delightful Dijon as this was a card for the OnStage displays using that color, but play around with your favorite colors to find new and fun color combinations!
    • Cut out some shapes to help your kites float on the breeze – While there is a coordinating thinlit set, it doesn’t cut out the kite image or the little bows.  But don’t be dissuaded from adding this pop of dimension!  Here are a few of my tips for cutting out stamp shapes so they look great:
      Always leave some white space around the outside of your images! 
      When I first started cutting out stamped images, I tried to cut exactly on the outline of the image.  The problem with that is that I’m an imperfect cutter and so sometimes I would cut right on the line and sometimes I’d cut OFF the line, or leave a little bit of white.  Which in the end, didn’t look so great.  But when I would cut and always try to leave a little bit of white around the edges, you don’t notice when I’m slightly closer in one spot or a little farther away in others.  Plus, it keeps the clean edge of the stamped image in tact, so the image always looks great!
      Move your paper NOT your scissors! 
      This is another trick that blew my mind when I first started cutting things out.  If
      you are like me, you learned in kindergarten to open and close the scissors in the direction of where you want to cut.  And that works great if you are cutting strips of paper or other mostly straight lines.  It doesn’t work so well when you are cutting curves or in little detail areas.  So, now, I always start with my scissors open and slowly close them for my cutting, but with my other hand, I move my paper to change direction of the cut.  Moving the paper allows for smooth curves and can make it a lot easier to get in to those tight little spaces.
    • Cut up your dimensionals (and the edges of the foam dimensional sheets!) to pop up even the littlest pieces – I wanted my kites to be floating on the breeze, but then I had to figure out what to do with the tails.  Ended up being easy to just cut up some of the edges of dimensional sheets so I could pop up the thin lines behind a few of the bows on each string.  Seriously, it is easier than it sounds!
    • Try the other stamps in unexpected ways!  I thought the swirly images in the stamp set looked like birds nests or artsy flowers, but when working on this card, I suddenly saw clouds!  That is the beauty of it, you can make them whatever you want!  I used Soft Sky ink and then for fun, added a white sequin from the Metallic Sequins assortment to the middle of each with a glue dot.

    I loved how this card came together and hope it inspires you to give this stamp set a second look and maybe you’ll see some fun and unexpected combinations for an amazing project!

    And speaking of fun and amazing new products and projects, if you missed it over on my YouTube channel, I posted an “unboxing” video to walk through all the new ribbons, papers, accessories, kits, and many many new stamp sets!  In fact, I had so much I couldn’t keep it all in one box!  So, check it out and see if you find any unexpected favorites in there Smile

    Annual Catalog Unboxing and New Product Preview

    So, what do you think?  Have a favorite stamp or paper?  I love your comments and would love to hear from you on what your thoughts are Smile .

    NWstamper signature_thumb[9]

    order online button for sig 3_thumb[4]

    Use Hostess Code WKVC92UY at check out to get a special thank you from me!

    Project Supply List

  • Congratulations Card for my Fun n’ Crafty Stampers!

    Congratulations Card for my Fun n’ Crafty Stampers!

    So, I’m off with my hubby on an amazing adventure to the Mediterranean – the Stampin’ Up grand vacation cruise!  The grandparents are staying at our house to watch over kitties and kiddos, and I’m so excited to be headed off on this adventure! 

    PS – I don’t expect to have much access to the internet so I probably won’t be on email much for the next week and a half.  But when I can, I’ll try to post pictures of our adventure over on my Facebook page – so I’d love to have you come join me over there!  Visit my Northwest Stamper Facebook page.

    Ok, but back to where I was going with all this – aside from being really stinkin’ excited to get to see cities I’ve only read about AND get to stamp with some amazing folks ON A BOAT!  For reals!  Yep, they will have a hospitality room on the cruise ship and we’ll get to see project ideas and even stamp a little I’m hearing!  Ok, bring it back…. Smile 

    You see, I wouldn’t be on this trip if it wasn’t for my AMAZING Fun n’ Crafty Stamper team.  They are the coolest, most supportive group… and I’m so lucky that I get to share the fun demonstrator experience with them.  So, today’s card is one that I created for them!

    You see, at the beginning of the year, I posed a challenge to them.  I had them set a resolution and goal for something they were going to do to improve their business or their enjoyment of this fun hobby.  They had to track it and report back how they were doing.  And they could earn prizes along the way.  So, this card was for all the folks that completed the challenge – because WOW they rocked it!

    I used scraps to pull it together and some fun collage-y pieces from the Butterfly Basics stamp set to create the background elements.  I love how you can get lots of fun different layouts and look from these stamp pieces.

    I wanted to experiment too with my Wink of Stella and getting cool glitter drops on my page.  I think they turned out really cool – and they are easy to do, the only thing you run into is that if they are extra big or juicy, you get a little bit of staining on the inside flap of the card where it soaks through a little.  But I didn’t mind, and hopefully they didn’t either. Smile

    Making the Glitter Drops with Wink of Stella

    • Start by unscrewing the brush tip from your Wink of Stella brush.  This should expose a black flat circle with a small hole in the middle
    • Make sure you have shaken up you pen too before you start!
    • Hold the pen upside down over your paper (I held mine pretty much vertically) and then squeeze the barrel
    • You can tap the barrel (kind of like you might with a ketchup bottle) to get more of a splatter effect, or just squeeze to get different sized droplets.


    I love finding ways to use up scraps and I especially love getting the chance to cheer and celebrate folks on my team.  Something I plan to do more of going forward!  Because really, they all deserve way more happy mail hand stamped cards coming their way, don’t you think?

    Ever thought of getting the perks of being a Demonstrator?

    There are so many great perks and fun reasons to be a demonstrator, from 20-25% off all your purchases to the amazing community and stamping friends you make – especially on our Fun n’ Crafty team facebook page.  Plus the opportunity to start earning money or even trips when you share your love of creating with others! 

    If you’ve been thinking about it, we’d love to have you join us on the Fun n’ Crafty Stampers team.  Smile  Check out some of the fun and perks here.

    So you know… just sayin’ Winking smile  Only $99 to pick out your starter kit of $125 worth of products, PLUS right now you’ll even be able to pick out new catalog Sneak Peek items!  Yahoo.  Oh, and did I mention shipping is free too?  I can’t wait to welcome you to the fun side.

    NWstamper signature_thumb[9]

    order online button for sig 3_thumb[4]

    While I'm Cruisin' Special ad

    Start shopping here

    Product List

  • Butterfly Basics Bokeh CASE–a Pretty Purple Card!

    I’m back with another Bokeh card for you.  I’ll keep it quick since I shared how to do the Bokeh technique with you a couple times already.  But I do love how this card came together.

    This card was a CASE of a card by Monica Davis that I loved and had to play with for my Bokeh technique class.

    Tips for making this card:

    • Rely on bundles to make the supply needs for a card quick and easy to pull together!
    • I stuck with just using the Butterfly Basics Bundle (the Butterfly Basics stamp set and the Butterfly Thinlits) and then a few purples for my inks.   Seriously, you cannot go wrong with this stamp set!  It is one of those, “any way you layer it” and “any combinations of stamps” they always seem to come out looking great!
    • I also had fun expirimenting with stamping first before you do the white circles (like with the Rich Razzleberry leaf) and stamping after you do the white circles (like the Memento Black Sending Wishes Your Way sentiment).  Pick if you want it soft (under) or strong (over) and go from there.
    • Sometimes plain white paper is exactly what you need!  With the darker colors of the background, the Whisper White butterfly needs no embellishment to stand out just enough!
    • Layer a piece of Vellum just to add a subtle contrast under your butterfly without being distracting.

    • In this card I just used my 2-Way glue pen to only adhere the butterfly in the center so the wings pop up and float free.  Similarly I only adhered my vellum to the card underneath the center of the butterfly.  I know it means the vellum doesn’t sit quite flat at the ends, but it looked nicer than seeing the adhesive show through on the ends of the paper! Smile
    • Want a reminder for how to do the Bokeh Technique, you can check it out

    If you want a reminder how to do the Bokeh Technique, you can check out my first Bokeh blog post or watch my Walkthrough Wednesday card with Watercolor Wash and Bokeh technique video!

    Did you sign up for the Sprinkles of Life class by mail yet?

    I realized that when I sent out my email about this class to my newsletter list (along with my June Customer Coupon – missed it?  Get on my mailing list here) that the link to sign up wasn’t working.  Oops!  So if you wanted to get a kit for this class, I’m ordering supplies for everyone who signed up so far TONIGHT and would love to get some sent your way too. 

    Sign up using the paypal buttons on the registration page here

    NWstamper signature_thumb[9]

    order online button for sig 3_thumb[4]

    Project Supplies Used:

  • Last Day to Save on the Butterfly Thinlets or Bundle

    Last Day to Save on the Butterfly Thinlets or Bundle

    We all are loving the Butterfly Thinlits and I will say, the Butterfly Basics stamp set too.  Now, I’ve told you before, I wasn’t quite sure what I thought about the Butterfly Basics stamp set when I first saw it… I loved the dies but the stamp set let me wondering what I would make with it.

    I shouldn’t have been so worried!  I decided to just go for it since they had the 15% off bundle, and boy am I glad I did.  It make it so easy to make this card:

    I’ll have the project tips below, but first…

    DON’T FORGET!! 
    TODAY is the last day to get this awesome deal on these items:

    Here is where you can find them in the online store:

    137360Butterflies Thinlits DiesPrice: $24.95 $21.20138865Butterfly Basics Photopolymer Bundle w/free product bonus
    Price: $41.50
    139323Butterfly Basics Clear Bundle w/free product bonus
    Price: $51.75
    139322Butterfly Basics Wood Bundle w/free product bonus
    Price: $61.95

    Tips for making this card:

    • Butterfly Basics turns out to be an awesome collaging set!  As in, you can take the stamps in the set and just start randomly mashing them together and 90% of the time, something super cool comes out!  I love a stamp set that doesn’t make me think too hard. Smile 
    • Use your medium butterfly thinlit to die cut completely out a butterfly from a piece of Whisper White paper.
    • THEN stamp your background images on the big white paper with the butterfly set aside.
    • THEN adhere your big piece of white paper to a slightly larger piece of colored cardstock (in this case, the lovely Coastal Cabana)
    • THEN adhere your butterfly back into the die cut hole, but only glueing down the central body of the butterfly.  This lets the wings be free to lift up from the page.

      Tip
      : Use 2 way glue pen for a quick adhesive that isn’t messy to glue your diecut down.
    • Fill in the corner by stamping the butterfly from the same stamp set on scrap paper to punch out, and then again (without reinking) onto your cardstock for a lighter matching butterfly.

    Ok – now I’m off to stalk the new Annual Catalog!  They are making it available for demonstrators to view the catalog online this morning and then start preordering new goodies May 5th!  So, I’m eager to check out all the new and start planning what I can show and teach.Want to get in on the excitement?  You can still join my team– get $125 in your choice of items for only $99 – PLUS see the catalog online right away and preorder along with me!  You will even get a discount on what you preorder.

    Join the excitement and sneak peek fun with the Fun n’ Crafty Stampers! NWstamper signature_thumb[9]order online button for sig 3_thumb[4]Project Supplies Used:
    Easy shopping anytime!  Click the images below to see the item in the online store.

    Supply List

    Built for Free Using:  My Stampin Blog

  • The 2015 Stampin’ Up Retirement List is Here!

    The big annual catalog is coming to an end as of June 2nd, which means it is time for Stampin’ Up to release the list of all the stamps and accessories that will be discontinued after this catalog is gone.  Thankfully, we have the list TODAY so you can see what to snag now before it is gone.

    Save up to 50% off some items!

    NOTE:

    • Everything BUT stamps on the following list are while supplies last
    • I expect the 2013-2015 In Color reinkers and cardstock (especially Coastal Cabana) to sell out very quickly. Reinkers are usually gone in a few hours.
    • Place your order online at www.nwstamper.com/shop and use the hostess code PEQH2R3T at check out and receive a gift of 3 finished cards using the Butterfly thinlit as a thank you!
    • If you have over $100 in items, consider joining my group as demonstrator and creating your own starter kit out of items from the retiring list AND get first access at the new catalog with a preorder in May!  Learn more about the start kit here.

    2015 retiring list

    Use Hostess Code PEQH2R3T at checkout for a gift from me!

    >>>  Download the PDF of all the items  <<<

    HEADS UP!

    I also just read that the Clearance Rack will be updated TOMORROW (4/22) so you can balance the items selling out today with the retirement list with waiting until tomorrow for the new items that get added…I’m so curious to see what gets added!


    New Weekly Deals

    Weekly Deals
    Apr 21 – Apr 27

    image

    See the weekly deals online here


    Butterfly Framelits Special is still On too!

    Whew!  That is a lot of savings and discounts!


    And like I mentioned before, don’t forget the awesome deal that is the Starter Kit!

    • Pick $125 in items to get for only $99 – you pick what you want, anything you want!
    • Pay NO SHIPPING on your starter kit
    • Save 20% on all your future purchases from yourself!
    • Save 30% on your first order of $150+ in your first 45 days
    • Be a part of my super fun, Fun n’ Crafty Stampers group
    • See the new Annual Catalog FIRST!  See it May 1st and preorder May 5th as a demonstrator!

    NWstamper signature_thumb[9]

    order online button for sig 3_thumb[4]

  • The Butterfly Thinlits are HERE!!

    I know a bunch of folks missed out when it was available at the beginning of the year and Stampin’ Up knows how frustrated everyone has been with the dies and the discounted bundle being out of stock for so long due to the dock workers strike that was going on recently, especially if you were hoping to get the bundle and earn Sale-a-Bration benefits with it!  So, because Stampin’ Up is awesome – they are offering a special “thank you for your patience” deal as soon as the dies show up in their warehouse and go on sale.  Check it out:

    Check out the special “Thank You for Waiting” Offer from Stampin’ Up!

    1. Get 15% off the Butterfly Thinlits!
      OR
    2. Purchase one of the 15% off Butterfly Basics Bundles
      and pick one of the following
      FREE Sale-a-bration items while supplies last:
      –  Best Year Ever designer paper
      –  Best Year Ever ribbon & button accessory pack
      – Irresistably Yours specialty 12×12 designer paper

    Get started right away with my special thank you gift!

    If you place your order with me, I will send you a special thank you gift of 3 card samples and ALL the measurements using the Butterfly dies and Butterfly Basics stamp set to give you more ideas you can use right away to start creating with your new goodies.

    Shop Online Here
    Please use hostess code PEQH2R3T

    NWstamper signature_thumb[9]

    order online button for sig 3_thumb[4]

  • Big News about the Butterfly Thinlits & a Special Offer!

    Have you been loving the Butterfly Thinlits?  I LOVE how pretty the delicate shapes are from the dies like on this card I made with the Red Glimmer Paper:

    And I will say (even though I totally forgot to get a picture before I gave away all my swaps) that I really enjoy how EASY it is to put together a card with the Butterfly Basics stamp set.  Seriously, it looks like an ok stamp set in the catalog, but when you start playing with it, cards start coming together really quickly!  Here is one that I was sent recently (and it got a little crinkled in the mail!

    image

    Card by Susan Timchack

    Well, I know a bunch of folks missed out when it was available at the beginning of the year and Stampin’ Up knows how frustrated everyone has been with the dies and the discounted bundle being out of stock for so long due to the dock workers strike that was going on recently, especially if you were hoping to get the bundle and earn Sale-a-Bration benefits with it!  So, because Stampin’ Up is awesome – they are offering a special “thank you for your patience” deal as soon as the dies show up in their warehouse and go on sale.  Check it out:

    Buttefly Basics April 2015 promotion

    The dies are expected in the warehouse TODAY and should be available for purchase on WEDNESDAY (April 15th)!

    Everyone has been eagerly awaiting the return of these dies, so while they should be getting a lot in, I would make sure to order yours early to make sure you don’t have a bit of a wait in line as everyone makes a run on them! Smile 

    So, you can either:

    • Watch for my “The Dies Are Here!” post with links to purchase in the online store – and get my 3 card samples bonus as a thank you for ordering from me!
      OR
    • Email me at jennifer@nwstamper.com with your information and I’ll place the order for you as soon at they go live & mail your card samples out to you as a thank you!  I will just need your shipping information and either a credit card or paypal email address for an invoice.

    And if you are still on the fence, here are a couple more ideas for you:

    image

    Card by Carol Hickman

    image

    Card by Jen Pitta

    image

    Card by Naomi Keeling

    NWstamper signature_thumb[9]

    order online button for sig 3_thumb[4]

  • Birthday cards blog hop with the Fun n Crafty Stampers

    Birthday cards blog hop with the Fun n Crafty Stampers

    I’m so excited to be participating in the Fun n’ Crafty Blog Hop this month!  We are celebrating birthdays and sharing cards and project ideas to help you with those celebrations any time of the year!  You know they are coming! 🙂

    And it is fitting because today is my Mom’s birthday!  Happy Birthday, Mom!!

    Petal Potpourri Birthday Card with Best Year Ever paper and buttons

    This is one of the 5 cards from my Birthday Card Bash Class to Go and I love it!  I was inspired by a fellow talented demonstrator Kriss Huels and thought my local stampers would love this card and so I had to recreate it!  Plus I was dying to use my Best Year Ever designer paper and this was a fun combination, don’t you think?

    Tips for making this card:

    • Don’t be afraid to use your designer paper!  Grab a paper pack – or get this one FREE during Sale-a-Bration with your $50 order – and then pick two patterns and mix away!  You may find a pattern you weren’t a fan of in the 12×12 size looks great in a smaller piece.
    • Don’t you love this new Flower Medallion punch and matching Petal Potpourri stamp set?  I love that the flower set ranges from simple and modern to lacy and elegant.  This clean shape goes great on any style of card.  Plus get the punch and stamp set together in a bundle and save 15% off both while you are at it!
      Petal Potpourri close up with Best Year Ever designer paper
    • Make a simple leaf for your flower by punching an Extra Wide Oval from your Coastal Cabana cardstock and then scoring and folding down the middle.  Easy, peasy, done!
    • Don’t forget the 7/8″ scallop circle punch matches perfectly the smaller flower shape in the Petal Potpourri stamp set!  It makes a great finishing touch to your flower.
    • Use one of your designer buttons (or one of the buttons from the FREE Best Year Ever Accessory Pack during Sale-a-Bration) and tie some white baker’s twine through for a little extra pizzazz on your card.

    Best Year Ever birthday card with petal potpourri

    Quick Sale-a-Bration Bundle Idea for you:
    Petal Potpourri bundle for SAB

    I didn’t get a chance to get more cards up, but you can get some sneak peek ideas of other fun birthday cards you can create at home by checking out my image for my Birthday Card Bash class below!

    Check out the wonderful and talented ladies who joined me on this blog hop!
    They also have great ideas to share with you and so hop along and enjoy the inspiration!

    Fun & Crafty Blog Hop

    Stacey L. of A Work of Carte

    Pam W. of Stinky Tofu

    Tobe B. of The Craft Sea

    Jennifer B. of Northwest Stamper

    Susan S. of Stampin’ By The San Francisco Bay


    Here is the teaser photo for my Birthday Card Bash Class… so you can get a few more ideas!

    Birthday Card Bash Promo

    Or, get your own project kit and make these cards at home!  SIGN UP HERE.

    NWstamper signature_thumb[9]

    order online button for sig 3_thumb[4]

    Project Supplies Used:
    Easy shopping anytime!  Click the images below to see the item in the online store.
    Use Hostess Code 9CYWBHVC to receive a free gift from me when you place your order!

  • Stampin’ Up! Leadership 2015- Day 1 Recap

    Stampin’ Up! Leadership 2015- Day 1 Recap

    So, after going to bed Wednesday night/Thursday morning at 3:30am and then getting up at 7:30, I told myself I was going to go to bed by midnight tonight.  (I couldn’t really go to bed earlier than that because I had an event that didn’t get me home until 11pm)…. so, it is now 12:45am and I’m still wrapping up everything.  Seriously, someone teach me how to travel and actually GET sleep! Smile

    Today was the first day of the Leadership Conference here in Orlando for Stampin’ Up and it was FULL of information, tummy cramping laughter, great friends, and amazing project ideas!  I hope you don’t mind indulging me as I relive the day a little.  (and you can see ALL my pictures from today over on my Facebook page – Leadership Day 1 photo album)

    ———————————————————

    So after getting a late start we headed to the convention center to get our bag and say hello to new and old friends around the convention center!

    2015-01-29 08.30.21

    I was a total slacker, but my sweet friend Karina Chin gave me this amazing bag tag and notebook!

    2015-01-29 08.48.35

    I was so glad to have a few of my Fun n’ Crafty stampers and downline here with me, it made it so much fun to be able to share this with them!

    IMG_3814

    Even though we spent literally all morning and early afternoon going over compensation plan changes for demonstrators that are coming up in October.  I don’t mind math… but being tired and trying to do math is way harder! Smile

    We got a nice lunch

    2015-01-29 12.11.55

    Had an (unintentionally) hilarious stamping presentation by Shelli Gardner…

    2015-01-29 15.56.53

    2015-01-29 15.38.56

    IMG_3844

    2015-01-29 16.07.49

    2015-01-29 15.44.58

    See, when she was showing how to make these feathers using the new Cotton Twine and Washi Tape… she didn’t tell us she was making a feather at first and with the white stringy tail it looked like something a little different that had us all dying of laughter including Shelli when she realized  (think feminine product with a string ha ha)

    They even gave us ALL a stamp set she was using! Smile

    2015-01-29 16.12.12

    I participated in a great card swap (so many cute samples to share later)

    2015-01-29 12.55.102015-01-29 12.33.11

    and loved seeing some old friends!  Including the adorable Andrea Withers2015-01-29 09.29.16

    Brandy Cox

    2015-01-29 11.48.11

    and my Stampin’ twin (when I cut my hair again) Julie Davison

    2015-01-29 22.17.46

    Then in the evening it was time to head to Manager’s Reception!  A fun night out for any demonstrator with the title Manager or above.  So Karina and I were ready to grab the bus and go!

    IMG_3953

    This year they rented out part of Disney’s Hollywood Studios and though it was a bit chilly, we had a chance to mingle….IMG_7268

    You know, me and my buddy Shelli Gardner Winking smile

    We also had a private showing of Fantasmic

    IMG_7277

    Photo ops with the Mickey Mouse and friends…

    IMG_7311

    Yummy desserts! Isn’t that cake pop adorable???

    IMG_7302

    And even a hot chocolate bar… care to guess how many scoops of marshmallows went into my cup? Don’t stop at just one! Smile

    IMG_7308

    So all in all, a great first day! Next up, more great sharing of business ideas from demonstrator speakers, more stamping demonstrations, more samples, and more playing with the latest products!

    See Even MORE Pictures and Samples from Day 1 here

    While you are visiting my Facebook page, make sure you have liked it so you can get updates as they come throughout the day tomorrow!


    Don’t Forget!  Get Double Your Rewards Points through Sunday!

    And while I’m away, get 2x the rewards through Sunday! My gift to you while I’m playing in Orlando.

    1. For every $40 you order = 1 punch 2 punches!, $80 = 2 punches 4 punches AND a Sale-a-Bration freebie…and so on!
    2. Any purchase from me in the last year counts towards accruing rewards punches!
    3. Got 10?  Email me and let me know what stamp set you want. Easy Peasy!

    Shop online with hostess code S7A2HN9W (enter it on the shopping cart page) and you are all set or email me at jennifer@nwstamper.com with your order.


    NWstamper signature_thumb[9]

    order online button for sig 3_thumb[4]