
Do you remember the Bokeh technique? The big trend for making your cards look like they had the out of focus light spots? Well, I shared how to make your own in this blog post, but sometimes I want to go the quick route and just use pretty paper like this Falling in Love designer paper! It has a bunch of cute patterns including multiple bokeh photo-realistic designs! (You can see all the prints in my Occasions Catalog walkthrough video starting at 26 mins HERE)
Category: Clean & Simple
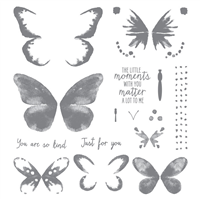
Share the Love with a Clean and Simple Watercolor Wings Card
Summer is flying by and if your schedule is like mine… I don’t have quite as much time to create and craft as I did when the kiddos were in school. I have lots of projects in my brain… now to get them out on paper! Ever have that problem?
Well today, I wanted to share a quick card that you can pull together in a flash when you need to send a little love but don’t have a ton of time or a ton of supplies on hand for that matter! All you need is a little bit of ink, some white paper, and some scraps of glitter paper and ribbon!

Project Tips for Creating This Card:
- Take your basic Whisper White cardstock for your card base (cut to 8 1/2” x 5 1/2”, and scored at 4 1/4”).
- Grab your Sahara Sand ink pad and stamp a few splatters in the middle of the page using Gorgeous Grunge. You don’t need a lot, just a couple splatterings will do!
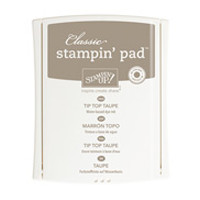
- Add a strip of scrap Dazzling Diamond glimmer paper and a scrap of ribbon like this fabulous Mini Striped Tip Top Taupe ribbon. See, this is a perfect use for your scraps!
- Create a butterfly! Grab the Watercolor Wings stamp and get creating on a scrap of Whisper White cardstock:

- Pick a great color combination! I used Sahara Sand, Tip Top Taupe, and Elegant Eggplant. Aren’t they so pretty? But try out your favorite colors and you will be surprised how fabulous your butterfly turns out!
- Kick up the shine by coloring with the Wink of Stella clear glitter pen over all the Elegant Eggplant ink. Seriously, it looks fabulous in person! Don’t forget about this great pen… it makes every project just a little more awesome.

This stamp set is a hidden gem. So if you have it at home – break it out! You won’t be sorry.
 And if you don’t have it yet… it may want to go on your wishlist. Just saying
![NWstamper signature_thumb[9]](https://i0.wp.com/www.nwstamper.com/wp-content/uploads/ad87b4046c1e_C9F6/NWstamper-signature_thumb9_thumb.png?resize=322%2C118 "NWstamper signature_thumb[9]")
![order online button for sig 3_thumb[4]](https://i0.wp.com/www.nwstamper.com/wp-content/uploads/ad87b4046c1e_C9F6/order-online-button-for-sig-3_thumb4_thumb.png?resize=307%2C45 "order online button for sig 3_thumb[4]")
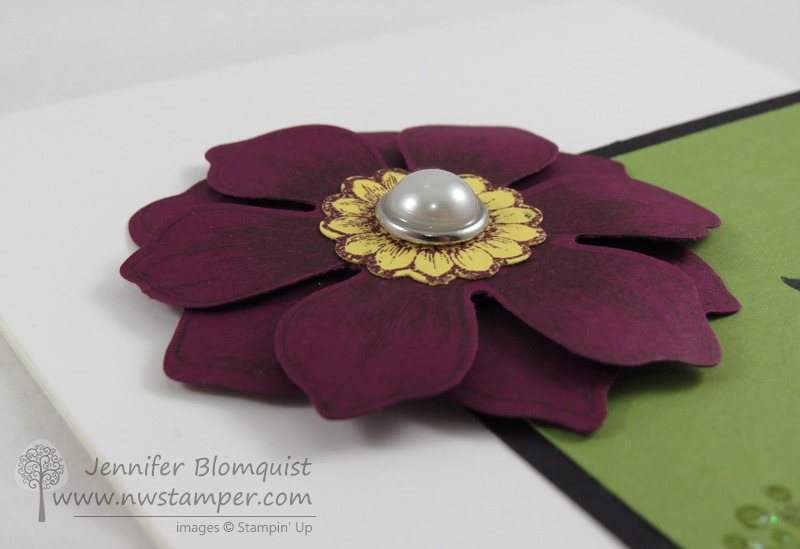
Classy and Not-to-Flowery Birthday Card using Beautiful Bunch
Ahhhh…. finally getting back in to creating! Last Friday I had my monthly Creative Cards Class and so while I was on my family trip to Orcas Island at the beginning of the week, I had packed a few supplies and I started playing around and I was so excited when this idea started coming together! (I mean, really excited! I had been having a total creative road block before!)

It is a card that is great to pull together for those last minute needs, or spend extra time and gussy it up to make it even more fancy than my clean and simple version here.
Tips for making this card:
- Keep it simple with an always elegant Whisper White card base. I just changed it up a little by cutting my cardstock to 4-1/4” x 11” and then scoring at 5-1/2” so that it made it extra easy for me to wrap my ribbon around the front flap of the card.
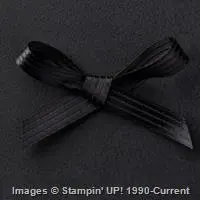
- Speaking of ribbon, it always looks just a little bit nicer when you can actually wrap it around the paper instead of just cutting the ends off at the edge of your cardstock. Do even more to hide the seams by starting one end of your ribbon just under the left side of the black cardstock and then wrapping around the front flap of the card and ENDING just underneath the right side of the black cardstock! It keeps it smooth and lovely on the inside of your card.
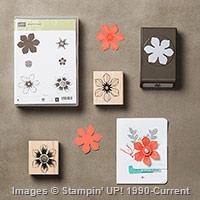
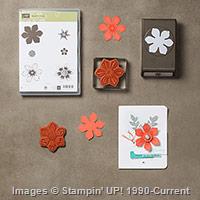
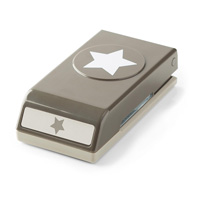
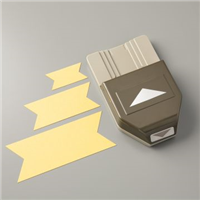
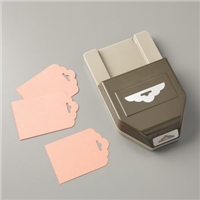
- Add a pop of color with a single accent piece for your card – in this case the flower. It is built up using the Beautiful Bunch stamp set and matching Fun Flower punch (Get them as a bundle together and you save 15% on both!)

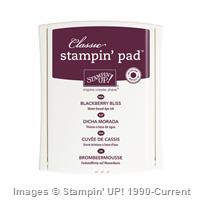
- Stamp the flower image onto a piece of scrap Blackberry Bliss cardstock using Blackberry Bliss ink (or pick your own tone on tone coloring), punch out and then layer together using Stampin’ Dimensionals for flowers that wow!

- Did you know? You can punch out the center of the flower using the 7/8” scallop circle punch! That is what we did to give us that contrasting Daffodil Delight flower center.
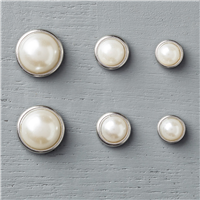
- Oh! And aren’t those Metal Rimmed Pearls the perfect touch for the center of the flower?? They come with adhesive already on the back so they are SUPER EASY to use too!
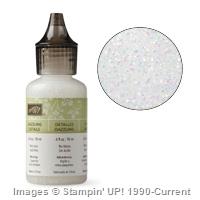
- Finishing touches are key! We used another stamp from the set to create the spotted accent line and then blinged it up by using some Dazzling Details. Seriously, for $2.50/bottle, I {heart} this stuff so much!

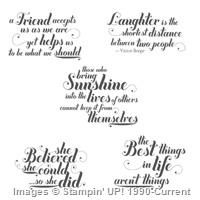
- Find so many elegant sentiments that are the perfect size for almost every project with the Tin of Cards stamp set – see, it’s not just for the Tin of Cards project kit!
Easy and fun, right? My son, Nicholas is 5 and since he was a year and a half, he has been wanting to play along with creating with my stamps. It was adorable… he actually asked me earlier this week if an ink pad was the “twist twist tap tap” kind or just “tap” kind (linen pad vs foam ink pad)!
Well, he often sees me getting ready for card classes or swaps and wants to the do the cards with me. I usually don’t have the time to walk him through it then and so tell him to grab HIS craft supplies and create a card. But lately he’s been insisting he wants to do one of my cards from my classes. So I had a couple extra kits from this class, so I let him and his sister (Caitlin who is 3) have at it. I think they did pretty well!

And their finished cards:


They did all the work themselves! I didn’t do any stamping or punching for them!
 I see many fun years of crafting together coming….
Project Supplies Used:Built for Free Using: My Stampin Blog
CASE This – Clean and Simple Thank You Card with Layered Letters
As I’ve been working on getting my crafty mojo back – I swear, when you take time off from creating, it gets a little creaky getting back into it
 – I realized that what really helps me is a cute and simple card that I can CASE (you know, Copy and Share Everything) to help me get back in the groove and refreshed. So, I discovered this card that I had put together back when I first got my Layered Letters Stamp Set and knew it was the perfect card to help get back in the groove.
Tips for making this card:
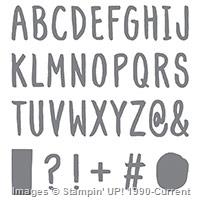
- The awesome thing about this stamp set is that you can make it say ANYTHING in ANY color you’d like! There is a circle and a rectangle in the stamp set that are exactly the right size for layering behind any of the letters.

- In this case, I grabbed the new 2015-2017 In Colors to create my color palatte. If you are struggling to pick some colors, you can always be confident that you can grab a few colors from a single color family (brights, subtles, neutrals, regals, in colors) and mix & match. They are designed to be all in the same color tones and so work great together.
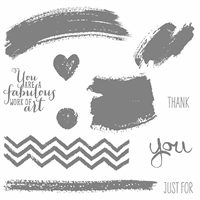
- Just because you are using an alphabet stamp set doesn’t mean all the letters on your card need to be from it! Mix and match fonts too! I used the “you” from the Work of Art stamp set to finish out my “Thank You” sentiment.
- Add a little fun and whimsy with the teeny flowers with a rhinestone center. These flowers come from the Tree Builder punch and are great mini accents for your card. Especially when you make flowers in the cardstock that matches the ink!

Easy peasy and you don’t even need to cut complicated layers! Just a simple card base, some stamps, and a little bit of fun with punches and you are good to go!
Get the Mojo Flowing by Stamping with Me!
Another awesome way to get your creative juices flowing is to try out a stamping class! I am finishing publishing my class listing for Aug-December today and I have LOTS of fun classes and events coming up both for IN PERSON stamping or CLASSES BY MAIL!
- Join me in person! I run most of my classes in the Bellevue and Redmond,WA areas (near Seattle) and you can check out my class listing on my Bellevue-Redmond Card Makers Meetup group to see what is coming and RSVP!
- Take a Class by Mail! I will also have 1-2 classes per month that are also available as a class by mail. So even if you can’t join me here in the Seattle area you can participate from the comfort of your home. See what is available on the Classes by Mail page. (note this will be updated will the full listing this afternoon)
Project Supplies Used:Built for Free Using: My Stampin Blog
- The awesome thing about this stamp set is that you can make it say ANYTHING in ANY color you’d like! There is a circle and a rectangle in the stamp set that are exactly the right size for layering behind any of the letters.
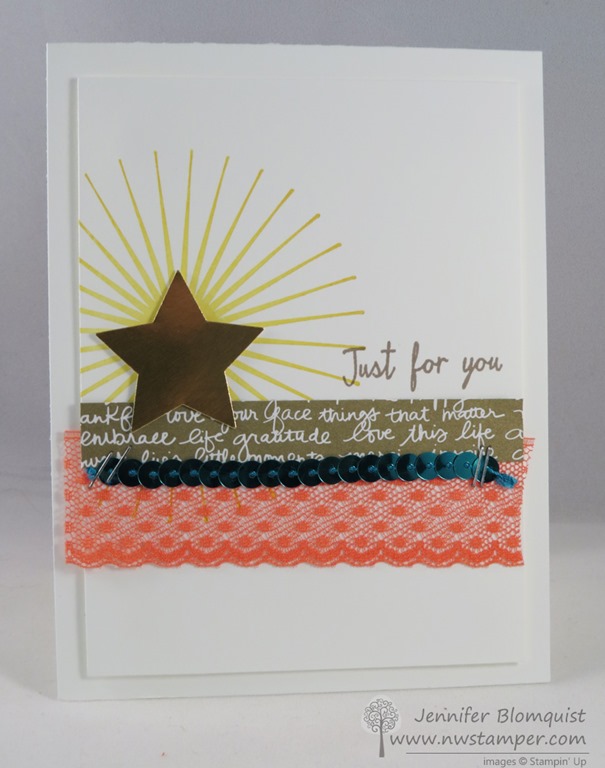
Walkthrough Wednesday – Clean, Simple, and a little bit Funky 2015 Convention Card Swap
Now, before I go, I always create some amount of swap cards. Often I will make multiple designs because goodness knows I don’t have the patience for actually making 100 of the same card! This year, I participated in 3 organized swaps and then made extra of those designs to swap out and about with random people. This was my absolute favorite and also my last minute card too! I literally designed and cut for it about 12 hours before my flight left for Salt Lake City!

It is quick to make and yet still has a lot of personality, which I love. So I wanted to share it with you AND I have a Walkthrough Wednesday video tutorial below so you can see how to make it step by step.
Tips for making this card:
- Start with an idea that grabs you and build from there!
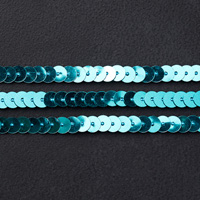
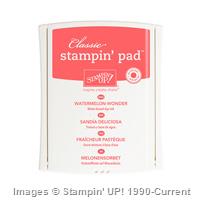
In my case, I really liked the idea of using the Sunburst from the Kinda Eclectic stamp set and having a Gold Foil Star in the center and then I started adding more paper and ribbon from there. - Don’t feel like your ribbon colors have to be a traditional match. Mix and match and you’ll be surprised how fun things can turn out. I used the Watermelon Wonder dotted lace trim and then added a layer of designer paper and a finishing touch of the Bermuda Bay sequin trim.

- Find common elements to pull everything together. Like in this case, I have gold sprinkled throughout and I have “shiny” too! The paper and the star are both gold and the sequins tie in to the star by being shiny!
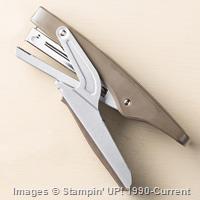
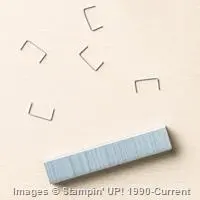
- When trying to attach lace trim and paper, the tape runner (like the Stampin’ Up SNAIL work great) but for sequins, I prefer to either use glue dots to hold the ends down, or use a mini stapler to attach the ends.
- If you can’t tell, Stampin’ Up has done something new with their Neutrals Designer Paper stack this year and has added in Gold and Silver metallic papers. I like that they are metallic without looking like foil so I can add it in without it overpowering my projects. It is really cool paper!

Want to see how it all comes together? Check out this video I put together to walk you through step by step with dimensions and all the great tips you expect along the way.

(note – if you are reading this post in email, you can get to the video here)
Need any of the supplies so you can make this yourself? (You can’t go wrong with any of the items I used in this card this week… they are all favorites that I totally recommend!) You can find them all in my Online Store or click any of the pictures below to learn more about any of the supply items.
Thanks so much for stopping by! I hope you’ve been enjoying the Walkthrough Wednesdays… I’m looking at ways to change and improve my blog posts and ways I share my projects and so hopefully I’ll have more fun stuff for you soon.
Project Supplies Used:Built for Free Using: My Stampin Blog
- Start with an idea that grabs you and build from there!
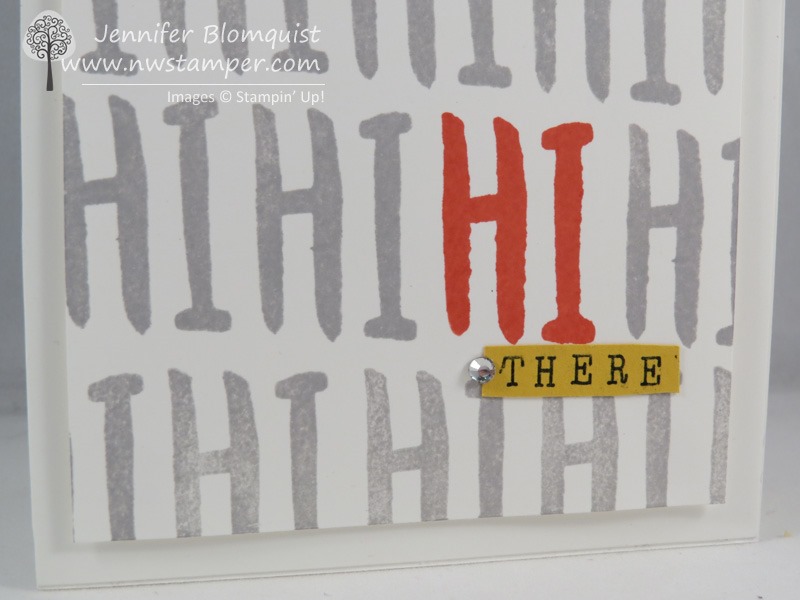
Clean and Simple Hi Card with the Awesome Layered Letters
I don’t know about where you are in the US but up here in the far Northwest, we are trying not to melt! We have been hit with a week of 85+ degree weather… which wouldn’t be too bad except none of the houses here have AC! And I’ve spent the last 2 days outside in my Garage running my Craft Garage sale.
 But now today I get to stay inside in our basement and cool off and craft, craft, craft! I’ll be making all the samples for my Fun Folds Technique class on Tuesday & the Playing with Color – Meet the In Color class on 7/7!
You can still RSVP or order a kit by mail if you hurry!
But for today, I have a card to share that is one of my favorites using the new Layered Letters alphabet stamp set…. check it out:

This card is so easy to do and has a totally fun vibe to it! Here are some tips for making it at home:
Tips for making this card:
- The new Layered Letters stamp set is one of the Photopolymer cling sets. The nice thing is that the letters are really closely cut, so you can place both the “H” and the “I” on the block at the same time and have normal spacing!
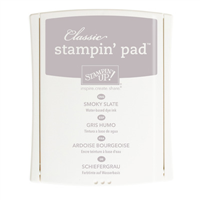
- When you put the “H” and “I” on your block at the same time, stamp your Watermelon Wonder (red colored) Hi first, then clean off your stamps and then start inking with Smoky Slate and then just stamp in rows starting with the “Hi” to the left and to the right of your red “Hi”
- Stamp on a slightly smaller than your card front piece of Whisper White cardstock (this was 3 3/4” x 5” paper)

- Stamp any extra words, like the “there” onto a contrasting cardstock color like this Delightful Dijon cardstock. Make your own custom words to you can say exactly what you want by using the Alphabet Rotary Stamp for that extra word – you get 13 letters, numbers, spaces, or symbols to work with!

- I added a little rhinestone for just a little touch of sparkle…always have to have a little sparkle!
- Pop your stamped layer up on Stampin’ Dimensionals before adhering to your card and you are good to go!

Ok, now I’m off to stamp! I’ll be back tomorrow with more fun ideas… specifically, I’m going to try to come up with some great ideas you can use if you decide to take advantage of the TWO Free Stamps when you get the Starter Kit deal! So you can get an idea for all the awesomeness you can get in your starter kit PLUS what you can make with those goodies!

Project Supplies Used:Built for Free Using: My Stampin Blog
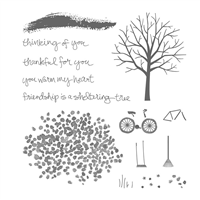
Simple Spotlight Card with Sheltering Tree
Sometimes I see a card online that I LOVE and totally inspire me. Today was inspired by a card I saw by Michelle Long and I had to play around with the idea! Because you know me and my deep love of clean and simple cards!

It is a fun take on the spotlight technique with the details of the tree framed in the middle of the card.
Tips for making this card:
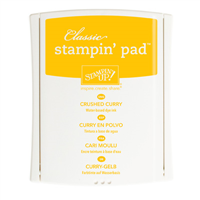
- The Sheltering Tree stamp set lets you take this one design and make it perfect for any season! Use Blushing Bride tree leaves to make a pretty cherry blossom tree, or grab your Crushed Curry or Delightful Dijon to make it a pretty autumn image!
- Stamp you tree leaves on the upper right corner of your card base…I found I needed to stamp it 2x to get wide enough coverage of the leaves. You can check it is enough coverage by periodically placing your center mat cardstock down to see how many leaves are showing.
 Dimensions for this card:
– Card base = 4 1/4” x 11”
– Brown mat = 2 5/8” x 2 5/8”
– White center cardstock = 2 1/2” x 2 1/2” - When you keep the rest of the card muted with light Subtles colors, give it is a POP with a bright colored flower, like the one from the Itty Bitty Accents Punch Pack. Add a rhinestone in the center and it is just cute, cute, cute!

What would you do with a $100 Shopping Spree?
The Sizzlin Summer Spectacular Promotion has kicked off and you have lots of chances throughout the summer to win great prizes!

June Bonus Drawings & Tickets!
As I do a final push to try to earn a Mediterranean Cruise from Stampin’ Up, I’m doing 2 bonus drawings in June! Earn your tickets this week and you’ll not only be entered for the grand prize drawing but these bonus drawings and any others throughout the summer!
- June 23rd – I’ll draw for one person to win 50% off any item in the catalog
- June 30th – I’ll draw for one person to with a free stamp set!
PLUS-
For every $100 in Stampin’ Up product purchased June 15-June 30
in person or online with the hostess code ZKGTCW6U) = get 5 bonus ticketsLearn more about earning tickets here
And if you are looking for some great deals while you are shopping, check out this weeks Weekly Deals-

Project Supplies Used:
Built for Free Using: My Stampin Blog
A Quick 5 Minute Card using You’ve Got This Video Tutorial (Walkthrough Wednesday)
Sometimes we want a card but we don’t have a lot of time or supplies to come up with something. Well, today for our Walkthrough Wednesday project, I have a card that is fast to make and only takes a few supplies! Change up the colors and you will have lots of cute options that is perfect for you!

Now one thing that is really hard to see in the picture above is how *SPARKLY* this card is… because I added Dazzling Diamond glitter to the flower head from the You’ve Got This stamp set.

Can you see it a little better now?

Add a few banners for your sentiment – and use the new Banner Triple punch to make it go extra fast and perfect everytime! – and you have a fun card, and if you change up the sentiment, use it for birthdays, thank you, sympathy, or whatever you like!

Walkthrough Wednesday Video
Check out this video to see how to make this card from start to finish
*Note – if you are reading this post in email, click here to view the video.
Get 2 Craft Kits for only $9.95 each– Ends Today!
And if you missed out on the Paper Pumpkin deal last month and wish you had tried it, there is a summer special available through TOMORROW

Sign up here with code SAVE50

Built for Free Using: My Stampin Blog
Project Supplies Used:
Sprinkles of Life Cupcake Birthday for the Fun n’ Crafty Blog Hop – (Wednesday Walkthrough Video Tutorial)
If you missed it yesterday, the new 2015 Stampin’ Up annual catalog launched yesterday and so today we are in full swing of everything ramped up and ready to go with all the changes that come with the new catalog. If you haven’t seen yours yet, here is the link to the new catalog and to my new catalog walkthrough video that went up on my YouTube channel yesterday.

See the new catalog PDF | Check out my new catalog walkthrough on YouTube!
But not only is the new catalog here but it is once again time for another Fun n’ Crafty Stampers Blog Hop! We were supposed to be mixing products from the new catalog with items from the prior catalog… you know, the good ol’ mixing of old and new. And I can tell you, the new products do that great, especially the new In Colors! So, while I got a little excited playing with my new stuff, I did at least mix in some old colors and my 2-1/2” circle punch to do a bit of old and new. So it counts, right?

Triple Banner Punch + Cherry on Top paper + Sprinkles of Life stamp set = a Bright Birthday Card!
As I was working on this card, I got inspired to put together a whole Card Class by Mail around this super duper awesome stamp set – so this is card 1 from my new Sprinkles of Life card class by mail!

Tips for making this card:
- The new “Banner Triple Punch” or as I call it, the Triple Banner punch, makes these banners come together super easy. Sure, it doesn’t take that long to trim paper ends by hand with your scissors, but after using this, I can tell how great it is to not have to worry about being a little off… or wanting to go quick because I want to have 2 or 3 banner ends per card!
- Use the color palatte of your designer paper to get you started! In this case, I pulled the Crushed Curry ink, Watermelon Wonder, and Bermuda Bay from the Cherry on Top designer paper pack. It really pulls everything together!
- The Sprinkles of Life stamp set gives you a TON of options for your projects

– especially when you add in the Tree Builder punch. Because then suddenly you get so much dimension for your clouds, trees, and cupcakes!
- Sponge the edges of your banners to help them POP and keep from blending into one another. It use Crushed Curry as a bright alternative to my typical browns.
- Get more control and a better sponged edge when you use a Sponge Dauber for your inking as opposed to direct to inkpad or the yellow sponges.
- Don’t be afraid to stamp onto non-traditional colors! I don’t think of Watermelon Wonder and Bermuda Bay as real-life cupcake colors, but they still totally work on a card!

- Use the flower punch from the Tree Builder punch to get the little accent flower and then bling it up with the smallest sized rhinestone.
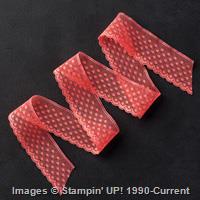
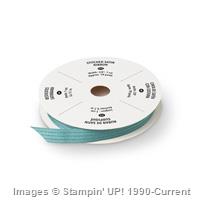
- Add the perfect finishing touch with the new Dotted Lace Trim in all the new In Colors (though I have to say the Watermelon color in the lace is my FAV!)
Watch my Wednesday Walkthrough video for even more tips and to see just how easy it is to pull this card together! And then make sure to hop along to all the other great project ideas on our Hop!
(viewing this in email? You can find the Wednesday Walkthrough video here)
Don’t miss out on all the other great project ideas waiting for you on the hop!
 Fun & Crafty Blog Hop
Jennifer B. of Northwest Stamper <–YOU ARE HERE
Tobe B. of The Craft Sea
Susan S. of Stampin’ By The SF Bay
Pam W. of Stinky Tofu
Sara G. of 1200 Some Miles


And if you are interested in more ideas with this stamp set and/or are interested in being able to make all of these cards at home, make sure to register soon for this class by mail!
 Sign up for this class here
 Did you know? Members of my Fun n’ Crafty downline get all my class by mail tutorials for free? Its my way of helping you learn more ideas for sharing classes or projects with your friends and customers!
Plus, with the get 2 free additional stamp sets when you sign up this month, you can pick up this Sprinkles of Life stamp set as a free bonus item! Get started here
Project Supplies Used:
Built for Free Using: My Stampin Blog
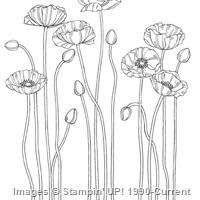
Clean and Simple Congrats Card with Pleasant Poppies and Hey You
Remember how I told you that stamp sets on the retiring list were now while supplies last? Well, on a whim as I was getting this blog post ready, I thought I would check out how the stamps were doing and discovered that the Pleasant Poppies stamp that I used for this focal point on this card is sold out. *total sad face*
 !
!But if you do have it, awesome! And if you don’t, well you can still use this great idea with the flower stamps you do have, right? Right!

Featured Retiring Products:
- Pleasant Poppies (sold out)
- Hey You stamp set (wood | clear – 25% off!)
- Lost Lagoon Stitched Satin Ribbon (50% off!)
Get them before they are gone by the end of the month!
Sometimes you don’t need a lot on a card to make an impact. Which is what we did with this card when we made it at Stamping Bingo earlier this month. Have a bookmark sized piece as your focal point and then just punch out a sentiment like one of the many from the Hey You stamp set using the Wide Oval punch and then help it stand out by sponging the edges.

TIp – I recommend sponging the edges of your paper with Sponge Daubers. I have some people share how they sponge by running the paper across the surface of the ink pad (you get a really dark line only on the very edge of the paper) or they will use the yellow sponges (which gives you a very diffuse sponging area and it can be harder to control where you want the color). I love Sponge Daubers because they give you finer control of where and how much ink you are coloring with and BONUS your fingers don’t get inky! Yay!
Because you know you are going to get ink all over from something… might as well spare some ink where you can.


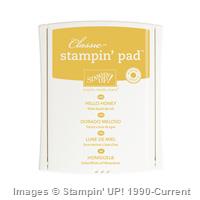
To do the poppies, I cut a 2” strip of cardstock and stamped the flowers from my background stamp in Memento Black ink. Color the flowers using your markers or Blender Pen until they are just right. Then color the white space in between using those handy dandy sponge daubers! I didn’t sponge over the flower heads but just went around them. In this case it is Lost Lagoon on top and Hello Honey on the bottom.
Leave the rest of your card base plain white and your colored image will jump off the page!

Join me in celebrating the new catalog launch!
I’m getting excited for the release of the new catalog in only a few days.
Did you know? The retiring catalog AND the Occasions catalog AND the new catalog will all overlap for ONE DAY! Yup, it is true! For ONE DAY ONLY you will be able to order out of all 3 catalogs and take advantage of the current hostess benefit levels. So get those wishlists ready!
In Seattle? Join me for my New Catalog Kick Off Party!
In with the new! New Catalog Kick off Party!
Monday June 1 – drop in anytime from 6:30 to 8:30pm
Jennifer’s House (Bellevue, WA)
Cost – FREE!
RSVP to jennifer@nwstamper.comWe’ll have samples on display, new products for you to check out, make & take projects using the newest supplies, shopping specials, games, and lots of great crafty people to hang out with.
Not nearby? Join me online on June 2nd! I’ll be posting a new catalog walkthrough video! I’ll walk you through all the cool new stuff and some great things that are easy to miss! I’ll even have a little shopping incentive for those of you who come check it out!
Project Supplies Used:
Built for Free Using: My Stampin Blog
Memorial Day Weekend Sale & a Feels Good Clean and Simple Rainbow Card
So we decided today to go pick out a big kid bike for Nicholas, which seems like a great way to kick off a holiday weekend. So, I grabbed my newspaper and was checking the ads when I realized that another tradition here in the US is lots of sales and specials on a holiday weekend. I thought I’d join in the fun and have this little special for you this weekend. So, if you were still eyeballing some retiring items or Occasions Catalog goodies before they are gone in a little over a week, you can pick some up this weekend and I’ll send you a little gifty of your choice with your thank you card.

Pick from pearls, rhinestones, candy dots, or epoxy stickers!
Just shop online using hostess code ZGKDJEB3
(please don’t use the hostess code if you purchase $150 or more, since I want you to get the hostess benefits!)
or email me with your order by Monday night.Alright, and now lets get on to some fun craftiness shall we! This is a card I shared in classes recently and I love how clean and simple it is!

Can you tell how bright and cheery it is?
Tips for making this card:
- Layer a piece of Whisper White cardstock over your Whisper White cardbase. It gives you dimension and depth while keeping the card simple and uncomplicated.
- Use your pattern papers to make a pretty rainbow on one side. In this case, I used the retiring Brights Designer Paper Stack and used some of each of the primary colors.

- I love to cover the seam between papers with ribbon or twine. In this case, the Bermuda Bay Baker’s Twine was a great way to stick with the bright colors without overpowering the card.
- Mix in a few gold sequins to add a touch of shine… especially with such a great sentiment about Sunshine!
- PS – I use glue dots to adhere my sequins, easy and no mess!

I hope you have a wonderful weekend!
Project Supplies Used:
Built for Free Using: My Stampin Blog
Quick and Easy Card for that Special Someone
I was looking for a quick card idea as a bonus card for my Stamp Club recently and after being inspired by the lovely Connie Stewart and her cards using the One Tag Fits All stamp set, I made a few changes to one of her cards and came up with this idea that is perfect for when you are short on time but want the handmade touch for someone:

Tips for making this card:
- Make a bunch of cards at one time by grabbing a piece of the Designer Series Paper Stacks (the ones that give you 4 monochromatic pages per color in a color family) and cutting 2”x5-1/2” pieces. Use the scallop edge border punch to round out one side of your strip and adhere to the left side of a Whisper White card base.
- Use the One Tag Fits All stamp set, and all the sentiments are the same width, so you can make a bunch of different versions since you know they will all fit!

- Grab a Stampin’ Write marker (like the Hello Honey marker I used here) and color a few of the images and then scribble over one of the words to highlight it!

- Tie a coordinating ribbon – like this Hello Honey quilted ribbon – around the patterned paper and you are done!

See! Quick, easy, and still cute!
There is still time to register for my Card Celebrations! Fun with Washi Sheets class (and class by mail!)
Thanks to everyone who has already signed up! If you signed up for the instructions only, or for the kit by mail, I’ll be getting the instructions emailed out by Monday and the kits will be going out by Wednesday.

And if you haven’t signed up yet – you still can! Register here
Project Supplies Used:
Easy shopping anytime! Click the images below to see the item in the online store.Built for Free Using: My Stampin Blog


![NWstamper signature_thumb[9]](https://i0.wp.com/www.nwstamper.com/wp-content/uploads/ad87b4046c1e_C9F6/NWstamper-signature_thumb9.png "NWstamper signature_thumb[9]")


