Northwest Stamper

Tag: woodland embossing folder

  • ICS Blog Hop – White Woodland Embossed Christmas Card

    ICS Blog Hop – White Woodland Embossed Christmas Card

    white-on-white-woodland-reindeer-christmas-card
    Hello!  Welcome to this month’s Inspire Create Share blog hop. 🙂  This month our theme is I am Dreaming of a White Christmas and we’re showcasing ideas using a white on white! We hope you enjoy this beautiful hop and will become inspired to give the white on white look a try!

    Now, first up, let me just say that it is SUPER HARD to photograph a whilte on white card and so I’m just going to say, that this looks way prettier in person!  But it was fun to play with ideas that didn’t have to use lots of color and supplies.  When you go White on White you can focus on a couple details and let the card be elegant in it’s simplicity.

    white-on-white-woodland-reindeer-christmas-card-close-up

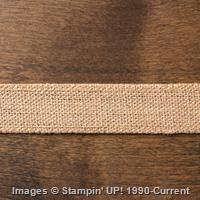
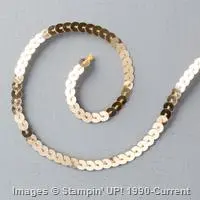
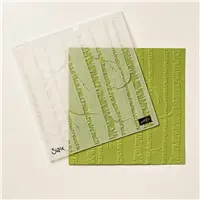
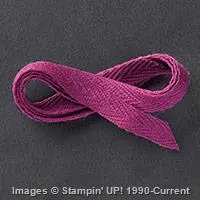
    When I knew we were focusing on white, I knew that the best way to get the most bang for your buck is to add texture!  This lets your card be really interesting without needing to add lots of colors.  I knew I wanted to use the Woodland Embossing Folder, because it is perfect for a snowy wintery scene.  I just ran a partial strip through my Big Shot and added my main hint of color by adhering on some of the 3/8″ Glitter Ribbon from the Holiday catalog to the bottom.  This is the Sweet Sugarplum ribbon, which struck my fancy more than the silver did.  (Love it?  You can get it for 40% off while supplies last.  Woo hoo!)

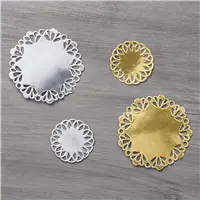
    And to balance all the stamping and ribbon below the embossed strip, I cut a White Doily in half and adhered it to the TOP of the embossed piece, so you had kind of like snowy mountains balancing it out.

    white-on-white-woodland-reindeer-christmas-card-glitter-ribbon-close-up

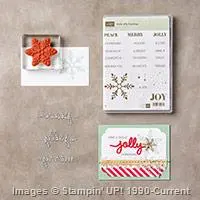
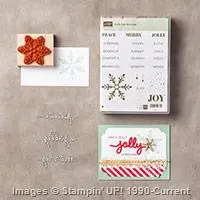
    I did all my stamping in Sahara Sand, to keep the ink from looking too heavy.  The reindeer and the sentiment are both from the Santa’s Sleigh stamp set (don’t miss out!  The discounted price on the bundle ends January 3rd, so if you like the die to go with the stamp, get them and save now!)

    Well, to pull it all together, just go a little crazy with your Stampin’ Dimensionals!  Add some behind the embossed piece, then add more behind the reindeer!  More texture and more layering to keep the white from blending together.

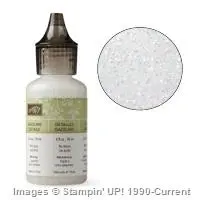
    Finally, add a few of the Fancy Frost sequins and you are good to go!
    (tip – I recommend using glue dots to adhere them to your card)

    So I hope you’ve enjoyed this project – make sure to check out more in the Inspire Create Share Blog hop!  Next up is Deb with a Flurry of Wishes idea for you… should be cute!

    12716163_10153896754558048_7268295107596979641_o

    December Hostess Code – FUYTBWNK
    Use this month’s hostess code when you shop with me and receive a cute thank you card in the mail. Plus get the current Premium Tutorial Pack FREE with your $50+ purchase! Learn More
    December’s pack is all about using those Holiday Catalog stamps for NON-Holiday projects!  Stretch your stamps for more versatility!

    15337448_10153958608190776_434046684919808825_n

    NWstamper signature_thumb[9]

    order online button for sig 3_thumb[4]

    Project Measurements:

    • Whisper White cardstock – 8 1/2″ x 5 1/2″ cardbase, 2 1/2″ x 4 1/4″, scrap for the reindeer
    • Sweet Sugarplum glitter ribbon – 4 1/4″

    Project Supply List

  • 3 Ways to Play with the Season of Cheer Designer Paper–Plus a Note about the Woodland Embossing Folder

    I know, I normally try to share one project in a post at a time, but today I had 3 projects that all used the retiring (and discounted!) Season of Cheer designer paper and since it was going away in a couple days, I figured why not share them all so you could see some different ways to use the paper in that pack!  You see, I tend to get into the trap of thinking a paper is just for the holiday it is sold for; so when I discover all-year ideas, I get really excited.  I think this paper pack especially lends itself to the all-year idea and so that is extra awesome.

    So, for example, this card…change out the sentiment and it could be thinking of you, thank you, miss you… absolutely anything you want!

    Missed the Woodland Embossing folder?  It’s coming back!

    And while we are here talking about retiring items.  I wanted to do a quick PSA about the Woodland Embossing folder… Stampin’ Up heard us, they realized this embossing folder was so stinkin popular and not everyone had a chance to get it before it sold out.  So they are working with their manufacturer and the embossing folder WILL BE BACK with the Annual Catalog in June.  So, don’t pay obscene amounts on Ebay for it.  Just hang tight and you will be able to get it again soon!

    Ok, now back to the card… Smile

    I love this technique with the Woodland embossing folder – brayer ink on the side of the folder where the trees are indented, then BEFORE you run through your Big Shot, stamp your background image on that same side.  THEN run your paper through the embossing folder.  It gives you color behind the trees along with pretty background images peeking through.

    Retiring (and discounted) products in this card:

    Colors used:

    • Very Vanilla
    • Soft Sky
    • Pear Pizzazz
    • Early Espresso

    Now, the next question is… what to do with the definitely holiday/seasonal themed papers in the pack now that December is pretty much gone.  Well, I shared this card in class a couple days ago to share the idea that you can still use them – turn them into holiday thank you cards!

    I really wanted to play with my love – the wooden snowflake elements – and I realized it fit really well in the Flower Medallion punch!  So we punched out the flower from a 3 1/4” x 3 1/4” piece of Very Vanilla cardstock.  And THEN punched out the flower shape using the 2 1/2” Circle punch.

    You can layer this over a piece of Whisper White cardstock that has the Winter Wonderland washi tape stretched across for a cool peek-a-boo technique.  Then just add your snowflake to the center using the Fine-Tip glue pen or a couple of glue dots.  I especially love the added touch by my friend Tanya Cabral who added the White Perfect Accent to the center of the snowflake!  Really centers it, don’t you think?

    Retiring (and discounted) products in this card:

    Colors used:

    • Very Vanilla
    • Whisper White
    • Crumb Cake
    • Night of Navy

    Finally, what if you really don’t want to look at another holiday card for a long while?  Like you’ve made and sent your tons of holiday cards and you are ready to move on?  How about a birthday card?!

    Yup, totally same paper pack!  Just flip over some of those patterns to see great anytime designs.  I used these to make a cheery birthday card that is great for any guy or gal in your life.  We mixed the Tin of Cards stamp set for the sentiment with the Be the Star stamp set for the star accents.  Then used the star punch to punch out the shapes, especially from the Gold Foil that is oh so snazzy.

    Sponge your edges with Soft Suede and a sponge dauber; tie on some linen thread, and you have a fun pulled together card.

    Colors used:

    • Whisper White
    • Crumb Cake
    • Hello Honey
    • Lost Lagoon
    • Soft Suede (sponging)
    • Early Espresso (cardstock)

    So hopefully this gave you some ideas for this fun paper – whether you already have some in your stash or if you are doing one last run through the Year-End Clearance sale and are looking for a great deal!

    NWstamper signature_thumb[9]

    order online button for sig 3_thumb[4]

    Use Hostess Code BEFX37ZS at check out to get a special thank you from me!

    NEW ITEMS ADDED – BIG Year-End Clearance Sale!  See what is on sale here.

    See all the tutorials & classes by mail here

    Check out the Holiday Catalog Retiring List & Sold Out Updates

    Save 25% on the Latest Weekly Deals

  • Lightly Sponged Woodland Thanks Card

    As we are winding down our Thanksgiving holiday weekend, I’m trying to get back to my computer and back in the groove of getting all of these project photos off my camera and up on the blog to share.  Because, making projects is fun… sharing them is even MORE fun!

    Today, I have a card I put together using the Woodland embossing folder and some simple sponging!  We were told the night before Thanksgiving that this embossing folder is close to selling out permanently, so if this was on your wishlist, I wouldn’t wait too long to get it!   I’m waiting to see when Stampin’ Up opens tomorrow if we have an update on it, but for now you can still orders yours in the online store.

    Tips for making this card:

    • Keep the colors simple – You know me, I love clean and simple cards.  The trick is to pick a couple neutral colors and one to two brighter colors to add the POP of color!  In this case, I stuck with Very Vanilla, Soft Suede, Gold, and Rich Razzleberry for my pop!
    • Try sponging your embossing folders – The woodland embossing folder is perfect for this technique!  Run your paper through the embossing folder and then when it comes out, use a sponge dauber to lightly rub ink over the raised areas!
    • Help the word die cuts pop out quick & easy – I waited to share the Precision Plate for the BigShot with folks in my class until I could really see why it made a difference.  And using these thin word dies, I DO see a difference!  I find the words are much easier to pop out when I use the precision plate, as well as especially when you are using easily dentable paper like the foil papers, you don’t get the “polka dot effect” of the paper pushing up into the holes in the die.  So, now I ALWAYS use my precision plate when cutting out thin word dies.
    • Extend your Metallic Doilies to the perfect size – I have been loving the Metallic Doilies (and love that they are 30% off through tomorrow in the Online Extravaganza sale!) and they often give me the right touch of shine on my card.  But sometimes you need them to be just a little bit bigger than they are.  So, grab those scissors and snip away!  I cut one of the smaller doilies in half and stretched it out so some peeked out above and below my sentiment!
    • Use the fine tip glue pen for glueing details diecuts a breeze – the thin lines of the words and the metallic doilies can sometimes be a challenge to glue.  Thankfully, the Fine Tip glue pen makes it easy to get it all glued without the glue showing!
      Here is the trick:  Use the glue from the fine tip glue pen sparingly!  Don’t draw the lines of the paper with the glue, instead place dots of glue in areas with larger spots of paper and use the tip of the glue pen to spread the glue out along the finer lines!  This keeps the glue from smooshing out the sides.

    Don’t forget!  The online extravaganza ends tomorrow with one more set of 24hr deals!

    Just a reminder that the deals end tomorrow of when they sell out!  Tomorrow they will be adding 3 sale items:

    • Project Life Starter Bundle!  You get a 12×12 album, This is the Life card kit, This is the Life accessory kit, and page protectors in a bundle for 30% off!  Everything you need to get your pictures from your last vacation or just the last year, in an album and off your computer or phone.  It makes it easy and cute without too much thinking!
    • Christmas Tagables Bundle!  Get a set of a TON of christmas gift tag stamps plus the Scalloped Tag Topper together in a bundle for 20% off.  Just add some of that paper you may or may not have been hoarding at home Winking smile and you are ready to go!
    • Tiny Triangles embossing folder.  And just to be different, they added an embossing folder for 20% off on Monday only!  Add fun geometric designs to your projects.

    I’ll be updating my list once I get an update from Stampin’ Up!  But you can see all the sale items here:

    Online Extravaganza Sale List!  Only available through Monday

    NWstamper signature_thumb[9]

    order online button for sig 3_thumb[4]

    Use Hostess Code PU2EYZJY at check out to get a special thank you from me!

    See all the tutorials & classes by mail here

    Check out the Holiday Catalog Retiring List & Sold Out Updates

    Save 25% on the Latest Weekly Deals

    Don’t miss up to 60% off in the online Clearance Rack!

    Project Supplies Used:

  • Gold & Burlap Rustic Christmas Card from the NEW Holly Jolly Greetings CLASS BY MAIL!

    I have been having so much fun creating for my Holiday Card Series this fall and when I put the finishing touches on the Holly Jolly Greetings class, I couldn’t wait to share it with everyone.  This was one of my personal favorites from the class, but you’ll have to tell me which is your favorite! Smile

    I had a heck of a time photographing it because one of my favorite touches was the subtle sparkle on the trees from where we lightly painted on Dazzling Details glitter glue!  You can kind of see it in this picture… it is only on the raised parts of the trees.  We ran a thin line of Dazzling Details down the center of each tree and then smeared it around with our finger to make a lightly sparkling tree and something that would dry quickly too!

    We used a few stamps from the Holly Jolly Greetings stamp set (which was the focus of the class) but added lots of neutral touches like the different browns in the cardstock (Crumb Cake & Early Espresso with Very Vanilla) along with the strip of Burlap Ribbon which I’m just loving this year.

    But we also needed some glitz and cheer for the holidays too!  You can’t have Christmas without a little sparkle, right? Smile  So I added some of the Gold Sequin trim along with that Dazzling Details schmear. A full strand of sequins below the embossed paper and then individual sequins for ornaments.  And I had to continue the tree theme between the Woodland embossing folder and the Perfect Pines framelits!

    A little bit of sponging with Garden Green ink, some stamping and layering and you have yourself a fun card!

    I ran this first as an in-person class, and everyone made 2 of this card and the other 4 cards, and if you sign up for this class by mail, you’ll get supplies to make 2 each as well – for a total of 10 cards!  Like I said, this probably was my favorite, which of these cards is yours?

    Sign up for the class by mail and you’ll get:

    • Precut supplies & accessories for 10 cards – 2 of each of the 5 designs
    • Pre-punched & embossed elements for the cards
    • Holly Jolly Greetings Stamp Set (clear mount)
    • PDF instructions walking you step-by-step through how to complete each of the cards
    • Priority shipping of your kit to you
    • (optional) Add on the Christmas Greetings thinlits (what we used to create the “peace”, “jolly”, and “merry” for only $16.  That is LESS than the catalog price!  <— BEST VALUE ADD-ON  — 

    Live outside the US or don’t need the kit – PDF instructions ONLY option is also available


    Kit choices


    >>> See all the classes in the Holiday Card Series here <<<


    Don’t forget about the Big Stamp Sale too! —TODAY IS THE LAST DAY!  —

    So visit the online store or grab your catalog and wishlist and let me know by 10:30pm PST/11:30pm MST what you want and we’ll get you that 15% off savings!

    15 off stamps promo_NWStamper[5]

    NWstamper signature_thumb[9]


    order online button for sig 3_thumb[4]

    But use Hostess Code FHRCKER7 to get a special thank you from me!

    Product Supplies Used: