Northwest Stamper

Tag: stampin’ up

  • Stampin’ Up OnStage 2016–Getting the Party Started!

    Stampin’ Up OnStage 2016–Getting the Party Started!

    Earlier this week was all about getting ready for OnStage and then Wednesday was travel and Thursday was the first day!  It has been BUSY!  But oh my goodness has it been a wonderful experience!  I can’t even believe where my journey with Stampin’ Up has taken me and I’m so grateful I stuck with it so that I can have amazing experiences like I am this week!

    2016-04-13 15.44.42

    I know many of you aren’t able to join us here in Salt Lake City, so I thought I would share a little about the adventures happening here so you can be here with us in spirit… we can always use more crafty friends!

    Over the years, I have built a team of amazing folks that we now call the Fun n’ Crafty Stampers.  There are folks from all across the US from the east coast all the way to Hawaii and many states in between.  So, when OnStage (the new version of Convention) is in Salt Lake City, it is a great opportunity for some of us to travel to reconnect in person, get inspired, try new things, and of course, STAMP!  This year, it is in Utah from April 14-16 and we had 7 of us from the team meeting up here

    IMG_0121So, 6 of us arrived on Wednesday and after meeting up, 5 of us headed south to Riverton for the annual pilgrimage to the Stampin’ Up home office.

     2016-04-13 15.35.37

    It is always fun to get to meet and chat with the staff and see what has changed.  This time, there were a few new displays in the Legacy Room museum

    2016-04-13 15.42.25

    2016-04-13 15.42.05

    And we even got to tour the upstairs floor and see Shelli and Rich’s offices!

    2016-04-13 16.00.54

    2016-04-13 16.01.16

    Then it was time for a bit of shopping… driving back in HORRIBLE rain… (sorry guys, didn’t realize the Seattle rain tagged along with us!) and then raced back to the hotel for a fun night of Shoebox Swapping with Dawn Olchefske and Kelly Acheson’s teams.  Better believe some of the cards we made will be showing up in my upcoming classes!

    2016-04-13 20.37.13

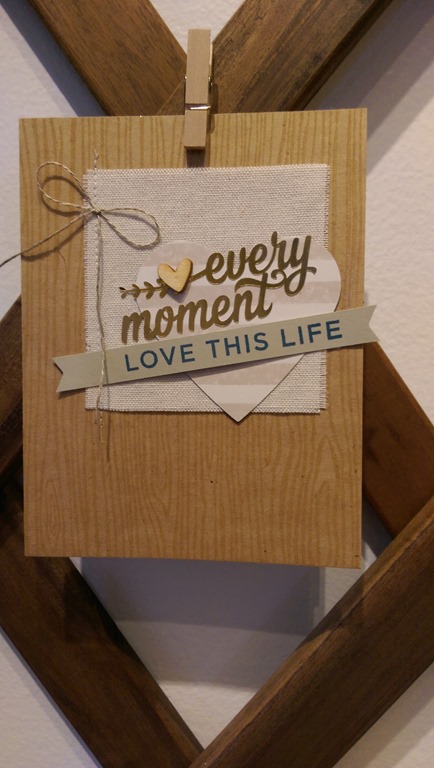
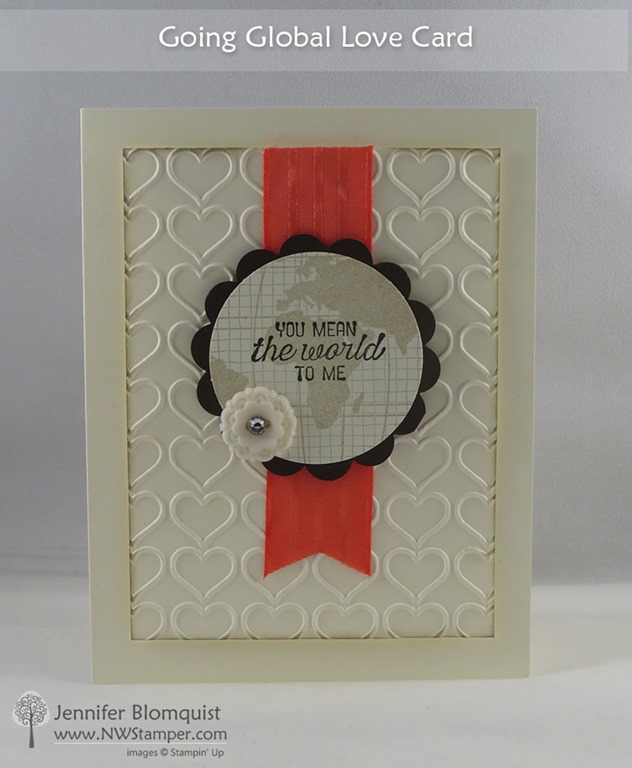
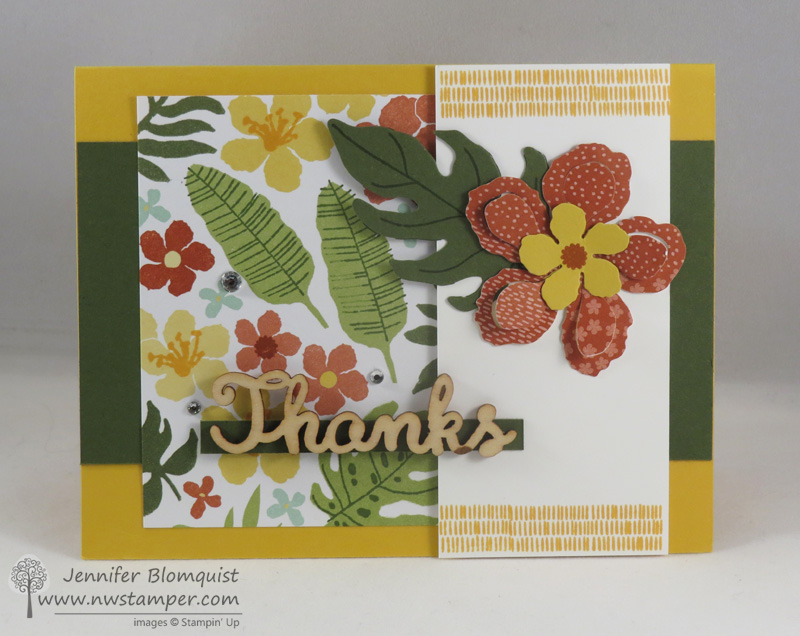
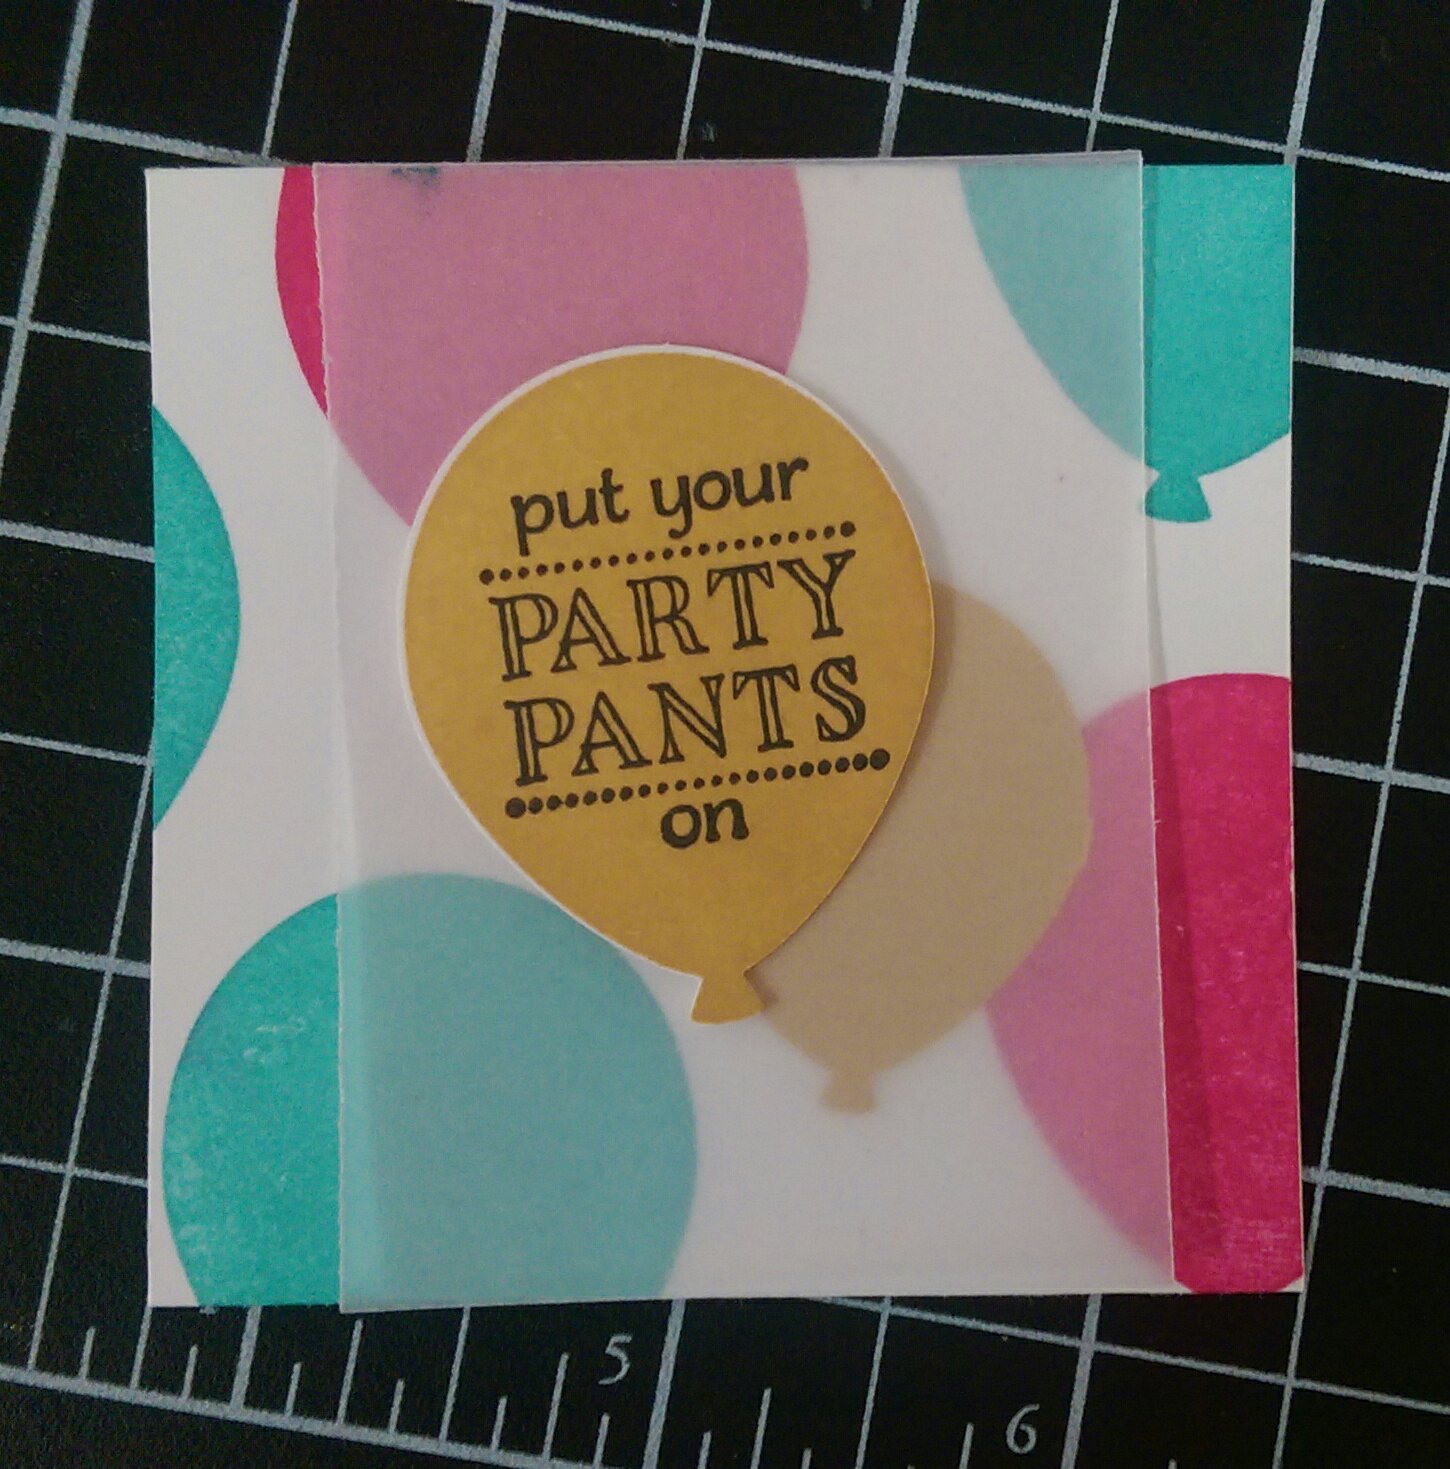
    Then it was back to the room to finish up card swaps and team gifties!  These are the general swap cards I made for this year and am trading around the convention center.

    IMG_2421

    OnStage 2016 – Day 1

    Due to the schedule, we pretty much had the morning to kill, but as a Display Stamper this year, I ended up heading over to start putting up my projects….and can I just say, they picked some AMAZING demonstrators to work on the display boards because they all look fantastic!

    2016-04-14 11.52.32

    Unfortunately, I can’ post pictures from that until Monday (due to SU’s spoiler alert” policy.  But I can share photos of us waiting to get our bags and to go in and be part of the party! Notice any pretty colors you like from the banners?  That may or may not be a sneak peek of the new In Colors. Winking smile

    IMG_2259

    And of course there was swapping…. I’m very serious about my swapping….

    IMG_0151

    seriously CHEESY!  Open-mouthed smile

    IMG_0153

    2016-04-14 12.07.37-1

    And then it was time for Opening Session!  Hopefully I didn’t hurt the ears of my Mom and Nicole next to me from my screaming.  Let me just say, I freaked out more than once as they gave us the new catalog and I got to see new things that are coming out!  So glad I am a demonstrator and have the demo discount because my wishlist is LOOOOONG! 

    2016-04-14 14.30.42

    IMG_2265

    IMG_2260IMG_2274

    IMG_2281

    I know!  I wish I could show you pictures or tell you more details about what I saw in that new catalog and on the presentations but we have a gag order until Monday afternoon.  But I can say, you won’t be disappointed!

    CenterStage Live – Evening Dinner and Entertainment

    Stampin’ Up hosted a lovely incentive dinner that first night to celebrate and thank folks of Silver Elite and above titles – which includes me!  So they bussed us to a nearby swanky hotel where we socialized and had some mocktails. 
    Isn’t Sheri adorable?  She is a lovely friend from Canada who I always love to see at SU events. 

    2016-04-14 19.14.05-2

    Side note, this is one of the coolest parts of attending the SU events, you end up making friends in random places that you connect with for life!  I met Sheri randomly during one of the Make & Take sessions at Convention a couple years ago.  She had been recognized as a Rising Star (one of the demonstrators who had a stellar first years as a demonstrator)  and so I had congratulated her and we hit it off talking.  Just like I met Brandy Cox when we both went to Founder’s Circle for the first time and we had a sweet connection from that.  Now I’m so blessed to see them at events and get to reconnect and share laughs and hugs.  The women you meet in this business really are just some of the most amazing people!  It really does make my heart full!  And I’m so grateful to be able to cheer them on and get to celebrate their successes!

    2016-04-14 22.16.39Anyway, back to CenterStage, enough of my sappy moment. Smile  We ad a fabulous 4 course meal.

    2016-04-14 19.24.06

    They even had dueling pianos while we ate which was way more fun than I expected!  I’ve never seen a dueling piano show and it hilarious!

    2016-04-14 20.39.40

    So, at the end of the day, iit was an awesome time to meet and/or connect with folks who share this awesome journey with me.  We had a few fun gifts from the company and then it was off to bed to try to get some sleep before we start bright and early in the morning!

    IMG_2420

    Wish you could have been here with me!  Hopefully next time you can join the Fun n’ Crafty Stampers at one of the events in the US!


    NWstamper signature_thumb[9]

    order online button for sig 3_thumb[4]

    foo

  • Last Call for these Next to Last Weekly Deals!

    Around here, last week was spring break and I didn’t take into account how my days are different with both kids running around as opposed to them being in school.  So things have been a little bit hectic around here as I prep for OnStage later this week and my Northwest Crafty Escape Weekend next week!  But, I wouldn’t trade it for the world and loved the time with them.  And we even got to go up and visit my parents and my Mom was amazing and helped me start prepping goodie bags for the retreat and swaps for OnStage!  Isn’t she awesome?

    2016-04-06 22.30.14

    We even took some time to visit the Tulip Festival in Mt Vernon, WA while we were away.  We couldn’t have asked for a better day or prettier flowers!  When I finally get to share my samples I’ve been creating for the OnStage Display Boards, you’ll see a few pictures from that trip for my scrapbook pages!

    IMG_2134

    But in the meantime, as I get ready for Stamp Club tonight and finish everything for OnStage, I wanted to give you this one last reminder about the Weekly Deals for this week.  These end TONIGHT at 11:59pm MST and there are a LOT of awesome deals!

    12967366_10206521556066747_838165165224174815_o

    If you didn’t hear, next week is the last week that Weekly Deals will be offered.  Then on April 18th the retirement list will be published for the current Stampin’ Up annual catalog.  So, now is the time to grab your favorites before they go to while supplies last!

    Shop the weekly deals here

    And make sure you are visiting the blog this week!  I’ll be posting what I can from OnStage and then start sharing some sneak peeks and display board samples next week!  Its going to be fun times around here! 
    NWstamper signature_thumb[9]

    order online button for sig 3_thumb[4]

  • An Anytime Love card with Going Global

    An Anytime Love card with Going Global

    We always think of sending cards when it is someone’s birthday or anniversary or Christmas.  But what about all those other times of the year?  People do amazing things, or are just awesome for being a part of your life… so why note surprise them with a note to tell them how special they are and how glad you are in their life?Heart embossed Going Global Love card

    This is another one of my big projects I want to start up this year… just because and you are awesome cards.  In this busy and bustling world we are in right now, how great would it feel to go to the mailbox and tucked in amongst the bills and junk mail is a little hand crafted surprise. Smile  Love it!

    So, this card today, is an idea to create a card just for that using the Going Global stamp set.  I made the center piece by stamping the globe image with Crumb Cake (to keep it light) and then punched with my 2” circle punch.  Then just stamp your sentiment from the same set on top using Early Espresso ink.  And you know me, I just had to add some glitz by dropping a rhinestone into the center of one of the Classy Designer Buttons and popping that onto my sentiment with a glue dot.  Just makes it fancier don’t you think?

    Heart embossed Going Global Love card close up

    I also had to add in a pop of color and LOVE LOVE LOVE this Watermelon Wonder Stitched Satin ribbon.  It is so pretty and soft in person!

    Tip – When adhering your ribbon to the front of your card, only put adhesive down under where you will have your scalloped circle for the sentiment!  If you run adhesive down the full length of the ribbon, it will start making strange bumps as it glues down over the embossed background.  It is so much prettier fluttering losely at the bottom.

    Heart embossed Going Global Love card side view

    One last tip for you.  I embossed a piece of Very Vanilla cardstock with the hearts embossing folder and attached it to the Very Vanilla card base.  So help the layers stand out, I sponged the edge of the embossed layer.  However, if you sponge AFTER you emboss, you have a higher chance of the paper tearing where it is embossed.  So, you may want to sponge the paper FIRST and then emboss to minimize tearing.

    Heart embossed Going Global Love card nt

    Are you coming to the retreat?  The Northwest Crafty Escape Weekend signs ups are due soon!

    >> Get all the details here! <<

    Just a reminder that the deadline to sign up for this is coming up in less than a week!  The tables are filling up, so make sure you’ve saved your spot!

    Retreat in a Box option is coming soon too! 

    If you can’t come because you are out of town or can’t travel, I’ll be offering a Retreat in a Box so you can play along at home. Smile  I’Il be posting the details tomorrow so check back for that!

    NWstamper signature_thumb[9]

    order online button for sig 3_thumb[4] Product List

  • Weekly Deals are Going Going Gone!

    I wanted to do a quick post to share something I learned yesterday… the weekly deals we know and love will be discontinuing after next week!  Stampin’ Up has been evaluating the program and decided to try something new and so instead of having a small batch of items that are on sale each week (this week though there are more than a few!) they are going to be moving to every few months having a bigger promotion called a “special offer” for discounting select products.  I don’t know more than that… but I do know, if you love some of these items, grab them now while they are on sale!

    12967366_10206521556066747_838165165224174815_o

    Here are a few of my favorite projects using weekly deal items!  I love so many of them, so this is only a sampling since it is so hard to pick a favorite. Smile

    Gift Bag Punch Board

    see the blog post here

    Sunburst Thinlit

    or you can combine the two with this die I love!  (I just realized I have a bunch of cards I’ve made with it at home but forgot to post, I’ll be fixing that!)

    blog post here

    Rose Garden Thinlit

    blog post here

    and the Gold 1/8” ribbon

    blog post here

    So, hopefully that gives you a start to some inspiration!  Check out the Weekly Deals online and grab your favorites before the sale is over on Monday! 

    And watch for next Tuesday for the LAST Weekly Deals to be offered!

    NWstamper signature_thumb[9]

    order online button for sig 3_thumb[4]

  • Botanical Blooms Thank You Card

    Botanical Blooms Thank You Card

    One of the really fun things about going to OnStage (the new name for Stampin’ Up convention and regional demonstrator events) is that we get to try out the newest products that are coming up and make some samples to use when we get home.  One of the products we got to try in November was the Botanical Blooms stamp set and matching dies.  We learned that the stamp set is designed to perfectly match the patterned paper (see the details on the leaves and flowers in the patterned paper?  yep, I STAMPED THEM!  How cool is that??!?)  And this is what we made at the event:

    image

    Now that was a fun and all sample to see how the products all worked, but I just wasn’t inspired to turn it into a card as is.  See, it was this odd 4 1/4” height (same as a normal card) but only 5” wide (narrower than a normal card).  So I decided I had to cut things up and experiment a bit.  And ended up really liking the end result… what do you think?

    So, what I ended up doing was cutting down the designer patterned paper and then layering it onto some Mossy Meadow cardstock (I’m sooooo going to miss this color when it retires later this month!!) and then put it all onto a Hello Honey card base.

    The design was so busy, I wanted to keep my sentiment simple so I reached for the wooden Expressions Elements for a simple thanks and to make it easier to read, I just adhered a thin strip of Mossy Meadow cardstock behind the letters to make it super clear.

    You can see from my imperfect stamping, show the detailing on the leaves is stamped on.  And the centers to many of the flowers.  It was kind of fun finishing out the paper design!  Then I just added a few rhinestones here and there for a little sparkle and we were good to go!

    A Quick Note about the Botanical Blooms Bundle – You Get Extra in It!

    I’ve had a couple people confused about the Botanical Blooms bundle… because they know that when you get a bundle you get 15% off the dies and stamp set.  But what they didn’t notice, is that in THIS SPECIFIC BUNDLE, you ALSO get the pack of designer paper too!

    botanical blooms bundle

    See the bundle details in the online store

    Fun bonus, right?  If you have questions, don’t hesitate to say hello and drop me a line at jennifer@nwstamper.com!

    NWstamper signature_thumb[9]

    order online button for sig 3_thumb[4]

    Botanical Blooms thank you card

    Product List

  • Don’t Miss Out!  The LAST DAY of Sale-a-Bration is here!

    Don’t Miss Out! The LAST DAY of Sale-a-Bration is here!

    Just a quick reminder – If you are a last minute person like me… don’t miss out on Sale-a-Bration!  Today is the last day to get your free bonuses and gifts!

    12718206_10207687075187407_3806769387226182929_n

    Shop online and get your FREE GIFT with your $50 order!  Select from:

    sab final

    – OR – 

    Get a bonus when you become a Fun n’ Crafty Stamper and join our fun group of stampers who love getting a discount on all of our products plus all the other perks of being a demonstrator – like sneak peeks, free catalogs, and other incentives!  Join us in monthly challenges, creative inspiration, business ideas, support, and just fun and friendship.  Get $155 in product for only $99…and no Shipping cost to get you started!

    Get the Starter Kit here
    ANYONE can buy it… with no obligation but to have fun and use your discount!  Or decide to give it a try and have a money making hobby if you want one! 🙂

    Steal the BIG deal and join our fun group – the Fun n’ Crafty Stampers!  Get started here –http://nwstamper.stampinup.net/jointhefun


    NWstamper signature_thumb[9]

    order online button for sig 3_thumb[4]

  • Beautiful Botanicals For You–It’s Not Just Flowers!

    Alright people, we are at T-minus 2 DAYS of Sale-a-Bration!  Did you get your order in?  If not, let me share with you some more ideas from another of one of the free Sale-a-Bration items you could choose before the month is out!

    Today I’m featuring the Botanicals For You stamp set

    image

    The name makes you think it is all about flowers, but it is because it matches some of the Botanicals Suite products in the Occasions Catalog.  I just love the big “Just For You” and so created a couple cards with it that I just love:

    Fun with Color – Botanicals For You Card

    This was one of the cards we did in Stamp Club this month

    This was a fun card to pull together.  I used a bunch of my favorite products… but even more fun was playing with color!  I used the 2015-2017 In Colors to pull together my card.  The big letters on the Just for You is perfect for coloring with your markers.  So I used Mint Macaron, Watermelon Wonder, and Delightful Dijon as my focus colors here.  Don’t they look awesome together?

    Then I used the fun follow on sentiment and created a banner to go along the bottom of the card… because, really, people need to hear they are awesome more often don’t you think?

    I stamped the flower in Watermelon Wonder and cut it out and it is hard to see, but used some of the Gold Wink of Stella in the middle for a little bit of shine and color.

    And what are we thinking of the Brick Wall embossing folder as the background?  I used it for texture along the back of the card… I kind of like it in Mint!  Smile  Then add a hint of the Watermelon Wonder satin ribbon… seriously the BEST ribbon in the Occasions Catalog!

    And don’t forget the finishing touch of the Mint Macaron/Black Baker’s Twine from the combo pack!  Tie it in the crease of your card for the just right final touch!

    Keep it Simple – Emboss Resist Botanicals For You

    Now, if you want to keep it really simple, I have one more option for you…. this sweet and simple emboss resist card.

    All you have to do is stamp your sentiment in Versamark and then heat emboss with white embossing powder.

    Sponge your favorite color over the top with the yellow Stampin’ Sponges and and the color won’t stick to your words but will make them really POP!

    Layer on coordinating cardstock and then pop up on Stampin’ Dimensionals over your favorite ribbon and/or twine… love that gold baker’s twine!  And you are done!

    Shop online and get the Botanicals For You stamp set for free with your $50 order!

    Steal the BIG deal and join our fun group – the Fun n’ Crafty Stampers!  Get started here –http://nwstamper.stampinup.net/jointhefun


    NWstamper signature_thumb[9]

    order online button for sig 3_thumb[4]

    ***Use Hostess Code MZ2REKD7 at check out to get a special thank you from me!***

    Product List

  • Final 3 Days of Sale-a-Bration–Pedal Pushers and Party Pants Ideas

    Final 3 Days of Sale-a-Bration–Pedal Pushers and Party Pants Ideas

    Oops!  I was so focused on getting ready for and running my Terrific Techniques classes yesterday (we had LOTS of fun with Vellum this month!) I completely spaced posting up day 4 countdown to the end of Sale-a-Bration!  So, today I’ll remedy that by posting two featured products for Day 4 and Day 3 – Pedal Pushers and Party PantsYep!  Only 3 Days Left of Sale-a-Bration!  Both of these were part of the new flyer of bonus Sale-a-Bration items that came out in mid-February.

    new sab items updated

    And just a quick note- All the Sale-a-Bration items are while supplies last, so if you want something, don’t wait!

    So, as a reminder:

    Party Pants

    (blog post here)

    2016-03-29 09.58.31-2

    This was one of the samples we made in the vellum class 🙂

    Pedal Pushers

    I made a quick notecard using the Pedal Pushers stamp set thanks to the quick and easy Notecards and Envelopes.  A little washi tape, some twine, and paper and you have a quick and cute card.

    I stamped the bike with Memento ink and then colored in with my markers.  Don’t you just love that little bird in the basket?  Don’t forget to sponge the edges and round the bottom corner!

    Then add some pizzazz with some of the It’s My Party designer paper on the left side and cover the seam with some Washi tape.  This is the Stacked with Love washi tape that is on the clearance rack!  You can totally score some great deals here like sets of 3 washi tape rolls for $2!  And Clearance Rack stuff counts for Sale-a-Bration totals too!

    Add some twine and you are done and done!

    Get your Sale-a-Bration orders in before your favorite Freebie is Sold Out!

    With a few of the stamp sets and the metallic tape running out, I wanted to make sure to give you one more reminder to get your order in before the last day!  If you are local, I’m doing a group order today! 

    Or, get all your favorites in one fell swoop, when you place a $250 order!  You’ll get:

    • 5 free Sale-a-Bration items
    • An extra $25 in hostess credits for a total of $50 in free product
    • An invitation to my Sale-a-Bration celebration or a care-package of the goodies from the event if you are not local!


    Shop online and get the Pedal Pushers and/or the Party Pants stamp sets for free with your $50 order!

    Steal the BIG deal and join our fun group – the Fun n’ Crafty Stampers!  Get started here – http://nwstamper.stampinup.net/jointhefun

    NWstamper signature_thumb[9]

    order online button for sig 3_thumb[4]

    ***Use Hostess Code MZ2REKD7 at check out to get a special thank you from me!***

  • Wildflower Fields Joy Fold Card–5 Days Left of Sale-a-Bration!

    Now, before I get to the card for today – a Joy Fold card using Wildflower Fields designer paper… let me just start by saying Happy Easter!  Today is a day of fun and festivities for my family.  If you celebrate Easter, I hope you have a wonderful day celebrating with your family as well.  Smile  If you remember that Curvy Keepsake Bunny I shared the tutorial for last week, I thought I’d share how I used them… I let the Easter Bunny fill them with jelly beans and they were peeking out of the Easter baskets this morning.

    2016-03-26 23.22.01

    Aren’t they so adorable?  I think they ended up just perfect for this year and the kids were even very good with them and didn’t tear them apart to get to the candy!  So success all around!

    Now, back to my NEW share for you today!  We are doing our Sale-a-Bration Countdown,  I’ve shared ideas using Perfectly Artistic designer paper and the Honeycomb Happiness stamp set the last two days.  And today I have another paper set for you – the Wildflower Fields designer paper.

    image

    So, this is paper that you can ONLY get free with a $50 order… see everything that is available as a free choice here.

    It is a really pretty paper pack.  I’m going to be making a bunch of envelopes to mail with mine.  But I also put together this Joy Fold (fancy fold) card to share in a class as well!  It was inspired by a swap I received at the beginning of the year and I made a few stamping tweaks to fit the supplies I had.

    I discovered that while the images on the Wildflower Fields paper pack are designed to go GREAT with the Flowering Fields stamp set (also free during Sale-a-bration), but it goes great with the Flower Patch stamp set as well!  That along with the matching Flower Fair dies is what I used to create the flower in the corner and to stamp the Calypso Coral cardstock behind the sentiment.  Kind of cool, huh?

    Now the neat thing about a Joy Fold card is that the layers sandwhich together so that when opened, reveal your note to the recipient in the middle of the card!  You can sort of see that in the picture below.

    Dimensions for a Joy Fold Card

    Here is what you need to cut to make a joy fold card:

    • 4 1/4” x 8 1/2” piece of cardstock (for your base), scored at 5 1/2” – I did Old Olive
    • 5 3/8” x 4 1/8” piece of cardstock (for mat for cardbase) – I did Basic Black
    • 5 1/4” x 4” piece of designer paper (for patterned piece on cardbase) – I used the green striped pattern
    • 2 7/8” x 4 1/8” piece of cardstock (for mat for front little flap) – I did Basic Black
    • 2 3/4” x 4” piece of designer paper (for patterned piece on little flap) – I used white with leaves pattern
    • 3” x 8” piece of cardstock (for your middle sentiment layer), scored at 4” – I did Basic Black
    • Two 2-3/4” x 4” pieces of cardstock (as layers for your 3”x8” piece of paper), I used a Whisper White piece for the inside and Calypso Coral for the outside

    Adhere all the pattern pieces to your cardbased so that the score line is on the left.  Then glue the pieces for the 3”x8” piece of cardstock together and glue down to the middle of the cardbase so that its score line is on the RIGHT.

    Decorate the front of the card to your preferred design!  I added a sentiment layer for the cute Lovely Amazing You stamp set and them made a flower using that Flower Patch bundle.

    Yes, there is a bit of cutting up front, but the card comes together pretty easy and it is a cool WOW card for someone who deserves something a little bit different.  Smile

    So, I hope this inspired you, and gave you a fun idea for your stamping!

    How are YOU Sale-a-Brating?

    With 5 days left, now is the perfect time to figured out how you are going to Sale-a-Brate!  Did you get all the free items you wanted?  Check out all the options here!  Get even more free when your order (or combined party order) is $250 or more!  You will get your free products PLUS a $25 hostess benefits bonus to use right then!

    Or, this is also the last 5 days of the starter kit special.  I’d love for you to join my Stampin’ Up peeps. Winking smile

    Steal the BIG deal and join our fun group – the Fun n’ Crafty Stampers!  Get started here – http://nwstamper.stampinup.net/jointhefun

    NWstamper signature_thumb[9]

    order online button for sig 3_thumb[4]

    ***Use Hostess Code MZ2REKD7 at check out to get a special thank you from me!***

    Product List

  • Sale-a-Bration Countdown–6 days left!–a bit of Sweetness with Honeycomb Happiness

    The countdown is on!  We only have 6 days left of Sale-a-Bration, and I’d hate for you to miss out. Smile  Today I’m sharing some ideas from one of my FAVORITE options from Sale-a-Bration, the Honeycomb Happiness stamp set.  The funny thing is, you actually get a few different images from the set, but I’ve pretty much only used the Chick from the set… as you’ll be able to see from my multiple samples below, ha ha!  So, just so you know everything that is in the set, here is what it looks like:

    image

    NOTE – they are RUNNING LOW on the clearmount version of this stamp, so you might want to grab yours sooner rather than later! Since they are not making more at this point!

    But let me share a new-to-the-blog card with another idea for this set.  This was a card from my new Terrific Techniques series.  Last month we did Heat Embossing and this was one of the cards everyone made practicing the basics!

    heat embossed honeycomb happiness sweet card

    The other thing about this card that is cool, is that it is an example of how AWESOME the Project Life Grid Cards are.  But this isn’t a Project Life album page you say… that is right!  The cool thing is that the grid cards are a really economical way to have precut 3”x4” layers for your cards.  One side has a light grid pattern and the other side is plain white.  It isn’t as glossy as Whisper White cardstock, but when you are doing things like simple stamping or in this case, heat embossing, it works great!  And you get 50 cards for only $3.50.  Which is a steal of a deal!

    In this card, you ink the chick with VersaMark and stamp onto the grid card and then cover with Black embossing powder.  Heat with your heat gun to set and then you can color to your hearts content with your Aqua Painter!

    white embossing on dark cardstock

    Then we showed how great heat embossing looks on dark colored cardstock.

    • Rub the paper lightly with an Embossing Buddy (if you press hard, the white powder will show up on the paper)
    • Ink your stamp with VersaMark ink and stamp on the dark paper (this was Blackberry Bliss, one of the retiring In Colors)
    • Generously coat with light colored embossing powder like this White embossing powder
    • Tap off the excess and then heat with your Heat Gun
    • Only heat until the powder becomes shiny.  If any part is not shiny, you haven’t melted the powder enough.
    • TIP – if you are using metallic embossing powders, make sure to stop heating as soon as it becomes shiny!  Overheating will cause the metallic finish to dull and it will look tarnished instead.

    Sponge the edges and layer with some of the Pretty Petals designer paper.  Add some of the White Perfect Accents (currently on the Weekly Deals!) and you have an oh so cute card!

    close up of honeycomb happiness card

    See why I love this chick?  He is just too dang cute!

    NEW Terrific Technique Class is coming next week!  We’ll be playing with Vellum and different variations with it!  You can get your instruction sheet, samples, video instructions, and supplies to make two cards FREE with your $40 purchase through Monday!  Just use hostess code MZ2REKD7.

    Shop online and get your Honeycomb Happiness stamp set FREE with a $50 order! Get shopping – www.nwstamper.com/shop

    More fun ideas with the Honeycomb Happiness Stamp Set

    treat bag with gift bag punch board using Honeycomb Happiness

    (blog post here)

    (blog post here)

    (blog post here)

    Steal the BIG deal and join our fun group – the Fun n’ Crafty Stampers!  Get started here – http://nwstamper.stampinup.net/jointhefun

    NWstamper signature_thumb[9]

    order online button for sig 3_thumb[4]

    ***Use Hostess Code MZ2REKD7 at check out to get a special thank you from me!***

  • One Week Left – Count It Down!  7 Days of Sale-a-Bration Ideas!

    One Week Left – Count It Down! 7 Days of Sale-a-Bration Ideas!

    If you can believe it, there are only 7 days left to score with Sale-a-Bration!  And to help count it down, each day I’ll be featuring one of the remaining exclusive items that you can only get this month as part of the promotion. Today we’ll be starting out with the Perfectly Artistic Designer Paper!

    Last week of Sale-a-bration meme

    Sale-a-Bration Scoop – All the Deals

    But first, just to make sure you have a reminder of all the ways your can save and score… here is the scoop:

    • Free stuff when you SHOP – for every $50 you spend, pick one of the items below to get for free! (get going in the Online Store)
      Sale-a-Bration free productsSee the full Sale-a-Bration Catalog & Bonus Flyer for more project ideas!
    • Extra hostess benefits for bigger orders – Put together an online party (I’ll give you a hostess code and you share with your friends and family, they order and their orders count towards your party!) or place a $250 order and you’ll get an EXTRA $25 to spend in free hostess benefits!  (Shop online or email me at jennifer@nwstamper.com)
    • Even more free stuff and free shipping when you JOIN – get the starter kit for only $99 and you’ll be joining my Fun n’ Crafty Stampers demonstrator group which is awesome all by itself, plus you’ll get an EXTRA $30 in free product of your choice (so $155 in product total) plus free shipping! (Pick your starter kit here)join the fun stampin up peeps

    Ok… got all that?  Now on to the fun stuff… PROJECT IDEAS!

    Sale-a-Bration Countdown-  7 Days Left!  Feat. Perfectly Artistic designer paper

    So I’m starting with the Perfectly Artistic designer paper today… since I’ve had some fun projects with this paper pack.  It is nice because it is great for backgrounds or just making a fun bunch of cards in different colors.  So, here are some ideas for you!

    Perfect for your punch art animal ears and feet Smile

    Easter Bunny Curvy Keepsake box with Perfectly Artistic Designer Paper

    (blog post for this project  |  video tutorial)

    Butterfly and Wink of Stella card with Perfectly Artistic designer paper

    (blog post here)


    Using up Perfectly Artistic designer paper scraps

    (blog post here)


    Embossing strips of Perfectly Artistic designer paper

    (blog post here)


    Lots of card variations with the Perfectly Artistic designer paper

    (blog post here)

    Shop online and get your pack of Perfectly Artistic designer paper FREE with a $50 order!  Get shopping – www.nwstamper.com/shop
    Steal the BIG deal and join our fun group – the Fun n’ Crafty Stampers!  Get started here – http://nwstamper.stampinup.net/jointhefun

    NWstamper signature_thumb[9]

    order online button for sig 3_thumb[4]

    ***Use Hostess Code MZ2REKD7 at check out to get a special thank you from me!***

  • Easter Bunny Box with the Curvy Keepsake Die (VIDEO TUTORIAL)

    As I was getting ready for my Stamp Club for March, my hostess asked for some cute Easter box or place setting.  Well… when it comes to cute animals and boxes, I knew just where to turn – the Curvy Keepsake Box!  I had made a bunny before, but as I was hopping around the interwebs, I found a cute variation by Wendy Lee and so I had to make some tweaks to my bunny and out came this Easter Bunny Box cutie!!

    Easter bunny box from the curvy keepsake die

    The best part is that it only takes the Curvy Keepsake die and a few punches to pull together this super adorable guy.  And if you want to see how it all comes together, just check out below because I have a video tutorial all ready to go for you!

    But what you will need to play along is:

    • The curvy keepsake thinlit die  (base)
    • Large Oval Punch  (insides of ears and feet)
    • Extra-Large Oval Punch  (ears and feet)
    • Owl Builder Punch  (cheeks, nose, eyes)
    • Fast Fuse adhesive
    • Stampin’ Dimensionals

    Curvy Keepsake Easter Bunny close up

    I also LOVED using the Perfectly Artistic designer paper (free for one more week with Sale-a-Bration, get it added to your order at no cost with any $50 order).  The watercolor wash side was super cute, but some folks in club used the marble side and it was awesome too!  Use that paper for the insides of the ears and feet… you are just layering your oval punches.

    Then glue the ears to the inside of the box flap so that you can open and close the box without hurting anything and you don’t see where the ears are glued on.  You just tuck them into the top slit of the box before gluing.

    Easter Bunny Curvy Keepsake Box Open

    And I just had to add a little bow over the ears with the 1/4” cotton ribbon in Blushing Bride to make my bunny extra cute. Smile

    Make It! – Curvy Keepsake Easter Bunny Box Video Tutorial

    If you want to see the video for this project, check out the VIDEO TUTORIAL below:

    (note – if you are reading this in email, click here to view the video)

    Curvy Keepsake Easter Bunny Treat Box

    Starting tomorrow!  The Final Week of Sale-a-Bration kicks off

    We are down to the final week of Sale-a-Bration if you can believe it!  I’ll be doing a countdown here on the blog and featuring a few more projects I haven’t posted before to remind you of all the cool projects you can make with the free choices during this great promotion.  Here is what is still available (all items are while supplies last) and I’ll be featuring most of them!

    Shop online and for every $50 pick one of these to get added for free!

    12901011_10207661677172460_561712037254347609_o (1)

    join the fun stampin up peeps

    Steal the deal and join our fun group – the Fun n’ Crafty Stampers!  Get started here – http://nwstamper.stampinup.net/jointhefun

    NWstamper signature_thumb[9]

    order online button for sig 3_thumb[4]

    ***Use Hostess Code MZ2REKD7 at check out to get a special thank you from me!***

    What I Used to Make This project
    (click any picture to get more product details)