Northwest Stamper

Tag: see ya later

  • Sale-a-Bration countdown with Scallop Tag Punch Boxes

    Ok, after spending almost an hour fighting with my computer on formatting of this blog post, I’m just giving up and I hope you don’t mind if it scrolls a little long! 🙂 I’m starting the Sale-a-Bration countdown today and so I’ll be spending the next 4 days sharing Sale-a-Bration projects, and I just know I will have a bunch to share, so I figured I’ll post a few each day to fill you up with ideas! scallop tag punch boxes Last weekend was my first ever Stamp & Share for my group of Fun n’ Crafty demonstrators.  I am so grateful for these ladies and I wanted to make sure I was helping created events and opportunities for everyone to get to know each other, stamp together, and share ideas.  So, I put together an afternoon of stamping fun and business tips.  It was a huge success and I can’t wait to start planning the next one as I’d love to hold these each quarter! This time, I had some great presenters who shared some tips and tricks for some of our tools – specifically the Scallop Tag punch and the Thinlit flip dies.  Kathy Thisted (below) shared on the Scallop Tag punch. She had a TON of good ideas and tips but I’ll share the one that was new and exciting to me!  The idea that you can punch paper that is larger than 2”! I know, that shouldn’t be as mind blowing to me as it is, but I thought you could only punch paper that was 2” or less; but she showed how you can make borders, cut box flaps, and more with larger paper.  The big trick though to making sure you have the scallop edge where you want is to mark the front of your punch with a piece of paper or post-it showing where the edges of the tag opening are.  That way, you can align your score lines or markings on your paper so that the scallop tag end is exactly where you want it! Then she shared a bunch of great boxes including this one – all using some great Sale-a-Bration items including the Sweet Sorbet paper, See Ya Later stamp set, Banner punch, Sweet Sorbet accessories, and the Heartfelt Banner kit :

    It is a simple 2” strip of cardstock that has been folded in half to make your basic bag shape.  Then add small strips of cardstock to the sides (adhering to the inside of your tag) to make the walls to keep your goodies from falling out the sides!  (side note – aren’t those little banners stinkin’ cute sticking out from behind the label framelit cut out?) Next was another box she made, only this time she took two of the flaps and cut the ends using the scallop tag punch.  The opposite flaps were trimmed and decorated.  But the scallop top makes for a cute decorative touch and a great place for a ribbon to tie your box closed.

    Oh!  I totally forgot to point out the coolest part!  See that canvas banner on the side of the box?  Guess where it is from?  And no, she did not hand cut it! Give up?  It is from the Heartfelt Banner kit!!  How clever to cut up the banner kit into cute pieces to use in other projects.  Love that multi-purpose functionality. I just LOVED this third box though.

    Another tall box with the scallop tag punch… but my favorite touches?

    1. The belly band with the huge flower using the Blossom Punch
    2. Tying the Sweet Sorbet twine through the top and anchoring it with a Vintage Faceted button!  Those buttons are really pretty but I never know what to do with them.  Looks like this is a really good answer! Smile

    So, hopefully you saw some fun ideas and inspiration here.  Have a question about one of the boxes?  Leave me a comment or shoot me an email at jennifer@nwstamper.com and I’ll see if I can get the details for you!

    Don’t forget, everything you see here that is from Sale-a-Bration is going away after Monday March 31stSo take advantage of the last 4 days of Sale-a-Bration

    image

    image
    (Yes! There is still time for a last minute facebook or online party!)

    image

    So, have fun and I’ll be back with more ideas for you soon!

    spaced shop now sig bar

    March Online Stamp Club Hostess CodeXEWP4DFD
    Use this code to get free exclusive tutorials & project kit! Learn more


    Supplies Used (click any picture for descriptions or to add to your shopping cart)

    133324s
    125603s
    127555s
    109070s
    132982s
    125598s
    131390s
    124005s
    117193s
    133521s
    133522s
    133533s
    133514s
    133519s
  • My Favorite Banner Card Yet!

    My Favorite Banner Card Yet!

    I just realized this morning that I hadn’t shared this card yet and I love it so much that I figured I needed to fix that!

    This is my favorite card yet that I’ve made with the Sale-a-Bration set Banner Blast and I know a lot of it is the color… and the bling… and the sentiment.  Ahhh, don’t you just love it when a card comes together for you?!  Smile 

    Isn’t Bermuda Bay and Basic Black a GORGEOUS color combination??  I just loved the colors and so I wanted to keep the whole card to those tones.

    From the sentiment that I love from the See Ya Later stamp set – “I don’t believe it’s your birthday.  You don’t look any older than you did last year.”  to the clean white background to show off the banners.

    Now, I don’t know why it took this long for me to think of stamping one of the Banner Blast pennants onto colored cardstock… for some reason I kept only stamping a colored ink onto white cardstock.  But look at how great the black ink looks on the Smoky Slate cardstock:

    I also connected the banner by adding rhinestones instead of bakers twine or some other line.  Just the right amount of glitz.

    Yes, both of these stamps sets are only available during Sale-a-Bration, so don’t forget there is only 1 week left to get them free with a $50 order!  Shop online and then pick out your favorite free item(s) and they will appear in your box!

    spaced shop now sig bar

    March Online Stamp Club Hostess CodeXEWP4DFD
    Use this code to get free exclusive tutorials & project kit! Learn more

  • Quick and Easy Sweet Sorbet Birthday Card

    Quick and Easy Sweet Sorbet Birthday Card

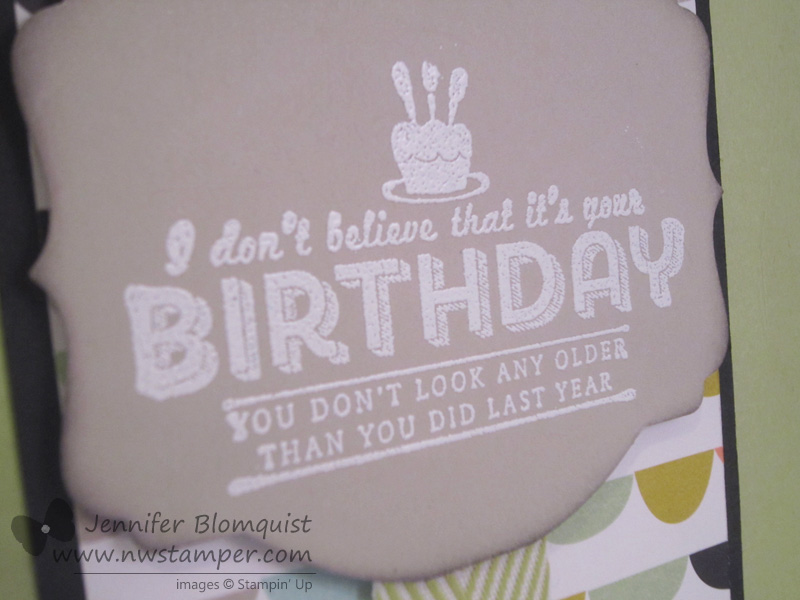
    Today over on the Stylin’ Stampin’ Inkspiration blog, the design team girls have been putting together some quick and easy cards to share.  This is one that I put together recently to play with some of the free items from the Sale-a-Bration catalog.  I think it took me all of like 5 minutes to make…. and that is WITH die cutting and embossing! 🙂

    Sweet sorbet birthday card

    The card is your straightforward designer paper (isn’t that Sweet Sorbet so fun?!) matted with black cardstock… a piece of ribbon trimmed and sticking out from the back of a die cut piece.  Which was the only place I got fancy with the card…. remember, quick and easy!

    see ya later embossed birthday close up

    I stamped the sentiment from the See Ya Later stamp set (one of the free options when you place a $50 order) using versamark ink and then coated it in white embossing powder.  Heat it up… and it looks oh so nice.

    Then I cut that puppy out using my Deco Label framelits… sponged the edge… pop up on dimensionals… DONE!

    So, grab a fabulous designer paper, and really cute sentiment and you can be on your way to a great card in no time.  (Though if you want to grab this cute stamp set and designer paper, make sure you shop and order soon, because these won’t be around for that much longer!)

    spaced shop now sig bar

    Virtual Stamp Club Hostess Code – BNDDMDVU
    Use this code to get free exclusive tutorials & project kit! Learn more

    Sweet sorbet birthday cardStampin’ Up! Supplies Used
    Stamps – See Ya Later (**)
    Ink – Versamark, Sahara Sand
    Paper – Pistachio Pudding, Basic Black, Sahara Sand, Sweet Sorbet designer paper (**)
    Accessories – Big Shot, Deco Label Framelits, Chevron ribbon (Pear Pizzazz), Sponge Dauber, Heat gun, White embossing powder, embossing buddy
    ** FREE with a $50 order

  • Sale-a-Bration Starts Today!

    Today is the day… it’s Sale-a-Bration Time!

    image

    image

    This is the biggest promotion of the year for Stampin’ Up! They have specials for everyone, whether you are wanting to add to your crafting supplies by ordering, hosting a party, or getting it all by joining Stampin’ Up!  But best of all, there is the catalog full of exclusive stamps, accessories, kits, tools, and more that you get to pick from over the next couple months.  So you can make things like this:

    I made this card for the Stylin Stampin’ Inkspiration design team to show a way that you can use markers.  If you look close, you can tell that I used 3 different greens (Gumball Green, Always Artichoke, Pear Pizzazz)for the stamped image.

    image

    I also used a few different items from the Sale-a-Bration catalog to put it all together! Just so you could see a few in action:

    • See Ya Later stamp set
    • Sweet Sorbet designer paper
    • Sweet Sorbet accessory pack (twine)
    • Decorative Dots embossing folder

    So, how can you get the most out of Sale-a-Bration, check out your options:

    image

    So, for every $50 you order pick something free from the Sale-a-Bration catalog to go with it!  Spend $100, get 2 items, spend $150 get 3 items PLUS hostess benefits!  Shop online here.

    image

    Hold a private class, a party, or an online event (see you don’t even have to clean up your house!) and if your total sales at the event are $300 or more, you get a bonus $30 to spend on whatever you want!  Email me at jennifer@nwstamper.com to get it all set up and rolling.

    image

    Join my team of Fun n’ Crafty Stampers by purchasing the starter kit and you’ll get access to a TON of great stamping resources, be invited to be a part of my team events and facebook group, have a chance to share Stampin’ Up and earn some extra money, and get an extra $25 of anything you want from the catalog to go with your kit.  So you get $150 in your choice of goodies for only $99 and FREE shipping!  Woo hoo!  Ready to go?  Get started here.


    Wanna See What Else is New?

    Here are a few items that are new (or newly discounted) for you to consider when putting together your wishlists:

    • NEW Textured Boutique Embossing Machine – A cute mini machine that allows you to emboss (it doesn’t fit dies and framelits) and for only $29.95 it is an easy way to get access to lots of fabulous textures for your craft projects!
    • NEW DISCOUNTS on the Weekly Deals – 6 more items have been discounted for you this week including:image
    • STILL AVAILABLE!  Stampin’ Up decided to extend the Valentine’s promotion and so you can continue to grab the great Love themed stamps, kids kits, and bags until Feb 14th.  See the Whole Lotta Love! 


    spaced shop now sig bar

  • Fringed and Fabulous Birthday Card

    Today, the design team over at Stylin’ Scrappin’ Inkspiration decided to do a post sharing ideas using the upcoming Sale-a-Bration items (if you have no idea what that means, Stampin’ Up has a promotion every spring – this time starting January 28th – where for every $50 you order, you can pick any item in this special catalog to get free with your order; which is what we are playing with today!)  And since I wanted to play along, I dug through my limited stash of Sale-a-Bration goodies to come up with a fun project to share. 

    So today I have another “Little bit of this and that” style card to share –

    It all started with the pair of fringe scissors on my desk and a vision of this super duper great fringed card that my downline, Stacey shared in our team facebook page.  I took the inspiration of layered fringing and started grabbing what was lying around on my desk. 

    This included a card base that got ink and spots on it at a recent card class:

    IMG_3986

    And the plan to use my fringes to cover it up… because darn it… it is still a totally usable card base!

    So, I grabbed some scrap paper and started cutting and layering.

    Then I needed something for the top – so Washi to the rescue!  Yup, I used the Gold washi tape and the Gingham Garden washi tape.  Mix and match away!

    Where is the Sale-a-Bration stuff you ask?

    All in the top of the card!

    First up, the super cute sentiment from a new See Ya Later stamp set (and yes, it has a sentiment that says “See Ya Later, Alligator”!  I had to color it in with markers because, well, I just did.

    And then see that flower and those diamonds?  More SAB goodies!

    These are the Sweet Sorbet self-adhesive cork embellishmentsI will warn you – this isn’t your kiddos adhesive.  I stuck one of those diamonds down and when I decided I wanted to move it, it was NOT going anywhere!  I had to carefully slice it out of my card using scissors to get it to move.  So, word to the wise, they are great embellishments, just make sure you have it where you think you want it before pushing it down.

    Stampin’ Up Supplies Used:

    Stamps – See Ya Later (free Sale-a-Bration item)

    Ink – Sahara Sand, Markers: Early Espresso, Raspberry Ripple, Primrose Petals, Daffodil Delight

    Paper – Whisper White, Primrose Petals, Raspberry Ripple, Sahara Sand, Coastal Cabana

    Accessories – Sweet Sorbet Accessory Pack (free Sale-a-Bration item), Gingham Garden washi tape, Watercolor Wonder washi tape, Fringe Scissors

    spaced shop now sig bar