Northwest Stamper

Tag: sale-a-bration

  • I’m Back! With Sneak Peeks and More!

    Ahhh…back to the blog.  Its funny, I looked at my blog and I really haven’t been that way behind on my blogging, but I guess when you go from blogging pretty much everyday to having 5 day gaps in blogging – mostly about super fabulous sales –, it feels like its been forever.  Especially because I can look at my Edited Blog Pictures folder on my computer and see that I have a BUNCH of projects that I really really want to share with you.  Just means we are in good shape to hop back on the proverbial horse, huh?

    image

    See, I have just a few projects to share. Smile

    But I was talking to another great demonstrator, Ronda Wade, and she reminded me that yes, we are all human and life sometimes gets crazier than we would like.  Thankfully I don’t have any big sad stories about anyone getting seriously sick or damage and destruction (though we did have a frustrating bout of kids tummy bugs for days)… just that turns out sometimes momentum in your life takes over and it is a little hard to keep up with the pace you set for yourself.  So, I had to step back for a minute, get life a bit more in balance (you know like actually have a room in the house that was CLEAN… just ONE would do!)

    2014-11-09 21.50.03

    This was before it was at it’s worst… though now I can almost see my desktop again and I can actually see floor!

    I’m pretty darn blessed to have wonderful customers who kept coming to my classes and were so patient when I was a bit frazzled, and my amazing downline who kept chatting and sharing and INSPIRING each other and me when I was posting as often.  Seriously, how cool is it to have a hobby and a business that you can pause to take a breath and then come back feeling so much better and pick up where you left off?

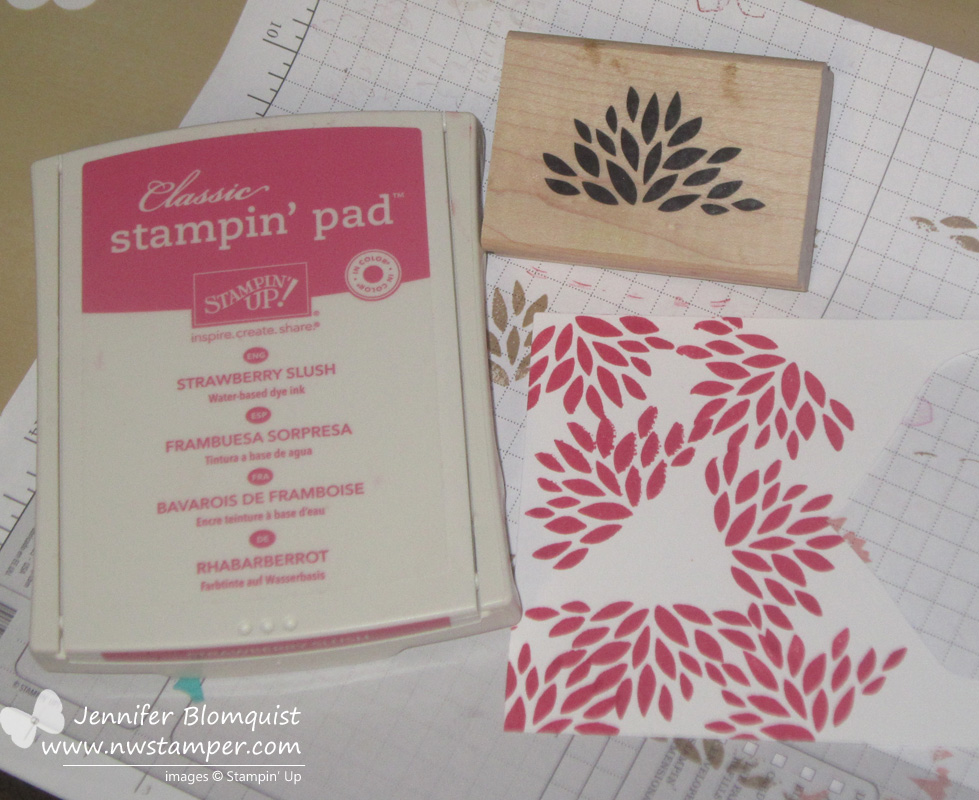
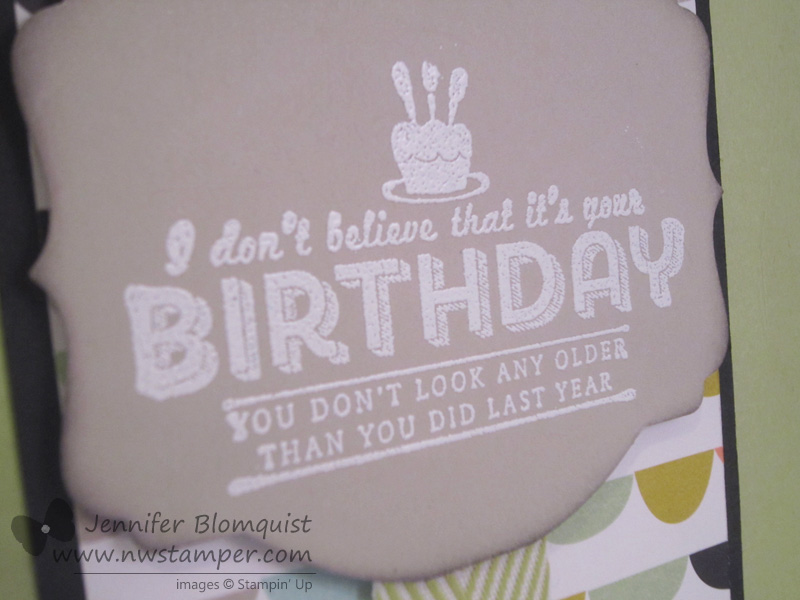
    The one thing I did keep up on, was my Northwest Stamper Facebook Page and in doing so, shared a lot of sneak peeks from the upcoming Sale-a-bration and spring Occasions Catalog!

    2015 Occasions Catalog cover

    Yes, that is a project coming in the spring!  If you are local to me in the Seattle/Bellevue area, we’ll be doing this together as a class later in the spring!

    2015 Sale-a-Bration catalog cover

    And look at that!  Sale-a-Bration is starting on January 6th!! That is WAY earlier than usual and awesome because I’m actually pretty excited about a lot of the items you can earn free during Sale-a-Bration… from cute paper and stamps that are only available during this promotion, to picking out those extra Blendabilities sets you may not have gotten yet. Smile  And a GREAT bonus for hostesses as well (extra $25 to spend in hostess benefits anyone?)  If you are interested in setting up a date for a private class, card night with your friends, Facebook online party, or just extra catalogs to pass out to your friends, let me know and I’d LOVE to set something up for you to help you get all the extra goodies you can get! Email me at jennifer@nwstamper.com

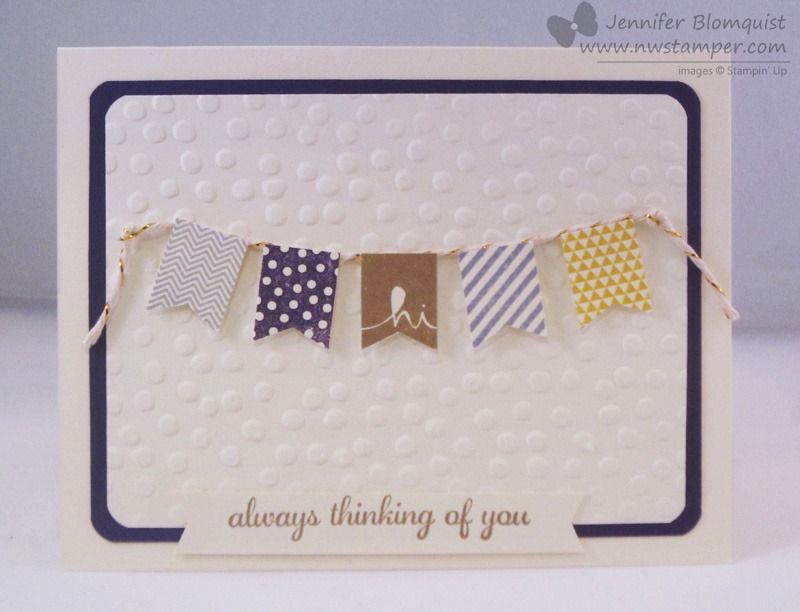
    For example, here are a few cuties you can get:

    2014-12-03 17.31.492014-12-03 17.38.102014-12-03 17.39.49

    See MORE sneak peek photos over at my Northwest Stamper Facebook Page since I was sharing them in real time during the New Catalog Kickoff event for demonstrators.

    So, to finish catching you up, here are a few of the recent releases and deals you may want to know about:

    Gift Certificates Available!

    Need a perfect gift?  Or want someone to get YOU the perfect gift?

    Stampin' Up! Gift Certificate

    Email me at jennifer@nwstamper.com and I can get you set up with a Stampin’ Up Gift Certificate that you can use to get whatever goodies are still sitting on your wishlist.  It is quick and easy and I can either send you a certificate by email or mail you out a physical copy in a handmade card holder!

    See the details here.

    New Weekly Deals

    Some super fun stuff is up this week on the weekly deals.  Grab it while it is on sale, now through Monday.

    image

    See Weekly Deals online here

    New Photopolymer Stamp Set – Snuggles and Smooches

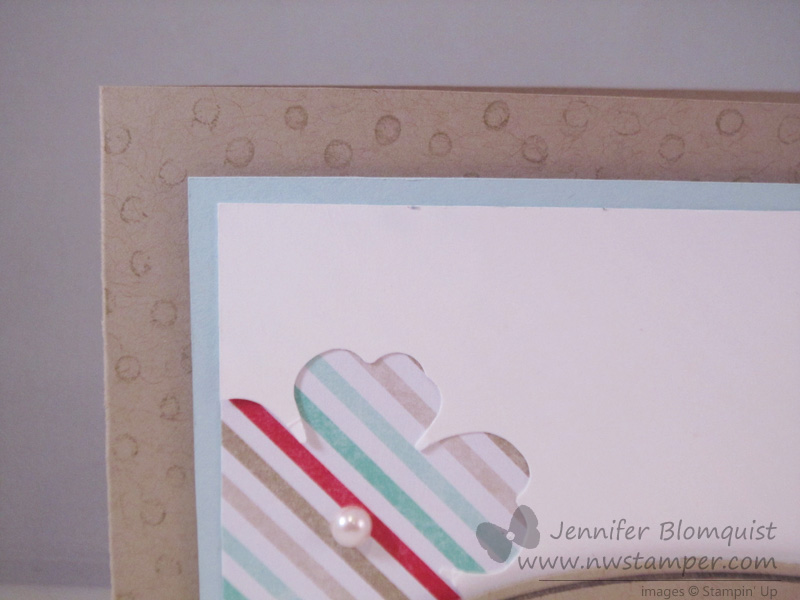
    And there is a new photopolymer set if you are ready to move off Christmas and start thinking about Valentine’s Day!

    image

    It makes really cute projects, like these:

    image

     See it online here

    So, there you have it… and you are a little more caught up than you might have been before. Smile  So thanks for checking back in and I’ll be back with more projects tomorrow!

    NWstamper signature_thumb[9]

    order online button for sig 3_thumb[4]

  • Waiting for News on the Stampin’ Up Blendabilities?

    Waiting for News on the Stampin’ Up Blendabilities?

    So, I’m delaying my originally planned post for today until tomorrow.  So in the meantime, I wanted to share some news I just learned and remind everyone that there is only 5 days left for the Super Starter Kit deal!

    And, after I tell you about the Blendabilities news… you are really going to want to make sure you know about your option for being a member of the Stampin’ Up Family. Smile

    Stampin’ Blendabilities – Coming Soon(ish)

    Now, if you haven’t heard of Blendabilties, they are Stampin’ Up’s version of alcohol ink markers.  These types of markers are great for blending colors and get complex shading of your images.  It also isn’t nearly as hard as it looks either!

    Here is an example of the type of project you can make:

    Pleasant Poppies

    I don’t have this type of marker yet (I just got to play with them at Leadership in January) but I found this BEAUTIFUL card created by Darlene DeVries.  She used Copic markers which is the same type of marker so you can see the possibilities with the Pleasant Poppies stamp.

    Now, if they have Copics, why am I waiting to buy Stampin’ Blendabilities?

    A few reasons…

    1. Stampin’ Blendabilities are more cost-effective!  They will be available for $11.95 for a set of 3 as opposed to $5-$8 a marker.
    2. They will come in SU colors and so coordinate with the papers, cardstock, and accessories I already have.  (I know, I’m a sucker for easy matching!)
    3. You get your markers in sets of 3 that tell you which shades go together.  So no guessing.  I can get a set of Cherry Cobbler markers and have the light, medium, and dark in one set and know I can shade anything red and know which marker colors go together.
    4. And of course, as a demonstrator, I get an extra discount… and any chance to save money on some awesome tools is always a great perk!
    When can I get some Stampin’ Blendabilties?

    So, here is the tricky question.  Thankfully, Stampin’ Up realized that there are a LOT of people eagerly waiting for these markers and so they are trying to make sure they have enough inventory to prevent backorders.  Turns out, manufacturing is taking longer than they thought, so they have had to shift the release date.

    Demonstrators – If you are a demonstrator, you will be able to preorder 6 of the colors plus some accessories with the new catalog products preorder on May 1st!  Then when the new catalog launches June 2nd, the skin tone colors will be out next.

    Customers – We are still waiting to hear when they will be available for everyone to order.  All the Blendabilities products will be shown in the new Stampin’ Up! catalog in June but the date for ordering will be based on how manufacturing goes in the next couple months.  (The goal being as soon as possible when the new catalog launches)

    I’ll keep you posted as they update us, but if you are really eager for your own set of Blendabilities, consider getting your Stampin’ Up starter kit and joining the demonstrator family!  Get all the perks including seeing the 2014-2015 catalog first & get in on the early ordering the new products!

    5 Days Left of the Super Starter Kit Deal!

    I’m so excited to welcome new members to our Fun n’ Crafty demonstrator group, and right now with the extra bonus as part of Sale-a-Bration, it is a great time to join!

    image

    You have until March 31st  to get the BONUS $25 of your choice of product with your starter kit. 

    Learn more about the perks of membership

    Get started ordering your Starter Kit here

    If you have any questions, about Blendabilities or details of joining Stampin Up, just let me know!  I’d be happy to help – just email me at jennifer@nwstamper.com.


    spaced shop now sig bar

    March Online Stamp Club Hostess CodeXEWP4DFD
    Use this code to get free exclusive tutorials & project kit! Learn more

  • Weekly Deals for the last week of Sale-a-Bration

    Weekly Deals for the last week of Sale-a-Bration

    Happy Tuesday! 

    We are down to our LAST WEEK of Sale-a-bration, and so if you have been thinking of stocking up on supplies, picking up some wish list items, or just getting started on that project you’ve been thinking about for a while; you have one week left to get the stuff you need and get BONUS stuff you want for free. Smile 

    Stampin’ Up has also posted the weekly deals for this last week in March as well.  So, here is what is up on special this week:

    weekly deal 3-25-14

    See all the details and shop the sale here

    Love that core’dinations paper!  Its like cardstock, textured cardstock, and a cool sanding medium in one!  One of the color families that is on sale this week is the Subtles collection…wanna see it in action?  Check out this cute card by Breelin Renwick (she shared it with Annie Lee, who shared with me)!

    Those pretty colors are:  Pool Party, Wisteria Wonder, and Calypso Coral.  And when you emboss the Pool Party core’dinations cardstock with the Decorative Dots embossing folder, you can sand the bumps to show the lighter blue core instead.

    Also, love how she combined the Banner Blast stamp set (and Banner punch) with the Hearts a Flutter stamp set and framelits!  Don’t they layer so well together?

    And if you are trying to remember what all your options were for free stuff this month… here is the full list again! 

    Sale-a-Bration 2014

    This week, I’ll be sharing lots of projects using my favorites from the Sale-a-Bration flyer!  So, come on back throughout the week to help get more ideas for how you can use your fabulous freebies!

    spaced shop now sig bar

    March Online Stamp Club Hostess CodeXEWP4DFD
    Use this code to get free exclusive tutorials & project kit! Learn more

    Stampin’ Up! Supplies Used
    Stamps – Hearts a Flutter, Banner Blast**
    Ink – Pool Party, Wisteria Wonder, Calypso Coral
    Paper –Pool Party, Wisteria Wonder, Calypso Coral, Whisper White
    Accessories – Big Shot, Hearts a Flutter framelits, white baker’s twine, rhinestones, Itty Bitty Punch pack, small Heart punch, Decorative Dots embossing folder**
    ** item available as a free gift with a $50 order

    Favorite Products:

    113439s
    129252s
    130159s
    118309s
    133520s
    133551s
    133519s
  • Create a Flower with Petal Parade

    Create a Flower with Petal Parade

    Turns out I’m the queen of last minute!  I knew that I was on-deck for a card for the Stylin’ Stampin’ Inkspiration design team this week and I really did keep meaning to create some fun flower for our “Create a Flower” theme today.  But next thing I know, it is 9:15 last night and I’m working away on a card for a workshop this weekend when I suddenly get the reminder to have my card posted.  Oops!

    Well, the card I was working on had a stamped flower, but it wasn’t a particularly unique use of the stamp.  So, I quickly put my thinking cap on for what was some flower I could create that was different than just the typical stamped flowers that you punch out.  (Don’t ask me why I didn’t think of using my new spiral flower die!)  But a hare-brained idea to create a layered punch art flower with the Petal Parade stamp set came to me and this is what turned out:

    petal parade punch art flower

    So, aside from the sentiment, all the stamping for this came from the Petal Parade stamp set!  Some mixing and matching of ink, stamps, and punches and it came together.

    For reference, here is what the stamp set looks like:

    petal parade SAB 2014

    First was the base layer of the flower – I stamped the half flower image from the stamp set onto white paper in a random pattern.  I actually tried to make a triangle out of the flower image and then fill in the gaps with random stamping to fill it out.

    Petal Parade flowers

    Then for the subsequent layers it was straight forward stamping and then punching it out.

    Top layer – The larger round flower in Strawberry Slush
    Layer 2 –  The daisy like flower in Crushed Curry
    Layer 3 –  The larger round flower in Calypso Coral
    Base layer – Random stamping of the half flower in Strawberry Slush

    petal parade punch art flower

    I to a white piece of paper and cut out of the middle a flower shape using the Floral Frames Framelit and sponged both the outside edge and the inner cut-out edge of the flower with some Crumb Cake ink.  Then I could just glue that to a Crushed Curry card base and glue down my flower punchouts to the middle of the flower.

    I made a couple leaves out of the artsy chevrons from the stamp set and cut them out and adhered them to the sides of the flowers.

    Then just add a few pearls, a sentiment, and some really bad random stamping (seriously, don’t look too close! 🙂 ) and you have yourself a card!

    So what do you think?  Ok for a last minute idea for a punch art flower?  Hopefully it at least gave you some ideas to try at home!

    spaced shop now sig bar

    March Online Stamp Club Hostess Code – XEWP4DFD
    Use this code to get free exclusive tutorials & project kit! Learn more


    Supplies Used:

    133602s
    127012s
    118874s
    119850s
    119861s
    129404s
    133188s
    119247s
    113439s
  • Quick and Easy Sweet Sorbet Birthday Card

    Quick and Easy Sweet Sorbet Birthday Card

    Today over on the Stylin’ Stampin’ Inkspiration blog, the design team girls have been putting together some quick and easy cards to share.  This is one that I put together recently to play with some of the free items from the Sale-a-Bration catalog.  I think it took me all of like 5 minutes to make…. and that is WITH die cutting and embossing! 🙂

    Sweet sorbet birthday card

    The card is your straightforward designer paper (isn’t that Sweet Sorbet so fun?!) matted with black cardstock… a piece of ribbon trimmed and sticking out from the back of a die cut piece.  Which was the only place I got fancy with the card…. remember, quick and easy!

    see ya later embossed birthday close up

    I stamped the sentiment from the See Ya Later stamp set (one of the free options when you place a $50 order) using versamark ink and then coated it in white embossing powder.  Heat it up… and it looks oh so nice.

    Then I cut that puppy out using my Deco Label framelits… sponged the edge… pop up on dimensionals… DONE!

    So, grab a fabulous designer paper, and really cute sentiment and you can be on your way to a great card in no time.  (Though if you want to grab this cute stamp set and designer paper, make sure you shop and order soon, because these won’t be around for that much longer!)

    spaced shop now sig bar

    Virtual Stamp Club Hostess Code – BNDDMDVU
    Use this code to get free exclusive tutorials & project kit! Learn more

    Sweet sorbet birthday cardStampin’ Up! Supplies Used
    Stamps – See Ya Later (**)
    Ink – Versamark, Sahara Sand
    Paper – Pistachio Pudding, Basic Black, Sahara Sand, Sweet Sorbet designer paper (**)
    Accessories – Big Shot, Deco Label Framelits, Chevron ribbon (Pear Pizzazz), Sponge Dauber, Heat gun, White embossing powder, embossing buddy
    ** FREE with a $50 order

  • Eggplant and Gold Banner with Banner Blast

    Eggplant and Gold Banner with Banner Blast

    Right now, everyone is LOVING the Banner Blast stamp set and punch from the Sale-a-Bration catalog and so I wanted to sit down and play around with my supplies to see what I could come up with.  Turns out, it is really quick to come up with something cute and fun – this is what I came up with:

    Apparently, I had the University of Washington Huskies on the brain as I was inspired by Elegant Eggplant and had to pair it with Gold!  (Which just so happens to be the school colors.)  So, I picked out a few complimentary colors and started stamping and punching. 

    For the banners I ended up using:

    • Smoky Slate
    • Elegant Eggplant
    • Soft Suede
    • Wisteria Wonder
    • Crushed Curry

    Pretty combo, right?

    Each banner piece was popped up on a dimensional and then I tucked some of the Gold baker’s twine behind each one and then just tied a knot at the end for my banner string.  I love the subtle shine of the gold – for a girl who has always been about silver, I think gold is growing on me!

    Finally, I wanted to use the banner punch in a different way and so I used it to create the sentiment piece as well.  I cut a strip of cardstock that was the same width as the punch shape of the banner.  Then I could tuck in the ends to the punch…. yes, I realize I should have taken a picture to better explain this, so watch for a photo or video to come soon! – so that I could make the sentiment as long as I needed and have a banner point at each end.

    Oh, last note… isn’t this sentiment great?  I wanted to mention it because you may be like me and once Stampin’ Up switched the way they do hostess benefits and now they make it so that you can use your freebies on anything in the catalog…. I stopped paying much attention to the hostess stamp sets!  So, it is easy to overlook some of the great stamps in the back of the catalog!  This was one of the first stamps I got with hostess benefits and thought it deserved a little spotlight. Smile

    image

    Express Yourself – Hostess Stamp set

    spaced shop now sig bar

    Virtual Stamp Club Hostess CodeBNDDMDVU
    Use this code to get free exclusive tutorials & project kit! Learn more

    Stampin’ Up! Supplies Used
    Stamps – Express Yourself (hostess), Banner Blast (FREE with a $50 order)
    Ink – Smoky Slate, Elegant Eggplant, Soft Suede, Wisteria Wonder, Crushed Curry
    Paper – Whisper White, Elegant Eggplant
    Accessories – Big Shot, Decorative Dots embossing folder (FREE with a $50 order), Banner punch (FREE with a $50 order), Gold baker’s twine, corner rounder punch

  • Cheery Thinking of You with Petite Petals Flowers

    Cheery Thinking of You with Petite Petals Flowers

    Whew!  I’m back to the land of the living!

    I went to bed last Thursday night thinking of all my plans of what I was going to finish and get caught up on on Friday (aka Valentine’s Day).  Instead, I woke up in the early hours of the morning with a terrible stomach bug!  So, instead I spent the day in bed with a brief period laying on the couch.  Finally I am back to functional again (though now my husband has gotten taken out) and I’m trying to get caught back up. Smile 

    Today’s card was the perfect share today because of the number of people I heard of that were sick recently as well as a sweet friend who just had to suffer a devastating loss.  So, for all of them and for you, here is a card to send a little sunshine your way.

    This card was inspired by a card by Natasha Zandbergen that I had found on Pinterest and of course had to give it my own flair!  So, I loved the idea of cutting out the oval shape from the Oval Framelits and stamping my sentiment from the super fabulous Perfect Pennants stamp set for the focal piece…. and then I started getting a little creative.

    First – I embossed my front layer with the Decorative Dots embossing folder from the Sale-a-Bration brochure.  Then I decided to be a little odd and I sanded the the dots that were embossed.  It is a really subtle thing, but I wanted to soften the dots and give them a bit of texture.  See, when you sand your embossed elements, even if you don’t use core-dinations cardstock, it gives the raised part a bit of a velvety look.

    Then, I wanted to play with the new Petite Petals stamp set.  So I got to stamping.

    Psst – here is a little secret.  If you look at those flowers and wonder why they aren’t punched out very crisply, that is because I was borrowing this stamp set from my mom and she had forgotten to loan me the punch.  I wanted to have the flowers cut out, so I hand cut them.  They look much nicer when you use the punch!

    It still needed something though, and I played with all different options for breaking the So Saffron yellow color up along the bottom of the card and ended up settling on the Natural Chevron Trim as that extra piece. 

    Plus I thought that the chevron looked like arrows for a conveyor belt shuttling along those good thoughts to the card recipient. Winking smile  I know totally dorky… but hi! *waving* I’m a dork!  hee hee

    So, hope you are healthy and having a wonderful weekend at your home!  Until next time!

    spaced shop now sig bar

    Virtual Stamp Club Hostess CodeBNDDMDVU
    Use this code to get free exclusive tutorials & project kit! Learn more

    Stampin’ Up! Supplies Used
    Stamps – Perfect Pennants, Petite Petals
    Ink – Basic Black, Raspberry Ripple, So Saffron, Soft Sky
    Paper – Whisper White, So Saffron
    Accessories – Big Shot, Oval Framelits, Decorative Dots embossing folder (FREE with a $50 order) Petite Petals punch, Naturals Chevron ribbon, Sanding Block, Rhinestones

  • Word Bubbles Valentine or Spring Card–you choose!

    Word Bubbles Valentine or Spring Card–you choose!

    I was working on finishing out the last card for Stamp Club tonight and I wanted to do something Valentines-y.  So I was looking at my new stamps and just HAD to pull out my Just Sayin’ word bubbles stamp set and put something together.  This is what I came up with for the first sample:

    Just Saying Word Bubble Valentines

    Now, I know not everyone needs a Valentine’s Day card at this point, so I wanted to give them some options for what they made (plus I didn’t have enough of the patterned paper for everyone to make this exact card) so I created a second variation of the card that could be used any time:

    Just Sayin Word bubble flower card

    So, basically the exact same idea from the first card only with a few minor changes:

    But did you notice the coolest part?

    Check out the background for the card base!  NO it isn’t a rubber stamp!  Can you guess how I made it? 🙂

    stamping with embossing folders

    Yup!  An embossing folder!!

    I took my Decorative Dots embossing folder (free with a $50 order) and inked it up with my crumb cake ink and then “stamped” it onto my card base.  Burnish with your bone folder and you have a fun new background stamp!

    Makes you look at your embossing folders a little differently, huh?

    Join me in my Virtual Stamp Club!

    As i mentioned earlier, I created these cards for my stamp club gals.  I love my local stamp club, but know I have some friends and customers who aren’t able to join me in person each month because of distance or time. So, I wanted come up with a way to share the fun with them as well.

    And so… I am starting a Virtual Stamp Club!  Its easy to join and you can do it from anywhere in the US!

    How does it work?

    1. Place an order in my Online Store that is at least $25 by the 25th of the month.
    2. Make sure you use the Virtual Club hostess code when you check out (I’ll post the code each month at the bottom of my blog posts)
    3. Within 48hrs, I will send you the password for an exclusive club page with links for PDF tutorials for the 2-3 projects we are making in Stamp club that month with full supply lists for all of the projects.
    4. If your order is $40 or more, then I will mail you a free class kit packet for the club projects so you can make them at home!  Class kits will start going out by the 2nd Thursday of the month.
    5. PLUS – every time you spend $40 you also are getting a punch towards a free stamp set with my Northwest Stamper Rewards program!

    There is no commitment and you can participate one month and skip the next!

    And if you’ve been in the club at any time in the prior 4 months when a new catalog comes out, you will be sure to get one in the mail from me for free!

    If you have questions, shoot me an email at jennifer@nwstamper.com.

    Ready to go?  Shop online and use the hostess code BNDDMDVU

    spaced shop now sig bar


  • A Spring Card with Petal Parade

    Have you ever noticed how some stamp sets look completely BLAH in the catalog but then you see it stamped a few different ways and you realize it is actually a great set?  That happened to me last year with the Oh, Hello stamp set and now in the new Sale-a-Bration Catalog, the Petal Parade stamp set is very easy to look over, yet it makes really cute cards!

    See?

    I love how bright and happy this card is.  All of the stamped images (except for the words) come from the Petal Parade stamp set. I just mixed in some Baked Brown Sugar cardstock, some Strawberry Slush ruffled ribbon, and the sentiment from the Happy Day stamp set.  Done!

    Yes, all of the images you see are stamped.  Smile

    I was flattered when my neighbor told me it looked like the paper came with those flower images printed on!

    Also out today – new Weekly Deals!

    Just a reminder that it is Tuesday which means we have new weekly deals available.  Here is what is up for 2/3 – 2/9:

    Weekly Deals Feb 3 to 9

    Order any of these discounted items online here


    And now I’m reminded to go off an play with my Simply Pressed Clay and Canvas Creations. Smile  Until next time!

    spaced shop now sig bar


    Stampin’ Supplies Used

    Stamps – Happy Day, Petal Parade (free as part of Sale-a-Bration)
    Ink – Strawberry Slush, Pool Party, Pistachio Pudding, Baked Brown Sugar
    Paper – Whisper White, Baked Brown Sugar
    Accessories – Snail, Strawberry Slush strech ruffle ribbon

  • Spring Birthday Card with Six-Sided Sampler

    Today I wanted to share with you a fabulous card I received this month as a swap card from fellow stamper, Stacey Lane!  She joined my Fun n’ Crafty stampers last fall and creates the most amazing cards!  Seriously, I need to start attending her classes. Smile 

    But each month our group does a swap where you send one or two cards to other folks in the group and get a couple ideas back your way.  This is the card she sent me this month:

    Isn’t it fantastic?

    So, here is the awesome part… see that patterned background?  That isn’t designer paper – THAT IS STAMPED!!

    She used the Six-Sided Stamper stamp set and hexagon punch to make this card.

    image

    Now, it seems like a lot, but the nice thing is that if you stamp and punch a bunch of random hexagon images, you can glue them down to a larger piece of paper – say a 5.5” x 8.5” piece of scrap paper and then cut it up to create a background for multiple cards.

    I also love some of the touches she added like

    • Sponging the hexagons in Smoky Slate, which really softens the look of the card
    • Embossing the banner with the Decorative Dots embossing folder (free with an order as part of Sale-a-Bration)
    • Using a toothpick to create a dimensional stick for the banner
    • Using Pool Party core’dinations cardstock for a textured mat behind her stamped background.

    So, now it is time for me to break out this stamp set again and try it out in a non-masculine style (which is what I normally think of with this set. 


    spaced shop now sig bar

      Stampin’ Supplies Used

    Stamps – Six Sided Sampler, Simply Sketched (hostess set)
    Ink – So Saffron, Pool Party, Smoky Slate
    Paper – Whisper White, Pool Party Core’dinations cardstock (subtles collection), Smoky Slate
    Accessories – Hexagon Punch, Big Shot, Decorative Dots embossing folder (sale-a-bration), Stampin’ Dimensionals

  • Game Day & a Superbowl Special!

    You may have heard that there is little football game happening today…. Smile  It’s Superbowl Sunday!

    And all around Seattle here the town has been transformed into Blue and Green; even the construction cranes are flying the 12th man Seahawks fan flags!

    Lots of folks have been using the Undefined sets to create their own custom Seahawks stamps

    seahawks stamps using undefinedand making awesome decorated treat bags for their game day parties!  (These use the Twisted Treats bags and tags that you can get free out of the Sale-a-Bration catalog)

    Seahawks twisted treats goodie bags

    So, to get in the spirit of game day, I’m putting together a last minute game day special!

    Stampin’ Super Bowl Special!

    Place your order by emailing me at jennifer@nwstamper.com or shop online and use the Hostess code 3DWH3NCF before the game ends this evening to be eligible for the Super Bowl special!

    How it works:

    If the Seahawks win –

    You will receive a coupon for free shipping on your next purchase with me!  Plus a little bonus goodie in the mail with your thank you card. Smile 

    If the Broncos win –

    You will receive a coupon for 5% off your next purchase with me!

    See, either way you win, but you don’t know exactly what you will get until the game is over!  I’ll be watching the game and you know I’ll be cheering for the hawks!  But for all you Broncos fans… good luck! 


    spaced shop now sig bar

  • Sale-a-Bration KickOff Cards–Sweet Sorbet, Banners, & More

    You may have noticed that earlier this week, was the start of Stampin’ Up’s big spring promotion – Sale-a-Bration.  It is a really fun promotion that basically gets you free stuff no matter what you do!  You can

    So yeah, basically everyone wins!

    Anyway, I always like to throw a party when a new catalog comes out and at the beginning of Sale-a-bration.  It is a great excuse to hang out with friends, share samples I go at recent events, let everyone see and try out a TON of new products from the Occasions and Sale-a-bration catalogs, and STAMP!  (what kind of party would it be if there was no stamping? Winking smile )

    Wanna see what we made?  Here you go!

    This was the first card we made and inspired loosely by a card I saw from a German demonstrator named Ines.

    I’ll admit, when I saw Petal Parade in the Sale-a-bration catalog it looked a little boring to me, but let me just say I have been having a blast playing with it and think it may be my favorite stamp set from SAB!  Plus, got to add in that little detail with the cork and the twine from the Sweet Sorbet Accessories bundle.

    Stampin’ Up Supplies Used
    Stamps – Petal Parade (SAB), Perfect Pennants
    Ink – Summer Starfruit, Baked Brown Sugar, Pool Party, Pistachio Pudding, Crisp Canteloupe
    Paper – Whisper White, Baked Brown Sugar, Pool Party
    Accessories – Sweet Sorbet Accessories – Crisp Canteloupe twine & cork stickers (SAB)

    I also really wanted to use the Banner Blast stamp set and Banner punch and so we made this card:

    This card is a more direct CASE from my friend and look-alike, Julie Davison.  I made a few adjustments like changing up the sentiment, making it a standard size card, and using the Decorative Dots embossing folder for the starfruit trim.

    So cute, huh?!

    Stampin’ Supplies Used
    Stamps – Banner Blast (SAB), Sweet Essentials
    Ink – Pool Party, Basic Black, Summer Starfruit, Crisp Cantaloupe
    Paper – Sweet Sorbet designer paper (SAB), Crisp Cantaloupe, Whisper White, Summer Starfruit
    Accessories – Banner punch (SAB), Big Shot, Decorative Dots embossing folder (SAB), stampin’ dimensionals

    The girls who made it to the party enjoyed them and hopefully they give you some ideas to try when you order and get your free Sale-a-Bration goodies too!


    spaced shop now sig bar