Northwest Stamper

Tag: remarkable you

  • Easy and Classy Watercoloring with Remarkable You

    As I go to post this picture, I realized that if it was a poppy, it would have been even more perfect for Veteran’s Day today.  But that is ok… it is still fair to say to all the men and women who have joined our Armed Forces and been willing to do what is needed to protect our country and folks who cannot protect themselves around the world… thank you.  You are remarkable!

    Isn’t this such a pretty card!  It just makes me happy when I see it.  And I’ll tell you, I can’t really take the credit for it.  While I did make this copy you see here, it is a CASE from the lovely Diane Dimich and you can see her original here.  But I needed an idea for card class and wanted to use this stamp set because I LOVE watercoloring with it, and I just loved the colors and how easy to put together this card is.

    Tips for making this card:

    • One of the best things about this card is how easy it is to put together… here is all you need for it:
        –  Basic Black cardstock for the base – 5 1/2’ x 8 1/2”
        –  Whisper White cardstock – 4” x 5 1/4”
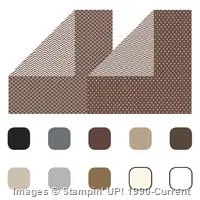
        –  Polka Dot designer paper from the Neutrals Designer Paper stack – 1 3/4” x 5 1/4”
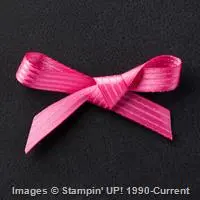
        –  Melon Mambo stitched satin ribbon – 6”
    • Just adhere the designer paper to the bottom of the Whisper white cardstock and then wrap the ribbon over the seam before adhering to your card base!
    • When you are doing watercoloring, you will want to stamp your image onto Watercolor Paper – this is a special type of paper that is thicker and the fibers are designed to be able to handle lots of water going over them without the paper pilling up or wearing a hole through. 
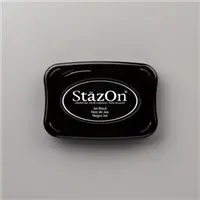
    • And make sure you are using Staz On ink for your stamping!  You don’t want the ink to start bleeding into your image as you are coloring. Smile
    • Once you’ve stamped your image, you can just start layering on the color until it looks the way you want.  YES!  You can go over the same area over and over again to get it darker if needed.
    • TIP – if you’ve never done watercoloring before, it is really easy!  Here is what you need to know:
        – Start by stamping your image onto watercolor paper with StazOn ink (both are available in the Stampin’ Up online store)
        – Take the ink color you want to color with and SQUEEZE the ink pad so that ink transfers to the TOP of the ink pad
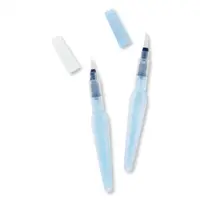
        – Open your ink pad and use an Aqua Pen and use it like a paintbrush to pick up the color from the lid – NOT from the surface of the ink pad.  You don’t want to pick up the ink from the ink pad because you will end up diluting the ink in your pad and getting funny spots where you were getting the ink. Smile
        –  Brush on your color over your image and repeat until you get it looking how you’d like.  If your color isn’t spreading on smoothly when you are coloring, squeeze the barrel of the Aqua Pen slightly to get more water to the tip of the brush.
    • After you like how it looks, we just cut it out and adhered to the front of the card using dimensionals.  Add your sentiment and some rhinestones and it looks great!

    Fun and easy, right?

    Don’t forget the savings on my Flurry of Wishes Class by Mail!  Through Monday 11/16!

    Just a reminder that since the Snow Flurry punch is on sale this week as part of the weekly deals, I’m passing the savings on to you with my Flurry of Wishes Class by mail!  Purchase either the class kit & punch or the best value bundle and I’ll take $4.50 off your class fee! 

    Sign up here!

    NWstamper signature_thumb[9]

    order online button for sig 3_thumb[4]

    But use Hostess Code PU2EYZJY to get a special thank you from me!

    Project Supplies Used:

  • Even More Remarkable You Card Samples and a Holiday Catalog Pre-Preorder Walkthrough!

    So much to share today including a new stamp set that I love and some of my Fun new goodies from the holiday catalog!

    Holiday Catalog Pre-Preorder Walkthrough

    As a convention attendee, we got the opportunity to preorder a select set of items from the upcoming Holiday Catalog while we were there!  I had to jump on getting a few items early before the main preorder starts today.  My order came in last night and so I had to do a quick video to share it since I know I’m not the only person who CAN’T WAIT to see what is new and coming!  I show what I have and open all my packs of paper so you can see all the patterns since I can’t post a video of all the pages of the catalog yet. Smile

    (Though, did you know?  If you pick up the Stampin’ Up starter kit starting today, you can get ANYTHING from the Holiday Catalog in you kit?  So you can preorder too!)

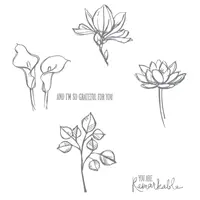
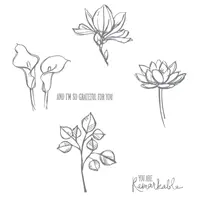
    I also shared some items I got from the Annual Catalog as well including this Remarkable You stamp set.  I had totally passed it by everytime I had gone through the catalog and then while I was at convention, I saw SO MANY awesome samples with it that I knew I had to have it.  Smile  So, it came on my order.  I shared one of the cards yesterday, but here are 5 more ideas to get you going:

    Remarkable You stamp set – available now!

    image

    Isn’t it pretty??  I can’t wait to play and watercolor with it!

    Weekly Deals are In!

    11219678_10206087634084179_4199534965934073362_n

    View the weekly deals online

    Just a reminder – new weekly deals are out and 25% off!  You can grab yours in the online store or by emailing me… but just a heads up……

    PSST – Clearance Rack Updates are coming TOMORROW (8/5)!

    Just wanted to let you know that a little birdie told me that tomorrow the Clearance Rack will be updated with new items.  I’m not sure what is coming but you know I’ll be up and checking it out.  I would shop early and let me know by noon tomorrow if you want anything from the clearance rack so I can snag it before things start selling out.

    Finally, if you missed it:

    Get Half Off the First 2 Months of a New Paper Pumpkin Subscription

    Yup!  If you haven’t tried Paper Pumpkin yet, or took a break and have considered coming back, don’t miss this deal.  NOTE – if you had a prior subscription, you will need to start a new subscription with a DIFFERENT email address to get the 50% off discount of your first 2 months

    image

    get started with your subscription here – Join the Paper Pumpkin Fun!

    NWstamper signature_thumb[9]

    order online button for sig 3_thumb[4]

  • Sharing a Few of my Favorite Swaps

    After coming back from the Stampin’ Up convention, I had a TON of swap cards… ok, more like 120, but still, that feels like a ton!  I spent time over the last few days photographing the cards and finally have pictures of all of them.  I posted them all of my team facebook group (so if you are one of my Fun n’ Crafty Stampers, make sure you’ve checked out the album on our page!) But I want to share some of my favorites with you here on the blog too!

    I’ve hand picked a few that I’m going to go into detail on later this week, but for now I thought I’d get the party started with 6 cards that I loved and I hope at least one catches your eye too!

    I love how simple yet bold this card is.  Plus it also shows a great way to use that vegetable paper from the Farmer’s Market designer paper in a way that is cute!  I love this paper pack, but will admit to not having a clue on how to use some of the patterns.  So when I saw this card I had to swap for it!

    This is another simple yet super cute cards!  The heart is the Dazzling Diamond designer paper that she spritzed with Watermelon Wonder ink to create the matching heart.   If you haven’t tried this at home, here is how it works:

    To make custom color glitter paper:

    1. Start with Dazzling Diamond glimmer paper and cut down to near the size you need for your project
    2. Take a Spritzer and fill with rubbing alcohol
    3. Add 20-60 drops of your preferred color ink refill (like this Watermelon Wonder ink refill)
      the amount of drops varies how dark your color will turn out
    4. Place your paper in a cardboard box, standing upright
    5. Press on the top of the spritz bottle while holding the bottle UPRIGHT
    6. Keep spraying until you get the color you want and then set aside to dry

    It is also hard to tell, but the paper with the words on it is actually silvery so that it has a subtle shine to it.  That is from the Stampin’ Up Neutrals Background designer series paper stack.  Isn’t it cute!!

    I also had to swap for this gift card holder as soon as I saw it!  I love punch art and just thought he was totally adorable!  I haven’t measured the circles yet to recreate him but I can share once I do.

    It wasn’t until I went to photograph the card that I realized it was a gift card holder.  How clever is that? 

    This was one of the cards that made me realize that I needed the Remarkable You stamp set.  In fact, it is now arriving at my house tomorrow!  Yay!  It is so simple yet oh so pretty!  I’m thinking this may need to turn into one of my customer thank you cards soon. Smile

    I loved the added touch of the flowers being popped up for more dimension without distracting from the rest of the card.  Awesome, right?

    I thought this was such a clever use of the Celebrate Today bundle!  I love the balloon die cut, but thought making the cloud background and then adding the sun from the Kinda Eclectic stamp set and adding two circles for Mickey Mouse ears were great added touches.

    I saw my friend Michelle Suit working on swaps in the weeks leading up to convention and then she and her family went to Disney World.  It looked like such a fun time and she had the brilliant idea to take some of her Disney Themed swaps and get them signed by the characters in the park.  I even lucked in to one signed by Snow White!

    Finally, I have one more for you today.  This was a great card created by Angela McCormack – one of our Fun n’ Crafty Stampers!

    She always comes up with great card ideas and I loved how easy this is to make.  All the words are part of the single background stamp – A World of Thanks.  The trendy sketched words look great all together and then with some added punched hearts, stars, and some rhinestones, it just really comes together, don’t you think?

    I hope you enjoyed these ideas and will stop back by as I share even more this week!  Plus, I’ll be getting my first back of New Holiday Catalog Preorder Items and will be sharing them with you too!

    If you want to get your own swap cards, consider giving my Fun n’ Crafty Stampers group a try!  We have a Holiday Catalog group swap coming up, monthly swaps, AND you will be eligible to join us and hundreds of other demos by attending the On Stage Local events around the country in November where there is sure to be lots more swapping going on!  Get your starter kit and give it a test run here, we’d love to have you join us!


    NWstamper signature_thumb[9]

    order online button for sig 3_thumb[4]