Northwest Stamper

Tag: petite petal punch

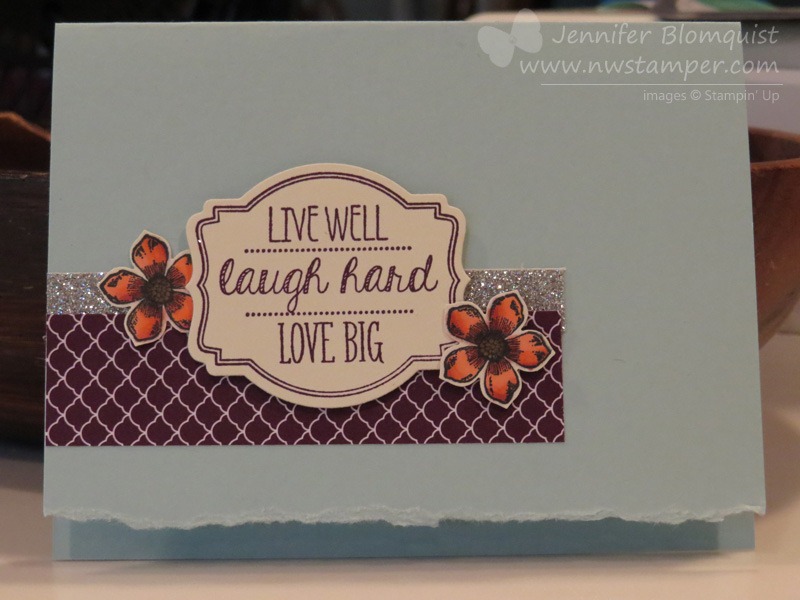
  • A Simple Elegant Card Perfect for a Birthday, Wedding, or White Christmas!

    Today is my Birthday and I am so excited for an afternoon where I don’t have to do anything except kick back with some great music and pull out all my preorder goodies and craft, craft, craft!  But before I got elbows deep in paper and ink, I wanted to share with you a card I put together for Stamp Club this month!

    I had had someone ask about a birthday card and I had seen a card that used white embossed paper over a white cardbase that I loved and so I set out to replicate and tweak that idea using my Stampin’ Up supplies I had at home.  I just love how elegant it turned out and I was so excited to share it with everyone at my events this month!  I made mine be birthday but switch out the sentiment and it would be great for just about any occasion!

    Tips for making this card:

    • Emboss a smaller piece of cardstock (in this case 2-3/4”x 3-3/4”) with your favorite embossing folder.  I liked the Mosaic embossing folder because it was a simple repetitive design that felt elegant and gave the card some visual structure.) and then mat it on a 3”x4” piece of white cardstock.
    • Since everything is based in white, pick a contrasting ribbon to anchor your color.  I love Black & White and so this Black Chevron ribbon was just the thing!
    • Punch 6 Petite Petal flowers and crumple each one up into the smallest ball you can in your hand.  Don’t worry if the petals are smashed in all the wrong directions, that is good!  The important thing is getting them extra wrinkled and textured.
    • Adhere the flowers together using glue dots and add a rhinestone to the center for sparkle amongst the texture.
    • Need extra sparkle?  Add a strip of Dazzling Diamonds glitter paper for a mess-free glitz on your card.

    You don’t need a lot of supplies to make a card that will wow them everytime. So, grab some paper and a flower punch, and have fun creating!

    My Birthday Gift is a Gift for You!

    maestro%20clipart

    I love celebrating birthdays… all the fun, cheer, and even a few presents!  I’ve been so amazed to receive some very sweet gifts this year (some fun crafty goodies, some shopping money to get more, and even some pampering by my hubby!) So I wanted to share the joy by giving you all a gift as well!

    I’m giving YOU a $5 gift certificate to be spent starting January, for every $25 you order today and tomorrow!
    This even counts if you order gift certificates from me or Paper Pumpkin prepaid subscriptions!
    So you can finish up your holiday shopping and get a little something fun for you as well. Smile

    Shop online or email me your order to jennifer@nwstamper.com and I’ll get your certificate emailed out to you right away!
    If your order is less than $150, then please use hostess code XMUM7PJZ.
    To purchase a gift certificate
    , email me so I can make sure I have all the details.  If you are interested in giving a Paper Pumpkin Subscription, you have the option to order them online here.

    And can I just brag about my super hubby today?  In the past we haven’t done much for birthdays but he has been amazing today including this yummy breakfast in bed!  Eggs, sausage, and the oh so delicious Orange Rolls!  Talk about spoiling a girl! 2014-12-18 08.01.11

    So I hope you all have a wonderful day too!  Until tomorrow!

    NWstamper signature_thumb[9]

    order online button for sig 3_thumb[4]

    Project Supplies Used:
    (if you are reading this in email, click here to see the list of supplies)

  • Petite Petals & Blendabilities

    Petite Petals & Blendabilities

    Ok, taking a quick break from my Craft Garage sale to finish getting this blog post up for today!  I wanted to share the card I pulled together on Friday using the new Decorative Goodies bundle you can get free right now.  Wanna see:

    Tips for making this card

    • The sentiment comes together really quick with the limited time Decorative Goodies bundle.  This is one of the bundles that you can get FREE with the purchase of a Big Shot this month, or get it for 15% off if you already have the machine (details here).  But I just stamped my image from the Oh My Goodies stamp set in Blackberry Bliss ink and cut it out with the matching Deco Label framelit.
    • Add a piece of the newly redesigned Silver Glimmer paper for a touch of easy sparkle without the muss and fuss.
    • The outline flower from the Petite Petals stamp set works great for quick coloring with the Blendabilities!  I used the new Calypso Coral blendabilities set  along with the new Crumb Cake blendabilities set to do my coloring.
    • Tear the bottom edge of the front of your card for an easy way to get some texture while still leaving your card clean and simple.

    And if you are in the Seattle area, we’ll be open for a few more hours for the Craft Garage Sale!  We sold quite a bit yesterday but still have all this to clear out today.  Come by through 2pm to snatch up a great deal!

    10556340_912851058731056_6735272720097048702_n

    spaced shop now sig bar

    August Online Stamp Club Hostess Code – TT2NETD4
    Use this code to get free exclusive tutorials & project kit! Learn more

  • A Card Sketch Thank You Card for SSInkspiration

    A Card Sketch Thank You Card for SSInkspiration

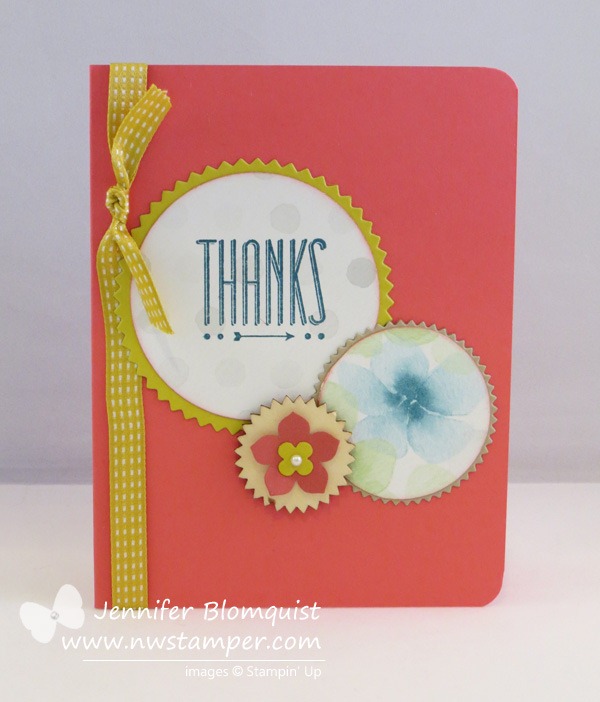
    Today I’m getting back in the saddle with the girls over at Stylin Stampin’ Inkspiration and made a card for today’s card sketch. I actually got some time to do a little crafting yesterday and I thought It would be fun to show some of the retiring 2012-2014 In Colors some love.  So, with a Primrose Petals card base and some Summer Starfruit cardstock, I ended up with this:

    Who knew starbursts could be so pretty!  This is the sketch we are all using, so you can see what I started from….

    I started out knowing I was going to use my framelits for the two bigger pieces, but when it came to the smallest shape, I really wanted to use the wood chip accent from the Occasion Catalog.  I didn’t want it to be plain but I couldn’t figure out what to put on it… then suddenly I realized some punched flowers were the perfect size!  (In this case the Petite Petals punch and the Itty Bitty Punch Pack flower that is retiring at the end of the month!)

    But got to love those starbursts!  And of course, using punches to fill in the centers with some Watercolor Wonder designer paper.  (If you are curious, that is the 2-1/2″ circle punch and the 1-3/4″ circle punch)

    I hope you enjoyed this idea!  It was quick and fun to make. Smile  And lets hear it for those hard working 2012-2014 In Colors as they get ready to ride off into the sunset in a few weeks!

    spaced shop now sig bar

    May Online Stamp Club Hostess CodeZUBHUEK6
    Use this code to get free exclusive tutorials & project kit!Learn more

    Stampin’ Up! Supplies Used
    Stamps – Hip Notes
    Ink – Island Indigo
    Paper –Watercolor Wonder designer paper, Primrose Petals, Summer Starfruit, Crumb Cake
    Accessories – Big Shot, Starburst Framelits, Retro Fresh wood accents, Summer Starfruit stitched satin ribbon, Petite Petals punch, Itty Bitty Punch Pack, Pearls

  • Quick Spring Easter Treat Bag Tutorial with Punch Art Daffodil!

    Quick Spring Easter Treat Bag Tutorial with Punch Art Daffodil!

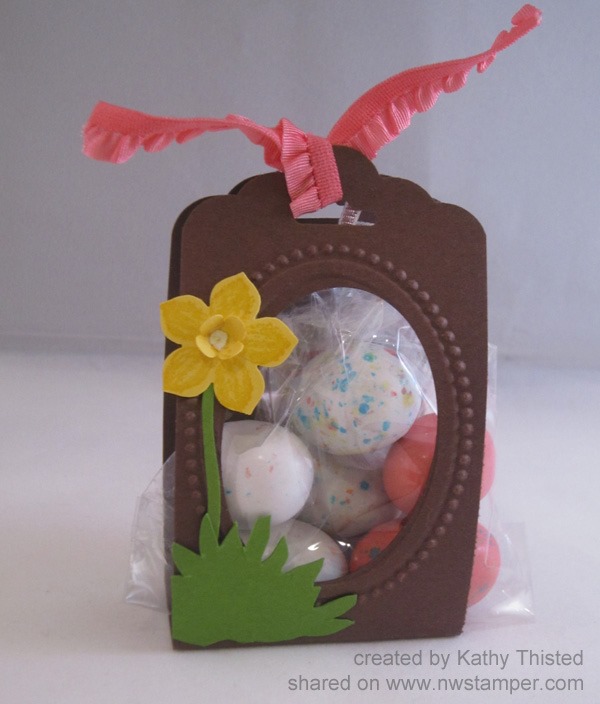
    Happy Easter weekend! I don’t know about you, but we still need to do a lot of our prep for Easter.  Today we’ll be spending time coloring Easter eggs – and I’ll be making sure I have everything I need for Easter baskets and Easter dinner! 

    (PS – don’t forget to enter the Retirement List Prediction Contest!  It is free to play along and you could win up to $30 in free Stampin’ Up products!)

    So, back to Easter treats!  I thought I would share a quick spring or Easter treat idea that you can pull together at the last minute!  This was created by my Mom, Kathy Thisted, for our Fun n’ Crafty team Stamp & Share a few weeks ago and I just love it.

    Scallop Tag Topper & Punch Art Treat Bag

    There are lots of fun elements to this treat bag, but the nice thing is that with a few punches, it is super quick to make!

    Start with a 2”x8” piece of cardstock (this is Chocolate Chip) and score at 3-1/2” x 4-1/2” to help it stand up on it’s own.  Then, grab the Designer Frames Embossing Folders and use the oval to one to emboss your frame. 

    Use the Extra Wide Oval Punch to punch out the center of your oval.  LOVE that it is an almost perfect match!

    Punch both ends of the strip of cardstock with the Scallop Tag Topper Punch to give you that pretty finished look!

    Then grab your Petite Petals punch  and the four petal flower punch from the Bitty Punch Pack to make your Daffodil.  I punched one of each shape out of Daffodil Delight cardstock.

    In the sample, the flower is stamped first using the Petite Petals stamp set – and I think it definitely adds something to it.  But for the sake of this tutorial, I didn’t end up stamping.  I hope you don’t mind. Smile 

    Fold up the small punched flower and adhere it to the center of your larger flower with liquid glue or a glue dot!  I love how my mom colored in the center of the little flower with the White Gel pen for a little extra definition!

    Add a scrap of cardstock for the stem and grass at the bottom.  Want to hear a fun trick?  Stamp out one of the flower heads from the Too Kind stamp set and then cut it out and use the backside for your grass!  Neat huh?

    image

    Add some candy, tie it with a ribbon and you are done!  Easy Peasy!


      Reminder! Get your guesses emailed in!

      If you haven’t gotten in your guesses for my Retirement List prediction contest, don’t forget to get those in!  You have until tomorrow afternoon but since I know many folks will be busy with Easter activities, you may want to send them in today. Smile 

    Pick 10 stamp sets from the annual catalog that you think will be retiring and email me your list to jennifer@nwstamper.com.  If you have the most guesses correct when the list is posted Monday morning, you will win a shopping spree from me!  See all the details here.

    spaced shop now sig bar

    April Online Stamp Club Hostess CodeG4VQJ7VB
    Use this code to get free exclusive tutorials & project kit! Learn more

  • The Wow Factor of Coloring on Natural Composition Specialty Paper!

    The Wow Factor of Coloring on Natural Composition Specialty Paper!

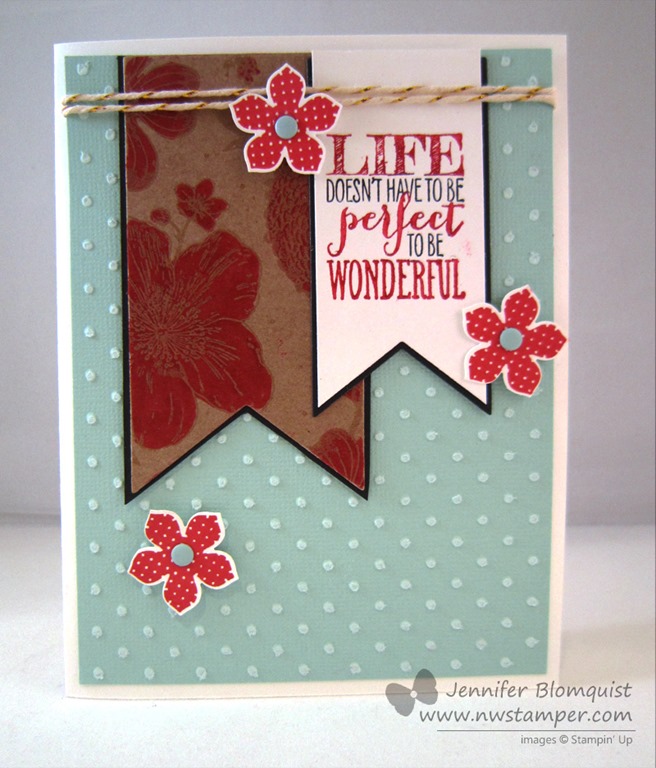
    Have you experienced the coolness of the Natural Composition Speciality Paper?  Once again, I have another project that I can’t believe I haven’t shared yet and my favorite part of it is how the Natural Composition paper makes it look!

    I created this card for a class last month and was playing with a few of my favorite things:

    • Core’dinations cardstock – I used the Pool Party core’dintations cardstock and ran it through my BigShot with the Perfect Polka Dots embossing folder.  Then I sanded off the top of the dots to help them pop a little bit more.
    • Petite Petals stamps & punch – I have to admit I’m totally falling in love with these little flowers!  And the fact that they are so easy to punch out is just awesome!
    • Gold Baker’s Twine – Turns out it just always is the perfect touch of subtle sparkle on your projects.  It took me months to start using it but now I LOVE using it!
    • Perfect Pennants stamp set – the sentiment is my favorite sentiment from the Occasions catalog!
    • and finally – Natural Composition Paper!

    The Natural Composition Specialty designer paper does not look very special in the main catalog and in fact, just about everyone I have in class that uses it tells me that they didn’t think it looked interesting in the catalog but they love it once they try it.  Because you can do things like this:

    So, the thing it it is a stiffer cardstock that looks a bit like cardboard or a stiff kraft cardstock.  But then on one side of the paper there is a clear embossed pattern.  So you can do cool stuff like sponging or coloring!

    In this case, we colored over the flower images with a Real Red marker and after it starts soaking in a little bit to the paper, it will wipe off the embossed image and you get a really cool defined image.  Don’t you think?’

    You can do this with any color or ink (if you want to sponge it) and it is pretty fool proof.  You can’t really mess it up.  Got to love that!

    spaced shop now sig bar

    April Online Stamp Club Hostess CodeG4VQJ7VB
    Use this code to get free exclusive tutorials & project kit! Learn more

    Stampin’ Up! Supplies Used
    Stamps – Perfect Pennants, Petite Petals
    Ink – Markers (Real Red, Basic Black), Real Red
    Paper –Pool Party cord’inations cardstock, Whisper White, Basic Black, Naturals Composition specialty designer paper
    Accessories – Big Shot, Pennants Framelits, Petite Petals punch, Gold Baker’s twine, Candy Dots (Subtles), Perfect Polka dots embossing folder, sanding block