Northwest Stamper

Tag: perfect polka dots

  • Fabulous Flower Shop Summer Card (Convention CASE)

    I had to continue my sharing of the great convention with another card that I loved so much that I had to share it in a class last week.  I really wanted to start playing with my goodies from the Holiday catalog but I couldn’t quite let go of summer yet, and so I gravitated to this cute idea.

    Card designed by Sherrie Schintz

    I loved how this card uses all 5 of the 2013-2015 In Colors together and after you emboss them with the Perfect Polka Dots embossing folder, they are pretty cheery wouldn’t you say?

    We added some of the flowers from the Flower Shop bundle (which includes the stamp set and the posy punch) and of course a bit of glitz with a rhinestone in the center of each.

    Now, I loved the card, but I wanted to add a little bit of something, so we all lined an envelope by creating our own matching designer paper.  Now, when playing with the liners recently I noticed that if you use designer paper that has a dark pattern, you can sometimes see it through the front of your envelope.  So this was an example of using Whisper White cardstock and stamping one side with your preferred image (in this case, we stamped the same flower images in a random pattern).

    Then, grab your NEW, AWESOME Envelope Liners!  Sigh, I love these things… Smile

    image

    They come in 3 sizes:

    1.  A2 – to fit 4.25” x 5.5” cards

    2. Notecards – to fit the 3.5” x 5” cards from the Stampin’ Up! notecards & envelope set

    3.  Square envelopes – to fit 3” x 3” cards

    So, we cut our Whisper White paper to 6”x6” (so you can get 4 out of a 12×12 piece and stamped our flowers.  Then cut it out using the largest envelope die.  Because you have white on the back, you don’t see anything through the front of your envelope, but on the inside you have lots of cute flowers!

    Plus, the liner stops just short of the adhesive on the envelope, so you still have the gummy to seal your envelope when you are ready.  Sweet, huh?  So, grab these dies and get creative and I know you’ll love the results!

    spaced shop now sig bar

  • It’s the Week of Love!

    Yup, its Valentine’s Week and so now is the time to finish up those Valentine’s that you totally meant to make and then got busy and never did.  Not that that would describe anyone writing reading this blog, right? hee hee

    Well, to kick off the week, I wanted to share a card that I received as a swap at Leadership last month.  It uses one of my favorite “love” stamps because it is so understated and pretty cute – the tree from Easy Events.

    card created by Diane Eichfield

    I was finishing creating the cards and treat boxes for my class this last weekend and as I was almost done with the design work, I ran across this stamp.  I couldn’t easily work it into my projects for the weekend, but I wanted to remind others like me out there that have this set to pull it out!

    It is perfect for watercoloring or just using your markers like Diane did.  Add to it the More Amore designer paper and a few embossing folders and some cute just exploded all over your card.

    To Order Stampin’ Up! Products Anytime, click here!

    Are you earning your Northwest Stamper Rewards?

    Every order gets you closer to your FREE stamp set!  Click here to learn more!

  • Masking with Framelits–A Super Pretty Effect!

    So, since folks were pretty positive about my masked Summer Starfruit card in my last blog post, I thought I would share another fun card using masking.  I got this at convention last summer and thought it was just the prettiest!

    card created by Candee Smith

    Label Framelits from Stampin' Up!I love how she used the fact that you get 6 different sizes of the framelits to create a perfect mask for her stamped image.  If I were to do this (and you know I will be doing it! Smile), here is what I would do:

    1. Pick your smaller (inner) size framelit and cut it out from a card front sized piece of scrap paper.  So, roughly 4.25” x 5.5”.
    2. Set aside the cut out piece…won’t need it for this project.
    3. Grab the piece of paper with the label hole cut out of it and lay it over a piece of paper for stamping on.  Tack it down some how, like with tape or a post-it note.
    4. Sponge all along the edges of the hole so you get the border on your stamping paper.
    5. Stamp your design if desired overlapping the edge of the scrap paper hole.
    6. Remove the scrap paper mask.  Cut out your stamped image using the next size bigger framelit.
    7. Woo hoo!  You are done!

    Ok, now I’m totally inspired now.  And I still need to get some swaps done for Leadership this week, so I think I’m going to take this idea and go play today!  Hope you got some inspiration too!


    To Order Stampin’ Up! Products Anytime, click here!

    Need a Spring Catalog or Sale-a-Bration flyer?

    shoot me an email to jennifer@nwstamper.com with your contact info and I’ll make sure one will be making its way to your mailbox shortly!

    Are you earning your Northwest Stamper Rewards?
    Every order gets you closer to your FREE stamp set!Click here to learn more!

  • Birds of a Feather Thank You

    Every year there is a pack of designer paper that I completely overlook until I get the paper in for my new catalog DSP paper share.  Then, as I pull out the sheets to cut it down to 6×6 pieces, I discover some hidden gem.  This year, Birds of a Feather is that paper pack!

    So, I wanted to make some thank you cards for folks who ordered at a recent workshop, and so I pulled out this paper and started playing around.


    And since I was so torn on which pattern of the paper I liked more for this card, I had to make a second version with a different pattern from the same pack.


    I don’t know if it is the colors or the “cute” feel from these designs, but I’m totally digging this paper set!


    Did you know? You can see a big picture of each pattern in a pattern pack online?  It took me a while to realize that even though the information page looks like this with tiny strips of samples from the pattern, you can still get to bigger pictures.  So start out on the product page like this:

    image

    If you click the “More Images” link under the picture, you can flip through bigger pictures of each of the patterns!

    image

     I know it took me a while to figure that out so hopefully that helps someone else!


    To Order Stampin’ Up! Products Anytime, click here!

    Are you earning your Northwest Stamper Rewards? Every order gets you closer to your FREE stamp set! Click here to learn more!

  • A Happy Halloween Owl!

    Halloween is almost here and since I’m so behind on posting, I wanted to hurry up and share a card I made this month using the holiday hostess set called Warmest of Wishes.  I normally don’t get halloween stamps but since this adorable trick or treating owl was a part of the set, I knew this year I had to make at least one Halloween card!

    Trick or Treat Halloween Owl

    I actually got the card layout idea from the October issue of Stampin’ Success (the free monthly magazine sent to all SU demos – see another fun perk of being a demo!)  But I had to play with it and add my own touches.  The trick or treat bag held by the owl is actually stamped in black on Pumpkin Pie cardstock and cut out to add some extra dimension and color.  And with the Rich Razzleberry designer button, I tied linen thread around the Pumpkin Pie ribbon and through the button holes to help gather the PP ribbon.  Then I just used glue dots to hold it in place. 

    This card was fun to make; I may just have to try it for other holidays too!


    Reminder: The Free BigShot Offer Ends Tomorrow!

    If you’ve been looking for an opportunity to do what you love, while getting a 20% discount on your favorite products, now is the perfect time! Through October 31st, you’ll get a FREE Big Shot (or $100 in extra free product of your choice) when you join the Stampin’ Up! family as a demonstrator! 

    This is a killer deal and I know I can’t live without my BigShot. Smile Between the starter kit (valued at over $345) plus this $100 offer, you are getting an awesome chance to start your own business, build your crafting stash, or just get one heck of a Christmas present!  Just remember, you only have until 11:59 MST tomorrow.

    Check out all the benefits of being a demo or Click Here to sign up now!

  • Strength and Hope Pink Ribbon card

    I’m back from my trip to California and I’m happy to share that my nephew’s surgery went well and while he has a lot of recovery ahead of him, he is doing great!  It really is amazing to me how advanced medicine has become these days and how much people go through on the road to a cure.  For example, my nephew was born with a heart condition that would have probably been fatal 20+ years ago but now you would never know he has now had heart surgery twice in his 3 years of life!  Its a lot of work for doctors, nurses, patients, and families; but all that work can lead to miraculous results.

    So, with all this in mind, I thought I’d share with you a card that I received at convention that I thought was beautiful.

    It uses the Strength and Hope stamp set from the Summer Mini – the one Stampin’ Up! is donating $2 for each set sold to the Breast Cancer Research Foundation.  I love the use of the ribbon over the stamped image and then the mixed of the Perfect Polka Dots embossing folder with the Tulip Frame embossing folder.  Sadly, this card did not have the creators name on the back, so if you know who created it…let me know and I’ll give them credit!

    Click here to shop online 24/7

    image

  • Happy Valentine’s Day To You!

    I’m a little late in posting today, but I wanted to be sure I wished all of you a very happy Valentine’s day!  I created this card specifically for sharing today.  Stampin’ Up! and the crafting I’ve done since I was introduced to Stampin’ Up! has introduced me to my second family of amazingly creative and supportive crafters. 

    So, thank you for visiting my blog and for all the wonderful comments and support you share with me.  I hope you have a great day with friends and family!  Sending hugs your way!

    Fun Fact about this card:  This card started as an “oopsie” card from one of my past workshops.  Someone tried stamping on the pink base and it looks like they later accidentally dropped an ink pad on the card as well.  Oops!  But I thought the Chocolate Chip strip and embossed dots layer could be used for another card and when I saw this Ice Cream Parlor DSP, I thought they just worked. 
    And see, if I hadn’t have told you, you never would have known. Smile 

    Happy Valentine’s Day!

    Hugs And Kisses Valentine Recipe:
    Stamps: 
    Love You Much
    Ink:  Chocolate Chip, Melon Mambo, Pink Pirouette
    Paper:  Chocolate Chip CS, Pink Pirouette CS, Whisper White CS, Ice Cream Parlor DSP (sale-a-bration item)
    Accessories:  Perfect Polka Dots embossing folder, Big Shot, Melon Mambo grosgrain ribbon, Scallop Circle punch, Stampin’ Dimensionals

  • Love You Much Valentine

    I’m so excited to be doing a Valentine’s themed workshop next week and so I’ve been busy getting the cards designed and ready to go.  I knew when we started talking Valentine’s Day, that I wanted to use this stamp set, Love You Much.  So, this is one of the first cards I created for the event.

    Because there is one stamp that stamps the three different hearts at the same time and the Heart to Heart punch will punch all three out at the same time, this card can come together pretty quickly.

    Heart-To-Heart Punch - by Stampin' Up!  image

    I stamped the Love You Much image in Cherry Cobbler and then went over the stem in Old Olive using a marker and then filled in the word Love with Pink Pirouette.  To add a little extra fun texture, I also cut an extra piece of Pink Pirouette CS and ran it through the BigShot using the Perfect Polka Dots embossing folder.  Then I just glued it straight onto the card base.  Kind of fun, no?

    I hope folks at the workshop have a lot of fun with this card. Smile  If you are in the Bay Area and would like to make this card yourself, I’d love to show you and your friends during your own free workshop!  Email me a jennifer@nwstamper.com to save your date.

    Love You Much Valentine Recipe:
    Stamps: 
    Love You Much
    Ink:  Cherry Cobbler Classic Ink pad, Whisper White Craft Ink pad, Pink Pirouette marker, Old Olive marker, Cherry Cobbler marker
    Paper:  Pink Pirouette CS, Cherry Cobbler, CS, Chocolate Chip CS, Whisper White CS
    Accessories:  Perfect Polka Dots embossing folder, BigShot, Heart to Heart punch, Stampin’ Dimensionals

  • Stampin’ Up! Convention 2010 – Swaps, Parties, and a Baby!

    I’m back from a trip to Salt Lake City for the 2010 Stampin’ Up! convention with my Mom and upline, Kathy, my dad, and my son.  I love the chance to go meet other demonstrators, including folks whose names I’ve seen on emails but now I got to meet in person, hang out with friends, get super cute stuff, swap gorgeous cards, and generally get pumped about Stampin’ Up!  I have way too many photos to share all of them in one post so I’ll be posting pictures in future posts as well.  But for now, here are some of my highlights.

    Before convention even got started, mom and I participated in two days of preconvention stamp camps and swaps with Late Night Stampers

    IMG_0819 Then came Wednesday – Check in day.  This is the day that everyone lines up in the early morning for a chance to be one of the first to get into Memento Mall (the SU convention gift shop).   My dad was kind enough to go get in line when he got up around 6:15am and he wasn’t the first in line!  By 7:30 the line was around the block. :)  checkin day line photoBut unlike Disneyland, its fun to stand in line at convention.  Everyone is swapping and I even saw a friend of mine from Portland (Hi, Liz!) and got a chance to introduce her to Nicholas. IMG_0856

    After we swapped, checked in and got our free stamps and bag, we relaxed before meeting up for a group photo and swap with our upline group – the SBStampers.  It was there that Nicholas got his very first swap.   He loved playing with this fabric squeaky toy made by Charity Lawson using the Scallop Square die for the BigShot and a squeak toy from a pet supply store.IMG_0871IMG_0873 

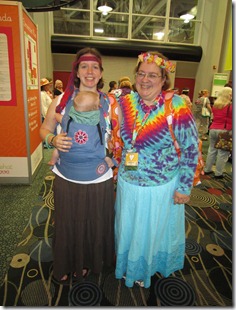
    Later we got dressed up in our grooviest attire for the Flower Power party.  Sadly, I missed getting my face painted by SU illustrators but I did participate in some fun games.

    IMG_0876

    That was only the beginning of a fun weekend.  Here is one of the swaps I created to trade with folks over the course of the weekend.  The flower is made using the Flower Fusion sizzlit that in one tiny little die cuts out 3 flowers of different sizes.  I then folded up the petals and stacked them using glue dots.  It really does pop off the page, which I thought was fun and cool.  I think you could step it up a notch even more by adding a pearl or rhinestone to the center of the flower.  I would have done it but I ran out of time.  But still, i like how it turned out and folks seemed to as well. Flower Fusion Swap Card

    I have to say, I love all the cards I got swapped and will be showcasing come of my favorites in a future post so you can see these great ideas too.  More photos and swaps to come!  Until then… Happy Stamping!

    Convention 2010 Thank You swap card:
    Stamps: Because I Care (hostess set)
    Inks:  Concord Crush classic ink
    Paper:  Basic Black CS, Whisper White CS, Pear Pizzazz CS, Concord Crush CS, Play Date DSP
    Accessories:  Polka Dot Impression Folder, Flower Fusion sizzlit, Little Leaves sizzlit, glue dots.