Northwest Stamper

Tag: masculine valentine

  • Going Global Lost Without You Card

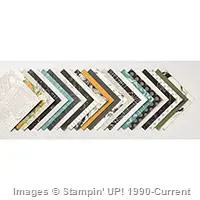
    One of the suites that was super popular during the November OnStage preview event was the Going Places Suite.  It has an interesting stamp set and some cool masculine papers and an AWESOME world map embossing folder.  Put them together and you can get something like this:

    I don’t know quite whether to call this a valentine/love stamp set, but I like how it is different than the other typical sets.

    image

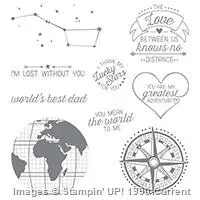
    Going Global Stamp set (wood | clear)

    It is a little hard to see, but we stamped the globe image onto one of the patterned papers and then punched it out with the 2″ circle punch.  Then I layered it over another patterned paper (the yellow) and then put the sentiment on top.  Isn’t layering nice? 🙂

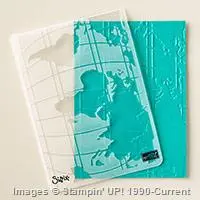
    Did you notice that vintage-y map image on the card base?  It’s not a stamp… it comes from this cool new embossing folder!

    image

    World Traveler Embossing Folder (in the store)

    We inked up the embossing folder with Sahara Sand ink and then laid it over our base cardstock and then rubbed with a bone folder.  This turned our embossing folder into a stamp!  Pretty cool, huh?!  You won’t get a solid image when you use an embossing folder as a stamp, but you get a cool vintage look with it.  So, don’t worry about perfection and just enjoy the neat rough outline.

    This is another set I can’t wait to work with more… and I hope to put a class together with it later this spring.  There is so much potential… and seriously love that embossing folder!

    In other news, today is a new Tuesday which means new weekly deals!  check out what is up this week:

    12494877_10205919447174401_3824887340519341168_n

    Save the Date!  Northwest Crafty Escape Weekend – Spring Fling is coming!

    I’ve had folks asking when my next Crop Weekend is coming and I’m happy to share that it is coming up in April!

    April 22-24th, 2016
    Bellevue Hyatt House
    3244 139th Ave SE, Bellevue, WA 98005

    Save the date!  Registration details will be out in the next week!

    Want to make sure you get the details when they come out?  Make sure you are signed up for my email list.  Sign up here

    NWstamper signature_thumb[9]

    order online button for sig 3_thumb[4]

    Use Hostess Code PGHMVNJM at check out to get a special thank you from me!

    Pick a FREE item with every $50 you spend!  See the Sale-a-Bration catalog.

    See all the tutorials & classes by mail here

    Save 25% on the Latest Weekly Deals

  • Little Bit of Love

    Little Bit of Love

    I have a few more cards to share that have a love theme and so as we work our way to Valentine’s Day in a few days I thought I would post them here for last minute ideas.  Today’s card uses the stamp set that I was so excited to get at leadership and have been woefully slow at using – Love You to the Moon!  I mean, look at these cute images:

    image

    Love You to the Moon – #133143 (clear)/ #133140 (wood)

    I origionally started this card for a Stylin’ Stampin’ Inkspiration design team project themed on using your markers – but I had a little love/hate relationship with the card and ended up doing something completely different.  But, I still like some of the details of this card so I thought I would share it anyway. Smile

    The very first thing that started this whole card off was the diagonal rows of “Love you” on the bottom half of the card.  I stamped most of them in Midnight Muse and YES, I used the stamp-a-ma-jig!  I am an imperfect stamper and am ok with things not being totally straight, but in this case I don’t think even I could have handled the randomness if I didn’t use the stamp-a-ma-jig!  The lone red Love you was colored with markers.  I used Raspberry Ripple for the “Love”, Midnight Muse for the “you” and even Chocolate Chip for the head and tail of the arrow.  Then, to help pull it together, I used my Summer Starfruit maker to create little dots between each of the sentiments.

    After I had the stamping done, I looked at the card and it wasn’t quite sitting right with me.  I loved the look, but I didn’t have a plan for layering anything else on.  So, I started by creating a border using the Watercolor Wonder gold washi tape (both the solid and the stripe patterns).

    Great, that looked good, but now what?

    Well, this is where things started getting haphazard!  I started grabbing scraps of paper and ribbon and stamps and started playing around.  In the end, I liked the pennant idea coming down from the corner so I put those one.

    But they looked too plain, so I tried some faux stitching with my markers.  That was ok, but it still needed something, so I added an additional sentiment to the Raspberry Ripple pennant for a final touch.


    I won’t go so far as to say this is a favorite card of mine, but like I said, I think there are some fun elements to it.  If you have any suggestions for tweaks or improvements, I’d love to hear!  Leave me a comment and when I redo this card, maybe that will help make it look better. Smile

    On a side note –

    If you don’t already get copies of my blog posts each day in email, you may consider Following my blog with Bloglovin.  I currently help people get subscribed using Feedburner but Google has stopped supporting it and so it may stop working when I don’t expect it.  So in the meantime, I’m checking out other options and one option I know a lot of people are liking is Bloglovin.  I’m going to try as well and hopefully love it!

    spaced shop now sig bar

    Stampin’ Up! Supplies Used
    Stamps – Love you to the Moon
    Ink – Midnight Muse, Raspberry Ripple, Markers (Midnight Muse, Summer Starfruit, Raspberry Ripple, Chocolate Chip)
    Paper – Whisper White, Summer Starfruit, Raspberry Ripple
    Accessories – Watercolor Wonder washi tape, Stitched Satin Ribbon (Midnight Muse)