Pattern paper can really make a card interesting and fun… but don’t think you have to stick to rectangles and mats! Play with your patterns and use them to create different shapes in your backgrounds. Like this Carousels & Cupcakes designer paper, it makes the perfect backdrop for the pretty and vintage Carousel Birthday stamp set. Especially when you start coloring and sponging your pieces.
Tag: gold thread
Black & White with Gold Daddy’s Love Scrapbook Layout & a Card using Winter Wonderland designer paper
I know, I normally post cards here on the blog, but I also love to scrapbook as well. Not only is it a fun way to get some of my favorite photos off the camera or computer and somewhere where I’m more likely to see them, but it is also a great way to use some of your favorite papers and elements you have lying around your craft room. For today, I have another idea for both a card and a scrapbook using the Winter Wonderland Specialty paper for non-holiday projects. First up, my favorite – the scrapbook layout!
See! This paper pack is such an awesome black & White & Gold theme, that you can use it for just about any project. I had some black & white photos from when Caitlin was a baby that I thought would go perfectly with this paper pack – and make it easy for me to have fun with the other random stamps and elements I had around my craft room, that I could just have fun and play with pulling this all together. The only thing was that this paper is a bit glossy, so it was hard to take a picture that wasn’t too shiny.

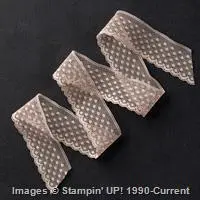
One of the first things I did was layer some of the Black & Gold stripe pattern over the black & white dots paper. I let the Gold frame my photo and decided to keep the rest of the layout simple and stick to neutrals for my color palate. Thankfully the Tip Top Taupe ribbon was just a perfect touch of neutral AND delicateness to balance all the bold feelings of the gold.
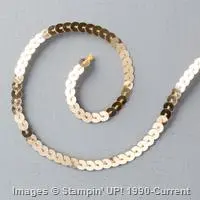
Then I added some Metallic Sequins to the corners of my photo to pull in the metallic and shine from the paper subtly into the photo area and framing even more two of my favorite people in the picture.
Once the photo was in, I started playing with other elements for my page. I started with one of the Project Life Grid Cards to use as a base for my journaling area, but sponged the edges in Crumb Cake to “dirty” it up and go for more of the vintage look. I did a similar trick for the strip of newsprint by grabbing a scrap of Typeset designer paper and crumpling it up. Then I used my sponge dauber to add some crumb cake in to the crumpled paper so it wasn’t so stark and new either. Then I looped some Gold Thread behind my strip of paper to fill in some of the grid card space.
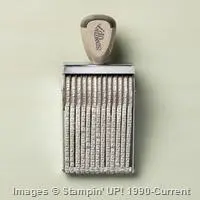
To finish up my title, I used my Alphabet Rotary Stamp to stamp the Daddy’s Love and then just cut around the words with my snips. I just plopped them down over the thread with some dimensionals… and done!
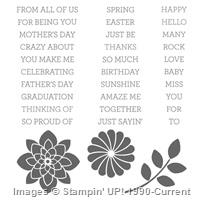
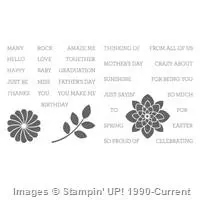
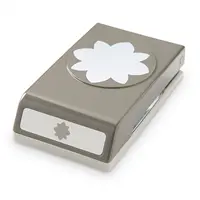
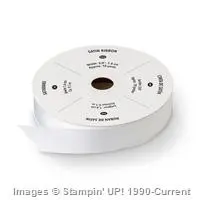
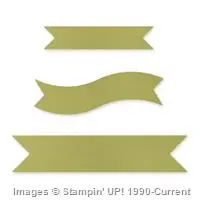
Then I moved on to adding some more elements, from some hearts punched using the Itty Bitty Accents Punch pack on a Circle from the retired Wooden Elements, to some layered banners with Satin Ribbon and the sentiment from the Amazing Birthday stamp set.
It actually came together very quickly and was fun to play and mix and match all my elements from my craft table.

Now, if you aren’t so much into scrapbooking, let me just say this paper pack is great for cards as well. Check it out:
See, the white and gold make really pretty backgrounds for your everyday cards too!
Fun notes for this card:
- The corrugated cardstock makes great elements pieces. Like in this case, I cut a 2” strip and then just used my Scalloped Tag Topper punch to make the cute end and voila! A perfect background piece!
- Use the precision plate when cutting out your words from the Greetings Thinlit, especially when you are using the gold foil paper… you won’t get the polka dots from the die showing through on your word!
- Use the bird builder punch to create some easy leaves to come out from behind your flower. Easy, peasy, done!
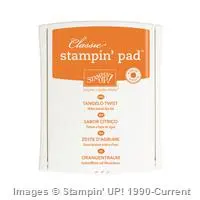
- When stamping the flower, get a cool mottled tie-dyed look by inking up your stamp with Daffodil Delight ink. Get it nice and covered – but don’t stamp it yet! Then grab your Melon Mambo ink and add some color by daubing the pink into onto the inked stamp using a sponge dauber.
- Finish it off with a bit of baker’s twine for a cool pulled together card.
So, I hope these gave you more ideas! Don’t Forget! The Holiday Catalog items retire TOMORROW (1/4)! Some items have already sold out, so make sure to check the list for your favorites along with the Year-End Sale that ends tomorrow as well!
Holiday Catalog Retiring List – see the list of what’s leaving
Year-End Clearance Sale – shop the sale online
![NWstamper signature_thumb[9] NWstamper signature_thumb[9]](https://i0.wp.com/www.nwstamper.com/wp-content/uploads/ad87b4046c1e_C9F6/NWstamper-signature_thumb9_thumb.png?resize=322%2C118)
Use Hostess Code PGHMVNJM at check out to get a special thank you from me!
NEW ITEMS ADDED – BIG Year-End Clearance Sale! See what is on sale here.
See all the tutorials & classes by mail here
Check out the Holiday Catalog Retiring List & Sold Out Updates
Save 25% on the Latest Weekly Deals
Built for Free Using: My Stampin Blog
Love this Post? Share it with your friends!
Using up Some Scraps with Acorny Thank You
As I’m clearing off my desk and getting ready for the new year and the new Occasions Catalog, I am trying to use of scraps and bits and pieces from my desk. It really is a fun challenge to see what neat new designs you can come up with using up those bits left over from other projects. This this card using the Acorny Thank You left overs from a prior card plus some scraps from the Into the Woods designer paper.
Once again, I loved being able to use a paper for a different season then I had stuck in my mind. Its pretty and bright and I love pairing it with the Acorn punch.
Plus add in some Gold Metallic Thread and a Metallic doily and you really have some sunny shine to share with someone.
TIP – If you are trying to do the looping thread look behind an element – like this acorn – coat the back of the item with a bunch of Snail tape runner. Then start by pressing the end of the Gold Thread onto the back of the element, so that it is held by the tape runner. Then continue making loops, pressing into the tape on the back of the acorn each time you loop. Then, when you are done, help secure it in place by pressing a Stampin’ Dimensional over where most of the threads cross to give extra security, plus a way to pop-up your element off your card.
So, don’t let your fall and Christmas papers languish in the back of your paper shelf or drawer now that the seasons are past. Mix them up and use them for any season! I bet you can find some creative uses for them.
![NWstamper signature_thumb[9] NWstamper signature_thumb[9]](https://i0.wp.com/www.nwstamper.com/wp-content/uploads/ad87b4046c1e_C9F6/NWstamper-signature_thumb9_thumb.png?resize=322%2C118)
Use Hostess Code PGHMVNJM at check out to get a special thank you from me!
NEW ITEMS ADDED – BIG Year-End Clearance Sale! See what is on sale here.
See all the tutorials & classes by mail here
Check out the Holiday Catalog Retiring List & Sold Out Updates
Save 25% on the Latest Weekly Deals
Built for Free Using: My Stampin Blog
Love this Post? Share it with your friends!
Acorny Thanks with a Bit of Glitz! Plus new Weekly Deals too
*******************************************
Don’t Forget! Only 3 More Days of the 15% off ALL Stamps Sale!
Shop in my online store and you’ll automatically see the discount
Use hostess code FHRCKER7 to get a special thank you from me!
(excludes hostess stamps, bundles – because they already are discounted, and rotary stamps)
*******************************************A lot of times when I’m working on creating a card for classes or just for my own fun, I start out by getting the mojo going by searching on Google Images or hoping around Pinterest or some of my friends blogs. Usually, I see a few cards that inspire me in different ways and I combine my favorite elements into a card that is something new. Like, maybe I love how the first card uses an embossing folder in the background, and I love the color scheme from a second card, and in a third card, I love how a set of punches are layered together. I’ll mix and match all of those elements into one card that makes me happy.
But then sometimes, I find a card that I love so much that I have to recreate it exactly how I see it. And today’s card share is one of those cases… or should I say CASEs.
(see what I did there? some crafting humor
) I was inspired by the very talented Ilina Crouse and her original card here, to create this card to give out as thank you cards… now if only I can figure out what I did with my completed cards I would be very happy!I think my favorite part of the card is the hint of glitter along the edge of the white sentiment layer! Here is what I did:
- Adhere a strip of the Into the Woods designer paper along the left edge of the card base
- Adhere a 1/4” strip of Gold Glimmer paper to the back of a 3 3/4”x5 1/2” piece of Whisper White cardstock so that only about 1/8” of the gold is showing.
- Mount the white and gold paper to the front of the card using Stampin’ Dimensionals
- Decorate the front of the white cardstock.
This gives just a touch of gold and adds some fun dimension that is subtle. One tip though, I did this on a card that had the crease at the top (so a 4 1/4” x 11” piece of base paper folded in half) but when I gave people this card, because of the dimension on the front, they wanted to open the card from the side. So I recommend using a standard card base with the crease on the left (so a 5 1/2” x 8 1/2” piece of paper folded in half)
For the front, I grabbed the super fun Acorny Thank You stamp set. Here are a few tips for the front of my card:
- Tangelo Twist and Early Espresso make a great fall color combination! That is what I used on my acorn.
- You can cut out your Thankful banner really easily using the Bitty Banners framelits!
- Cover the back of your acorn with SNAIL or other tape runner, and then create loops from the Gold Metallic Thread and press them into the back of your acorn so that the tape covering the back holds them in place.
- Add a few gold sequins from the Gold Sequin Trim for some extra glitz using glue dots

I just totally love this card and may have to make it in other colors and designs. Don’t you love it?
Yesterday was also the start of some new Weekly Deals too! A few fun and festive items are on sale…
And while you are there, don’t forget about the Big Stamp Sale too!
![NWstamper signature_thumb[9] NWstamper signature_thumb[9]](https://i0.wp.com/www.nwstamper.com/wp-content/uploads/ad87b4046c1e_C9F6/NWstamper-signature_thumb9_thumb.png?resize=322%2C118)
But use Hostess Code FHRCKER7 to get a special thank you from me!
Product Supplies Used:
Built for Free Using: My Stampin Blog
Love this Post? Share it with your friends!

