Northwest Stamper

Tag: gift tags

  • How to Make Your Own Gift Bags with the Gift Bag Punch Board Video Tutorial (Walkthrough Wednesday)

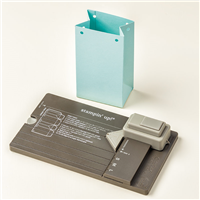
    So, I had the chance to order the new to Stampin’ Up Gift Bag Punch Board during the demonstrator preorder… but I didn’t get it.  I hemmed and I hawwed.  Did I really need another punch board in my life?  But my Mom had one, and so I decided to give it a go.  All it took was me making that first bag and I just HAD to get my own!  Just the idea of being able to make all kinds of cute little bags, luminaries, treats… oh my goodness I have so many ideas.  This may be this years Curvy Keepsake Die for me, now if I can just keep the kids from being too crazy this summer to give me a chance to get through making all my ideas! Smile 

    However, in making my first bag, I realized that you REALLY DO need a video tutorial or someone standing next to you to help you figure it out for the first time, so I figured it would be the perfect topic for a Walkthrough Wednesday (scroll down for the video!)!

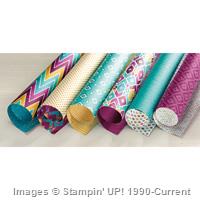
    So here is my bag… isn’t he cute?  I used the new Farmer’s Market designer paper… I like how you can go a bit more rustic/country style on some sides and more elegant or at least all-occasion on the other sides.

    image

    And what bag would be complete without a cute gift tag?  I grabbed my You’re So Sweet stamp set (yes, made for the Mini Treat Bag dies but who says you can’t use it with other things too?  Here I layered the “Just For You” sentiment for the central point of my card.

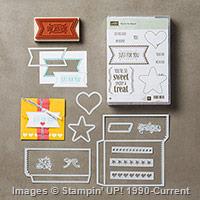
    TIP:  Use the Mini Treat Bag thinlit dies to cut out the center banner piece (they are made to go together!) then layer on a stamped version in a different color that you cut out by hand.

    I also found that the smallest of pearls are a perfect match for the dots in the center of the flourishes above the sentiment.

    Finally, when you get the stamp set, they helpfully pre-die cut the rubber for your stamps including the INSIDES of the Heart and the Star stamp images from this set.

    image

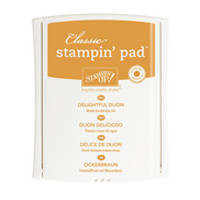
    Use the center of the star stamp to create the star over the sentiment… I used Delightful Dijon, but just be sure to stamp off onto scrap paper TWICE before stamping on your image!

    Walkthrough Wednesday Video

    Check out this video to see how to make this bag from start to finish


    *Note – if you are reading this post in email, click here to view the video.

    Here is another version with the Bohemian Designer paper:

    Don’t Miss the first June Bonus Drawing!  Get 50% off ANY item in the catalog!

    As I do a final push to try to earn a Mediterranean Cruise from Stampin’ Up, I’m doing 2 bonus drawings in June!  Earn your tickets this week and you’ll not only be entered for the grand prize drawing but these bonus drawings and any others throughout the summer!  The first drawing is next week and it is a good one Smile

    • June 23rd – I’ll draw for one person to win 50% off any item in the catalog
    • June 30th – I’ll draw for one person to with a free stamp set!

    PLUS-

    For every $100 in Stampin’ Up product purchased June 15-June 30
    in person or online with the hostess code ZKGTCW6U) = get 5 bonus tickets and a gift from me

    Learn more about earning tickets here

    NWstamper signature_thumb[9]

    order online button for sig 3_thumb[4]

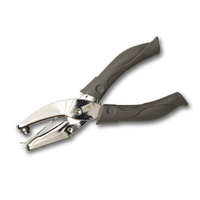
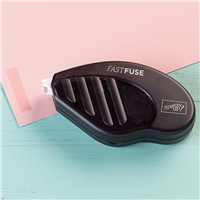
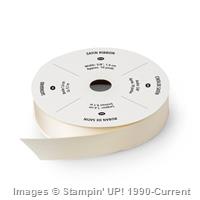
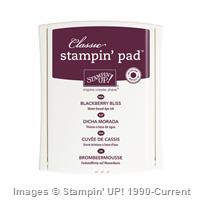
    Project Supplies Used:

  • Christmas Gift Tags from Scraps and No Peeking

    Ok, so Christmas is only 2 days away!  Eep!  Are you ready and have all your presents wrapped?  I’ll admit, I have most of them wrapped but not all of them!

    But wrapping presents got me thinking about gift tags and I was going crazy with the No Peeking set and had so much fun playing with my ribbon and paper scraps to make a variety of tags for this year.  Check out what I made:

    It all started with me stamping a bunch of images on scrap paper and then picking up extra cardstock scraps from around my craft table and punching or cutting them into roughly tag shapes.

    First I grabbed some Gumball Green and heat embossed the “No peeking” sentiment with white embossing powder.  Then I punched them out and added some ribbon and cut out stamped images


    Next were some simple flap style tags.  I scored them so that the heat embossed sentiment (white for the “no peeking” and Early Espresso for the “Jolly Christmas”) would show when it was closed.  Then I decorated the flap with cut out stamped images and ribbon.

    Next I was on to some more simple tags.  I just embossed or stamped the images of the penguin and reindeer and cut them out, then layered them onto the Real Red scallop and Gumball Green circle.  Stamp the “To: From:” sentiment on the back and you are good to go!

    Finally, my last set were my random experiments.  I had an extra reindeer on a scallop circle and thought it would look cute on a piece of Crumb Cake cardstock (really like how this turned out) and I tried to leave enough space so you can actually write who it is to and from.  (I had thought this through in my head before seeing how much space there actually was!)

    And finally, my ultimate in playing.  I had the scrap of Crumb Cake and Real Red and decided to do a twisted tag.  I stamped and then heat embossed the penguin in Basic Black (it looks awesome heat embossed by the way) and then colored in some of the spaces with my Real Red marker.  Then I stamped a little bird next to him also in Basic Black (you can see how much nicer it looks embossed this way).  Then I added some “snowballs” aka pearls along the side.

    So there you have it!  Some quick last minute gift tags to add a touch of handmade to your projects.


    To Order Stampin’ Up! Products Anytime, click here!

    Are you earning your Northwest Stamper Rewards?
    Every order gets you closer to your FREE stamp set!Click here to learn more!


    No Peeking Gift Tags Recipe
    Stamps:
    No Peeking
    Ink: Basic Black marker, Gumball Green, Real Red marker, Early Espresso, Basic Black, Versamark
    Paper: Gumball Green, Real Red, Whisper White, Crumb Cake
    Accessories: Stampin’ trimmer, 1 3/4” scallop circle, 1 1/4” circle punch, Real Red stitched grosgrain ribbon, Whisper White stitched grosgrain ribbon, Crumb Cake seam binding ribbon, Cherry cobbler bakers twine, Embossing Powder (white, black, early espresso), basic pearls, Real Red 1/8” taffeta ribbon, 1/16” hole punch, heat gun, embossing buddy, Stampin’ Dimentionals

  • Ornamental Elegance Kit — While Supplies Last!

    If you are on Facebook, you probably saw about this limited edition kit that Stampin’ Up! is offering to help you quickly make the ornament that is seen on the cover of the Holiday catalog.  You know, this one:


    If you bought the Ornamental Keepsake stamp set and matching framelits, you can make a number of cute variations of ornament type and color (for example, Blue and Silver look AMAZING!!)  But you can make other types like this cute gift tag made with one of the medium ornament images and die:

    tag designed by Kathy Thisted

    But if you don’t have the stamps and dies yet, this is a SUPER deal!  You get all of the images you need to make 10 full ornaments and all you have to do is pop them out of the cardstock sheet.  Plus you get linen thread, Cherry Cobbler Tulle, Faceted buttons, and Jumbo Pearls to make it complete!  You just need to provide the glue and the man-power to put it together. 🙂  All for only $14.95!  Didn’t I tell you this was a great deal??

    When I talked to demonstrator support yesterday because I was trying to put together a class with the kits and needed to know how soon to order them and learned that they started with 5,000 kits available but that they were going fast.  I was advised not to wait long to put in my order.  So if you like this idea, you may not want to wait either!

    Come to my Ornament Kit Class on Dec 16th!

    Want to join me in making these ornaments?  I’ll be holding a class on Dec 16th to make some of these ornaments in a group.

    You’ll get 1/2 a kit – so enough to make 5 ornaments – and I’ll provide the hot glue, adhesive, and tools you need to turn your die cuts into the cool ornament above.  Plus you get the fun atmosphere of crafting with some cool gals.  We’ll each make 1-2 of the ornaments in the kit and then you can take home the remaining supplies to make the rest of the ornaments or use them for other holiday projects and crafts!

    The class fee is only $15 or if you want a full kit – so you can make 10 ornaments – is only $23.

    Please rsvp to jennifer@nwstamper.com as soon as possible so I can make sure to order enough kits.

    To Order Stampin’ Up! Products Anytime, click here!

    Its INK-REDIBLE December!
    Get a FREE set of 10 ink pads with a qualifying order or party; or get them free when you join the Stampin’ Up! family! Learn more

    Are you earning your Northwest Stamper Rewards?
    Every order gets you closer to your FREE stamp set! Click here to learn more!

  • Holiday Gift Tags and Gift Card Holders

    Last friday I held a holiday class around gift tags and gift card holders.  I have to admit, while trying to get project ideas, I got so inspired that I had way to many projects I wanted to do with the class.  I managed to reign it in some, but I still ended up with a ton of little projects for everyone to do.  Thankfully no one was in a rush to get in and out and so we had a great time socializing and crafting. 

    So, if you are looking for some ideas for some fun ways to gift a gift card or easily make a ton of gift tags, here are what we made and hopefully they will give you ideas for your own creations. Smile

    Gift Card Holders

    Gift Tag TinOk, so the first thing we did was decorate one of the skinny tins currently found in the Clearance Rack.  This was intended as a container to hold the gift tags we were going to be making, but it also works well as a gift container to use during the holidays.  I did use some retired paper from last year’s holiday mini, but I just love how it looks on the front of the tin.

    We also added a piece of designer series paper to the inside of the tin to give it a little more finished of a look.

    Tip: when adhering your embellishments to the front of the tin, use Sticky Strip to ensure your decorations stay put long term.

    Next we created two different gift card holders.  The first one was a simple folded pouch with a belly band for decoration.  The base paper is 3.5” x 9.75” and is scored at 3” and 7”.  I used the 3/4” circle punch to punch a half circle out of one end and then used sticky strip to adhere that flap down to the middle section of the base.  Wrap a piece of DSP around the folded up gift card holder and adhere the ends of the DSP together using Snail adhesive.  We decorated this holder using the Tags Til Christmas stamp set and the Decorative Label punch (currently on sale as a Handmade Holiday bundle for 20% off) and some adhesive back pearls.

    Tip:  Did you realized that you can use the “Dec 25th” stamp from Tags Til Christmas and then cover up the date with the Modern Label punch?  In this case, we still used a Christmas sentiment, but you could make it into anything!  Got to love versatility!

    For our last gift card holder, we made what I call the “booklet gift card holder”.  This pattern has been seen all over the internet and you’ll probably see a few different measurements out there.  I found that I liked the following measurements the best:
    – Cut your base paper to be 4 1/4” x 11.  
    – Score at 3”, 5.5”, and 8”

    Once you have your paper scored, fold it into a ‘W’ shape so that there is a shorter peak on the inside of your booklet.  Use your word window punch to cut out two “half-ovals” across the top of that shorter peak and then use the 3/4” circle punch to punch out a half circle in the middle.  Then, embellish the front, back, and insides to your hearts content using ribbon or fabric to tie your booklet closed.  For this project, we used the Candy Cane DSP and A Cute Christmas stamp set, stamping both on the outside and inside of the holder.  I also used a white gel pen to add the little white dots to the Bashful Blue scalloped circle on the front of the booklet.

    Finally, after all that, we made some gift tags as well.  These were made almost entirely with the Tags Til Christmas stamp set with one tag using the Sweet Season set just for fun. 
    Some things you may not be able to see well in the picture:

      -  The ornament tag is actually a tag that flips open.  We folded over a piece of cardstock before stamping our ornament image. Then we punched out the ornament image making sure to have the crease of the folded paper showing in the opening of the punch (so that we were keeping the crease intact). 

      -  We also used a two-way glue pen to add Dazzling Diamonds to the front of the ornament.

      -  The “do not open until christmas” tag was created by first stamping the image on a piece of paper and then punching it out using the 1 1/4” square punch.  You want to make sure the text is aligned at the bottom of your square punch.  Then we punched out a scallop square piece using scrap designer series paper and folded that scalloped square in half.  Finally adhere that folded scallop square to the top of your 1 1/4” square punch out and add some hemp thread to make it a hanger.

    Well, I hope that gave you at least one new idea.  I’d love to have you join me at one of my classes in person, but if you are too far away, please come visit me at my blog again as I’ll be sharing the future projects here as well.  Until next time… Happy Stamping!