Northwest Stamper

Tag: for you card

  • Whimsical Hearts Background with Birthday Blooms

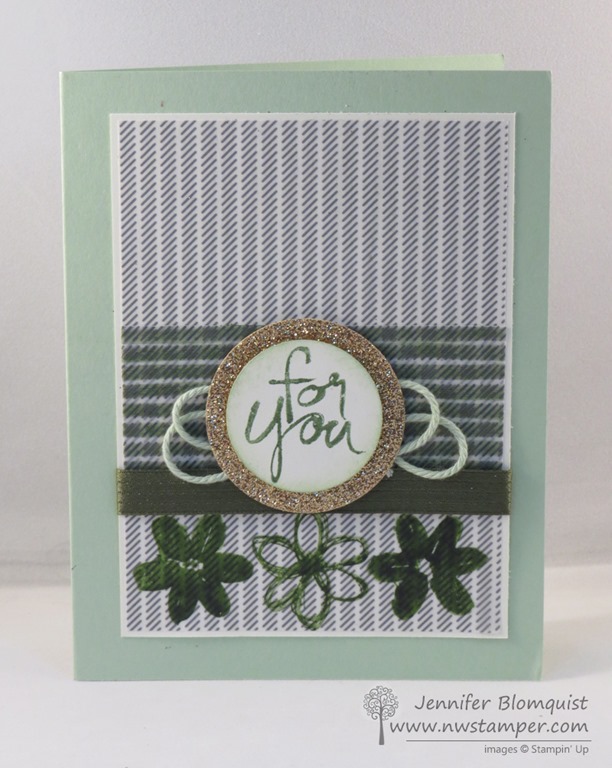
    I just love when a card comes together!  This is one that I was playing with recently for a secret sister swap and I tried a few new things and just had fun playing with paper – and isn’t that what it is all about?  Having fun and just experimenting with stamps, ink, and paper! And with the Birthday Blooms stamp set, you can do all kinds of experimenting!

    Birthday Blooms with Whimsical hearts background

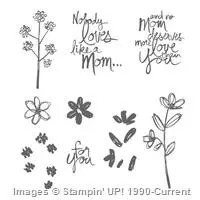
    So when you see the Birthday Blooms stamp set, it is easy to immediately gravitate towards the large flower and start playing with that.  I mean, it is the biggest image in the box, so your eye wants to head straight there right?

    image

    Birthday Blooms (available in Clear mount rubber or wood mount rubber)

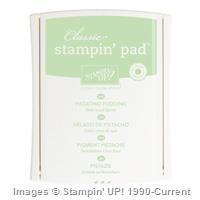
    But I wanted to do something fun with that row of hearts, and turns out it makes a great background for the card.  Just ink it up with Archival Black ink and stamp directly to your card front.

    Worried about even spacing?  Grab some grid paper (the large grid paper placemats are perfect for this) and use the measured gridlines to guide your stamp placement along the way!

    Creative layering is not just for paper!

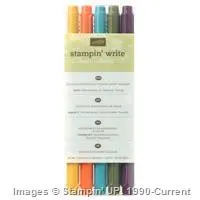
    When I started putting together my main image, I kept it simple by stamping the flower and then coloring it in with markers (I used Pear Pizzazz and Hello Honey).  But then I let my layering take over.  From bold mats around the flower, to different shapes (circle and rectangle) to keep it quirky.  Just experiment and you’ll be surprised what works!Birthday Blooms with Pool Party Glitter Ribbon Close Up

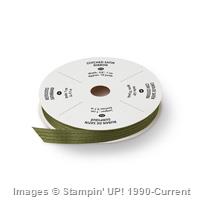
    And don’t just limit your experiments to paper, I started playing with my ribbon and realized it doesn’t always have to go BEHIND ALL the layers of your image.  Try placing it IN BETWEEN some of the layers for a different look and to let more of the ribbon shine.  Especially when you are using a fun ribbon like this Pool Party Glitter ribbon.

    Just start playing and have fun!  That is what this hobby is all about!

    Love Techniques?  February Terrific Technique Class is next week – in person or online!

    If you missed it, I just started a new technique series last month.  Each month, we’ll explore a new tool or technique.  I’ll be sharing how to do that technique plus multiple variations of the technique so you’ll be not only learning the basics but lots of options and new ideas!

    Each month, we’ll make a page in your 2016 Technique Instruction book, plus 2 cards or other projects.  You can join me in person or place an order in my online store and receive the completed instructions page for the book, video tutorials for the technique and their variations, plus the supply kits for the 2 monthly projects.

    Technique series - kissing technique sample

    Want the class to go?

    All you have to do is Shop in my Online store and place an order that is $40 or more before tax and shipping using the hostess code TNCXV4MP at check out.  I’ll send you the completed instruction page and project kit plus links to quick video tutorials for each of the techniques and variations!  Easy peasy, and super fun!

    NWstamper signature_thumb[9]

    order online button for sig 3_thumb[4]

    Use Hostess Code TNCXV4MP at check out to get a special thank you from me!

  • Make Your Own Plaid Paper with Sheer Perfection Vellum

    Make Your Own Plaid Paper with Sheer Perfection Vellum

    Yesterday I posted my Green Card Challenge – where I challenged you to create a card that only uses greens and neutrals and then link them up for fun and prizes.  So, I thought I would play along with my challenge and make something to share as well!  So this is my creation:

    Everyone is loving the Sheer Perfection Vellum that is one of the free Sale-a-Bration items that was released at the beginning of March.  I finally received mine and wanted to play and while this card turned into something totally different than the original plan, I was so excited to discover the idea for making your own plaid with the vellum!

    Tips for making this card:

    • You can customize your Sheer Perfection vellum by coloring with your Stampin’ Write markers over the parts of the pattern you want colored.  In this case, I took some of the striped paper and colored over the slash lines using my Mossy Meadow marker.
    • Make your pattern plaid by laying one piece of the striped paper horizontally over the same patterned going vertically.  Because they are printed on vellum, you will be able to see through and have both patterns show at the same time!
    • How to glue your vellum – with printed vellum like this, use the 2-way glue pen to ink behind the strips.  This gives you lots of holding power without showing through!
    • When doing a monochromatic card, mix and match your inks and embellishments for different shades of the same color to keep it interesting.  Here I used the Mossy Meadow ribbon as a base and then had loopy flourishes of the Pistachio Pudding twine behind my sentiment to pull in the card base color.
    • You can also stamp directly onto the vellum.  When you stamp on top it gives it a bolder color but you still get subtle bits of the underlying pattern coming through.

    Don’t forget, you can only get this Sheer Perfection vellum through the end of the month as part of Sale-a-bration – it’s free with your $50 order!

    Your Turn! Join me for my card challenge! 

    Make a card using only greens and neutrals and post it up HERE.  You have until monday 3/23 and for fun I’ll draw someone randomly to get a small prize from my stash here.  I can’t wait to see what everyone creates!


    NWstamper signature_thumb[9]

    order online button for sig 3_thumb[4]

    Project Supplies Used:
    Easy shopping anytime!  Click the images below to see the item in the online store

  • Build Your Own Stamped Palm Trees and New Weekly Deals

    Build Your Own Stamped Palm Trees and New Weekly Deals

    My family and I are off on an adventure this week as we take our kiddos to Legoland California!  My son is a HUGE lego fan… seriously, he only just turned 5 and we have a ridiculous amount of legos already. Smile  So while we are exploring here in sunny California, I thought I’d share a card idea for bringing the sunny beach to you!

    See?  It’s a build your own palm tree! Smile 

    Tips for making this card:

    • To make your palm tree, grab your Too Kind stamp set and instead of making flowers, turn one of the little stamps upside down and stamp in brown to make the tree!imagesffds
    • Make yourself some whispy clouds by punching out the top to the cupcake builder punch (make it really easy on yourself and do it out of a post-it note, making sure to punch some of the adhesive part).  Use that as a mask as you sponge Soft Sky ink over whisper white cardstock.  Move the cloud around to make as many or as few as you want!
    • To get your beach, just grab scraps of Crumb Cake cardstock and tear the tops off.  Layer on the front of your card for a one of a kind beach!
    • Add your favorite sentiment and embellishments and there you go. Smile 

    And in case you didn’t see these yesterday, new Weekly Deals are up too! 

    11010580_10204053349717405_2159798156492252091_n

    Shop the weekly deals here

    And with that, we are off to see and explore amazing creations with Legos!  If my son in the Legoland Hotel lobby is any indication, this should make for an awesome adventure for my kiddos. Smile 

    2015-02-17 20.16.46


    order online button for sig 3_thumb[4]

  • Dress Card using Designer Fabrics

    I saw a project someone made at convention last year that created the dress part of this card using cardstock and a paper napkin.  Then, when I was looking for ideas for using the Stampin’ Up! designer fabrics, I ran across some cards that used the dress and put it onto a standard card base.  Cute, right? 

    I originally found instructions from Lorraine Castellon-Rowe’s blog and then started playing with the fabrics and papers I had around.  Because I wanted to use the swirly pattern from the Deck The Halls fabric set, I decided to use my swirly pattern Texturz Plates for my BigShot to emboss the background piece of Very Vanilla cardstock. 

    To make the dress bodice, I used a series of punches:

    Dress Card Punch Art Step 11.  Punch a circle using the 2 1/2” Circle Punch for the base of the bodice
    Dress Card Punch Art Step 2 2. Punch out the waistline of your dress using the 1 3/4” Circle Punch.  If you want to be very precise, you can take the cut out from the first side and trace that curve on the opposite side.  Then use the pencil line as your guide when lining up the punch.
    Dress Card Punch Art Step 33.  Punch the neckline using the 3/4” Circle punch

    Then embellish as you like.  I used the adhesive pearls and added some ribbon to the waistline but you could get creative with gems, buttons, embossing, or whatever sounds fun to you.  The skirt was just run through the BigShot using the Scallop Square die though I think for future cards like this, I would probably use the new Scallop Square Duo die.  And then adhere to the back of your bodice.

    It’s a fun card and one you could make in so many variations to be a perfect match for the recipient of the card. I hope you enjoy this project!

    Click here to shop online 24/7


    Just For You Dress Card Recipe:
    Stamps: 
    Teeny Tiny Wishes
    Ink:  Basic Black
    Paper:  Riding Hood Red cardstock, Very Vanilla cardstock
    Accessories:  BigShot, Scallop Square Bigz die, Backgrounds 1 Texturz plates, 2 1/2” Circle punch, 1 3/4” Circle punch, 3/4” Circle punch, Adhesive Pearls, Very Vanilla taffeta ribbon, Stampin’ Dimensionals, Small Oval punch, Deck the Halls designer fabric

  • Punch Potpourri Sweet and Simple Card

    Today I thought I would do a quick card share to show an easy and fun card I made for my friend and downline.  I’ll admit I was in the middle of creating some Valentine’s Day cards when I created it so I think it came out a bit “love-y” due to the colors I used; but I still like it anyway. :)  How can you go wrong with pearls and seam binding ribbon! 

    This card started with the idea of tearing a piece of cardstock and laying it over a stamped image (or set of images – in this case the flower stamp from Punch Potpourri that is a perfect match for the Boho Blossoms punch).  Then I had to add some Rose Red seam binding ribbon because, well, I just love the Stampin’ Up! seam binding ribbon.  I think it is my second favorite ribbon behind the satin ribbon.  Finally, I needed an excuse to play with my new Full Heart punch and so the rest just came together from there.  I stamped in Early Espresso ink and then used Stampin’ Write markers to color in the flowers on the heart image.

    Tip –  I’ve had some folks ask me recently if there is a specific way they should tear their cardstock for projects like this with a rough edge.  In general, there is no wrong way to tear your cardstock, however you can influence the final effect you get depending on how you tear.  Plus, because Stampin’ Up! cardstock has color all the way through the paper (as opposed to some papers out there that are only colored on the surface and have a white or other colored core), the cardstock is very forgiving when you try to do a card like this. 

    If you want an edge that is more roughed up and shows part of the core – like the card above – I recommend holding the paper in one hand and with your second hand, tear down and in towards the hand holding the paper.  That means you are sort of tearing at an angle.  Think of it like you are holding the paper facing you and you are tearing the paper towards your shoulder.

    If you want and edge that is torn but very clean and minimal distressing, I recommend holding the paper in one hand and with your second hand, tear straight down.  This means you are tearing basically perpendicular to the paper, like you are just trying to rip a piece of paper in half.  In this case, think of it like you are holding the paper facing you and you are tearing the paper straight towards your chest.

    Try it out and you’ll see that you get two pretty different looks.

    Now is the perfect time to host a card night with your friends.  Not only can you get this stamp set – Punch Potpourri – for FREE but everyone will get great deals and opportunities to receive free stamp sets as part of Sale-a-Bration.  I have a couple dates left and would love to come show you and your friends some fun new ideas for your creative projects!  Email me at jennifer@nwstamper.com to reserve your date!

    Punch Potpourri For You Recipe:
    Stamps: 
    Punch Potpourri (hostess set)
    Ink:  Early Espresso, Pink Pirouette
    Paper:  Pink Pirouette, Whisper White
    Accessories:  Full Heart Punch, Stampin’ Dimensionals, Pink Pirouette marker, Certainly Celery marker, Adhesive backed Pearls, Rose Red Seam Binding Ribbon