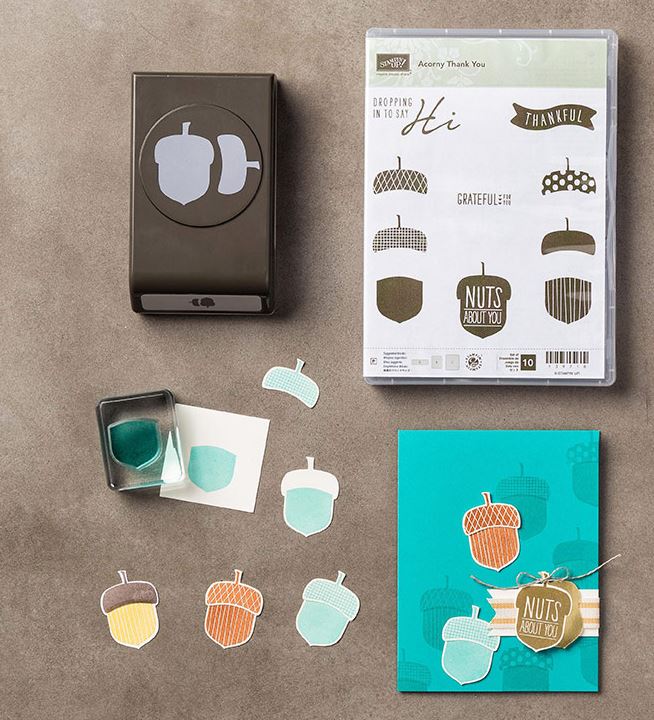
Acorny Thank You for Mojo Monday Challenge
Ahhh… as some of you saw over on my Northwest Stamper Facebook page this week, I finally got in some crafty time just for me and for fun! My mom came to visit and we had an awesome time stamping! I didn’t know where to start so I decided to find a sketch challenge to play…
St Patrick’s Day Special (17% off!) and a Green Card Challenge for YOU!
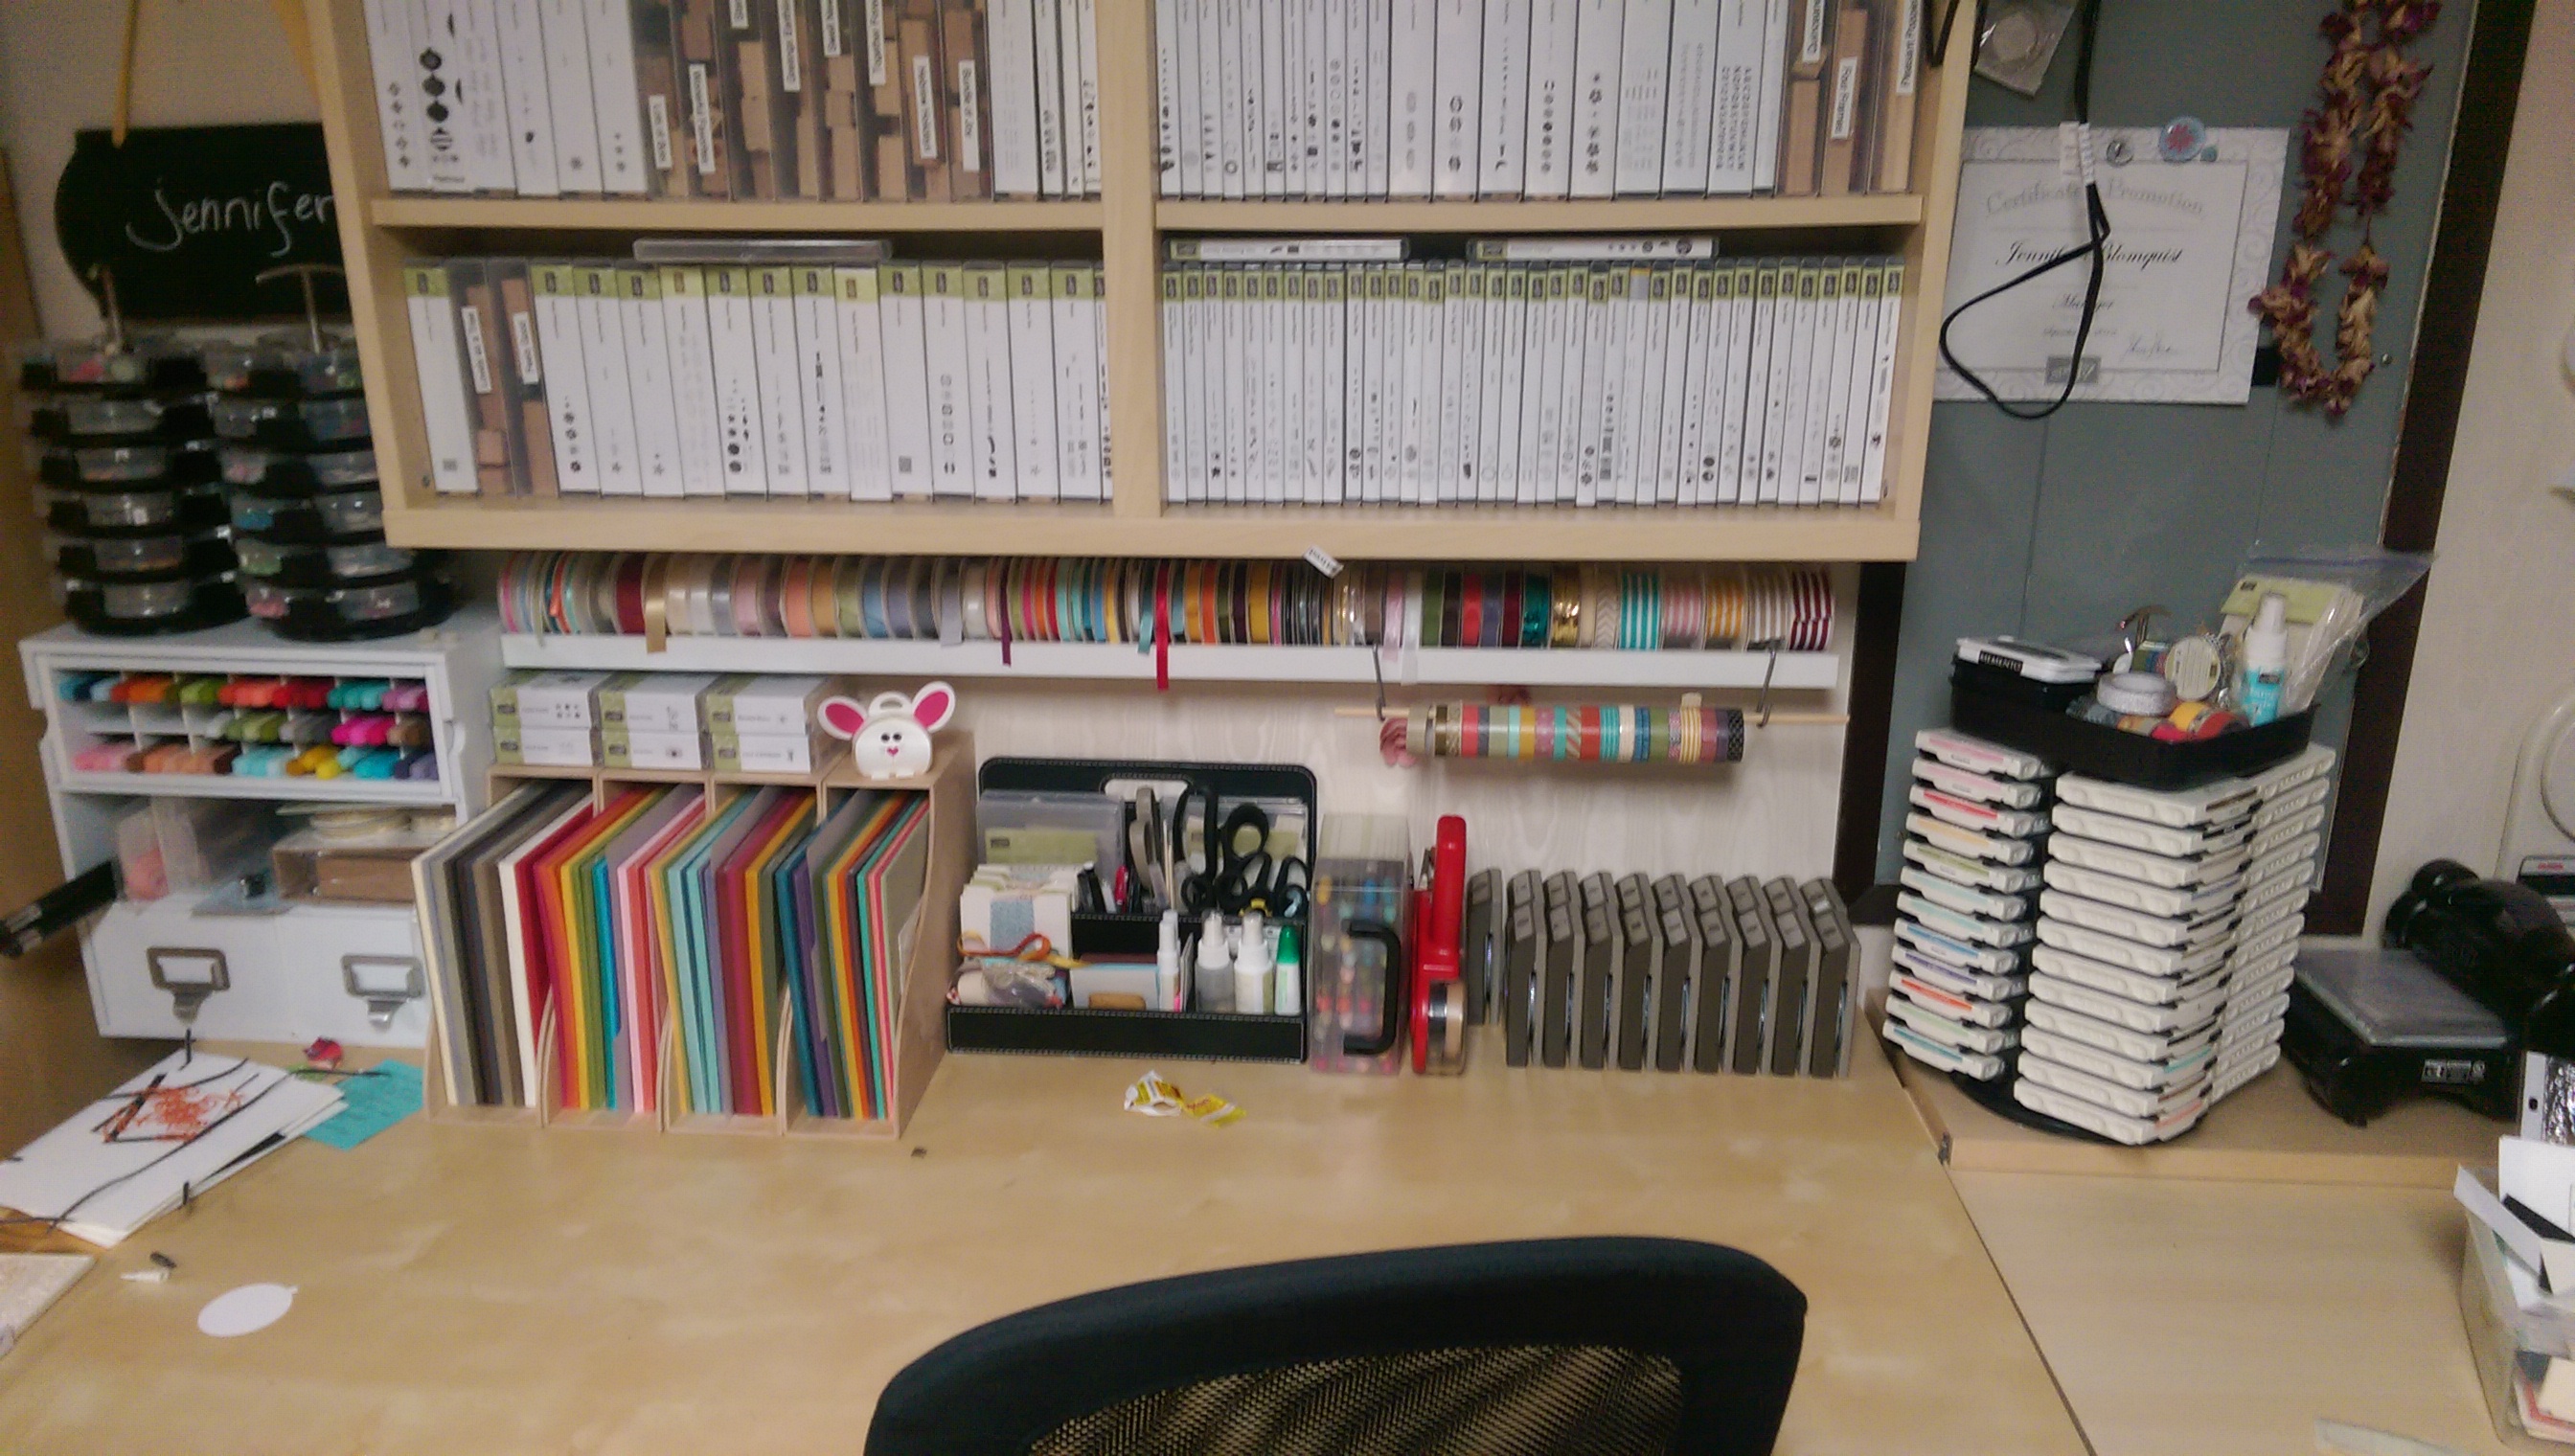
Ok, so I got super distracted last night with organizing my crafting space (I was cleaning and noticed that my now overly large collection of just the larger sized punches were getting too heavy and bowing the bottom of my drawer!) and so it was time for them to move. Though I wasn’t quite sure…
Sweet and Simple Christmas Card with Wondrous Wreath
Nothing like some Christmas cards to start getting me in the mood for the holiday season! The late fall/winter time is my favorite time of the year! Yes, there is Christmas and even my birthday, but I just love all the joy that is everywhere, the twinkling lights, the shimmer and sparkle that you see…
You Did It! Winning Craft Wars: Paper Pumpkin Card
If you were reading my recap of Leadership, I mentioned a fun activity they ran over the course of the conference. They called it “Craft Wars: Paper Pumpkin”! Now, I’ll admit, I haven’t ever watched Craft Wars but I get the general idea (or at least have a guess). You have a pile of miscellaneous…
A Color Challenge with the Stylin Stampin Inkspiration Girls
So I was talking yesterday on Facebook about challenges and how they can be pretty handy when you need a little something to jump-start some craftiness. I’m still looking for feedback on favorite challenge sites and what types of challenges you find most fun to do, but in the meantime, I have one to share…
A Little Watercoloring with On The Grow
I decided to participate in another challenge with week – again with the Late Night Stamper group. This week was challenge #133 and you were to create a thinking of you card that has blue on it. Seemed easy enough and so I grabbed my poor neglected On The Grow stamp set from the summer…
A White Only Card– LNS Challenge 131
Whew! Nothing like a deadline to get me to hurry up and post a card I made this week for a challenge the the Late Night Stampers yahoo group. Each week they post some kind of project challenge, and this week sounded really interesting: Challenge 131: Only use white in your project except you can…