Northwest Stamper

Tag: bellevue card class

  • NEW Class by Mail! Endless Wishes Card Gift Set & Desk Organizer

    I’m so excited to share a new class that I just finished the samples for – the Endless Wishes card gift set!  This was a compilation of many of my favorite new (and returning!) holiday goodies that gave me lots of fun time playing and experimenting and being really stinkin’ glad I got them!  You know… Endless Wishes stamp set, Trim the Tree paper, Stars embossing folder, Stars framelits, etc.  Sigh… so much to love!

    Here is one of the cards where I really got to play a lot with new stuff – what do you think?  Are you loving stars yet?

    The best part of this was that I got to put this class together with one of my downline – Tanya Cabral and so we’ve worked together to design some really fun cards to share at our class in early November (Nov 3rd for those of you in the area that would like to attend. Smile)

    Tips for creating this card:

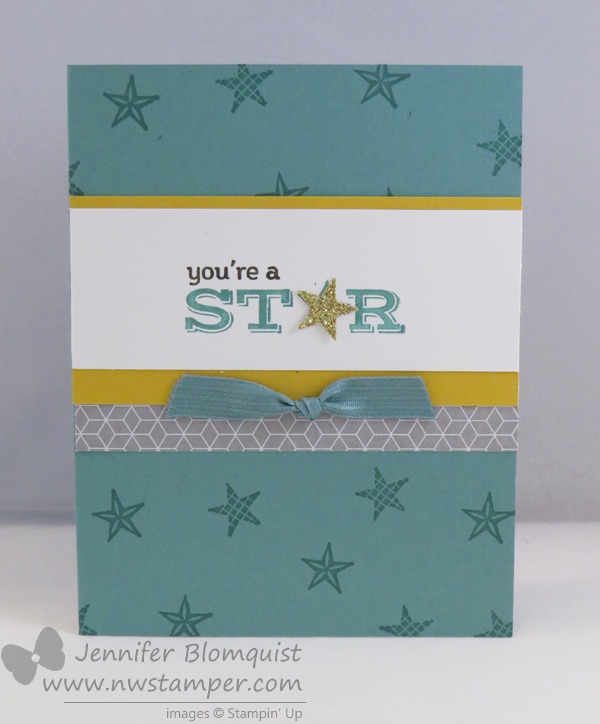
    • The Endless Wishes stamp set is a returning favorite and is fabulous because you have the script font and the small type font.  Mix and match – INCLUDING COLORS – for really unique and trendy looks to your cards.
    • Tie your card together with similar elements – in this case the Stars embossing folder and the Star framelits!  The subtle tie-in helps keep your card cohesive without being busy.
    • Sponge the edges of your die cut elements to help them stand out from the background.  Here I sponged the star with Early Espresso ink and a sponge dauber.

    Ok, and so this isn’t a tip, but don’t you just love that plaid?  It makes it look like the card has a cozy scarf, don’t you think?

    And that is just one of SIX fabulous cards and yes, you see that cozy plaid in a desk organizer that you can actually use year round!  See, I think ahead. Winking smile 

    Endless Wishes Gift Set Class

    If you would like to try out these fun designs, I have a few options for you!

    IN PERSON – Join me on November 3rd at 7pm at the Round Table Pizza in Bellevue (Overlake) where you will get to make 6 cool & unique cards plus a cute desk organizer that will hold all of your cards from the class plus space for any additional cards you have at home or make in the future! 
    You’ll receive your own pack of Trim the Tree design paper, a pack of 20 notecards & envelopes, plus all the extra supplies you need to make the cards and printed instructions so you can make more later! 
    Cost is only $25 or for only $40 get the kit+your own personal stamp set (SAVE over15% on the stamp set this way over the cost of the set + tax&shipping from the catalog!)
    RSVP here

    KIT BY MAIL – Get all the pieces precut and mailed to you in a kit to make all 6 cards and the desk organizer,
    plus step-by-step instructions, all the extra designer paper from the Trim the Tree paper stack and 14 additional cards & envelopes!
    BONUS – get a bottle of Cherry Cobbler dazzling details FREE with the kit by mail
    Cost is only $25+$5 shipping


    SAVE! Add the stamp set with your kit and save over 15% on your stamp set!
    Get everything listed above PLUS your own personal personal Endless Wishes stamp set
    Cost is only $40+$5 shipping


    INSTRUCTIONS ONLY – Get access to the instructions for all 6 cards plus the desk organizer so you can use your supplies at home to make these cute projects.
    Instructions will include all the dimensions, supplies used, and tips for making them as easy as possible!
    Cost is only $4.95  (that is less than $1/project!)


    Note – I will have instructions ready for emailing by Monday of next week.  Class kits will mail out the week of the 28th.

    I had so much fun designing these cards with Tanya that I KNOW you’ll have fun putting them together. Smile 

    spaced shop now sig bar

    Card Supplies Used:
    click on any of the photos below for more details and easy shopping!

  • Sweet and Simple Christmas Card with Wondrous Wreath

    Nothing like some Christmas cards to start getting me in the mood for the holiday season!  The late fall/winter time is my favorite time of the year!  Yes, there is Christmas and even my birthday, but I just love all the joy that is everywhere, the twinkling lights, the shimmer and sparkle that you see everywhere.  Today the Stylin’ Stampin’ Inkspiration girls are sharing some Christmas card joy and this is my card I wanted to share:

    Isn’t it so cheery?!  I love how easy this stamp set is to make these fun wreaths.  You get three stamps that each add a little bit more to the wreath:

    1. The leaves of the wreath
    2. A few accent leaves of the wreath
    3. The berries for the wreath

    Plus there are handle guides ON THE STAMP that help you line up everything just right!

    I was going to try to explain lining it all up, but I realized you would be so much better served by a video, so I’ll put one together for you very soon!

    Tips for making this card:

    • I like to start with a white 3.5”x3.5” piece of white scrap paper and stamp your image with all the leaves so that the guide (an extra “tail” of the photopolymer stamp) is pointed towards one corner.
    • Stamp your second image with the accent leaves over the top with it’s guide pointing towards the same corner (using the corners helps you remember how to line up your stamps)
    • The berries, just stamp however looks nice to you!

    • Keep it simple by using the matching framelits (Wonderful Wreath – and you might as well get the bundle, because you know you will want it and then you get 15% off both!) to cut out the wreath with both the inside and outside cutting at the same time.
    • And just cut out some cardstock with the included bow framelit to make a pretty bow!  Add a pearl for extra bling.
    • The sentiment even fits inside the fabulous Decorative Label punch.
    imageimage

    Make this at my Holiday Card Stamp-a-Stack!

    If you are coming to my Holiday Card Stamp-a-Stack, you’ll get to make 3 of this card; so you’ll get lots of practice lining up your wreaths. Smile   There is still time to RSVP if you’d like to come!

    Holiday Card Stamp-a-Stack #1
    Jennifer’s House in Bellevue, WA
    10/18/2014 at 1pm
    Make 12 cards – 3 each of 4 designs with envelopes for only $25
    They will be lots of ideas that you can replicate if you want to make more! 
    (Holiday Card Stamp-a-Stack #2 with more card ideas will be Nov 15th)
    RSVP here


    And don’t forget to check out the Stylin Stampin’ Inkspiration blog for even more fun holiday card ideas!

    spaced shop now sig bar

    Card Supplies Used:
    click on any of the photos below for more details and easy shopping!

  • Another Star Card with Pictogram Punches

    Another Star Card with Pictogram Punches

    Happy Friday!  It’s going to be a busy one around here between swim lessons, lego summer camp, a vet appointment, and trying to finish finalizing my samples for Monday’s Let’s Make Birthday Cards class.  But, its always nice when the work is fun work!  And if you are in the Seattle/Bellevue area – I’d love for you to join me for my last class before convention!

    Let’s Make Birthday Cards
    7/14 at 7pm
    Panera in Redmond
    details and RSVP here

    Ok, so on to the card share for today… I thought I’d continue the star theme from yesterday with this little guy:

    This is one of the cards the folks in my online In Color Club received in their packets last month.  We were focusing on Lost Lagoon but I just loved the pop of Gold Gimmer Paper and Hello Honey cardstock (which by the way will the be color you all will be getting this month!)

    See, I love this Pictogram Punches stamp set because of all the cute little stars and hearts that are part of the words.  You can either leave them stamped, or punch out your own matching shape to add some extra dimension to your sentiment.

    imageimage

    Pictogram Punches Stamp Set

    Itty Bitty Accent Punch Pack

    I kept it simple by using one of the stars in the set to stamp out my background on the card and then just used the matching punch from the Itty Bitty Accent Punch Pack to make the Gold Glimmer star for the center of the card.

    Yay for star power!  Smile   Have a wonderful Friday!

    Card Supplies Used

    spaced shop now sig bar

    July Online Stamp Club Hostess Code – 7RDHVEKR
    Use this code to get free exclusive tutorials & project kit! 
    Learn more