Northwest Stamper

Category: Baby/Kid

  • Bring on the Pink for Breast Cancer Awareness Month & the Ultimate Pink Blog Hop!

    Bring on the Pink for Breast Cancer Awareness Month & the Ultimate Pink Blog Hop!

    ultimate-pink-blog-hop-badge

    Welcome to the first ever Ultimate Pink Blog Hop – a collection of ideas from Stampin’ UP! demonstrators all over the globe featuring shades of pink in honor Breast Cancer Awareness Month.  Having had a grandmother who had to battle breast cancer, this is a cause that I know can affect anyone at anytime, and I loved the chance to participate in this fun way to play with all things PINK while raising awareness for this.

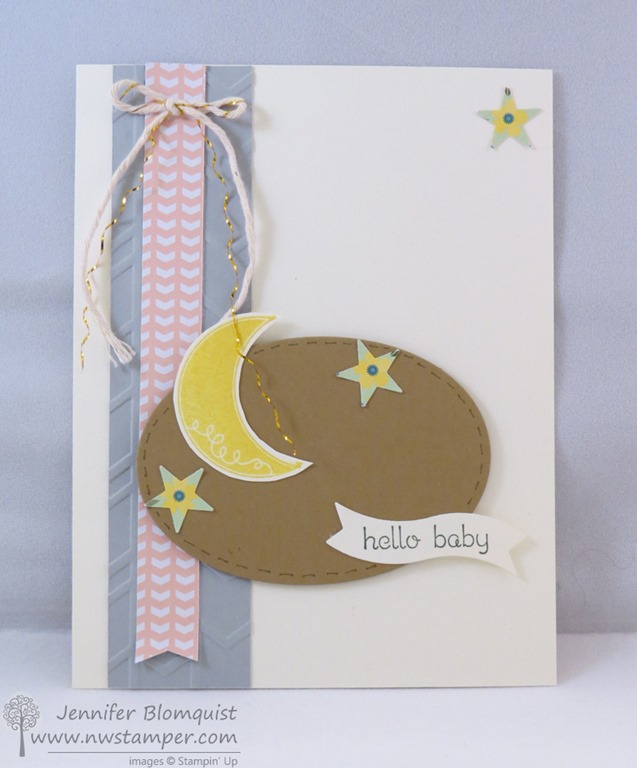
    I started by grabbing all my pink papers and had planned a “Thinking of You” card, but as things started coming together, it took a little bit of a turn and ended up here… 🙂

    baby-girl-card-with-cookie-cutter-christmasI had a lot of fun mixing all my pink papers with some of the new items in the Stampin’ Up Holiday catalog to create an anything but Holiday card!

    Not just “Holiday” items:

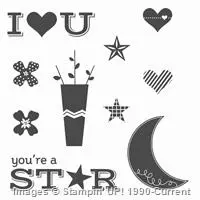
    • Use the bear in the Cookie-Cutter Christmas stamp set to make an adorable bear for a new baby!  Just pick your color to suit the gender or parents…
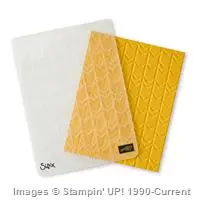
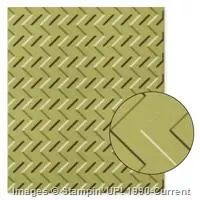
    • Fancy Frost Designer paper has many great anytime designs and is a quick way to add texture without having to pull out an embossing folder and BigShot.
    • Matching Glitz comes from the Fancy Frost Sequins – I shared a Frosted Medallions card recently using them for New Years or bust them out for Christmas, but the sequins are perfect for a baby too.

    baby-girl-card-with-cookie-cutter-christmas-side-view 
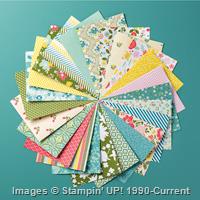
I mixed and matched my colors for this too.  Good thing there are lots of pinks to choose from in Stampin’ Up’s color palette and they all go great together!  I had

    • Melon Mambo for the card base,
    • Pink Pirouette and Blushing Bride cardstock for the stripes,
    • and Blushing Bride glimmer paper for just that extra sparkle.  Gotta love sparkle!

    baby-girl-card-with-cookie-cutter-christmas-close-up 
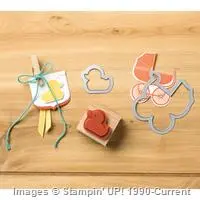
Now if you missed this bear (it’s easy to do!), she comes from the Cookie-Cutter Christmas stamp set.  You stamp the bear body first and then add in the ears (thankfully both ears are together on ONE photopolymer stamp so you don’t have to worry about spacing and you can see what you are doing!) .  Finally, add in the fun face and you are good to go.

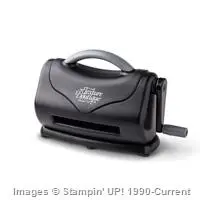
    If you want, stamp the bow and then punch it out with the coordinating Cookie-Cutter punch!  (And yes-siree, they are offered together in a discounted bundle!)

    PS – I have all the project dimensions below if you want to make this for yourself.  🙂

    Thank you so much for checking out my PINK idea and don’t miss out on even more great ideas on this blog hop – To continue to be inspired whether you’ve come from the person previous to me or after me (#4 – Jennifer Blomquist) on the list below, all participants are listed to help you as you journey among us being filled with pink inspiration.


    Happy hopping!

    NWstamper signature_thumb[9]

    order online button for sig 3_thumb[4]

    October Online Stamp Club Hostess Code – YG62GG6C
    Get free exclusive tutorials each month and even get the supplies in a Make & Take kit with your order over $40 when you use the monthly hostess code!

    Project Measurements:

    • Melon Mambo cardstock – 4 1/4″ x 11″
    • Pink Pirouette cardstock – 2 1/2″ x 4 1/4″
    • Blushing Bride cardstock – 1″ x 4 1/4″
    • Fancy Frost designer paper – 1″ x 4 1/4″
    • Whisper White cardstock – 2″ x 2 3/4″
    • Blushing Bride glimmer paper – 1/2″ x 4 1/4″

    Product List

  • Introducing the Stampin’ Up 2015 Annual Catalog!

    Are you ready?  Are you sure you’re ready?  Well, today is the big, fat, exciting day when the new catalog is official out and we get to love on our wishlists and get a few new fun goodies!  I have LOTS to share with you today so make sure you scroll!  I have the new catalog, a printable wishlist, samples, product samplers, In Color club, plus – get 2 free stamp sets of any value when you pick up the starter kit and join my Fun n’ Crafty group of demonstrators – even if you are doing it just for you!

    So, are you ready to dive right in?  Here we go!

    Shop the new Annual Catalog Online!

    2015 Annual Catalog

    the 2015-2016 Stampin’ Up Annual Catalog (click to view the PDF copy)

    Want an easy way to organize what you want to get?  Print out my handy dandy Wishlist!
    image

    Because you know you want to be able to make cute things like these:

    Annual15_p037_a

    New Made with Love stamp set (pg 37), 3×3 envelopes, & the envelope liner thinlits

    Annual15_p066_a_alt

    New Sweet Stack stamp set (pg 66) & the coordinating Cutie Pie Thinlit dies (pg 171), new Striped Cotton Ribbon too!

    Annual15_p077_a

    Gotta love that Flower Patch stamp set and framelits – get them together in a bundle for 15% off too! (pg 77)

    Annual15_p109_a

    New Bold Butterfly thinlits (pg 172 – they coordinate with the ones in the Occasions catalog!), Serene Silhouettes stamp set, new Pretty Petals 6×6 paper stack (pg 144), & new One Big Meaning stamp set (pg 16)

    Annual15_p120_a

    And my personal favorite – those Expressions Naturals wood words (pg 160), plus the new Bountiful Borders stamp set (pg 120) and updated Subtles Designer Paper Stack (pg 144)

    What’s the Big Deal about today?

    There are a number of reasons today is special, so make sure you catch them all so you don’t miss out on any!

    1. Today is the LAST CHANCE to order out of the 2014 Annual Catalog & Occasions Catalog!  But it is also the FIRST DAY to order out of the new 2015 Annual catalog!
      Ends June 2nd (TODAY!)Ends June 2nd (TODAY!)Starts June 2, 2015 – May 31, 2016
    2. Today is the ONLY DAY LEFT to get the old prices – everything is rounding up to the nearest dollar, plus a few items are increasing in price slightly (ink, ink refills, some large punches, the Big Shot, Big Shot plates)
    3. Today is the ONLY DAY LEFT to get the old hostess benefits – they change like so:

      image


    Start Shopping Here
    Please use the hostess code TPEBMGAS and get a thank you gift with your order
    (just make sure to check the box allowing your demonstrator to be able to contact you, otherwise I won’t have your info to send you your gift!)

    1. Today is also the start of a new SIGN UP SPECIAL!  Get 2 free stamps of ANY value when you purchase the starter kit and join my Fun n’ Crafty team of demonstrators – you can join as a hobbiest too!  Join for you, get all the perks, and enjoy the camaraderie of our awesome group of stamping enthusiasts!  There is no obligation, just lots of opportunity. Smile

      image
      If your wishlist is at least $100, then this would be totally worth your while to consider!  It is only $99 plus tax and you get $125 in product of your choice (from any of the available catalogs) PLUS those 2 free stamp sets!

    Did you know?  If you purchase your starter kit before the end of June, you are also eligible to get a 30% discount/commission off your first $150+ order?  When you sign up, you get your demonstrator id and password right away.  You could even place that first order the same day and take advantage of the perks all mentioned above AND get that 30% off.  Sweet, right?!

    Start Shopping for your Starter Kit Here

    Ok, lots to know, right?  Well, I have a couple more things that kick off today that I wanted to share too!

    • Reserve your Product Sampler Today!

    Try a little bit of everything that is new in the catalog for a fraction of the price!  Get 6×6 pieces of all the new papers including specialty papers; plus get a little of all the brand new ribbons and embellishments.

    Purchase a Product Sampler here

    • Start your new In Color collection with In Color Club

    Start collecting the new In Colors and get ideas for how to use them sent to your door with In Color club!  You spread out the cost of collecting all the coordinating items plus you get 2 project ideas completed and included with your supplies each month as an added bonus!

    Learn more about In Color Club here

    NWstamper signature_thumb[9]

    order online button for sig 3_thumb[4]

  • Sweet Hello Baby Card

    Sweet Hello Baby Card

    Every now and then a card comes together that is a little bit of this and that and I just love the end result.  This is one of those cards.  I actually made it for last summer’s convention display boards and realized that I don’t think I ever posted it, so I wanted to share!

    Tips for making this card:

    • This is a perfect card for using up a bunch of your scraps because it is lots of little die cuts and scrap strips of paper.
    • Cut out an oval framlelit shape and then add a little bit of detailing by creating faux stitches using your Baked Brown Sugar marker.
    • Don’t be afraid of letting your stamped elements go off the edge of the oval.  It keeps it more interesting to look at and not too stuck together.
    • Mix and match your stamps like the moon from Pictogram Punches and then the sentiment from Teeny Tiny Wishes for just the card you want.
    • Add some flair to your bows by tieing a bow with the Gold Baker’s twine and then AFTER you tie the bow, unwrap the gold piece for a bit of tinsel.
    • Both the pink designer paper and the paper for the little stars come from the All Abloom designer paper stack.  You can give your paper new life by punching out shapes (like the flowers in the paper) with a different shape (the star from the Itty Bitty Accent Punch Pack)

    Sale-a-Bration Update!

    Did you catch the extra set of annual catalog items that are now available as Sale-a-Bration freebies?  The items in the Sale-a-bration catalog and flyers are while supplies last and with Blendabilities now being available, they wanted to make sure there were enough choices for everyone for the last week and a half of the promotion! 

    So if you want to do some embossing like how I used the Arrows embossing folder above, check out some other options you could earn for free!

    11046535_1060613977288096_7649050778645325773_n

    See the rest of the Sale-a-Bration Items here:

    Start shopping here to get your favorites before they are sold out!

    NWstamper signature_thumb[9]

    order online button for sig 3_thumb[4]

    Project Supplies Used:
    Easy shopping anytime!  Click the images below to see the item in the online store

    Price: $99.95

    Supply List

    Built for Free Using:  My Stampin Blog

  • A Sweet Baby Card with Something For Baby

    A Sweet Baby Card with Something For Baby

    Thank you everyone who sent me notes or left me comments over the last few days!  I stay up late each night creating blog posts to share with you all the happenings at convention and so I’m glad so many of you are enjoying them. 🙂  I remember not being able to attend Leadership and sitting at home watching for someone to post pictures and news from the event, and I’m thankful I have the opportunity to take my turn to share the experience!

    I still need to photograph my swaps and some recent card class projects, so instead I’ll share a baby card I made a little while back.

    So apparently it was baby season at the end of last year as I’ve had 3 good friends have babies between mid-December and mid-January!  So, I’m glad I had this card on hand and it is time to get out a few more welcome baby cards.

    Tips for making this card:

    • Don’t be afraid to go outside the box and to try a different sized card base!  I was playing along with a sketch (its been so long I don’t remember which one it is) and the card back is the standard 5.5″ tall but more like 3.25″ wide.  That skinny width gives the card a whole different look but also gives me room to let my embellishments hang off the side and still fit in my regular envelope.
    • Use the matching framelits from the Something for Baby stamp set to get your little rubber duck cut out… or fussy cut if you feel like that instead of pulling out your Big Shot.
    • The sentiment is actually one long sentence, but with photopolymer it is really easy to stamp part of it and then clean your stamp and see where you are stamping to break it into two lines before punching.
    • Use your embossing folders to only emboss part of your card base by turning the embossing folder sideways (90 degrees) and having it cover only the desired segment of your cardstock. Makes a neat effect, no?
    • Oh, and don’t be afraid to use images to create a custom background and break out your markers to get fun and colorful with your stamps!

    Weekly Deals – Feb 3 to Feb 9th

    Love the punches and that dazzling diamonds glimmer paper!  Lots of fun tools on sale this week.  View these in the online store here.

    weekly deals 2-3 to 2-9-2015

    NWstamper signature_thumb[9]

    order online button for sig 3_thumb[4]

    Project Supplies Used:
    click any image below for more details or to see it in the online store!

  • Birthday Celebrations with a Treat Topper and Card

    2013-12-20 11.51.12Earlier this week, Nicholas (my now 4yr old) had the chance to celebrate his birthday with his Preschool class.  It’s a special circle time they call a “Birthday Circle” and they all sit around and the birthday child can have mom/dad/siblings come in for the circle while they share photos or something special about each year the birthday child lived. 

    And treats…. we “get” to provide treats.

    Now, the school is, um, “progressive” I’ll say and so they are very particular about what kinds of treats you can bring.  The list looks something like this:

    fruits and vegetables – or – 100% fruit – or -dried fruit – or –

    a snack from one particular organic company.  ~Done~

    Now, I am still trying to get my “Crafty Mom” cred, and so I couldn’t just send him in with applesauce squeezies… oh no, they had to be CUTE applesauce squeezies!  So this is what I created for him:

    2014-01-14 09.09.03

    Isn’t that lizard so adorable?

    So, I sat down the night before (at 10:45 pm, talk about last minute!) and started coloring this one stamp from the Tag It stamp set with my markers so I could stamp 18 of these guys for the treats.  Then I cut each of them out using the coordinating Chalk Talk framelits…. oh and adding the tag hole from the same framelit set.  Do a little sponging and then just the right twine to tie them off. 

    (psst – sneak peek alert!  This twine is from one of the accessory sets available as a freebie during Sale-a-Bration!)

    I got them all ready and sent them in to school, but then I figured the teacher needed a little thank you as well, so I had to make a card for her too using the same theme.  You know everything has to be coordinating!

    Ta-Da!

    Same idea but just a little mixing around of extra accessories and embellishments to turn it into a card.

    I needed some bright paper to match the bright colors in the stamped image  (I got lazy, no tag this time) and and then the AWESOME candy dots to break up the pattern of the paper and tie it into the birthday image.

    So see, it is like a coordinating set!

    Card Supplies Used

    Stamps – Tag It
    Ink – Crushed Curry, Markers:  Gumball Green, Real Red, Crushed Curry, Island Indigo, Early Espresso
    Paper – Crushed Curry cs, Whisper White Cs, Real Red cs, Quatrefancy specialty designer paper
    Accessories – Early Espresso Bakers Twine, Candy Dots (Brights, Regals, Neutrals), 2 1/2” Circle punch, Chalk Talk framelits, Stampin’ Dimensionals, Sponge Daubers, twine (SAB)

    So, don’t forget to try something simple and cute when you need a treat for something.  It doesn’t have to be complicated to be fun and appreciated by the recipients… even if they are 3 yrs old!  Smile 

    Want to see more great Birthday Card ideas?

    Today over on the Stylin’ Stampin’ Inkspiration blog, we are sharing different Birthday card ideas.  This was mine, but there are lots of other ideas and variety to check out.  So, hop on over and see what other cute ideas you can try.


    spaced shop now sig bar

  • A White Only Card– LNS Challenge 131

    Whew! Nothing like a deadline to get me to hurry up and post a card I made this week for a challenge the the Late Night Stampers yahoo group.  Each week they post some kind of project challenge, and this week sounded really interesting:

    Challenge 131:  Only use white in your project except you can use a different ink color for your sentiment.

    So, this is what I came up with:

    I know it is hard to see the different elements so I tried taking some close up shots to show the butterflies and flower heart.

    If you want to try this at home, I punched out a large heart from Whisper White cardstock.  Then I punched out a ton of flowers using the Itty Bitty Shapes punch pack.  Then I curled up the flower edges and glued them to the heart with the Tombow liquid glue (the nice thing about both the heart and the flowers being out of white is that if there are gaps, you don’t notice too much!)  Then I added the smallest rhinestone to each flower center.  It takes a bit of time, but looks very pretty in person. 

    The rest of the card is just an embossing folder and the Beautiful Wings embosslit and some white ribbon. 

    Reserve your Designer Paper sampler now! 
    Only $25 for 96 sheets including specialty papers!

    White Challenge Card recipe:
    Stamps: 
    Teeny Tiny Wishes
    Ink:  Elegant Eggplant
    Paper:  Whisper White cardstock
    Accessories:  Large Heart punch, Itty Bitty Shapes punch pack, Beautiful Wings embosslit, Framed Tulips embossing folder, Big Shot, Whisper White Organza ribbon, Stampin’ Dimensionals