Northwest Stamper

Category: Cards

  • Silver Sparkle Meets Everything is Rosy

    Silver Sparkle Meets Everything is Rosy

    I have been working on the cards for my Everything is Rosy Medley stamp a stack class coming up this weekend. I am trying to make lots of project ideas with the Everything is Rosy kit so I can pick my favorite 6 to share in the class. There are so many great pieces and options with the medley kit, that I wanted to do lots of playing!

    Usually I stay within the confines of the core colors used in the collection – Night of Navy, Melon Mambo, Whisper White, and Rose Gold. But, I decided to switch things up a bit and try out some different colors when creating this card.

    Embossed card base with silver glimmer paper and metallic ribbon

    This was supposed to be a simple card that was just a Granny Apple Green card base with the black matted patterned paper and the Striped Metallic Ribbon. But then it “needed something”, so I added the silver glimmer paper. Then the background needed more, so I embossed with the Dot to Dot embossing folder…. then some of the Melon Mambo ribbon from the kit snuck in… then we needed more bling so I added some rhinestones. 🙂

    Does that ever happen to you? You make a card but then keep adding bits here and there because it “needs something”? ha ha!

    In the end, I like it and think it turned out rather nice. But what do you think? Is this a card you would make and use, or it is too busy for you? I’d love for you to leave a comment and share what your card style is!

    Just a reminder – the Everything is Rosy product medley kit is only available in the month of May and while supplies last! You get so much in the kit and can make so many projects with it! Which is great because the paper and the ribbon are soooo pretty.

    Thanks for reading! Shop Stampin' Up by clicking here

    Supplies List:

  • Painted Season Ideas for the Last 2 Days of Sale-a-Bration 2019

    Painted Season Ideas for the Last 2 Days of Sale-a-Bration 2019

    I love when you find a stamp set and coordinating patterned paper that work for a wide range of seasons and sentiments; and that is what the Painted Seasons bundle turned out to be for me this Sale-a-Bration! So, since we only have 2 days left of Sale-a-Bration 2019, I thought I would share with you some of the projects we have been making in my classes in the Seattle area over the last few months with this bundle.

    I got the Painted Seasons bundle (free stamp set and paper pack – with your $100 purchase) because I loved the paper, and thought the stamp set was ok. Turns out, I love the stamp set just as much as the paper because it stamps beautifully every time for me!

    Painted Season bundle card with poppy parade and crumb cake layers
    Keep your colors simple and let the images POP for you!
    Stamp set – Painted Seasons**, Part of your Story**
    Ink – Poppy Parade, Soft Suede, Granny Apple Green
    Paper – Painted Seasons designer paper**, Poppy Parade CS, Crumb Cake CS, Whisper White CS
    Accessories – Story Punch**, Poppy Parade ribbon, Four Seasons framelits**
    ** item is only available through 3/31 as part of Sale-a-Bration or Sale-a-Bration coordination

    Take the same idea of the first card and change the orientation of the layout and switch up the images from the Painted Seasons designer paper and stamps. The base supplies are all the same, so with just a change of colors and images you can get another beautiful card.

    Painted Seasons with the Story Punch layered  die cut card
    Stamp set – Painted Seasons**, Part of your Story**
    Ink – Pool Party, Lemon Lime Twist, Basic Grey
    Paper – Painted Seasons designer paper**, Whisper White CS
    Accessories – Story Punch**, Calypso Coral ribbon, Four Seasons framelits**, Stampin’ Dimensionals, Watercolor Pencils, Aqua Painter, Frosted and Clear Epoxy Dots
    ** item is only available through 3/31 as part of Sale-a-Bration or Sale-a-Bration coordination

    See what I mean? Really pretty cards! And you could change up the images but leave the colors the same in the first card and turn it into a Christmas Card! But, still need convincing with more ideas? Check these out:

    This is one when you are feeling fancy and want to go for all the layers! Use Vellum to mellow out one of the brighter patterns in a designer paper pack, and then let your favorite bold pattern shine front and center.

    Layering Vellum over Patterened Paper and Stamping on Patterened Paper
    Stamp set – Painted Seasons**, Amazing Life
    Ink – Early Espresso, Call Me Clover
    Paper – Painted Seasons designer paper**, Sahara Sand CS, Early Espresso CS, Whisper White CS
    Accessories – Stitched Rectangles Thinlits, Poppy Parade ribbon, Four Seasons framelits**, Stampin’ Dimensionals
    ** item is only available through 3/31 as part of Sale-a-Bration or Sale-a-Bration coordination

    And finally, a sweet and simple card that uses a single stamp and just some basic coloring for a bold statement.

    Floral Phrases makes a great quick and simple card that is perfect for any hello or notecard
    Stamp set – Floral Phrases
    Ink – Memento Black, Granny Apple Green Stampin’ Blends combo pack, Pool Party Blends combo pack, Daffodil Delight Stampin’ Blends combo pack
    Paper – Painted Seasons designer paper**, Smoky Slate CS, Whisper White CS
    Accessories – Stampin’ Dimensionals
    ** item is only available through 3/31 as part of Sale-a-Bration or Sale-a-Bration coordination

    They are all a bit different and all totally fun! I hope they gave you some inspiration for making projects for yourself at home.

    *** Don’t miss out! You only have through tomorrow night (3/31) to get your favorite exclusive items as a free gift with purchase for every $50 or $100 in your Stampin’ Up order. You can see all the exclusive options available (and they’ve added a lot!) HERE

    If you have more than $99 in product in your wishlist, don’t forget you can sign up for the Demonstrator Starter kit and get all that up to $175 in product for only the $99 as part of the Sale-a-Bration bonus***

    Thanks for reading! Shop Stampin' Up by clicking here
  • Faux Watercolor Writing Made Easy with the Stamparatus {Blog Hop)

    Faux Watercolor Writing Made Easy with the Stamparatus {Blog Hop)

    2018 Holiday Catalog Cover

    Woo hoo!

    It is the first day of the new Stampin’ Up Holiday Catalog and I’m here with a few of my team members to share with you some really cute ideas from the new catalog.

    I mean, gotta kick it off right with some inspiration for you!

    Don’t forget! If you earned Bonus Days certificates in August, you are now able to use them!  You have until the end of September to use your certificates.  You can use them on any order and as many as you want in the order! So, if you see something you love from the ideas we share, take advantage of those $5 credits to get a deal on them in September!

    Fun n Crafty Blog Hop Badge

    Ok, now back to today’s project.  One of the things I love doing with my group is swapping when a new catalog is being released.  Many of us preorder some of the new product and then create cards to swap with each other so we have more ideas and samples to share.  So, my project I’m posting today is the card I created for our swap.  I know this is the “holiday” catalog and so there are lots of great Christmas, Halloween, and Thanksgiving/fall sets.  But I spotted this Mean So Much stamp set and love how it is unique and perfect for any time of year.

    Mean So Much Faux Watercolor Lettering

    Mean So Much Bright Color with Woodgrain Card

    One of the things I love about this stamp set is how neat the sentiment looks with all the different colors of ink.  I’ve seen this type of coloring – Watercolor Lettering – before and it often takes inking a stamp partially, cleaning it off, inking it up in a different area stamping again, rinse and repeat.  Or you can brush the lettering with an aqua painter and then tap in liquid ink.  However,  this stamp set breaks it up for you and makes it much easier!

    Here is what the stamp set looks like:

    Mean So Much Stamp Images

    You see those strange faded partial letters?  Well, they actually layer surprisingly easily to create this sentiment!  So you end up with Faux Watercolor Lettering!

    Mean So Much faux watercolor sentiment close up

    Tips for getting the letters to line up
    1. Use the Stamparatus!  With the Stamparatus, you can place all 4 images on the 2 clear plates included with it and this allows you to place each stamp and try it out on scrap paper so you can make sure you like your alignment before stamping your final project.  Because once you like it, you know the stamps are always going to stamp in that same spot.
    2. Start with stamping the last part of the sentiment first (“uch to me”).  If you stamp the last part first, it will leave a large enough image on your paper, that you can easily see where you need to position the next part of the sentiment (“u mean so uc”).
    3. Work your way from right to left on stamping the sentiment. Stamp the first image, and then set the next stamp over your first image.  Since these are photopolymer stamps, you can see through to know exactly where to line up your image.
    4. Play with color combinations. I spent a while trying out different color sets until I found the combination I liked best for this card. Start by looking at patterned papers or embellishments to see which colors go together well and then branch out into what calls to you.
      For this card I used the following colors:

    Add Other Fun Accents like WoodGrain Textures paper, sequins, and ribbon!

    So, once I had the sentiment how I liked it, I pulled together the rest of the card.  I cut out the heart from the same stamp set and added one of the small stars from the Twinkle Adhesive Backed Sequins.  And because one star or sequin is never enough, I added more to the upper left corner as well!

    Mean So Much woodgrain and star sequins card

    Finally, for the bottom, I used scrap strips of the Woodgrain Textures designer paper and layered a bit of the Powder Pink Mini Ruffled Ribbon underneath so a hint peeked out.

    So I hope you enjoyed the idea I shared with you today.  Remember, just because it is in a holiday catalog doesn’t mean it isn’t useful all year round!  Now, I invite you to check out even more fun ideas from more of the Fun n’ Crafty Stampers:

    1. Stacey – A Work of Carte
    2. Christine – Artful Musings
    3. Merit – MB Squared Designs
    4. Nicole – Inky Fingers Stamping
    5. Jennifer – NW Stamper<— YOU ARE HERE
    6. Tobe – The Craft Sea
    7. Pamela – Stinky Tofu

    *** Please leave a comment at the end of this post and on the blog hop stops, and let us know what you think!***

    Fun N Crafty Blog Hop - Visit Previous Blog
    Fun N Crafty Blog Hop - Visit Next Blog

    Want to make this project at home?  Here is what you’ll need.  Click any picture to find it in the online store –  

    Thanks for reading! Shop Stampin' Up by clicking here

  • 2018 OnStage Display Stamper Project Idea Submission

    2018 OnStage Display Stamper Project Idea Submission

    I’m super excited to be traveling to OnStage Live for the Stampin’ Up 30th Anniversary party!  Almost 10,000 demonstrators from around the world are going to be descending on Orlando, Fl in November for 3 days of celebration and excitement as we see the newest upcoming spring releases.  This year, they are inviting some number of demonstrators to be display board stampers and design ideas and inspiration for all those demos coming to OnStage.  I would love to have the chance to create and share for OnStage, so I wanted to pull together some of my favorite cards & projects from recent classes and my own craft room playing. 🙂  Those of you stopping by from Stampin’ Up’s home office, thank you for your consideration!

    Card Ideas

    A lot of my cards lately have been about mixing and matching different project supplies from my craft room so you can see how they go together.  The cards are a bit more clean and simple (I tend to either go lots of layers or clean and simple).

    Ombre Sponging with the Sponge Brayer, mixed with coloring rhinestones using a sharpie and the amazing Wood Textures designer paper!  It makes the perfect background for the Rooted in Nature stamp set.

    (See all the details for this Ombre card HERE)

    Simple layers to highlight the amazing new colors – Soft Seafoam & Grey Granite with Pool Party.  Plus using the Stamparatus to get perfect background stamps using the Handwritten background stamp.  The leaf and sentiment are from the Tropical Chic stamp set.  Finally, I used my favorite Grey Granite texture weave ribbon for a bit of texture. Because everything is cuter with ribbon and/or embellishments!

    This last card was showing how mixing and matching embossing makes for awesome effects!  I stamped some and heat embossed extra of the background dots from the Dragonfly Dreams stamp set. Then we layered over it some circles that had been embossed with the Hexagon Dynamic Embossing Folder.  Add on a glittery die cut and simple sentiment and you have a card that wows in person!

    (See all the details for this dragonfly card HERE)

    Scrapbook Layout 12×12

    I love using patterned paper to create scrapbook layouts and layering them to make my photos really stand out!  I wasn’t too sure at first about the Tranquil Textures designer paper but it was just the right look and colors to go with this photo of Caitlin at the beach.  The extra embossing with the sneak peek Corrugated Dynamic Embossing folder was a fun touch.  Plus it is soooo easy to make longer than 6″ pieces look continuous with this embossing folder.  It is going to be a must-have from the upcoming Holiday Catalog.

    Though I just have to show you a close up of the page title!  I did gold foil backed die cut words from the Sunshine Wishes thinlits.  And even created my own “my” by cutting up another “sunshine” and gluing them together!

    3D Projects

    Gift card holder, designed to look like a pretty present!  Mixing the August Special – Stitched Seasons framelits with the sneak peek of the upcoming Merry Christmas to All stamp and dies bundle.  Plus the awesome Cherry Cobbler double stitched ribbon and Red Rhinestones from the Annual catalog.  🙂

    Inside the gift card holder box!

    And a gussied up Silver Mini Gable Box.  I did this at an event to show people how the Support Ribbon dies and matching Ribbon of Courage stamp set are for more than just support cards.  Most people didn’t even realize these flower and leaf dies were in the set!  An easy way to make a perfect favor box.


    I hope you enjoyed my projects I shared today.  I’d love to hear what you think by having you leave me a comment and sharing which is your favorite!

    Some of these projects are new and I’ll be sharing full details soon on the blog, so please stop back by or leave me a comment and I can share more!  I hope to see some of you at OnStage in November as well!

    Thanks for reading! Shop Stampin' Up by clicking here


  • Mix & Matched Gold for the Perfect Friend Card

    Mix & Matched Gold for the Perfect Friend Card

    Alright, we’ve reached the last day of my 10 days of Celebration of my 10 years of being a Stampin’ Up demonstrator!  I have been sharing projects and ideas over the last few days and hopefully you’ve found some fun ideas to try.  Now, since this post was supposed to go live yesterday (whoops!) I’m extending the deadline to enter all the giveaways until 9pm pst tonight.  So, make sure you have followed the links near the end of this post to enter all of the prior days by leaving comments on the blog and then leave a comment for todays as well.

    I am also offering a free gift with purchase on all orders today – you get to pick your favorite gift that I offered over the last 9 days to be your freebie!  If you round your order up to $50, don’t forget you’ll be earning a bonus days coupon to boot!  So, stack on the extras while making a dent in your wishlist. 🙂Bonus days! Spend $50, get a $5 certificate to use in September

    Today’s Project – Gold & White Friend Card

    Elegant friend card with Springtime Impressions

    I was blown away by the card I’m sharing with you today.  It was created by my friend Breelin Renwick – who is an amazing stamper – for a swap.  It is such a good example about how little touches of gold can really make a huge impact on the finished look of your card!  This card mixes and matches the gold foil in the doily, punched out leaves using gold foil paper, and the gold mini sequins.

    Elegant friend card with Springtime Impressions gold foil leaves

    The sentiment and stamped flowers is from the Love What You Do stamp set and it goes so perfectly with the rest of the items from the Garden Impressions suite.  I will admit, the watercolor impressionistic flowers and designs from this suite doesn’t call to me when I see it all together like in the pictures in the catalog; but changing out the stamp set and using the designer paper and the dies as a pop of texture and color really works for me!  It makes for a stunning, soft background that lets your shinier elements really stand out, don’t you think?
    Elegant friend card with Springtime Impressions embossed die cut

    But the hidden amazing touch is the *embossing* using a thinlit die!  Can you see it in the picture above?  The large, corner die that cuts out flowers and leaves was instead used to emboss the paper, making a pretty raised texture without the need for fussy gluing.  To get this effect, you need the Big Shot Embossing Mats.  They come with a guide that tells you how to use ANY of your dies for embossing instead of cutting.  The embossing mats are a mix of silicone and thin plastic sheets that allow you to get just the right shim where your dies can be pressed into your paper to give the raised impression but not pressed so hard that they cut your paper.  So awesome, right?!

    I’ve used the embossing mats before in class, so I promise I’ll post more project ideas with them soon!

    Make it at home!  Here are the supplies you’ll need:


    LAST DAY – Anniversary Celebration

    Its the last day of my 10yr Anniversary Celebration!  I was a little behind on getting day 10 out, so you have until 9pm PST TODAY (8/9) to get your comments and orders in before I draw winners tonight!

    Quick links to enter for the first 9 giveaway gifts here:

    Day 1 giveaway | Day 2 giveaway. | Day 3 giveaway | Day 4 giveaway | Day 5 giveaway | Day 6 giveaway | Day 7 & Day 8 giveaway | Day 9 giveaway

    DAY 10 GIFT– Free gift with a $40+ order – YOUR CHOICE!
    Pick any of the gifts from days 1-9 and you can choose which you would like with your order TODAY ONLY!

    you must use host code 3XPZF4KW for orders under $150
    Shop here

    Peaceful place watercolored card

    DAY 10 GIVEAWAY – WIN A SPOOL OF BERRY BURST METALLIC EDGE RIBBON!

    TO ENTER – Leave a comment on this blog post sharing what type of project you think you’ll be working on next to be entered to win!  Winner drawn randomly on 8/9/2018.

    Berry Burst Metallic Edge Ribbon

    Don’t forget – you can go back and enter all 9 of the previous days giveaways.  You have until 9pm PST tonight to get your comments in. 🙂  Good luck!Thanks for reading! Shop Stampin' Up by clicking here


  • When Life Gives You Lemons, Make a Card!

    When Life Gives You Lemons, Make a Card!

    Today I had to share with you this fun card I received as a swap card at OnStage.  One of the things I love to do at Stampin’ Up events is swap.  You get such great ideas, especially with stamp sets and accessories you might not have yet.  I’m still trying to decide if I want to try to organize an official swap for the OnStage event in Orlando in November… but either way, you know I will be there ready to swap with everyone! 🙂  Will you be coming and joining me there?

    This card was created by Theresa Argonza and I loved the colors she used to make this card.  The Night of Navy cardstock is the perfect backdrop to these fun and bright lemons.  Check it out:

    lemon zest - if life gives you lemon night of navy card

    This stamp set is great for a number of different types of cards, but this sentiment is good for thinking of you and sympathy cards.  You can decide if the right finisher is

    • Live it with zest!
    • Chuck them right back
    • Squeeze them for all they are worth

    How fun are those sentiments?  I especially love the “chuck them right back”. 🙂

    lemon zest layered die cuts when life gives you lemon card

    The layering on this card was also brilliant too.  It really gives your cards a cool look when you layer embellishments in between matting layers of your main sentiment.  Like how there is a lemon peeking out between the vellum mat and the sentiment layer. So, definitely give it a try!

    Make it at home!  Here are the supplies you’ll need: 

    Anniversary Celebration

    I hope you have been entering each day.  I’m so grateful for everyone who has been a part of my 10 year adventure and I want to give to as many people as I can to give back to you. 🙂

    You have until August 8th to stop by each of the 10 anniversary blog posts and leave a comment to be entered to win that day’s giveaway item.
    ***I’ll be drawing for all 10 items on 8/9 and then posting the winners! ***

    Enter for the first 6 giveaway gifts here:

    Day 1 giveaway | Day 2 giveaway. | Day 3 giveaway | Day 4 giveaway | Day 5 giveaway | Day 6 giveaway | Day 7 & Day 8 giveaway

    DAY 9 GIFT– Free gift with a $40+ order – Stampin’ Blends! Pick your favorite combo pack
    you must use host code 3XPZF4KW for orders under $150
    Shop here

    Stampin Blends

    DAY 9 GIVEAWAY – WIN A FREE PACK OF THE PEARLIZED DOILIES!

    TO ENTER – Leave a comment on this blog post sharing what item you hope will be in the Stampin’ Up holiday catalog (or you are most excited for if you’ve seen peeks already) to be entered to win!  Winner drawn randomly on 8/9/2018.

    Stampin' Up Pearlized Doilies

    Don’t forget – we have one more day of gifts and giveaways, so make sure you stop back by for the last one soon!

    Thanks for reading! Shop Stampin' Up by clicking here

  • Springtime Impressions Butterfly and Vellum Card

    Springtime Impressions Butterfly and Vellum Card

    We are on our last day of our family trip and I realized we were so busy yesterday that I didn’t get day 7 of the anniversary celebration posted…oops! Well, today I have a pretty card to share with you and I have 2 days of giveaways at the end of the post. So check it out and then leave one comment for each of the giveaways. 🙂

    Pretty Spring Impressions Butterfly Card

    This card is a fun way to mix and match all the different types of goodies in your craft room! It uses your patterned paper (Garden Impressions), your embossing folders (Layered Leaves), your ribbon (metallic combo pack), dies (Springtime impressions), and even vellum and the new Petal Pink Rhinestones!

    Love what you do butterfly card
    One of the things that is hard to see from the picture is how pretty the butterfly is! It is first die cut out of the Petal Pink cardstock, then die cut again out of Vellum cardstock. Use a glue dot to adhere the Vellum to the pink cardstock. Then you can cover up the spot of the glue dot that shows through with one of the Petal Pink Rhinestones. It becomes a softer butterfly and the rhinestone makes a perfect match with the layered metallic ribbons (layer the Tranquil Tide over the Petal Pink)!

    So pretty, right?!

    Before I head into the anniversary giveaways, I thought I’d share some of what I was doing to celebrate. 🙂 The card says “Love What You Do” and it is true for me. It gives me the flexibility to travel when it fits for my family (when my husband can take time off) and I could work from the road. In this case, we were talking advantage of the summer break to take the kids to visit their cousins in Florida. We got to check out Universal Studios and hang out on a sandy beach. My inner child was so happy. 🙂

    Family with SpongeBobFamily at the Florida beach

    Tomorrow we are back home and I’ll have more new projects to share and 2 more days of the Anniversary Celebration!

    Anniversary Celebration

    I hope you have been entering each day.  I’m so grateful for everyone who has been a part of my 10 year adventure and I want to give to as many people as I can to give back to you. 🙂

    You have until August 8th to stop by each of the 10 anniversary blog posts and leave a comment to be entered to win that day’s giveaway item.
    ***I’ll be drawing for all 10 items on 8/9 and then posting the winners! ***

    Enter for the first 6 giveaway gifts here:

    Day 1 giveaway | Day 2 giveaway. | Day 3 giveaway | Day 4 giveaway | Day 5 giveaway | Day 6 giveaway

    DAY 7 GIFT– Free gift with a $40+ order – 1/2 spool EACH Tranquil Tide & Petal Pink metallic ribbon!
    you must use host code 3XPZF4KW for orders under $150
    Shop here

    DAY 7 GIVEAWAY – WIN A FREE PACK OF THE NEW BASIC BRADS!

    TO ENTER – Leave a comment on this blog post sharing what item from the Stampin Up catalog do you have on the top of your wishlist to be entered to win!  Winner drawn randomly on 8/9/2018.

    DAY 8 GIVEAWAY – WIN A FREE PACK OF CORRUGATED ELEMENTS!

    TO ENTER – Leave a comment on this blog post sharing your favorite snack to have when you are crafting to be entered to win!  Winner drawn randomly on 8/9/2018.

    Come back tomorrow to check out the Day 9 celebration giveaway!


    Make it! Here are the supplies you need for today’s card:
    Product List


    Thanks for reading! Shop Stampin' Up by clicking here

  • Animal Outing Card for Day 6 of my Anniversary Celebration

    Animal Outing Card for Day 6 of my Anniversary Celebration


    I’m in Florida visiting family and today we are heading to a sandy beach along the panhandle. So much different than the rocky beaches we have in Washington! So, I’m popping on quickly this morning to share a fun swap card I got recently using the new Animal Outing stamp set.

    Animal Outing giraffe card - together we make a good pair

    This card was created by Kimberley Morris for an OnStage swap. And I thought it was just a cute and easy way to use the Animal Outing stamp set. Plus it reminds me a bit of those circus animal trains you saw as toys as kids… Or the little engine that could. 🙂 Those two giraffes peeking out of a window. What do you think?

    I think I definitely need to play with this stamp set more! 🙂 Plus the matching designer paper is a perfect accent – especially if you want extra animals that come beautifully colored for you. 🙂


    Anniversary Celebration – Day 6 of Giveaways and Gifts!

    I hope you have been entering each day.  I’m so grateful for everyone who has been a part of my 10 year adventure and I want to give to as many people as I can to give back to you. 🙂

    You have until August 8th to stop by each of the 10 anniversary blog posts and leave a comment to be entered to win that day’s giveaway item.
    ***I’ll be drawing for all 10 items on 8/9 and then posting the winners! ***

    Enter for the first 5 giveaway gifts here:

    Day 1 giveaway | Day 2 giveaway. | Day 3 giveaway | Day 4 giveaway | Day 5 giveaway

    DAY 6 GIFT– Free gift with a $40+ order – Watercolor Paper!
    you must use host code 3XPZF4KW for orders under $150
    Shop here

    Watercolor Paper

    DAY 6 GIVEAWAY – WIN A FREE PACK OF COLORED DOILIES!

    TO ENTER – Leave a comment on this blog post sharing if you could vacation anywhere, where would it be to be entered to win!  Winner drawn randomly on 8/9/2018.

    Stampin' Up colored doilies

    Come back tomorrow to check out the Day 7 celebration giveaway!

    Thanks for reading! Shop Stampin' Up by clicking here

  • Blended Season Bundle – Sweet Friend Card

    Blended Season Bundle – Sweet Friend Card

    We are on Day 4 of my anniversary celebration – hopefully you’ve stopped by days 1, 2, and 3 and left comments to enter to win on each day. 🙂  So, today I wanted to share a pretty card that uses the August exclusive Color Your Season Bundle.

    color your season grapefruit and lime wreath friend card

    This has the beautiful color combination – Grapefruit Grove, Lemon Lime Twist, Granny Apple Green!

    Stamp with the Blended season stamp set and then color in the leaves (stamped in a circle to make them a wreath) using the new Watercolor Pencils assortment 2.  Color at the base of each leaf and blend the color out using a Blender Pen or an Aqua Painter.  It makes beautiful bright color.

    The sentiment is stamped with StazOn onto Vellum and adhered over the stamped image to allow the image to peek through and soften the look of the card.

    Add some die cuts from the matching Stitched Season dies to make a pretty accent in the corner.  Isn’t it pretty?!

    Check out the Color Your Season Exclusive items online

    Anniversary Celebration – Day 4 of Giveaways and Gifts! 

    To celebrate my 10 years with Stampin’ Up, I’m going to be doing 10 days of giveaways!  Its like a week and a half party.

    Each day I’ll have a one-day only gift with purchase, PLUS a free giveaway of the day just by leaving a comment on the blog.  You will have until 8/8/2018 to leave your comments – winners for all 10 days will be announced on 8/9/2018.

    DAY 4 GIFT– Free gift with a $40+ order – Wink of Stella Glimmer Brush!
    you must use host code 3XPZF4KW for orders under $150
    Shop here

    Wink of Stella Glimmer Pen

    DAY 4 GIVEAWAY – WIN A FREE PACK OF SHARE WHAT YOU LOVE ARTISAN PEARLS!

    TO ENTER – Leave a comment on this blog post sharing your favorite type of card or project to create when you have time to be entered to win!  Winner drawn randomly on 8/9/2018.

    Share What You Love Artisan Pearls

    Thanks so much for stopping by!

    Don’t forget you can still enter the Day 1 – 3 giveaways!

    enter to win the Day 1 giveaway | enter to win the Day 2 giveaway. | enter to win the Day 3 giveaway

    Come back tomorrow to check out the Day 5 celebration giveaway!

    Thanks for reading! Shop Stampin' Up by clicking here

  • Oh My Sponge Roller! And Other Cool Cards (Blog Hop)

    Oh My Sponge Roller! And Other Cool Cards (Blog Hop)

    Fun n Crafty Blog Hop BadgeI’m super excited to share with you a beautiful yet easy card to create thanks to the new Sponge Brayers!  This was a card I used in our Fun n’ Crafty team card swap recently to trade ideas using the newer Annual Catalog products. Today a few of us are sharing our swap cards in a team Blog Hop for you!

    On our team we have a range of folks from super experienced stampers to folks who are pretty new but really excited to create and stamp.  So, when we do a card swap with the team, we get a good range of styles and designs – but fantastically, they all turn out great!  I haven’t yet seen what the other 3 ladies in this blog hop are going to share with you… but I know they are really talented crafters so I can’t wait to check them out with you!

    Quick Reminder!

    Just a note to remind you that TODAY is the last day to get in on the Free Ink Pad promotion for joining our Fun n’ Crafty Stampers group by purchasing the Starter Kit.  It is a crazy good deal and we are pretty fun too. 🙂 Plus, you can swap and hop with us too if you want next time!
    ps – If you are visiting from one of the other blog hop participants – know you can get this same deal from them as well and they would love to have you join with them. 🙂 

    Join in July ink pad promotion image

    On to the Good Stuff!  The Sponge Brayer Swap Card!

    So, I will admit it.  I tried the Sponge Brayers when they first came out and I wasn’t sure I liked them.  I was used to the rubber roller and how much ink you transferred when you used that tool.  So, I set my sponge brayers aside and went on to coloring techniques.  Well, a year later, I pulled them out to create a background and WOW they were awesome!

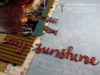
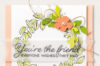
    I was inspired by a card from UK demonstrator Sam Hammond Donald and put my own twist on it and loved the result….Isn’t the final card fun?!

    I started by taking a 3″x4″ piece of Whisper White cardstock and then grabbing the 2 sponge brayers that come in a package.  I inked one up with Lemon Lime Twist ink and started lightly rolling from the top of my cardstock until about 2/3rd of the way down the paper.

    Then I inked up the other brayer with Granny Apple Green (my new favorite green color – brand new as of June 2018!) and lightly rolled from the bottom of the cardstock up about 2/3rds of the way.

    Once you have the dark color worked up, I went over the middle (and lightly the top) with the Lemon Lime Twist brayer, just to finish blending the colors.

    Stamp your solid image – like this tree over your newly made background first to make your base.

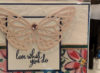
    I love this sentiment from the Rooted in Nature stamp set (the tree is from the same set) and just simply cut it up so I could haphazardly glue it down below my tree.  I just makes it a little more fun and eclectic when the sentiment is coming off and over the main cardstock and mats.

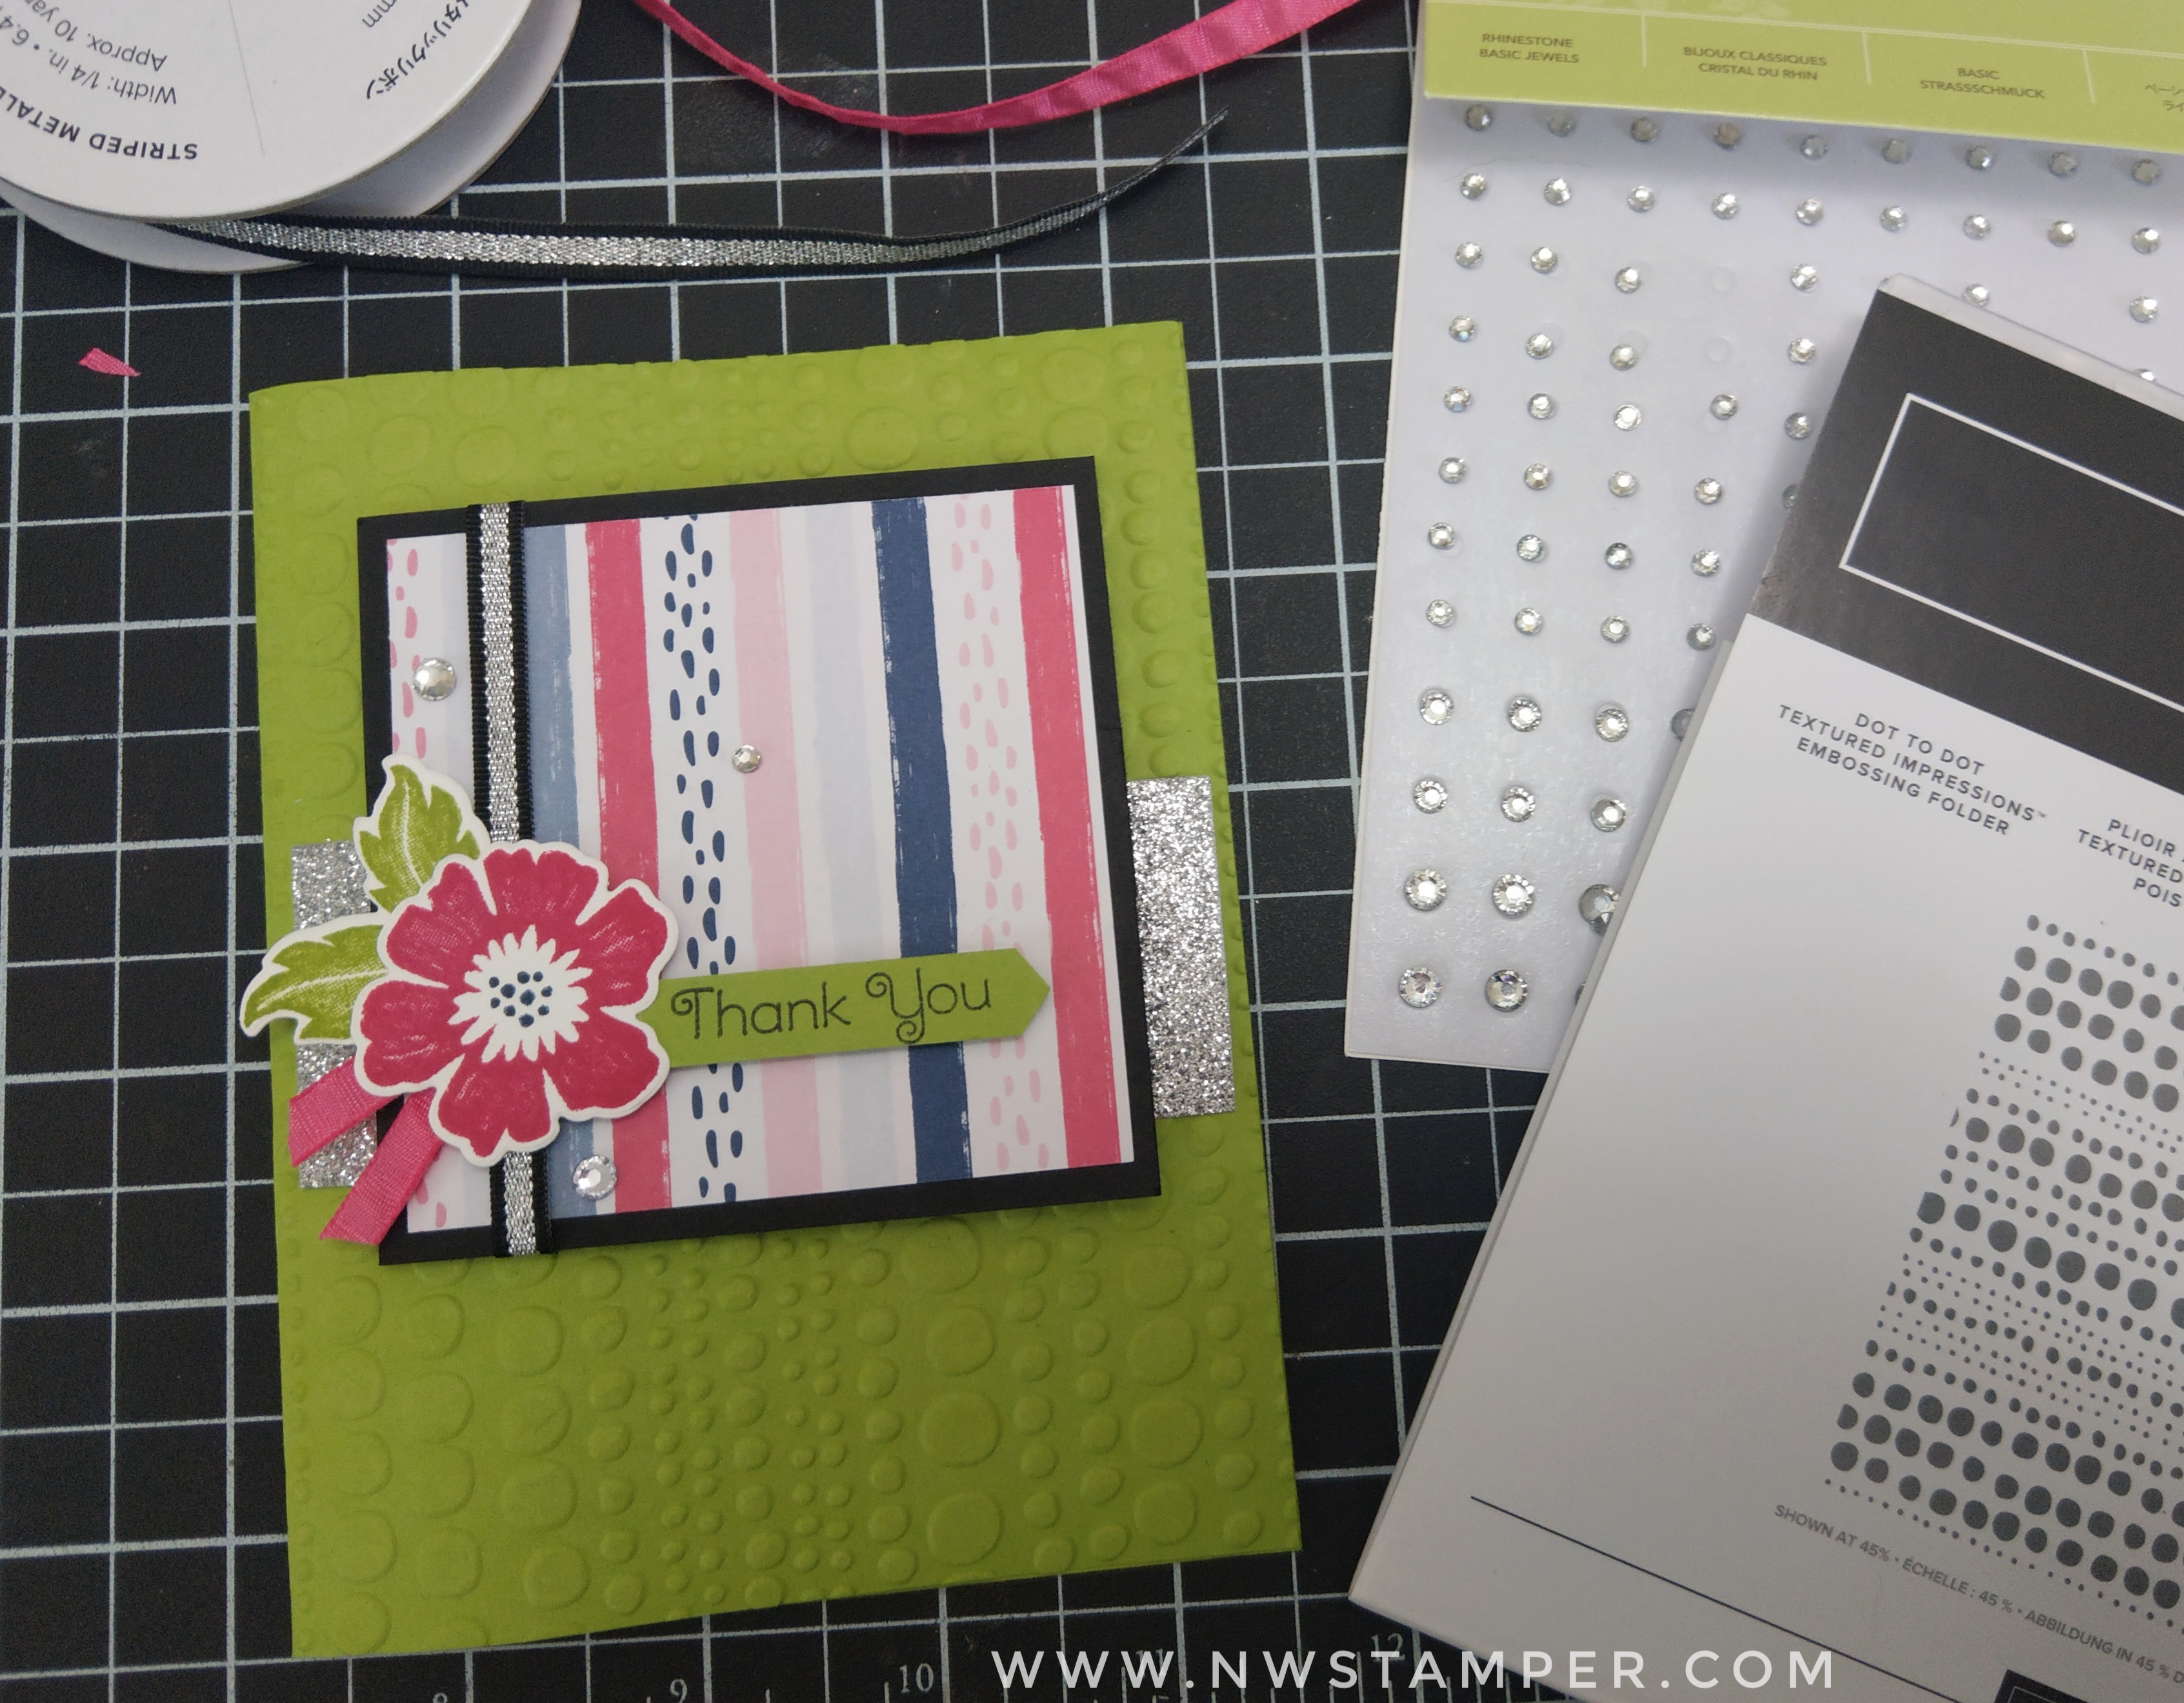
    And see those black rhinestones?  All you have to do is grab your basic clear rhinestones and a black sharpie and color away!  They stay slightly shiny but better fit in with the colors for this card.

    Finally, what I think really pulled it together was the Wood Textures designer paper for the background – would you agree? (and YES! it is one of the papers included in the Buy 3 get 1 free promotion that ends today)

    I tried just adding a strip or mat layer… basically something that was a bit more “economical” with my patterened paper; but none of them looked quite right.  I realized I needed to go big or not at all, so I cut up to a 4 1/4″ x 5 1/2″ piece and adhered it to the front of a Whisper White card base.  It is the perfect amount of natural and texture to go with the tree image and the greens of the rest of the card.

    This card was a lot of fun to make and I hope it inspired you to try out the Sponge Brayers and the Wood Textures designer paper.  They are both total winners!

    1. Nicole Flournoy — Inky Fingers Stamping
    2. Jennifer Blomquist — NW Stamper <— YOU ARE HERE
    3. Christine Szecares — Artful Musings
    4. Tobe Buffenbarger — The Craft Sea

    *** Please leave a comment at the end of this post and on the blog hop stops, and let us know what you think!***

    Fun N Crafty Blog Hop - Visit Previous Blog
    Fun N Crafty Blog Hop - Visit Next Blog

    DON’T MISS THIS!!!

    10th Anniversary Gifts!  Day 2 Giveaway

    To celebrate my 10 years with Stampin’ Up, I’m going to be doing 10 days of giveaways!  Its like a week and a half party.

    Each day I’ll have a one-day only gift with purchase, PLUS a free giveaway of the day just by leaving a comment on the blog.  You will have until 8/8/2018 to leave your comments – winners for all 10 days will be announced on 8/9/2018.

    DAY 2 – Free gift with a $40+ order – Gorgeous Grape Mini Striped Ribbon
    you must use host code 3XPZF4KW for orders under $150
    Shop here

    Gorgeous Grape Mini Striped Ribbon

    DAY 2 GIVEAWAY – WIN A FREE SET OF THE BEST ROUTE ENAMEL SHAPES!


    Leave a comment on this blog post sharing what is your favorite way to color on a project and which method do you avoid or are not confident enough to try to be entered to win!  Winner drawn randomly on 8/9/2018.

    Best Route Enamel Shapes

    Thanks so much for stopping by!  Don’t forget to enter to win the Day 1 giveaway, and then come back tomorrow to check out the Day 3 celebration giveaway!

    Thanks for reading! Shop Stampin' Up by clicking here

  • Celebrate 10 Years of Stamping with Me!

    Celebrate 10 Years of Stamping with Me!

    10 years… say what?!  Oh my goodness!  I was starting to write a blog post for Tuesday – I’m joining my team in a small blog hop showcasing some fun swap cards! – and I looked at the calendar and realized that I was right around the date I first signed up as a Demonstrator.  I looked it up and 10 years ago on July 26th, I was so excited to put in that starter kit order and join Stampin’ Up. 😊

    First card posted on my nwstamper.com blogThe first card I ever posted on a blog! Using supplies from my new starter kit in 2008!

    So, I had to take some time to sit and reminisce…..

    • How I only went to my first “stamp camp” because my friend was starting something new and I wanted to support her, but I had no idea what a stamp camp even was!
    • I started hosting card nights and my friend kept trying to tell me I should sign up. My response? “Oh, I couldn’t do it.  I don’t know anyone who would want to shop and I’m not a salesperson.”
    • Eventually convincing my mom to sign up instead of me because I knew she was great at teaching other sewing and craft classes and she was looking for a way to earn a bit of money. I told her I could be one of her customers!
    • Seeing all the perks and discounts she was getting, I thought she was pretty lucky but by then I had moved to Oklahoma and literally only knew my husband’s co-workers and their spouse.
    • I went ahead and hosted a card class with my mom as the long distance demonstrator and realized how fun it was running the event and not nearly as hard as I thought!

    Fun + Discounts + Sneak Peeks and Early Access to new releases = I was totally sold!

    Stampin Up 2010 Convention Jennifer blomquist Shelli Gardner Kathy ThistedMe, my son, Shelli Gardner, and my mom at the 2010 Stampin’ Up convention!

    What started as a way for great discounts, has turned into so much more.  I am so grateful for all the friends I’ve made over the last 10 years and the experiences I never would have been able to have if I hadn’t decided to take the plunge and become a demonstrator.

    Here are some fun stats from my last 10 years. 

    Since I joined Stampin’ Up I’ve:

    • Had 2 kids (they are currently 8 & 6)
    • Lived in 4 states (Oklahoma, Oregon, California, and Washington)
    • Gone to 12 Stampin’ Up Conventions/OnStages!
    • Been a display stamper for OnStages 3 times
    • Earned Founders Circle
    • Earned 3 Stampin’ Up Incentive trips (San Diego, Mediterranean Cruise, Thailand!)
    • And had times where I’ve stepped back and taken more time for my family, and other times where I really pushed extra hard in my business.
    • Been blessed with more friendships and getting to meet amazing people than I could begin to count!

    Fun n Crafty Stampers OnStage 2017A few of our Fun n’ Crafty Stampers demonstrator team at the Stampin’ Up office in 2017

    Crafty Escape Weekend 2018 Pajama PartyThe pajama party crew at the Spring 2018 Northwest Crafty Escape Weekend

    Its been an amazing journey and I can’t wait to see what the next 10 years bring – and I’d love to have you join me for them! 🙂

    You can join our Fun n’ Crafty Stampers team anytime – but don’t forget that if you do it by July 31st, you’ll also get a free set of 10 FULL SIZE ink pads in the color family of your choice!  Join now

    10th Anniversary Gifts!  Day 1 Giveaway

    To celebrate my 10 years with Stampin’ Up, I’m going to be doing 10 days of giveaways!  Its like a week and a half party.

    Each day I’ll have a one-day only gift with purchase, PLUS a free giveaway of the day just by leaving a comment on the blog.  You will have until 8/8/2018 to leave your comments – winners for all 10 days will be announced on 8/9/2018.

    DAY 1 – Free gift with a $40+ order – Garden Trellis Embossing Folder
    you must use host code 3XPZF4KW for orders under $150
    Shop hereGarden Trellis embossing folder

    Day 1 Giveaway – WIN a FREE set of Petal Pink Rhinestones!

    Leave a comment on this blog post sharing one thing that has changed for you in the last 10 years to be entered to win!  Winner drawn randomly on 8/9/2018.

    note – must have a US mailing address for any gifts and giveaways.

    Thanks so much for stopping by and celebrating with me!

    Thanks for reading! Shop Stampin' Up by clicking here

  • Time to Stock Up! Buy 3, Get 1 Free Designer Paper is on now!

    Time to Stock Up! Buy 3, Get 1 Free Designer Paper is on now!

    Do you love patterned paper? Do you have a tendancy to collect and hoard instead of use, because you don’t want to use it up? 🙂 I totally know the feeling!

    Well, now is the perfect time to stock up on your favorite designs so you can feel good about cutting into those pretty pretty patterns!

    Buy 3 Get 1 Free Designer Paper Sale

    Buy 3 Get 1 Free Paper

    Now through the end of July, you can pick from the following patterned papers and once you’ve put 3 packs in your shopping cart – you get to add a 4th one for free!  So, which one is your favorite?  I can’t decide between Twinkle Twinkle and Tropical Escape!

    Animal Crossing Designer Paper (12×12)
    Animal Crossing Designer Paper 2018

    Best Route Designer Paper (12×12)
    Best Route Designer Paper

    Garden Impressions Designer Paper (6×6)Garden Impressions designer paper

    Rooted in Nature (12×12)Nature's Poem

    Petal Promenade (12×12)Petal Promenade designer paper

    Tranquil Textures (12×12)Tranquil Textures designer paper

    Tropical Escape (6×6)Tropical Escape Designer Paper

    Twinkle Twinkle (12×12)Twinkle Twinkle Designer Paper

    Under the Mistletoe (12×12)Under the Mistletoe designer paper

    Wood Textures (6×6)Wood Textures designer paper

    Don’t forget! You can mix and match-  do 2 of one style – 1 of another style – and 1 of a 3rd style.  Or all 4 of the same pack, you decide!

    Just remember to order by July 31st to take advantage of the stock up sale.

    Thanks for reading! Shop Stampin' Up by clicking here