Northwest Stamper

Tag: word bubble framelits

  • Wonderful Word Bubbles for a I Love You Card

    Today I have to share a card that I created for a set of Pictogram Punches stamp set focused display board cards for our Stylin’ Stampin’ Inkspiration convention board.  I knew I had to get this set when I first saw it in the catalog, but when I had to create 4 different cards AND make sure they were cute enough to have on display next to some other very talented ladies… well, I knew I had to get creative.  And somehow this came out:

    YAY!  Isn’t it a fun card?  I often feel like I’m in a design rut when I’m staring at stamps and cardstock on my craft table and so I always get excited when I get my brain going in a totally different direction and something that isn’t a hot mess comes out! Winking smile

    Insight into the design process for this card:

    1. I started out with the idea that it would be fun to use the Word Bubble framelits (which by the way happen to be one of the dies that you can get FREE or discounted this month with the Big Shot special… just saying!)
      Anyway, I knew I wanted to use the framelits, but I had to use the Pictogram Punches stamp set, so I set out figuring out which image would work and I liked how the I {heart} U image looked and fit in the squarish word bubble.  So that settled that as my central image.
    2. Then I decided to use more word bubbles to emphasis my sentiment.
      So I pulled them all out and started experimenting with how to layer them together.  I ended up with something like this:

    3. Awesome…. now to figure out paper.
      I decided to use the Back to Black designer paper since I wouldn’t have to worry about it being too busy color-wise.  I could just focus on mixing and matching patterns.  I pulled out all the papers and picked 4 patterns that I thought would work in the small format of the die cuts and would go together ok.
    4. Somewhere in here I decided that I needed to add some texture to the card… either that or I had an extra piece of Sahara Sand that had already been embossed with the Stylish Stripes embossing folder and I decided to use that.
      I have a tendancy to do that… see something laying on my desk and jamming it into whatever project I’m working on at the moment.  You might say I’m desperate to use up scraps that I can’t bear to recycle or toss!
    5. I also thought that I needed a pop of color to break up the black and white, so here comes the Silver Baker’s Twine and then a splash of Real Red taffeta ribbon.
    6. Then I started putting down my die cut pieces.  Here is what it looks like before the sentiment got added.
      Yeah, I’m too lazy to actually trim off parts of the word bubbles so they just get flipped around so extra bits are hidden by the main sentiment. Smile

    7. Finally, I stamped the sentiment and cut it out using my Word Bubble framelits.  And for a final touch of color, I stamped again with Real Red ink and punched out the heart using the Itty Bitty Accent Punch Pack and layered that on top with yet another dimensional.


    Each card is like a puzzle, you just have to keep moving and turning the pieces until they suddenly all fit!  Eventually – and with a big enough hammer – they will fit for you. Smile

    And if you want to try this at home, don’t miss out on getting these framelits and the Somethin’ Somethin’ stamp set for FREE with the purchase of a BigShot or get the bundle for 15% off through the end of the month.


    Thanks for stopping by and congrats to everyone with Stylin’ Stampin’ Inkspiration for making to 1 year of regularly awesome projects, ideas, and inspiration!
    Now you can follow us on Pinterest or even like Stylin’ Stampin’ Inkspiration on Facebook!

    spaced shop now sig bar

    August Online Stamp Club Hostess Code – TT2NETD4
    Use this code to get free exclusive tutorials & project kit! Learn more

    Card Supplies Used:

  • Masculine Monday with Burlap, Woodgrain, and Word Bubbles!

    Masculine Monday with Burlap, Woodgrain, and Word Bubbles!

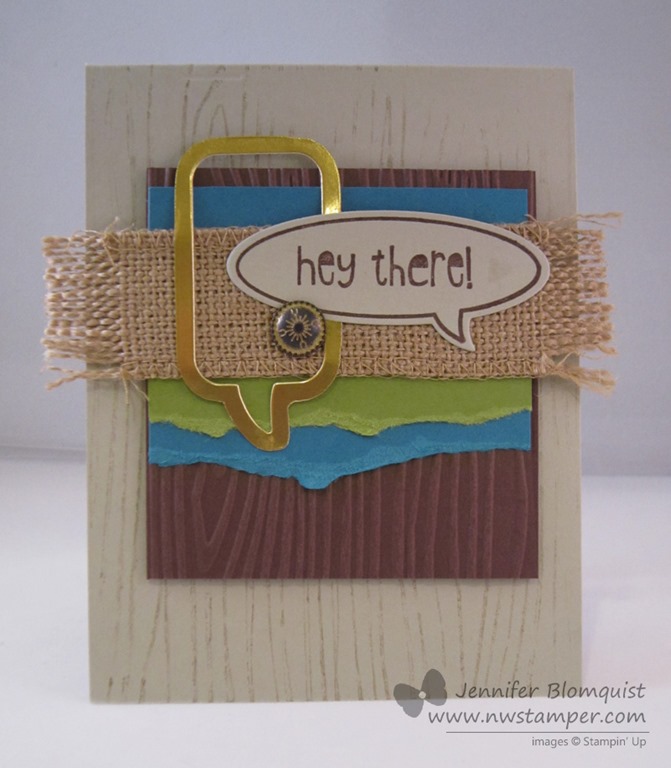
    I know many of us struggle with masculine cards.  I often find it so easy to reach for my flowers and rhinestones and pinks and whatnot; but when I need to make a card for a guy, those go-to items suddenly don’t seem to be quite the right fit.  Well, as luck would have it, today over on the Stylin’ Stampin’ Inkspiration blog, they are sharing some cards for Masculine Monday (and WOW are there some stunners!)  So, I wanted to participate with the design team and I wanted a guy card for my upcoming card class at the Scrapyard Chicks Spring Workshop, so I grabbed some burlap ribbon, some scraps of paper, and got to work!

    Can I just say… I LOVE how this turned out.  It has a lot of fun touches to it without being super over the top or fussy.

    The class I’m teaching in April focuses on 6 different techniques and for this card, I was showing off a neat different way to use your embossing folders…. as a stamp!  That is right, that grainy background on the card base – it is actually stamping using the Woodgrain embossing folder.

    So how does that work?

    1. You take your ink pad and slide it along the raised side of your embossing folder.
    2. Close the embossing folder over your card front so the ink is where you want it (basically, make it look like you are about to run it through the Big Shot)
    3. Do NOT actually run it through the Big Shot, instead use your bone folder to burnish the embossing folder and impress the ink onto your card base
    4. Open up the folder and admire your stamping work. Smile


    The other think I really liked about this card was the mixing and matching of the word bubbles.  I stamped the “Hey There” with the Just Sayin’ stamp set and then cut it out with the Word Bubbles framelits (and yes, get the bundle!  They are both cute Winking smile).

    But then I needed something more, so I grabbed some of the Gold Foil paper and cut out a different word bubble shape from the framelits.  Now, when you look at the paper that now has a word bubble sized hole in it, you will see that the framelit die embossed a faint line from the outer edge of the die (as opposed to the inner edge of the die where the cutting occurred).  So in this case, you can use that faint line as a cutting guideline and cut along that share to give you this cool metallic word bubble outline!

    Oh, and I actually did emboss the Chocolate Chip paper with my embossing folder… I like the contrast of the stamped woodgrain and the embossed woodgrain.

    So, what do you think?  I really liked how it turned out and can’t wait to share it at the workshop in a month!


    spaced shop now sig bar

    March Online Stamp Club Hostess CodeXEWP4DFD
    Use this code to get free exclusive tutorials & project kit! Learn more

    Stampin’ Up! Supplies Used
    Stamps – Just Sayin’
    Ink – Soft Suede, Chocolate Chip
    Paper – Sahara Sand, Old Olive, Island Indigo, Chocolate Chip, Whisper White, Gold Foil
    Accessories – Big Shot, Word Bubble framelits, Vintage Brads, Woodgrain embossing folder, Burlap ribbon

    Favorite products:

    134820s
    127821s
    132140s
    117273s
    132622s
  • Quick Cards with Kaleidoscope Designer Paper

    Quick Cards with Kaleidoscope Designer Paper

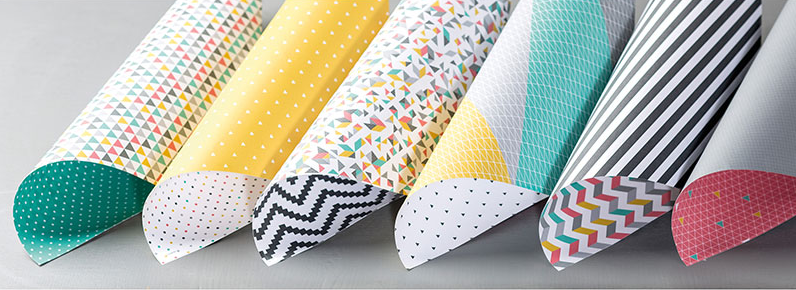
    Continuing on the theme of sharing some fun ideas from my Occasions Catalog swap with my Fun n’ Crafty gals.  Today I’m sharing a couple more cards that use the Kaleidoscope designer paper.  As I mentioned when I shared my Vivid Vases card earlier this week, this is a pack of paper that I loved the colors but have a hard time visualizing how to use the patterns.  So, I love when I get some good ideas for how to us it!  This is what the paper looks like:

    image

    And here are some quick cards that give you some ideas for how you could use the paper.

    You could use just a little bit of the patterns like Pamela Wu did:

    And I love the little touches she added to the word bubble… with the mini brad and the stitched satin ribbon.  See…. Summer Starfruit isn’t so bad. Smile 

    Or you can do like Elise Hamilton did and go BIG!  She used the polka dot pattern for her background and then grabbed her On Film Framelits to add some flair and accents to the cards. 

    And if you are a scrapbooker, I will say, these framelits are FABULOUS!  I need to pick them up so I can use that filmstrip die to make a fun strip for a scrapbook page. Smile Can I just say, this year’s spring catalog is killing me with so many great stamp/framelit/punch bundles?!  Anyone with me?

    spaced shop now sig bar

    Virtual Stamp Club Hostess CodeBNDDMDVU
    Use this code to get free exclusive tutorials & project kit! Learn more