Northwest Stamper

Tag: vintage

  • Vintage Christmas Card with Clear Block Stamping

    Vintage Christmas Card with Clear Block Stamping

    lovely-as-a-tree-clear-block-stamping-christmas-card
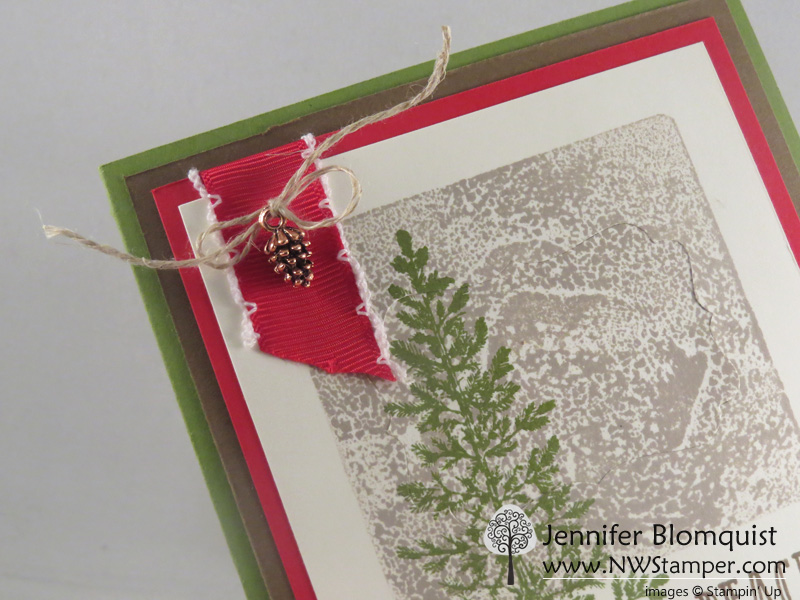
I have totally had a crafting-crush on these Mini Pinecones embellishments since I first got a chance to play with them.  They are so little, but oh so details and super cute!  My biggest challenge was actually getting them out of the container and onto my projects.

    Between the “don’t want to use them up” and trying to figure out where to put a 3D embellishment (though it is little so, it is still possible to mail), I just kept admiring them on my desk.  Come on, admit it… you have something like that in your craft goodies too. 🙂

    Well, as I was working on my Christmas card stamp-a-stack class, I found a way to break them out and I love it!
    lovely-as-a-tree-christmas-card-mini-pinecone-accent

    Thread a piece of linen thread through the top of the pinecone and tie a bow… then just attach to your project with a glue dot.  It couldn’t be cuter!

    It also pairs perfectly with my FAVORITE ribbon from the Holiday catalog – the Real Red Stitched Edge Ribbon.  I discovered a trick last night that let me see if certain items are going to be discontinued after the Holiday Catalog ends and *sniff* *sniff* both the pinecones and this ribbon are on this list.  So, I’m just going to snuggle this card, and then make a bunch more to enjoy the heck out of them. 😉

    Clear Block Stamping Backgrounds

    So, I realize I’ve been going on about the small embellishment piece in the corner of my card, but need to talk about the fun background image – that Sahara Sand square behind my tree!  It is so easy to do and adds a cool look to your cards.lovely-as-a-tree-clear-block-stamping-christmas-card-close-up

    • Pick the perfect shape for your background – its as easy as pulling out your clear blocks and setting them on your project (or over the stamps you plan to layer with) so you can decide which size is the right one for you.  Since the blocks are clear, you can easily tell which size will look the best for what you want.
    • Foam ink pads work best – now you can do this technique with the older linen ink pads, but I find that I like the look better with the foam ink pads.  (If you aren’t sure what I’m talking about, Stampin’ Up changed the actual pad that holds the ink a few years ago – the new style are a smooth-topped squishy foam pad.  The old style look more textured and aren’t shiny as they are a linen material.)
    • Gently tap the clear block onto the ink pad to pick up the color – you will find that you see a pattern in the ink on the clear block.  If an area didn’t get covered or you don’t like the pattern, just keep tapping!  Each time you tap you will get a slightly different look, so just go until you like what you see.
    • Use a foam or pierce mat under your paper – since the clear block is all acrylic, it doesn’t have any give if there is any uneveness in your table.  So, you will get a more solid image if you place a piercing mat under your cardstock so that when you stamp with the block, the foam can cushion as necessary to make sure all parts of the block make contact.

    I loved the background stamped in Sahara Sand and then layered with the tall tree from Lovely as a Tree, but I’m sure you can imagine a bunch of other combinations too!

    I’d love to hear what you think we should try next with this technique!

    And just a reminder, you have TODAY and TOMORROW to take advantage of the 25% off stamp sale.  Then December 1st the official retirement list is coming out for the Holiday catalog and the Year-End Closeout sale items will be announced.  So, lots to look forward to. 🙂 25% off Stampin' Up Stamp Sale

    UPDATED November Hostess code – FUYTBWNK

    NWstamper signature_thumb[9]

    order online button for sig 3_thumb[4]

    Project Measurements

    • Old Olive cardbase – 4 ¼” x 11”, score at 5 ½”
    • Soft Suede cardstock – 4″ x 5 1/4”
    • Real Red cardstock  – 3 3/4″ x 5
    • Very Vanilla cardstock – 3 1/2″ x 4 3/4″
    • Real Red ribbon – 3.5″
    • Linen Thread – 8″

    Product List

  • Have You Seen This in my Thank You Cards?

    Have You Seen This in my Thank You Cards?

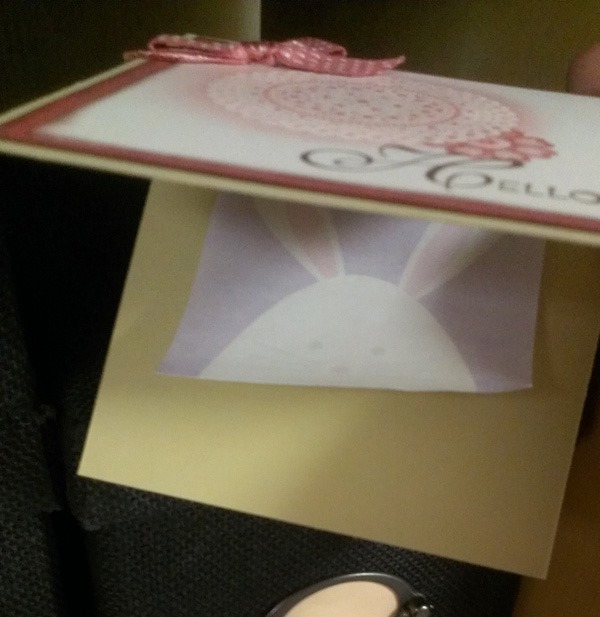
    I send out Thank You cards to everyone who places an order with me – sometimes I get a little behind (like in February when we had health issues at home) but I try to make sure I get caught up.  Well, yesterday, I was finishing up the last batch of Thank You cards and getting them ready to mail when I realized I do something that may seem strange to some folks.  So, I thought I’d share a little background today.

    So, what is it that I do that is odd?  Well, when I send out my thank you cards, instead of writing my note on the inside like I normally do for birthday cards, congrats, sympathy, etc, I write my note on a post-it note and put THAT inside the card!

    post it note in thank you card

    I always thought it was clear why I did that… I want to send you a Thank You for your order, but I also want to GIVE you a card that you can use for ideas or for giving away to someone else!  So, I write my note on a post-it so you can pull out and reuse the card.  If you want to keep it for ideas or for yourself, that is awesome.  If you want to share it with someone else, that is great too.

    I was talking with someone I gave a card to recently and when I mentioned I had written on the post-it note so she could re-use it if she wanted, she was surprised and shared that she hadn’t even thought of that.  Smile 

    So, thank you for ordering with me… please enjoy your card, however you choose!  Oh, and want to see the front of this card?  I can’t believe I haven’t shared it yet!

    lovely and lacy emboss resist

    Love, love, love this Lacy & Lovely stamp set!  Pair it with Primrose Petals and some emboss resist technique and it is a really pretty card.  I think I need to spend some more time with my Primrose Petals papers and ribbon before they go away next month! 

    spaced shop now sig bar

    April Online Stamp Club Hostess CodeG4VQJ7VB
    Use this code to get free exclusive tutorials & project kit! Learn more

    lovely and lacy emboss resistStampin’ Up! Supplies Used
    Stamps – Lacy & Lovely
    Ink – Versamark, Primrose Petals, Early Espresso
    Paper –River Rock (retired), Primrose Petals, Whisper White
    Accessories – Heat Gun, Clear embossing powder, embossing buddy, Primrose Petals stitched satin ribbon, glue dots, sponges


    Favorite Supplies:

    122887s
    102283s
    103083s
    109130s
    129053s
    126844s
    101610s
  • Wonderful Friend Vintage Card

    Today I thought I’d share another card I came up with while playing with ideas for the Valentine’s workshop.  I was figuring that not everyone would need four red and pink cards and so I was trying to come up with some more non-traditional cards.  That way they had something for a friend or husband that could be used for Valentine’s or really any time of the year.  In this case, I used one of my new favorite stamp sets – Wonderful Favorites.  I even won this stamp set which is even cooler!  Any who….this was my attempt at more neutral:

    Don’t you just love how, when you spread the tines of the Vintage Trinkets brad, it looks like leaves on the flower!  I kept the card simple with the muted colors and let the designer paper and embellishments do the work.  The only other extra touch I added was to sponge Soft Suede ink along the long edge of the Very Vanilla/Elegant Soiree paper.

    What do you think?  Would this work for a non-traditional Valentine?

    Wonderful Friend Recipe:
    Stamps:
    Wonderful Favorites
    Ink: Soft Suede Classic
    Paper: River Rock CS, Perfect Plum CS, Very Vanilla CS, Elegant Soiree DSP
    Accessories: Punch Pack, Vintage Trinkets, Victoria Crochet Ribbon, Sponge Dauber, Mini Glue Dots

  • Stampin’ Up! Convention 2010– Punch happy swaps

    I had a few more swaps that I had to share so here is one more post including my second swap I took to convention.

    So, you remember my first swap I showed you (recipe in this post) –

    Well, after punching out the leaves and the flowers from the BigShot, I was going to recycle the scraps when I looked at them and said, “I could totally punch out stuff using these scraps”.  So, I started punching out little hearts using the small heart punch and managed to actually get 5-6 hearts per scrap.  So, from there was born the idea for my second swap.

    This card uses the new Occasional Quotes hostess set.  It is a perfect set for an outside and matching inside sentiment for your cards.  Anyway, I had made 40 swaps and so had 40 of each color scrap, I watched a movie with my hubby and drove him crazy punching out hundreds of these little hearts.  Then, the night before I left for convention, I punched out the scallop rectangles using the new Scallop Rectangle Clearlits die and then did the assembly from my hotel room.  These took a bit of work to assemble but again, I felt very happy with them.

    hearts swap
    Finally here is another round of some of my favorite convention swaps.  Pretty cool huh?

    card by Mary Booker                                       card by Valerie Taylor

    card by Lorri Heiling                                     card by Jill Kelley

    card by Kathy Kuffel                                      card by Diana Curtis

    card by Terry Bolender

    Hearts Swap Card Recipe:
    Stamps: Occasional Quotes (hostess)
    Ink:  Concord Crush classic ink
    Paper:  Concord Crush CS, Pear Pizzazz CS, Whisper White CS, Crumb Cake CS, Chocolate Chip CS, Blushing Bride CS
    Accessories: Small heart punch, Scallop trim border punch, Scallop rectangle clearlit