Northwest Stamper

Tag: taffeta ribbon

  • Party Animal Suite Festive Birthday Pop-Up Card

    Ready for something new?  How about a fun pop-up birthday card?!

    The new Stampin’ Up Occasions Catalog has a lot of fun Suites, and if you like bright colors and birthday supplies that are great for kids or masculine cards, then the Party Animal suite is your place to be. Smile  I got to play with this fun Balloons Pop Up Thinlit die during the OnStage convention in November and we made this fun card.  It does all the cutting and scoring for you, so you get to have the fun of figuring out how to decorate all the little details.  Check it out:

    (more…)

  • Wednesday Walkthrough: Birthday Card with the Hello You Thinlits

    In an effort to help encourage myself to stick to the plan to do at least one video a week, and since folks seem to be liking the tutorial videos I’ve posted lately, I’ve decided to start a new feature on my blog – Wednesday Walkthroughs!

    The idea is that each Wednesday, I’ll walk you though a card…start to finish…in a video giving you tips and technique tricks along the way.  So this is the card I’m kicking things off with:

    It is a bright and cheery birthday card that you can make in any color that fits your recipient, especially when you use the retiring Chevron Background stamp!

    Featured Retiring Products:

    Get them before they are gone by the end of the month!

    Tips for making this card:

    • First off, I have to say, this stamp uses a Background stamp, which I love… but I’ve discovered that I don’t love these big stamps in Clearmount Rubber.  They are a pain to put the stickers on the back, if you are like me and have to do a sticker that is perfectly lined up, and I like the comfort of knowing that the rubber won’t move around as I’m doing different techniques with the stamp.  Now, the clear mount stamps work totally fine… I just wanted to share that I *always* recommend getting my background stamps in wood mount.  They make take up a little more room, but I think it is worth it in this case.
    • When stamping along the edge of the paper like I did here, turn your stamp upside down on the table so the rubber is facing up and then ink it up.  Press your paper onto the upright stamp and burnish with a bone folder to make sure you get a solid image.

    • I wrapped my taffeta ribbon around the entire card and glued it down on the FRONT of the card.  I know it sounds strange, but since you will be covering up a large portion of the front with the sentiment, hide your ribbon ends under that paper for a clean look on the rest of the card!
    • Check out the video below if you haven’t used wax paper with your thinlit dies.  It makes getting your die cut out so easy and everything looking perfect!
    • Don’t forget some extra accents, I LOVE my candy dots and they are just the perfect touch for this card, don’t you think?  Use your paper piercer to make sure they are aligned exactly how you want them with ease!  (also shown in the video below)


    Wednesday Walkthrough Video

    Want to make this card with me?  Check out this video and you can do just that!

    (ps – if you are reading this in email, click here to view the video)

    Quick Links:

    So, if you like this idea for a new video feature on my blog, let me know!  Leave a comment here or on the video!  Or shoot me a note over on Facebook.  I love hearing from you and hope to keep bringing you more fun projects soon!

    NWstamper signature_thumb[9]

    order online button for sig 3_thumb[4]

    Project Supplies Used:


  • A Quick Card Using Project Life Cards Plus Weekly Deals and a GIVEAWAY!

    Did you realize that the Project Life cards aren’t just for scrapbooking or memory keeping?  Yup! It’s true!  Check out how I used two of the cards to create a fun card that you can send to anyone – no stamping required!

    I cut my card base out of Bermuda Bay cardstock and then had to trim down one of the 4”x6” cards (the blue and white striped card).  There was a spot on the card where there some extra spacing of white that made sense when you were using it as a 4”x6” card but not so much when you were mounting it on a card.  So I trimmed it down to 4” x 5.25” and then took the extra 3/4” strip and added it over the white wide band to cover that up and add some extra fun striping (see the black arrow in the picture below to where I glued it).

    Then I used some black cardstock to mount my 3”x4” HI card from the Everyday Adventure card kit and added a bit of ribbon and rhinestones and mounted it to the front of my card.  Done and Done!

    Get this card kit and more for FREE with a new Giveaway that just launched today!

    Project Life giveaway

    Stampin’ Up! is doing a giveaway of either their entire Project Life line or 100 first prizes of your choice of card kit and accessory pack.  How awesome is that?  Plus, if you share it with your friends, you get extra chances to win.  And who doesn’t like free, right?  Maybe you AND your friends will win and can all get your photos organized together. Smile Its a easy and fun way to get those photos off your computer and into a cute photo album without the muss and fuss! Get entered here –http://bit.ly/1wz8yxu

    Weekly Deals

    Check out the latest deals that went live today!  You can click any image below to shop or get more details or see them all online here.

    NWstamper signature_thumb[9]

    order online button for sig 3_thumb[4]

    Card Supplies Used:
    (if you are reading this in email, click here to see the list of supplies)

  • A Color Challenge with the Stylin Stampin Inkspiration Girls

    So I was talking yesterday on Facebook about challenges and how they can be pretty handy when you need a little something to jump-start some craftiness.  I’m still looking for feedback on favorite challenge sites and what types of challenges you find most fun to do, but in the meantime, I have one to share with you!

    image

    I’m a member of the Stylin’ Stampin’ Inkspiration design team and each month we host a color challenge.  I checked out the colors we were set to work with this time and thought this was a neat color combo that mixes up colors and color families for a great spring combo.

    Now, all that said, I loved the combo but stalled out initially with what I was going to do with it…. but I started with a flower stamp set, the new Naturals Chevron Ribbon, and the So Saffron core’dinations cardstock paper and began to go it.  Very quickly I ditched the flower stamps and soon this card emerged:

    Yay!  They totally work together!

    All the stamping is from the new Perfect Pennants stamp set and yes – those hearts are cut out by hand… but I SWEAR it goes fast! Smile 

    I kept adding a little detail here and a little detail there and I think it all added up to just the right about of interesting going on… do you think?

    Anyway, I think this sentiment is perfect for me to share right now because I’m getting all packed up and ready to head to Houston for the Leadership convention this week and one of the big things going on with me right now in my Stampin’ Business is figuring out how I can make my blogging and creative sharing more useful and meaningful to you.  So think of this as a little love note to you….wishing you all the best and hope I can help make it a little brighter and nicer along the way.

    Card Supplies Used

    • stamps – Perfect Pennants
    • ink – Bermuda Bay, So Saffron, Primrose Petals
    • paper – Whisper White, Subtles Core’dinations cardstock (So Saffron)
    • accessories –  essential piercing pack, paper piercing tool, Bermuda Bay 1/8” taffeta ribbon, Naturals Chevron ribbon, Stampin’ Dimensionalsimage

    Check out more great ideas using this color combo over on the Stylin’ Stampin’ Inkspiration blog today.

    spaced shop now sig bar

  • A Fun Pop-Up Card with Swallowtail Tutorial

    When I was at convention this year, Shelli showed off some cards that had neat pop-up effects.  Once of the cards that really struck me was a cool card that used the Swallowtail butterfly to create a surprise pop-up on the inside of the card.  I thought it was extra cool because when you look at that stamp image, it is too big to fit well on a card front and so I never would have thought it would have thought to try it on the inside of a card.

    So for a recent technique class, I decided to try it out and create that moment of surprise for class attendees as they got to make this card.

    Here is the front of the card… I kept it simple since we were going to be focusing on the details inside the card.

    Then you untie the ribbon (which you need so the card doesn’t try to push open on you when you aren’t ready), open it up and hello, butterfly!

    If that is a little hard to see, here is another angle to help you see the pop-up effect.  I also used the Pleasant Poppies background stamp to give the effect of the butterfly flitting through the flowers.

    To create this pop-up effect, you want to do the following:

    1. Start by stamping and coloring your Swallowtail butterfly image. 
    2. Then cut out the butterfly. 
    3. Gently fold the butterfly image in half (you don’t have to press hard to crease it, just make sure it is set to fold how you want when the card is closed.
    4. imageTake a piece of window sheet and punch a 1-1/4” circle out.
    5. Cut a spiral into the 1-1/4” circle as shown in my poorly drawn image to the right. Smile 
    6. On the “top” side of your spiral, attach a glue dot to the center of your spiral.  Attach another glue dot to the “bottom” side of your spiral at the outside end of the spiral.  (it doesn’t really matter which side is top and bottom, as long as your glue dots are on the opposite sides of the spiral)
    7. Glue the right wing of the butterfly to the right side of your card inside.
    8. Fold the butterfly in half and press the window sheet spiral onto the backside of the left wing with the glue dot in the center of the spiral sticking to the wing.
    9. Hold the butterfly down so it is folded in half and close the card.  This will allow the left side of the card inside to stick to the glue dot on the edge of the spiral.
    10. Open the card and check if you like how much of a pop you get with your butterfly.  Reposition the spiral as needed to get it just how you like.

    Hopefully that made sense!  If not, let me know and I’ll try to put together a video on how to do the pop-up effect.

    Like I mentioned, this is a card I shared at a recent card class and I loved the idea of sharing some pop-up and flip style cards with everyone.  I’ve finished my class schedule for the rest of the year – so if you are interested in joining me at a future event, check out the calendar and let me know!


    Want to win a $20 Stampin’ Up! shopping spree? 

    Take this quick survey on in-person and online class offerings to help me better plan future classes, online offerings, tutorials, and events and you’ll be entered to win!  

    Take the survey now!


    In the meantime, give a pop-up card a try!  They are fun and easy, and give the recipient a fun surprise.

    spaced shop now sig bar


    Card Supplies Used
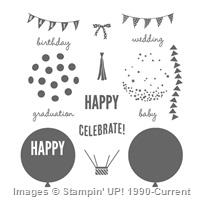
    Stamps- Swallowtail, Pleasant Poppies, Express Yourself (hostess set)
    Ink- Early Espresso, Sahara Sand (marker), Pool Party (marker), Calypso Coral (marker)
    Paper – Sahara Sand, Whisper White, Calypso Coral, Pear Pizzazz, Window Sheets
    Accessories – 1-1/4” circle punch, Word Window punch, Modern Label punch, Glue Dots, Pear Pizzazz taffeta ribbon, Elegant Butterfly punch, Bitty Butterfly punch

  • Everything Eleanor Christmas Swap Card

    Alright, I’m finally getting caught up which is nice!  Up next, getting ready to have a bunch of great ladies over on Wednesday night to check out all of my samples, swaps, and goodies that I brought back from Convention and then make a few projects to take home!  It should be a fun night
    (if you are interested in coming check out the details and rsvp here!)

    Anyway, this year, I took with me a ton of swap cards… normally I end up with 30-50 cards but this year I took 100!

    I didn’t mean to make so many but I discovered that I could almost exactly use the scrap from my Snow Much Fun swap to make this Everything Eleanor swap card, that I just kept making cards until I was out of scraps!  But that just means I have a whole bunch of great cards to use as inspiration now.

    So, want to see what I was swapping?


    I thought the flourish-y, journal stamp would make a fun wreath and my original idea had the bird stamped red for a cardinal… but I wanted the bird to stand out.  It took a little more work than I expected but I thought it was a fun use of the set.

    And before I sign off for the night, I thought I’d share all the fun goodies I got while I was at convention.  This is just the stuff I got for free as part of my registration, giveaways, and prizes.  Not too bad, huh? 🙂

    Stampin Up Convention Free Items

    That is a bag, red glimmer paper, 2 packs of designer fabric, 8 stamp sets, a journal made in My Digital Studio, 2 spools of satin ribbon, 1 pack of rhinestones, a pack of In Color Dahlias, a Holiday Mini catalog, a main catalog, and a hand fan!

    See, you know you totally want to come to convention next yere, huh??
    Shoot me an email and I can help you figure out how you can come with me and my team next year!


    To Order Stampin’ Up! Products Anytime, click here!

    Are you earning your Northwest Stamper Rewards? Every order gets you closer to your FREE stamp set! Click here to learn more!


    Make a Cake Pennant Card Recipe
    Stamps:
    Everything Eleanor, Curly Cute
    Ink: Garden Green, Basic Grey
    Paper: Real Red, Basic Grey, Whisper White
    Accessories: Big Shot, Square Lattice embossing folder, large Scallop circle punch, 1 1/4” circle punch, 1/8” Real Red taffeta ribbon, glue dots, snail, stampin’ dimensionals

  • Catching Up plus Something For You!

    Hello there! I know its been a while and can you believe it, its the end of the catalog year already! Yikes! Well, I’m going to try to get you all caught up, plus I have a little something for you too.

    So, a quickie update for me – cause some inquiring minds want to know. 🙂 Its been a crazy couple months for me with my big move to Washington plus at the same time (literally the exact same time), we found out we are expecting again in December! So all of that has made it so that I’ve been completely exhausted for the last couple months. Thankfully, the haze is wearing off, and I’m so excited to get back to stamping, the new catalog, and CONVENTION! Its going to be an awesome summer!

    Alright, now on to more of the fun stuff – and getting you all caught up as well.

    • LAST DAY of the 2010-2011 Catalog!
      Don’t miss out on your chance to grab some of the super cute items that will be no longer available after midnight MST tonight.  Some retiring papers and accessories are on sale but have been selling out, so grab them while you can because they will be gone tomorrow!  Plus, if you missed it on Facebook, I’m offering free shipping on all orders placed between now and July 5th.  So, stack savings on savings and get a great deal!
      List of the Retiring Stamps
      List of the Retiring Accessories 

    • You’ve seen the Summer Mini, right?
      I mentioned it on a blog post ages ago, and I figure that most of you either have the mini catalog or have seen it online.  But just in case you haven’t had a chance to check it out – you should!  There are some fun summer projects, stamp sets, and embellishments.  Plus a stamp set that Stampin’ Up came out with to support breast cancer research called Hope and Strength.  I’ll be posting more projects using items from this mini over the next couple months, so come back and visit me to see more ideas.  This catalog lasts until August 31st.
      Check out the summer mini catalog here 

    • The NEW 2011-2012 Catalog comes out TOMORROW!!
      Eek! So exciting!  I can’t wait to share with you the new Idea Book & Catalog.  I’ll be posting pictures and a link on my blog tomorrow when it goes live.  So, if you don’t have a physical copy quite yet, you can come back and visit and check it all out.  There are new stamps, new punches, new papers, new accessories, 5 new In Colors, and lots of project ideas combining the new with your old favorites!  Plus, did you catch that you can get free shipping with me this weekend through July 5th, so you can come check it out and then get an extra awesome deal when you place your order!  Are you excited yet?
      PS – do you need a copy of the catalog?  Let me know and I’ll work with you to get you a copy.
    • Lots of new digital downloads for My Digital Studio and other digital crafting
      Just a heads up for all you digital scrappers and crafters out there.  Stampin’ Up! has been going crazy adding a ton of new digital content online.  They have brought back retired stamp sets and papers in digital form (so you can even print out your favorite patterns to incorporate into your paper projects) as well as adding brand new images and patterns that aren’t even available in non-digital form.  There are so many cute items, that I can’t even describe them all.  But I DID update the catalog link on the right sidebar of my blog with a link to the latest PDF version of the digital download catalog.  It has pictures of everything currently available, so check it out and enjoy!
    • Did you catch FREE SHIPPING?!?
      Just a couple details on my free shipping offer.  From now until July 5th, any order placed with me will get free shipping.  So you can use it to get your last chance items with free shipping, or all your new favorites with free shipping, or BOTH!  🙂  The only catch is that orders must be placed by calling or emailing me; sorry, I don’t have a way to credit shipping charges for online purchases.

    I’m so happy to be back to blogging and crafting and so grateful you have stopped by. 🙂  I have a lot to share and will have even more this month when I head to the Stampin’ Up! convention in a couple weeks!  Until next time, here is a card I made for a friend when I mailed her a new catalog; hope you enjoy!

    Thinking of You card recipe:
    Stamps –
    Swirls and Curls Verses, Priceless (retiring June 30, 2011)
    Ink –
    Early Espresso classic, Whisper White craft, So Saffron classic
    Paper –
    Rich Razzleberry cardstock, Whisper White cardstock
    Accessories –
    Early Espresso 1/8″ taffeta ribbon, sponge daubers, Rich Razzleberry marker, Stampin’ Dimensionals

  • Playing with the Petal Cone Big Shot Die

    Every catalog since Stampin’ Up! started offering the Big Shot, they have offered new dies in all kinds of shapes and sizes.  This time around, the Occasion Mini catalog offered the Petal Cone Bigz die.  My mom ended up getting it and so I had to play with it myself.   

    The die itself actually punches out two sides of the cone (with attached half circle flaps), one half-scallop circle, and a banner like strip.  So, I decided to experiment.  I created the cone out of your basic Melon Mambo cardstock and then decided to use the Love Letter designer series paper for the half-scallop circles, which I attached underneath the flaps. 

    Tip – if you are going to use the scallop circles under the flaps, you will want to trim the last scallop or two off each side.  Otherwise your flaps will not lie flat as the scallops get in each others way.

    I wrapped some Very Vanilla taffeta ribbon around the rim of the cone and then added some pearls for an extra fun touch.  Finally, I couldn’t decide what I wanted to do with the banner, so I took two of them and glued them together to make the strap for the cone!  Since I didn’t want a seam to show, I cut out a couple flowers and added them to the strap for a pretty way to finish it off.

    So, this was a start but I’ve seen a lot of other cute projects with this die including baskets (made by folding in the pointed ends of the cone before you glue them together) and carrots for holding Easter candy! 

    Click here to shop online 24/7

  • A Non-Traditional Valentine using Bliss

    I’m excited to be headed out this evening to meet up with a bunch of ladies and show them these Valentine and Love themed cards.  As I’ve been sharing this week, I’ve tried to bring a mix of your traditional Red/Pink love-based Valentine’s and some sweet sentiment but more subtle Valentine’s.  This is the last card we will be making and as you can see, it falls in to the latter category:

    I tried to keep this version reasonably simple so that it (and the other 3 cards) could be completed in 1 – 1.5 hrs.  There are fun details that are hard to see in this picture like both the Whisper White piece and the cut out flower are popped up on Stampin’ Dimensionals.  And I kind of want to make this card again only this time spritzing the Crumb Cake base with my new gold Smooch Spritz.  Wouldn’t that be sooo pretty?  Oooh, and embossing the Bliss sentiment with clear embossing powder!! Oh yeah, I’m totally making another version of this card. 🙂

    Tip: When tying knots in ribbons on cards, I like to cut one length of ribbon that I only apply adhesive to the ends.  I wrap that around my piece of paper (in this case Concord Crush) so that it is tight to my paper.  Then, take a second piece of ribbon and slide it under your first piece and tie your knot from there.  That ensures your ribbon is on your card tightly and you get the added bonus of being able to slide your knot up and down the ribbon until you decide it is where you like it!

    Anyway, all of the images are from the new Sale-a-Bration stamp set – Bliss which you can get free with any $50 order or by hosting a party with you and your friends (check it out on page 10 of the SAB catalog)

    Shop the online store now to earn your free stamp set!

    Concord Crush Bliss Valentine recipe:
    Stamps: 
    Bliss
    Ink:  Crumb Cake, Concord Crush, Daffodil Delight
    Paper:  Crumb Cake CS, Concord Crush CS, Whisper White CS
    Accessories:  Daffodil Delight 1/8” taffeta ribbon, Adhesive back Pearls, Corner Rounder punch, Paper Snips, Snail

  • Last Chance for Filled With Love!

    filled with love pic

    That’s right! Today is the last day the Filled With Love stamp set and bundle will be available! So, if you were thinking of getting this bundle but hadn’t done it yet; don’t miss your chance. You can order now in the online store and until 11:59pm MST at which time it sails off to retirement.

    However, in the meantime I wanted to share with you some cards I made last night using Filled With Love. 

    This was the first card I made:

    I had the idea of stamping the row of heart flowers along the bottom and then embossing while watching tv with the hubby.  Unfortunately, that is where my inspiration seemed to stop.  So, I got through the stamping and embossing, added the ribbon, and then didn’t know what to do.  I put together the heart for the sentiment and added it; but I’m still not totally convinced.

    While trying to create the sentiment for that last card, I came up with the heart for this next card.  I didn’t like it on the first card, so I pulled it off and decided to create a card just for this sentiment.  And so I created this:

    I love the fact that I used “Christmas” paper – the Deck The Halls pack – for this Valentine’s Day card.  I also pulled out my Vintage Trinkets for the first time as well (the tiny safety pin).  It looks kind of like an arrow through the little heart don’t you think?

    Finally, I had one more sentiment that I had created during all this playing that I though needed a home as well.  I also wanted to use some of the other stamps in the set and so I created a “color-blocking” style card only instead of using different colored paper for the blocks, I used different stamp images from the set.

    Again, I think the jury is still out on this card but it sure was a lot of fun to make!

    Well, I hope you enjoyed this last day celebration of this stamp set.  I had a blast creating these cards and will miss this set!  If you haven’t seen the flyer or need a reminder of what is included in the Filled with Love bundle, here it is:


    Filled with Love Wood-Mount BundleLove Patterns Designer Series Paper Stack
    Bitty Buttons - by Stampin' Up!Check it out in the online store!

    If you have any questions, just let me know and I’d be happy to help! 

    Until next time, Happy Stamping!

  • Have a Blue Christmas

    Today I thought I’d share the final card from my Holiday Stamp-a-Stack last weekend.  I wanted to get away from the traditional reds and greens and ended up playing with some blues instead. 

    Marina Christmas Card sm

    I don’t know why I always forget about using white craft ink on cardstock, but thanks to a sample I saw on the demonstrator Stampin’ Connection site, I knew i just had to have some white snowflakes.  I also had seen some layering of ribbon with the Dotted Scallop Ribbon Punch and wanted to try that as well.  So, we ended up combining Whisper White, Bashful Blue, and Marina Mist to make this cute little winter flurry card.

    Blue Christmas Recipe:
    Stamps: 
    Northern Hearts, Christmas Classics
    Ink:  Chocolate Chip Classic ink, Whisper White Craft ink
    Paper:  Bashful Blue CS, Marina Mist CS, Whisper White CS
    Accessories:  Dotted Scallop Ribbon punch, Marina Mist taffeta ribbon, Large Oval punch, Decorative Label punch, Stampin’ Dimensionals, adhesive back rhinestones

  • Just Believe Easel Card

    Here is the last of the three fancy fold cards we made this week.  This final card was my first ever easel card.  I had seen lots of folks making them but never took the time to figure them out until this class motivated me to create one.  I started out thinking I wanted to make the card in Elegant Eggplant and that I wanted to use a Wheel stamp.  From there I picked the Just Believe stamp set since it match my Always In Bloom wheel and continued building and embellishing until I got to this:

    butterfly easel card (530x800)

    Now if you aren’t familiar with an Easel card, this type of card is called Easel because the base of the card acts as a stand so that you can have the card front permenantly popped up and on display if you want.  Here is a side view:

    butterfly easel card side (780x800)

    The nice thing is that the card lies flat for mailing.  Here are the steps to create this card:

    1. Cut a piece of cardstock to 4 1/4” x 11” for the card base. 
    2. Then cut a second piece of the base color cardstock at 4 1/4” x 5 1/2” for your card front.
    3. Score the 4 1/4” x 11 paper at 5 1/2” and 8 1/4”.  Fold the card in half at the 5 1/2” score line (like a typical card fold) and then fold the cardstock in the opposite direction at the 8 1/4” fold.  So you end up with the cardstock looking like a zigzag pattern when looking at it from the side. 
    4. Adhere the 4 1/4” x 5 1/2” card front piece to the smaller scored end of the paper so that when you fold the card flat, your card front completely covers your card base.
    5. Embellish your card as desired being sure to add some embellishment or paper layers to the inside of the card base to help “catch and hold” the card front when you open the card.  In the example above I used the Rose Red cardstock with the white stamped layer.

    Tip:  If you are using cardstock layers, you may want to curl/distress the edges so that there is more cardstock sticking up to catch the card front

    Tip:  When wrapping ribbon around a card front, especially closer to the open end of the card, use a bit of adhesive to tack down the center of the ribbon to the inside of your card front.  That keeps the ribbon from sliding when you are tying it as well as keeps it from sliding off the card entirely during handling. 🙂

    Just Believe Easel Card Recipe
    Stamps: 
    Just Believe, Always in Bloom wheel stamp
    Ink:  Old Olive, Rose Red, Elegant Eggplant
    Paper:  Elegant Eggplant CS, Rose Red CS, Whisper White CS, Blushing Bride hostess dsp
    Accessories:  Whisper White taffeta ribbon, self adhesive Rhinestones, Snail adhesive, Glue dots, Butterfly punch