I know many of us struggle with masculine cards. I often find it so easy to reach for my flowers and rhinestones and pinks and whatnot; but when I need to make a card for a guy, those go-to items suddenly don’t seem to be quite the right fit. Well, as luck would have it, today over on the Stylin’ Stampin’ Inkspiration blog, they are sharing some cards for Masculine Monday (and WOW are there some stunners!) So, I wanted to participate with the design team and I wanted a guy card for my upcoming card class at the Scrapyard Chicks Spring Workshop, so I grabbed some burlap ribbon, some scraps of paper, and got to work!

Can I just say… I LOVE how this turned out. It has a lot of fun touches to it without being super over the top or fussy.
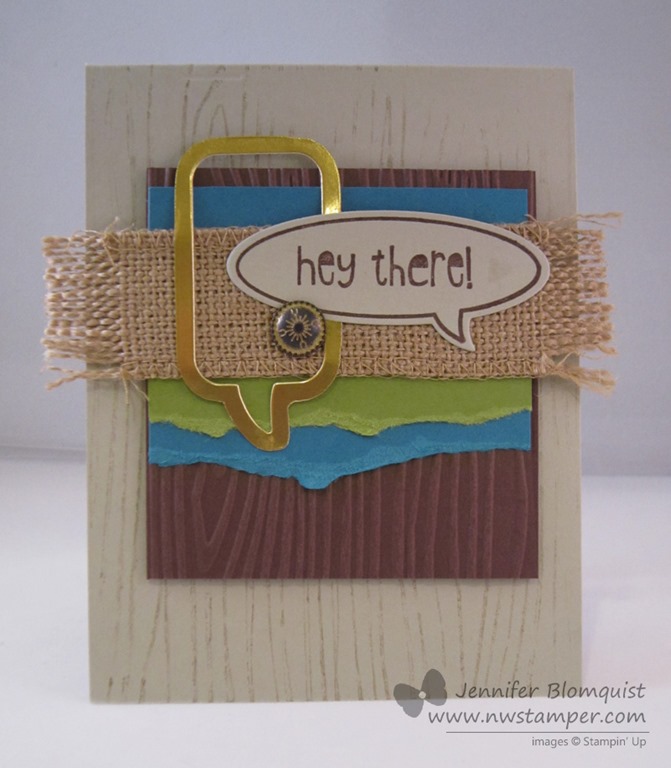
The class I’m teaching in April focuses on 6 different techniques and for this card, I was showing off a neat different way to use your embossing folders…. as a stamp! That is right, that grainy background on the card base – it is actually stamping using the Woodgrain embossing folder.

So how does that work?
- You take your ink pad and slide it along the raised side of your embossing folder.
- Close the embossing folder over your card front so the ink is where you want it (basically, make it look like you are about to run it through the Big Shot)
- Do NOT actually run it through the Big Shot, instead use your bone folder to burnish the embossing folder and impress the ink onto your card base
- Open up the folder and admire your stamping work.

The other think I really liked about this card was the mixing and matching of the word bubbles. I stamped the “Hey There” with the Just Sayin’ stamp set and then cut it out with the Word Bubbles framelits (and yes, get the bundle! They are both cute ![]() ).
).
But then I needed something more, so I grabbed some of the Gold Foil paper and cut out a different word bubble shape from the framelits. Now, when you look at the paper that now has a word bubble sized hole in it, you will see that the framelit die embossed a faint line from the outer edge of the die (as opposed to the inner edge of the die where the cutting occurred). So in this case, you can use that faint line as a cutting guideline and cut along that share to give you this cool metallic word bubble outline!

Oh, and I actually did emboss the Chocolate Chip paper with my embossing folder… I like the contrast of the stamped woodgrain and the embossed woodgrain.
So, what do you think? I really liked how it turned out and can’t wait to share it at the workshop in a month!


March Online Stamp Club Hostess Code – XEWP4DFD
Use this code to get free exclusive tutorials & project kit! Learn more
 Stampin’ Up! Supplies Used
Stamps – Just Sayin’
Ink – Soft Suede, Chocolate Chip
Paper – Sahara Sand, Old Olive, Island Indigo, Chocolate Chip, Whisper White, Gold Foil
Accessories – Big Shot, Word Bubble framelits, Vintage Brads, Woodgrain embossing folder, Burlap ribbon
Favorite products:
 |  |  |  |  |


