Northwest Stamper

Tag: no layer card

  • Sweet & Simple No-Layer Card

    Sweet & Simple No-Layer Card

    Well, I totally forgot that today was Oscars day…. but given that my son has given me another head cold, today seems like the perfect day for laying on the couch and watching some TV.  So, if you are following along with the Oscars with me, don’t miss out on my Winners Predictions Contest over on my Northwest Stamper facebook page for a chance to win some prizes!

    In the meantime, I thought I’d share a very quick and easy card that is perfect when you don’t have a lot of time or are just feeling a bit icky like I am today.  Look…. no layers at all!

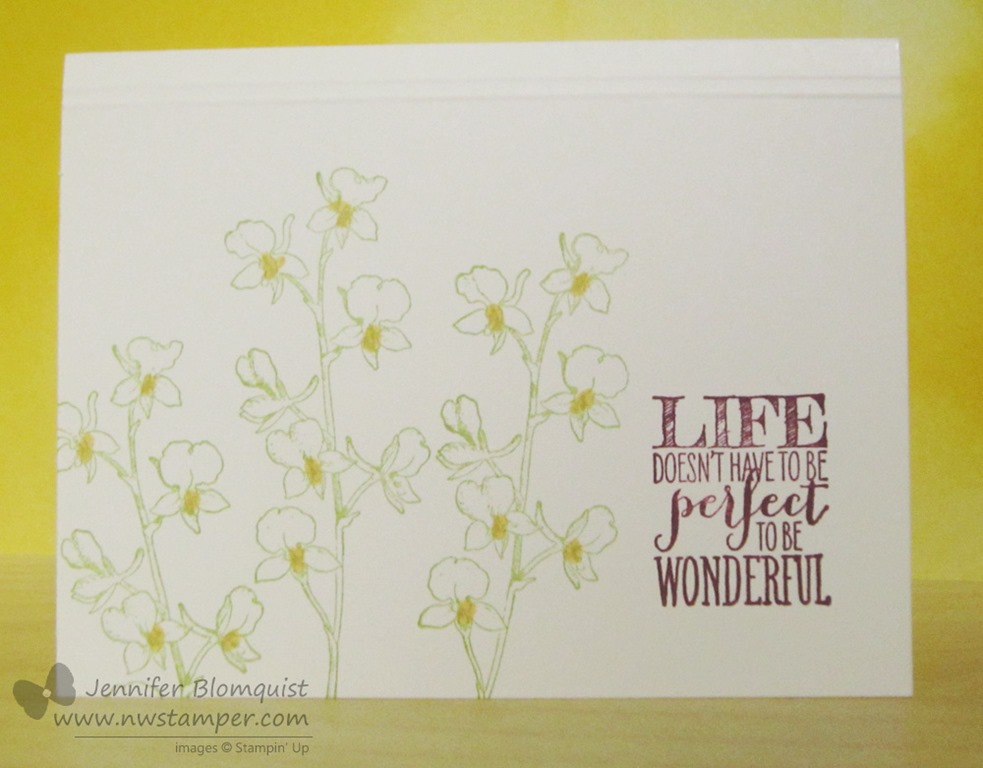
    All I needed was a couple stamp sets:  Happy Watercolor and Perfect Pennants, two ink pads, a marker, and my Simply Scored.

    After stamping each of the flower images, I went back over them and added some yellow to the centers of the flowers for an extra sweet touch.

    Also, I used my favorite trick for keeping no-layer cards interesting…. SCORING!

    Sometimes I make scored lines in a box shape to frame my image, but in this case I kept it even simpler than that and scored two lines along the top of my card.  The first link is about 3/8” from the crease of the card, then I scored a second line 1/8” further down from the first line to add emphasis.

    spaced shop now sig bar

    March Online Stamp Club Hostess CodeXEWP4DFD
    Use this code to get free exclusive tutorials & project kit!
    Learn more


  • Trying Out The Latest Embossing Folder–Framed Tulips!

    I’ve seen the different ways some folks have rigged their embossing folders to allow for texture around the edge of their card with a spotlight in the center.  It usually looks really cool and so I was excited to see a new embossing folder in the Occasion mini that takes all the work out of doing exactly that.  Plus, with the extra pop the texture gives your project, you can totally get away with a single layer card that looks fancy at the same time. Smile

    In this card, I embossed the Whisper White cardstock and then used a Pink Pirouette marker to add some color between the outer embossed frame and the bases of the embossed tulips.  Then I used that Pink Pirouette marker and an Old Olive marker to color in the Because I Care hostess stamp set.  I then took a Regal Rose marker and added some darker pink spots to the flower blossoms for some extra depth.  I used Early Espresso for the sentiment and then finished it off with some Rhinestone bling.

    This whole card can be created in 5 min but looks way prettier than one of those smiling monkey cards you find at the grocery store!

    Tip: If you are using a clear mount stamp set for this card, you can fit the sentiment and the flower stamp on one clear block.  This lets you get the image positioning just right before you stamp and so you don’t have to worry about stamping just right after you’ve already stamped one image and no need for extra tools like the Stamp-a-ma-jig!


    Love the Because I Care stamp set?  Get it free by hosting a fun night of stamping with your friends!  Plus, with Sale-a-bration starting January 25th, get even more free stamps at your workshop!

    Contact me to learn more and save your date.

  • Sponging up a No Layer Card

    Each week, the Late Night Stampers group has some kind of challenge.  This week was particularly intriguing to me as the challenge was to create a single/no layer card.  When I first read this, I thought, “won’t these cards be boring?”  Well, boy was I wrong!  Folks came up with all kinds of cool ways to make a card look interesting without needing lots of layers of paper and embellishments.  So, I took up the challenge and decided to create one myself, no paper layers, no embellishment layers, just paper and ink.

    Here is what I came up with:

    Using scoring lines and sponging, this card turned out much better than I expected.  I scored the outer frame at about 1” in from the top and the bottom of the card and about 1/2” in from the sides of the card.  Then I scored the inner frame about 1/4” in from the outer frame.  I then masked at the inner frame lines and sponged with Pink Pirouette ink and stamped my flowers using Blushing Bride and Rich Razzleberry.  Next I masked the inner part of the score lines so I could sponge the outer areas with Pink Pirouette and finished it off by sponging the edges of the card in Rich Razzleberry.

    Tip:  Did you know that it is easy to score at precise measurements that don’t go to the edge of your paper using a paper cutter and a bone folder?  For a frame like I created above, grab a paper cutter that uses a grooved track for cutting like this one and position your paper to the dimension you want to score.  So, if you were scoring the sides of the frame above, you would put your paper at 3 3/4” so that you are scoring 1/2” in from the side of your 4 1/4” card front.  Then use the bone folder instead of the cutting blade and use the ruler on the cutting track to help you score the length you want – so in this case, from 4 1/2” to 1”.  Keep doing that for each side of your frame, and voila!  You are done!

    Need a bone folder or a grooved paper cutter?  You can order them here!

    No Layer Card Recipe:
    Stamps: 
    Petal Pizazz, Just Believe
    Ink:  Pink Pirouette, Blushing Bride, Rich Razzleberry, Old Olive
    Paper:  Whisper White CS
    Accessories:  Paper cutter, bone folder, sponges