Northwest Stamper

Tag: going global

  • An Anytime Love card with Going Global

    An Anytime Love card with Going Global

    We always think of sending cards when it is someone’s birthday or anniversary or Christmas.  But what about all those other times of the year?  People do amazing things, or are just awesome for being a part of your life… so why note surprise them with a note to tell them how special they are and how glad you are in their life?Heart embossed Going Global Love card

    This is another one of my big projects I want to start up this year… just because and you are awesome cards.  In this busy and bustling world we are in right now, how great would it feel to go to the mailbox and tucked in amongst the bills and junk mail is a little hand crafted surprise. Smile  Love it!

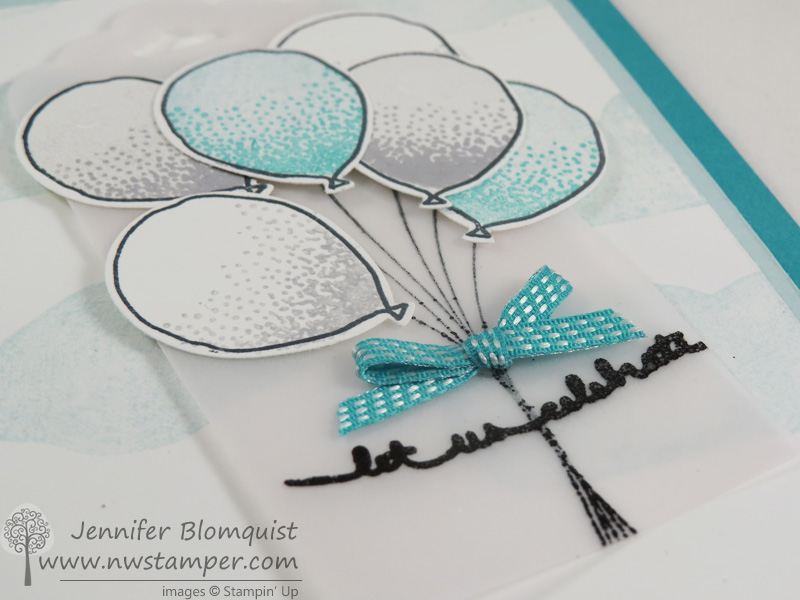
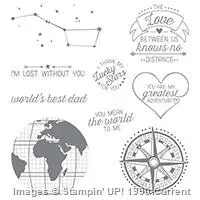
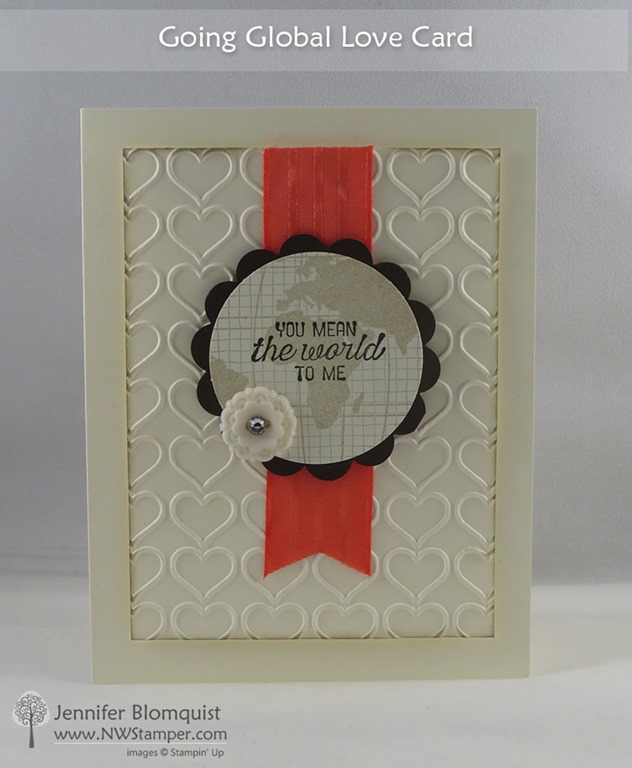
    So, this card today, is an idea to create a card just for that using the Going Global stamp set.  I made the center piece by stamping the globe image with Crumb Cake (to keep it light) and then punched with my 2” circle punch.  Then just stamp your sentiment from the same set on top using Early Espresso ink.  And you know me, I just had to add some glitz by dropping a rhinestone into the center of one of the Classy Designer Buttons and popping that onto my sentiment with a glue dot.  Just makes it fancier don’t you think?

    Heart embossed Going Global Love card close up

    I also had to add in a pop of color and LOVE LOVE LOVE this Watermelon Wonder Stitched Satin ribbon.  It is so pretty and soft in person!

    Tip – When adhering your ribbon to the front of your card, only put adhesive down under where you will have your scalloped circle for the sentiment!  If you run adhesive down the full length of the ribbon, it will start making strange bumps as it glues down over the embossed background.  It is so much prettier fluttering losely at the bottom.

    Heart embossed Going Global Love card side view

    One last tip for you.  I embossed a piece of Very Vanilla cardstock with the hearts embossing folder and attached it to the Very Vanilla card base.  So help the layers stand out, I sponged the edge of the embossed layer.  However, if you sponge AFTER you emboss, you have a higher chance of the paper tearing where it is embossed.  So, you may want to sponge the paper FIRST and then emboss to minimize tearing.

    Heart embossed Going Global Love card nt

    Are you coming to the retreat?  The Northwest Crafty Escape Weekend signs ups are due soon!

    >> Get all the details here! <<

    Just a reminder that the deadline to sign up for this is coming up in less than a week!  The tables are filling up, so make sure you’ve saved your spot!

    Retreat in a Box option is coming soon too! 

    If you can’t come because you are out of town or can’t travel, I’ll be offering a Retreat in a Box so you can play along at home. Smile  I’Il be posting the details tomorrow so check back for that!

    NWstamper signature_thumb[9]

    order online button for sig 3_thumb[4] Product List

  • Project Ideas for Stampin’Up 2016 OnStage Display Board Stamper Submission

    Project Ideas for Stampin’Up 2016 OnStage Display Board Stamper Submission

    I’m so excited to be headed to Salt Lake City in April for the first OnStage Live event in North America!  This is the new live event (think Convention) that Stampin’ Up holds to kick off the new catalogs, share new ideas, and get everyone inspired.  I’ll be headed there with a portion of my Fun n’ Crafty stampers team and know it will be great.

    This year, they are bringing back Display Stampers… so they have invited folks to submit some of their favorite/best projects that they think represent their style for a chance to be selected to create projects for the display boards at OnStage.  I thought it would be fun to throw my hat in the ring since I love creating; but my goodness it was hard to narrow down my favorites.  Here are a few that I think give a few ideas.  So, either way, I hope it gives YOU some inspiration!

    3 Card Ideas

    Card 1 – Balloon Celebrations

    For my first card, I thought I’d share one I made for our team swap using the Balloon Celebrations and vellum.

    I haven’t gotten the blog post written quite yet, but here is a close up of some of the details that are always so hard to see in the full card pictures:

    Balloon celebrations vellum celebrate card close up

    The strings and words are heat embossed on the vellum scalloped topped tag and then the balloons are stamped and punched out on top.  Then add a little bow with the Bermuda Bay stitched ribbon for a final touch.

    Blog post is up!  See more details for this card here

    Card 2 – Fun with Washi Tape

    This was a card I put together to show a couple different ways to use washi tape… as a background and with the masking tape technique to create the background Lost Lagoon stripes.

    It is a little hard to see, but the “thank you” is stamped on a Project Life grid card on the bottom and shows through a hole to the Project Life grid card that is covered in Washi Tape on top!

    Full blog post for this project here

    Card 3 – Bear Hugs & Party Pants Collar Fold Card

    I finally decide to add this card in because I thought it was a fun and different way to use the bear from the Bear Hugs stamp using a fold that hasn’t been used lately for your paper (the folded back Collar Fold).

    Party Pants Collar Fold bear birthday card

    So, Display Stamper Reviewers… those flowers are for you. 😉

    Also, it is hard to see, but I added Crystal Effects to the balloons on the patterned paper, which makes this paper EXTRA AWESOME!  Really, you should try it with your paper at home!

    Bear Hugs with Party Pants Birthday Card close up

    Whew, that was hard and there is so much more I want to show you now, but I guess I’ll have to wait for future blog posts. 🙂

    Full blog post for this card is here

    Scrapbook Page

    Next up, I needed to put together a scrapbook page.  I’m proud to say this came entirely from my brain and I am really happy with how it turned out.

    Legoland Pirate scrapbook page with Botanical Blooms paper 2

    I mixed the Botanical Gardens designer paper and the Corrugated Cardstock for my background with the Going Global stamp set to add color and boyish fun with the page.

    3D Projects

    Finally I had to put together two 3D projects… always the hardest for me!  But I still had fun playing with ideas for the recent holidays.

    Easter Gift Bag with Honeycomb Happiness and the Sunburst Thinlit

    I had so much fun playing with all my new stuff and the Gift Bag Punch Board to pull together this Easter treat bag –

    Doesn’t the Sunburst thinlit make such a great sun for behind our adorable chick?!

    Full blog post with all the details here

    Envelope Punch Board Valentine Owl Treat Bag

    I guess I’ve had a thing for punch boards lately.  This time I used the Envelope Punch board to create a little treat bag for Valentines.  Then I pulled out my trusty owl punch to make a cute little mascot for our project.

    Full blog post for this project here

    Bonus Card

    I LOVE this card but wasn’t sure if it would count because it isn’t the standard size – it is a 4 1/4″ x 4 1/4″.  So putting here for bonus option just because I think you might like it too.

    Full blog post with VIDEO TUTORIAL here

    So thank you for stopping by and thank you to the Display Stamper Reviewers for checking this out and your consideration!  I can’t wait for OnStage!

    NWstamper signature_thumb[9]

    order online button for sig 3_thumb[4]

  • Going Global Lost Without You Card

    One of the suites that was super popular during the November OnStage preview event was the Going Places Suite.  It has an interesting stamp set and some cool masculine papers and an AWESOME world map embossing folder.  Put them together and you can get something like this:

    I don’t know quite whether to call this a valentine/love stamp set, but I like how it is different than the other typical sets.

    image

    Going Global Stamp set (wood | clear)

    It is a little hard to see, but we stamped the globe image onto one of the patterned papers and then punched it out with the 2″ circle punch.  Then I layered it over another patterned paper (the yellow) and then put the sentiment on top.  Isn’t layering nice? 🙂

    Did you notice that vintage-y map image on the card base?  It’s not a stamp… it comes from this cool new embossing folder!

    image

    World Traveler Embossing Folder (in the store)

    We inked up the embossing folder with Sahara Sand ink and then laid it over our base cardstock and then rubbed with a bone folder.  This turned our embossing folder into a stamp!  Pretty cool, huh?!  You won’t get a solid image when you use an embossing folder as a stamp, but you get a cool vintage look with it.  So, don’t worry about perfection and just enjoy the neat rough outline.

    This is another set I can’t wait to work with more… and I hope to put a class together with it later this spring.  There is so much potential… and seriously love that embossing folder!

    In other news, today is a new Tuesday which means new weekly deals!  check out what is up this week:

    12494877_10205919447174401_3824887340519341168_n

    Save the Date!  Northwest Crafty Escape Weekend – Spring Fling is coming!

    I’ve had folks asking when my next Crop Weekend is coming and I’m happy to share that it is coming up in April!

    April 22-24th, 2016
    Bellevue Hyatt House
    3244 139th Ave SE, Bellevue, WA 98005

    Save the date!  Registration details will be out in the next week!

    Want to make sure you get the details when they come out?  Make sure you are signed up for my email list.  Sign up here

    NWstamper signature_thumb[9]

    order online button for sig 3_thumb[4]

    Use Hostess Code PGHMVNJM at check out to get a special thank you from me!

    Pick a FREE item with every $50 you spend!  See the Sale-a-Bration catalog.

    See all the tutorials & classes by mail here

    Save 25% on the Latest Weekly Deals