Northwest Stamper

Tag: flower card

  • Bright Birthday Card with a Swirly Scribbles Thinlits Bouquet

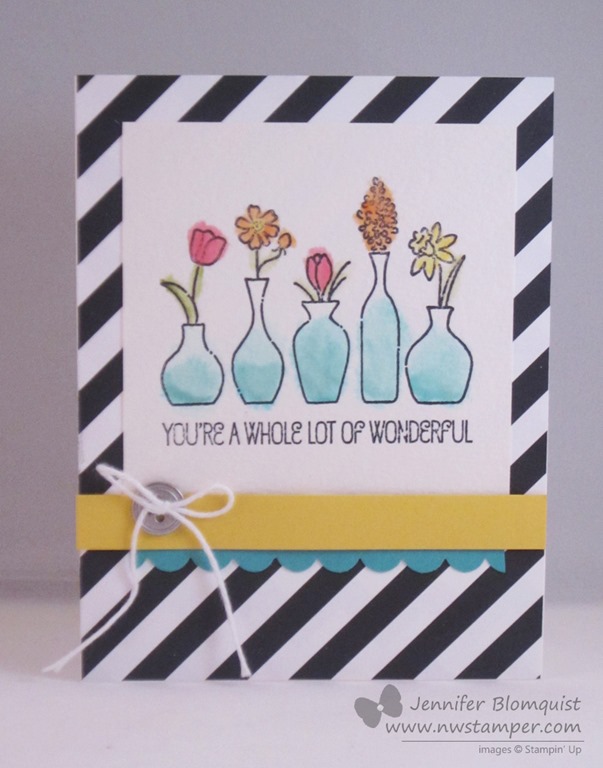
    When I start working on a project, sometimes I have a plan in mind, but often I turn to pinterest or google image search to give me a starting point for my project.  Most of the time, I end up mixing and matching my favorite ideas from multiple cards into one card.  But sometimes I come across a card that I love so much that I just have to make it exactly as I see it.  Today is one of those cards!  Check out how fun and cheery it is:

    I saw this card by Shannon Kay on Pinterest and loved the colors and layout, I just needed to change up the sentiment since I thought this would be the perfect birthday card!

    Tips and Tricks for this card:

    • Pick the perfect color palatte!  When trying to figure out what colors to use on cards, I usually start by looking at color combos from designer paper or start from a color family.  In this case, you can start with the Subtles color family and grab Calypso Coral, Pear Pizzazz, and So Saffron. But then the perfect third color comes from the 2016-2018 In Colors – Peekaboo Peach!  Aren’t they great together?

      TAMS Color Builder (2)
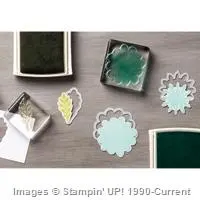
    • Swirly Flowers from the Swirly Scribbles Thinlits – these swirls are great for decorative accents, birds nests, and in this case… flowers!  When you look at your dies as they come in the packaging, you will see the little swirl die is sitting inside the larger swirl.  So, that big Saffron flower is actually two dies, the larger swirl and the smaller swirl stacked together.

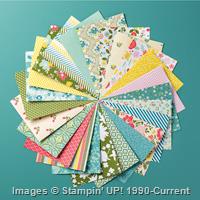
    • Tie in a pop of color in your backgrounds with monochromatic designer paper – This is one of those times where the color family Designer Paper Stacks are great.  They are sets of monochromatic paper that is perfect for adding an interesting background paper without being so busy as to take away from your main image.
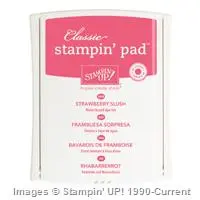
    • Pick the perfect sentiment! I love sentiment sets that give you a variety of fonts and phrases since it gives you lots of options on your cards.  In this case, I’m using the Better Together stamp set and it is one that I totally overlooked in the catalog for the longest time, but turns out it really adds some fun to your cards.  I mean, who wouldn’t smile getting this card and the happy “Happy Birthday!”?

    Who do you know who could use a smile like this on their birthday?

    And if you want to make fun cards like this with me (we did this one in stamp club a little while back), consider joining me for one of my monthly card making classes here in Redmond, WA!  We have lots of fun and there are multiple options a month to come get your crafty on.  Check us out over on my meetup here – the Bellevue-Redmond Card Makers

    NWstamper signature_thumb[9]

    order online button for sig 3_thumb[4]

    October Online Stamp Club Hostess Code – YG62GG6C
    Get free exclusive tutorials each month and even get the supplies in a Make & Take kit with your order over $40 when you use the monthly hostess code!

    Stock up on those pretty papers!  Click the image to get yours!
    B3G1DSP_DemoHeader_NA

    Project Measurements:
    • Whisper White cardstock – 5 1/2” x 8 1/2”, 3 3/4” x 5”
    • Peekaboo Peach designer paper – 1 1/2” x 5 1/2”
    • Scraps of So Saffron, Calypso Coral, Peekaboo Peach, Pear Pizazz cardstock

    Product List

  • Fun with the Thoughtful Branches Framelits for the ICS Blog Hop!

    Fun with the Thoughtful Branches Framelits for the ICS Blog Hop!

    12711055_10153896754563048_5322321900990997775_o
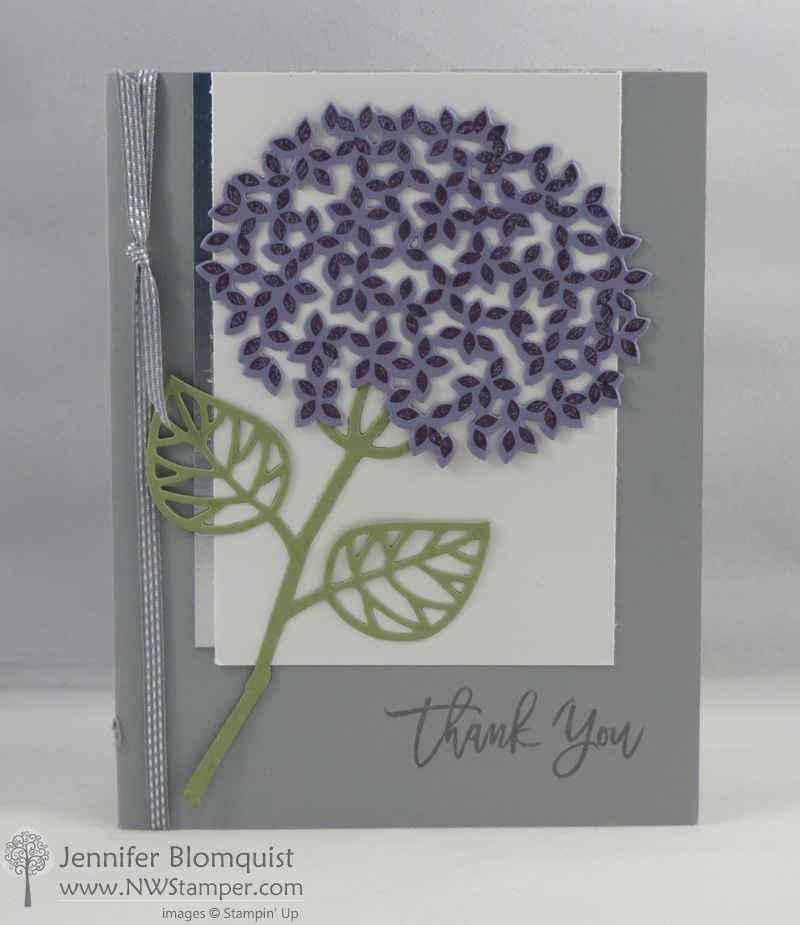
It’s been a while, but I’m finally back to blog hopping with the Inspire, Create, & Share team!  Its been a busy last couple months but I’ve been so inspired by the
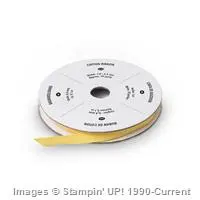
 Thoughtful Branches bundle that just came out yesterday, that I had to get off my duff and participate! This month everyone is showcasing framelits and after playing and seeing the possibilities, I’m loving these!

    ps-  this bundle is only available through August 31st or while supplies last!  So make sure you get your copy ordered sooner rather than later!

    I shared some samples that I made for my Thoughtful Branches class by mail in my last blog post, but I wanted to give you another idea with some up-close details and tips!  Check it out:

    Thoughtful Branches Hydrangea Card in Silver

    See?  Those pretty shapes that are great for tree leaves, turn into a fabulous topper for a flower – hydrangea, right?  I’ll admit, I know about 3 flower names… maybe I should just call this pretty flufferpuff!  😉  Ha ha ha… or maybe one of you can correct me and let me know the right name.

    Anyway, you can stamp the flowers in Perfect Plum ink onto Wisteria Wonder cardstock and use the coordinating die to cut them out.  IT IS EASIER THAN IT SEEMS!  I was totally intimidated by the idea of lining up the flowers, but thanks to the “shark fin” on both the die and the stamp, it isn’t too bad.
    Thoughtful Branches Hydrangea Card in Silver side view

    Then add the stem and leaves (from the same die set, of course) and keep the rest of your card simple and neutral to let the flower make the statement,

    I chose to stick to the silver family with a little piece of silver foil on the left, Smoky Slate cardstock for the base and ink, and some of the new Smoky Slate stitched ribbon.
    Thoughtful Branches Hydrangea Card in Silver nt
    Easy peasy sweetie!

    I hope you liked this idea for the Thoughtful Branches bundle…. like I said, don’t wait until the last minute to get yours, just in case it sells out before the month is up!

    Next up, get even more ideas for your framelits with another cool idea from Deb Naylor and the rest of the ICS crew.  There are 10 of us hopping this month, so lots of fun ideas to check out!

    12716163_10153896754558048_7268295107596979641_o

    I have the details on this bundle at the bottom of the post so you can see why I love it so!

    NWstamper signature_thumb[9]

    order online button for sig 3_thumb[4]

    Product List

  • Another Flower Idea for your Flower Patch Cards

    Another Flower Idea for your Flower Patch Cards

    Its been a fun week for my family as we took a real family vacation and flew to Legoland California for a few day adventure for my lego loving kids (and adults!)  I took my laptop planning on spending the evenings getting some work in but between terrible internet connections and so much excitement and things to do even in the evenings, I was too busy.  Which sometimes actually using vacation to completely vacation isn’t a bad thing. Smile  I’ll share a few photos at the end of the post but to get back into the crafty shares… today I have a card for you that was another one of those quick and simple cards using up bits and pieces from around my craft table.

    This is using the Flower Patch stamp set from the Stampin’ Up annual catalog.  It is a TON of flower stamps that you can mix and match to make hundreds of different custom flowers.

    image

    I’ll admit, I didn’t love this stamp set (and matching die set…because you gotta have something to make it easy to cut out all those flowers) when I first saw it in the catalog.  But then I saw more people using it and was excited to get it.

    Tips for making this card:

    • While you can die cut just about all the flower shapes from the stamp set and layer them, you can also get great flowers by just layering your stamps.  Like in this case, starting with Daffodil Delight for the big flower, Strawberry Slush for the medium flower, and Mossy Meadow for the little flower.  Add a pearl to the middle and done!
    • If you are going to layer your flowers by directly stamping, make sure to use your lightest color first so the other colors will stand out!
    • Mix and match by die cutting other flower shapes and layering them for some variety to your bouquet!
    • Use the new designer paper stacks (those little 4.5” x 6.5” pads) to give you lots of options for coordination designs, like this one from the All Abloom paper stack.

    I hope you had a wonderful week – I know I did! Smile

    family at legolandjennifer and the lego piratenicholas and the pirate legoIMG_7544IMG_7552

    NWstamper signature_thumb[9]

    order online button for sig 3_thumb[4]

    Project Supplies Used:

    Easy shopping anytime!  Click the images below to see the item in the online store.
    Use Hostess Code S7A2HN9W to receive a free gift from me when you place your order!

  • Fun with Vivid Vases

    Fun with Vivid Vases

    This week, I thought I’d share some inspiration for some of the fun new stamps from the Spring Catalog.  In my downline group (the demonstrators in my Fun n’ Crafty group) all created some amazing cards and I wanted to make sure everyone got a chance to be inspired by them!

    Today, I wanted to share a stamp that I LOVE that is also great because it is a single stamp, so it doesn’t take up much space, is inexpensive, and can be used a number of ways (even in ways that may surprise you).  For now, though, I thought I would share a couple ideas to get you started!  I’m talking about Vivid Vases.

    This was a make & take from Leadership this year and I loved how they used the geometric paper because I sometimes have a hard time figuring out how to use bold patterns but I loved this as a basic black and white striking background for the card.

    But really, the main thing we got to play with for this card is watercoloring the flowers and vases.

    When you want to do watercoloring like this, it works best when you start by

    1. Stamp your image with Stazon ink on watercolor paper.  By using watercolor paper, it lets you use extra moisture to get the mottled and diffused look without it tearing or pilling up your paper.
      Plus it gives your cards a fun texture because the watercolor paper is thicker and textured.
    2. Squeeze your desired ink pad while it’s closed so a little bit of the ink transfers to the top of the ink pad.  Use that like a paint pallet and pick up the ink with an Aqua Pen.
    3. Color your image with the pen like you would with a marker.  Add more color if you need.
    4. When you are done with that color, scribble your pen on a piece of scrap paper until no more color shows on the paper.  Then you can move on to your next color.

    Cute, right?

    Or get more fun colors by using paper piecing like my friend, Liz Mitchell!  Check out her great idea with this stamp set.

    I love how she took contrasting designer paper patterns (in this case from the Gingham Gardens paper pack) and made a mat for her card base and then cut out a smaller piece that she cut an oval out with the Oval framelit.

    Doesn’t it make a perfect picture frame?

    Then to add an extra pop of color with the vases, she stamped the stamp image again on scraps of patterned paper and then just cut out the individual vases.  Then you just glue them down to your main stamped image on a piece of white paper!

    Color in the flower buds with markers and you have a bright cheery card!

    spaced shop now sig bar

    Virtual Stamp Club Hostess CodeBNDDMDVU
    Use this code to get free exclusive tutorials & project kit! Learn more

    Stampin’ Up! Supplies Used
    Stamps – Vivid Vases
    Ink – Stazon, Melon Mambo, Daffodil Delight, Pumpkin Pie, Tempting Turquoise
    Paper – Watercolor paper, Daffodil Delight, Tempting Turquoise cardstock, kaleidoscope designer paper
    Accessories – Scallop edge punch, Aqua Pen

  • It’s Stampin’ Up! Convention Time!!

    I’ve been getting super excited over the last week as convention approached and I started getting exciting wondering what amazing ideas I’d see, what new products would be revealed, and have a chance to hang out and reconnect with some wonderful people.

    As I do each year I’ll be posting live updates to my Facebook page (as long as my battery holds out each day) and I’ll give you the full scoop and pictures each night here on the blog.  So even if you can’t be here in person, you can still participate in the excitement and get a feel for it with me.

    Travelling to Salt Lake City!

    So, today was my traveling day and I was very lucky to have 4 members of my group plus a great stamping friend traveling with me from Seattle to Salt Lake City.  We hopped on our plane last night and were treated to the most amazing sunset as we came in to land in SLC.

    salt lake city sunset

    We got our bags and a shuttle and headed to our homebase for the weekend – the Radisson at the convention center.  Check out the cool wall art about the nice beds:

    Convention 2013 Radisson hotel room

    And while I should really be sleeping in that bed right now (since breakfast comes waaay to early in the morning), I thought I’d show you some of the other fun things I brought with me to kick things off. Smile

    1.  My nametag & convention buttons!

    My first year at convention, I saw people with their lanyards full of pins and buttons and I realized that many people collect their convention pins and acheivement pins on their lanyard and I set out to start collecting mine.  It’s taken me 5 years, but I love that it is getting more full.  I know… its silly, but sometimes the little things make it more fun!

    convention 2013 name tag and lanyard

    Plus with 6,000 demos in attendance, they are checking badges this year and so I got to make it fun to look at!

    2.  Swaps!!

    What would a Stampin’ Up! event be without swaps?  I started out with making a ton of this Flower/Doily card… it was fun and easy to make a bunch.  But when I was done, I had made 76 cards and I decided a few days ago that a few more wouldn’t hurt and so I made the Christmas cards as well.

    Flower Shop Doily Card

    stampin up convention 2013 flower shop swap

    I used the new Flower Shop bundle to create the cute flowers and then just accented with one of the Whisper White doilies.

    I decided I needed a few more swaps and I thought of this fun way to use the new Christmas Collectibles stamp set.
    (psst – sneak peek alert!  New holiday catalog goodies including the new stamp set, punch, and embossing folder.)

    Christmas Collectibles Ornament Card

    stampin up convention 2013 christmas swap card


    3.  Fun n’ Crafty group gifts!

    And finally, I put together a little Convention Survival Kit for everyone in my group since it was the first convention for many of them.  Some people have the tradition of downline gifts and roommate gifts… I just was excited to have so many downline and friends going with me I wanted to put a little something together for them.

    Stampin up convention 2013 survival kit

    • I figured a few emergency snacks and mints would be nice.
    • Wet wipes for cleaning up after snacks or when you are stamping during make & takes and need a little extra clean up power.
    • Some tissue, because there is always some touching story or presentation that gets the whole room crying!
    • Chapstick – I swear, I always forget this and buy a new stick every year when I am here!
    • Band-aids were supposed to be in the bag, especially for when you are walking all day and your shoes start rubbing
    • …and of course a cute bag they can reuse each day to easily find their essentials.

    Today they get their handmade gift from me… but I’ll save that surprise for my next blog post!  Ooh, I can’t wait to give everyone theirs!

    So, today will be a day full of Stampin’ Up! home office tours, swapping, opening session, and a big party afterwards!  I’ll post as I go on my Facebook page and then back here later for the full report.

    I’m so excited!

    Now for a few hours sleep while I can….7:15am comes too early!

    spaced shop now sig bar