Northwest Stamper

Tag: convention swaps

  • Walkthrough Wednesday – Clean, Simple, and a little bit Funky 2015 Convention Card Swap

    Every year I go to the Stampin’ Up Convention in Salt Lake City and it is the highlight of my summer.  I mean, come on – getting to spend 3 days being surrounded by amazing creative ideas and even more creative men and women?!  What isn’t to love about that?  I always come away recharged and excited and filled with so many ideas.  And this year is no exception. Smile 

    Now, before I go, I always create some amount of swap cards.  Often I will make multiple designs because goodness knows I don’t have the patience for actually making 100 of the same card!  This year, I participated in 3 organized swaps and then made extra of those designs to swap out and about with random people.  This was my absolute favorite and also my last minute card too!  I literally designed and cut for it about 12 hours before my flight left for Salt Lake City! 

    It is quick to make and yet still has a lot of personality, which I love.  So I wanted to share it with you AND I have a Walkthrough Wednesday video tutorial below so you can see how to make it step by step.

    Tips for making this card:

    • Start with an idea that grabs you and build from there! 
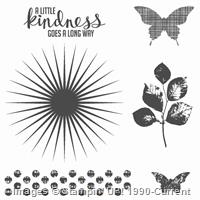
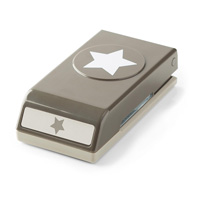
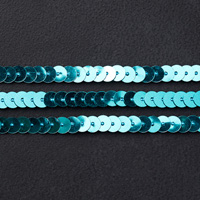
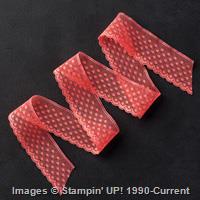
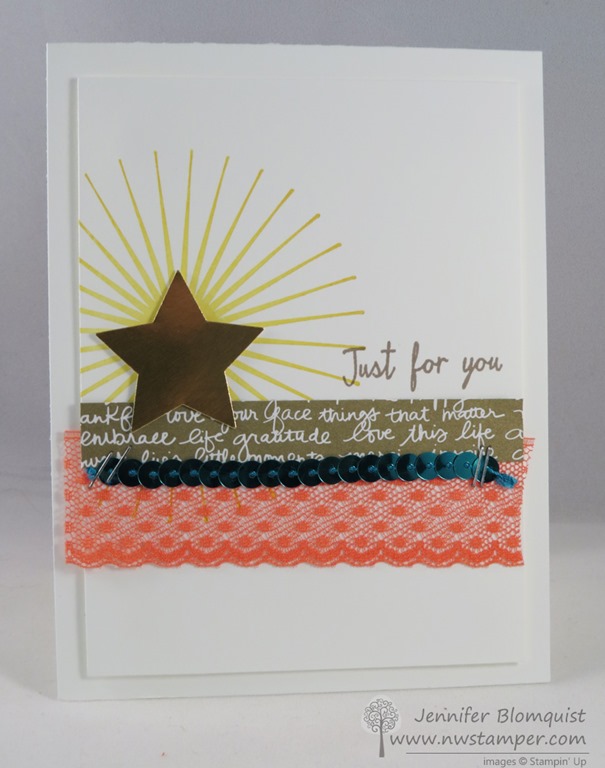
      In my case, I really liked the idea of using the Sunburst from the Kinda Eclectic stamp set and having a Gold Foil Star in the center and then I started adding more paper and ribbon from there.
    • Don’t feel like your ribbon colors have to be a traditional match.  Mix and match and you’ll be surprised how fun things can turn out.  I used the Watermelon Wonder dotted lace trim and then added a layer of designer paper and a finishing touch of the Bermuda Bay sequin trim.
    • Find common elements to pull everything together.  Like in this case, I have gold sprinkled throughout and I have “shiny” too!  The paper and the star are both gold and the sequins tie in to the star by being shiny!
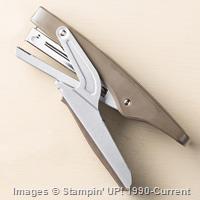
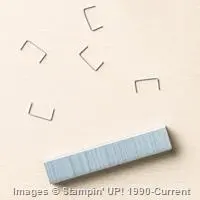
    • When trying to attach lace trim and paper, the tape runner (like the Stampin’ Up SNAIL work great) but for sequins, I prefer to either use glue dots to hold the ends down, or use a mini stapler to attach the ends.
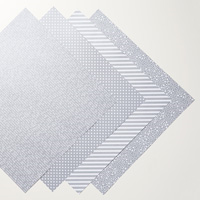
    • If you can’t tell, Stampin’ Up has done something new with their Neutrals Designer Paper stack this year and has added in Gold and Silver metallic papers.  I like that they are metallic without looking like foil so I can add it in without it overpowering my projects.  It is really cool paper!

    Want to see how it all comes together?  Check out this video I put together to walk you through step by step with dimensions and all the great tips you expect along the way. Smile


    (note – if you are reading this post in email, you can get to the video here)

    Need any of the supplies so you can make this yourself?  (You can’t go wrong with any of the items I used in this card this week… they are all favorites that I totally recommend!)  You can find them all in my Online Store or click any of the pictures below to learn more about any of the supply items.

    Thanks so much for stopping by! I  hope you’ve been enjoying the Walkthrough Wednesdays… I’m looking at ways to change and improve my blog posts and ways I share my projects and so hopefully I’ll have more fun stuff for you soon. Smile 

    NWstamper signature_thumb[9]

    order online button for sig 3_thumb[4]


    Project Supplies Used:

  • Even More Remarkable You Card Samples and a Holiday Catalog Pre-Preorder Walkthrough!

    So much to share today including a new stamp set that I love and some of my Fun new goodies from the holiday catalog!

    Holiday Catalog Pre-Preorder Walkthrough

    As a convention attendee, we got the opportunity to preorder a select set of items from the upcoming Holiday Catalog while we were there!  I had to jump on getting a few items early before the main preorder starts today.  My order came in last night and so I had to do a quick video to share it since I know I’m not the only person who CAN’T WAIT to see what is new and coming!  I show what I have and open all my packs of paper so you can see all the patterns since I can’t post a video of all the pages of the catalog yet. Smile

    (Though, did you know?  If you pick up the Stampin’ Up starter kit starting today, you can get ANYTHING from the Holiday Catalog in you kit?  So you can preorder too!)

    I also shared some items I got from the Annual Catalog as well including this Remarkable You stamp set.  I had totally passed it by everytime I had gone through the catalog and then while I was at convention, I saw SO MANY awesome samples with it that I knew I had to have it.  Smile  So, it came on my order.  I shared one of the cards yesterday, but here are 5 more ideas to get you going:

    Remarkable You stamp set – available now!

    image

    Isn’t it pretty??  I can’t wait to play and watercolor with it!

    Weekly Deals are In!

    11219678_10206087634084179_4199534965934073362_n

    View the weekly deals online

    Just a reminder – new weekly deals are out and 25% off!  You can grab yours in the online store or by emailing me… but just a heads up……

    PSST – Clearance Rack Updates are coming TOMORROW (8/5)!

    Just wanted to let you know that a little birdie told me that tomorrow the Clearance Rack will be updated with new items.  I’m not sure what is coming but you know I’ll be up and checking it out.  I would shop early and let me know by noon tomorrow if you want anything from the clearance rack so I can snag it before things start selling out.

    Finally, if you missed it:

    Get Half Off the First 2 Months of a New Paper Pumpkin Subscription

    Yup!  If you haven’t tried Paper Pumpkin yet, or took a break and have considered coming back, don’t miss this deal.  NOTE – if you had a prior subscription, you will need to start a new subscription with a DIFFERENT email address to get the 50% off discount of your first 2 months

    image

    get started with your subscription here – Join the Paper Pumpkin Fun!

    NWstamper signature_thumb[9]

    order online button for sig 3_thumb[4]

  • Fabulous Flower Shop Summer Card (Convention CASE)

    I had to continue my sharing of the great convention with another card that I loved so much that I had to share it in a class last week.  I really wanted to start playing with my goodies from the Holiday catalog but I couldn’t quite let go of summer yet, and so I gravitated to this cute idea.

    Card designed by Sherrie Schintz

    I loved how this card uses all 5 of the 2013-2015 In Colors together and after you emboss them with the Perfect Polka Dots embossing folder, they are pretty cheery wouldn’t you say?

    We added some of the flowers from the Flower Shop bundle (which includes the stamp set and the posy punch) and of course a bit of glitz with a rhinestone in the center of each.

    Now, I loved the card, but I wanted to add a little bit of something, so we all lined an envelope by creating our own matching designer paper.  Now, when playing with the liners recently I noticed that if you use designer paper that has a dark pattern, you can sometimes see it through the front of your envelope.  So this was an example of using Whisper White cardstock and stamping one side with your preferred image (in this case, we stamped the same flower images in a random pattern).

    Then, grab your NEW, AWESOME Envelope Liners!  Sigh, I love these things… Smile

    image

    They come in 3 sizes:

    1.  A2 – to fit 4.25” x 5.5” cards

    2. Notecards – to fit the 3.5” x 5” cards from the Stampin’ Up! notecards & envelope set

    3.  Square envelopes – to fit 3” x 3” cards

    So, we cut our Whisper White paper to 6”x6” (so you can get 4 out of a 12×12 piece and stamped our flowers.  Then cut it out using the largest envelope die.  Because you have white on the back, you don’t see anything through the front of your envelope, but on the inside you have lots of cute flowers!

    Plus, the liner stops just short of the adhesive on the envelope, so you still have the gummy to seal your envelope when you are ready.  Sweet, huh?  So, grab these dies and get creative and I know you’ll love the results!

    spaced shop now sig bar

  • Very Vintage Butterfly Thank You (Convention CASE)

    Every year that I go to convention, I get caught up in swapping.  The idea of taking a bunch of card fronts with you to convention and then trading them with everyone else so that you can get new ideas to take home and share… or copy… or hang on your wall and drool over!

    Well, I’ve learned from the one year that I showed up with NO SWAPS, and proceeded to spend my first night there trying to make as many swaps as I could from the crafting supplies I happened to bring with me; that I LOVE swapping.  I love seeing an amazing card from across the room and running up and saying,”swapping?”  Its like the thrill of finding an amazing deal at the department store.

    But the problem is, I come home with 50-100 card fronts and proceed to take pictures of them and then they sit in a box forgotten until I’m cleaning my room and find them again.

    Which is very sad….

    So, I decided this year, that I would not only share them on my blog, but I’d also use them for inspiration in my classes as well.  (Which really is one of the main points for swapping anyway!)  So, for class this month, I CASE’d (copy and share everything) two fabulous swap cards and I just had to share this one with you!

    Card case’d from a design by Julie Leblanc

    There are a few reasons why I love this card…

    1.  The color combination (why do I always forget about Perfect Plum?)

    2.  The touch of sparkle with the Silver Glimmer Paper

    3.  The fact that this card uses NO WHITE PAPER at all!

    I know it is silly, but that last point was kind of profound to me.  I’m so used to stamping on Whisper White paper with a colored ink that I didn’t think of stamping on Crumb Cake paper.

    And then there is the really cute butterflies.  I had to change this up from the original because I didn’t have the Papillion Potpourri that she used,  Instead I used the Best of Butterflies stamp set and the Elegant Butterfly punch to make them.  They are stamped with Basic Black ink and then sponged on top with the Perfect Plum ink. Neat effect, huh?


    And in class, I had someone emboss a little bit higher up the page than they meant and so they left their first attempt behind and made a second card.  So, I finished out the card with her “boo-boo” and the rest of the supplies only this time I used the Lacy & Lovely stamp set for my sentiment and drew around it with a marker.  I think it turned out just fine! Smile

    So I hope you liked this card as much as I did and I will have another fun card that we case’d tomorrow using the lovely Flower Shop stamp set and punch!  See you tomorrow!


    spaced shop now sig bar

  • Two Styles of Card, One Stamp Set–Lacy and Lovely

    I love when you get a chance to see how versatile a stamp set can be, not only in the different types of occasions that you can use the set for, but also when you can see it being used for a “girly” card as well as a “guy” card.  Well, thanks to convention this year, I was able to get some cool ideas for a set I had totally overlooked – Lacy and Lovely!

    See, I’m not normally a doily and lace stamp set kind of girl, so I skimmed past that section of the catalog, but after continually seeing swaps that made me go, “what stamp set is that??” and them all being from Lacy and Lovely, I have to reconsider my stance. 🙂

    Exhibit A:  the vintage card

    card designed by Sue McQuiston

    Sadly, my photo doesn’t properly show off the sponging and ivory/brown distressing the card, but you get the idea!

    Exhibit B: the guy card

    card designed by Daleen Pinder

    I love the clean and crisp style of this card and the colors are bold too.  I think this totally works for a guy even though I initially thought that stamp set was all lacy.

    Plus, I love that this stamp set comes with sentiments as well as the element images.  I so love having a variety of sentiments to choose from.

    Anyway, I thought this was a fun example of how colors and techniques can really make a big difference in how the same images come across.

    Shop for Stamps and More Online, click here!

    Don’t Forget!  Free Stitched Satin Ribbon with every $40 purchase!

    Are you earning yourNorthwest Stamper Rewards? Every order gets you closer to your FREE stamp set! Click here to learn more!


    Lacy & Lovely Wood-Mount Stamp SetVintage Card Recipe
    Stamps:
    Lacy and Lovely, Elements of Style
    Ink: Rich Razzleberry, Crumb Cake
    Paper: Very Vanilla, Rich Razzleberry
    Accessories: Basic Pearls, Big Shot, Delicate Designs embossing folder, Stitched Grosgrain Rich Razzleberry ribbon, sponge, Stampin’ Dimensionals

    Guy Card Recipe
    Stamps:
    Lacy and Lovely
    Ink: Basic Black, Lucky Limeade
    Paper: Whisper White, Lucky Limeade, Basic Black
    Accessories: Basic Rhinestones

  • Merry Minis Clean & Simple Christmas Card

    QUICK REMINDER:  Today is the last day to take advantage of my Buy One Get One Free offer for my retired stamp sets and products!  Place any catalog order and get 50% of your product total to spend for free on anything in my Retired Stamps and More page!  Shop online or email me to reserve your favorites!


    Ok, so I’m finally getting some of my favorite swap cards from convention photographed and edited to be able to share them with you.  (I know, I’m only a month behind the curve on this! 🙂 )  I love how I get a variety of style and design ideas from the super talented other ladies and guys I meet at Convention.

    In this case, I was super impressed by the simplicity of this card but it still packed a Wow! punch for me.  Get it… punch… ha ha.  Ok, I’m probably the only one laughing.  🙂  But I loved this idea for how to use the new Merry Minis punch pack.

    Card design by Kristen Little

    All you need is a Whisper White card base, wrap some Gumball Green stitched satin ribbon around the front (ps – starting tomorrow, you can get a spool of the stitched satin ribbon free with every $40 order), and add your die cut to the center.  To make the center piece, she cut out a piece of Whisper White paper using the Scallop Rectangle clearlit die for the Big Shot.  Then punch out three trees using the tree punch from the Merry Minis punch pack.  Add a piece of Gumball Green cardstock behind the punched shapes and top each tree with a rhinestone.  Adhere to the front of your card and stamp your sentiment on the front and your are done!

    Easy peasy!

    To Order Stampin’ Up! Products Anytime, click here!

    Check out the 2012 Holiday Catalog

    Are you earning your Northwest Stamper Rewards? Every order gets you closer to your FREE stamp set! Click here to learn more!


    Merry Minis Christmas Card Recipe
    Stamps:
    Teeny Tiny Wishes
    Ink: Gumball Green
    Paper: Whisper White, Gumball Green
    Accessories: Basic Rhinestones, Big Shot, Scallop Rectangle clearlit, Merry Minis punch pack, Gumball Green stitched satin ribbon, Stampin’ Dimensionals

  • A Little More Convention Inspiration

    Well, today is my day to photograph some of the recent projects I’ve made to share with you; so while I work on that, I thought I’d share with you a few more swap cards I received at convention.  These were all cards that when I saw them I just had to trade for them.  So I hope you enjoy like I did!


    card by Tammy Olsen

    I love how this card uses the scallop circle from the Perfect Pennant bigshot die and weaves Cherry Cobbler seam binding ribbon to make this adorable wreath!

    card by Kathy Gage

    I see this card and I think it looks like a present in the middle of a white card – perfect for a birthday card.


    I’m trying to find the creator of this card, I’ll update shortly.

    When I saw this card, I thought it looked like a work of art and was so excited to swap for it.  The cutest thing was the person who created it had designed it for a “Wow! swap” and was concerned it wasn’t good enough.  So, she really appreciated that I was wow’ed by it and I loved having such beautiful inspiration.

    card by Jacque Henry

    I’ve done masking techniques before and I’ve seen sponging and brayering techniques but I never put them together like in this card.  Doesn’t it make such a neat effect!  I know I’ll have to try different fun masked shapes now.


    Been thinking about Designer Paper?  I just got in my paper for the paper share and will be mailing out samplers shortly!  I have a couple samplers extra, so if you are interested in one – it is a great deal!
    Only $25 shipped for 96 6×6 sheets of all the patterns including specialty papers!

    Check out all the designs and reserve yours in this post – http://www.nwstamper.com/love-designer-paper-check-out-this-sampler/.

  • Simple Is Beautiful Too

    When looking at card samples online and at events like the Stampin’ Up! convention, its easy to be drawn in to the “WOW!” cards.  You know, the ones that surely took someone multiple hours to make and look like they should be hung on a wall as art and you could never bear to throw away.  You know which cards I’m talking about. Smile

    I love the inspiration and ideas from these cards, but often I don’t get the time to play with these ideas and replicate many of my favorites.  So, I get extra excited when I see some cards that are clean and simple, and ideas I can try in minutes at home.  Here are a few examples of some of my favorites from Convention this year:

    card by Julie Gunhus

    card designer unknown

    card by Nancy Knowles

    card by Rhonda Wells

    Each of these cards has a cool touch, from the Fancy Fan letterpress plate (which I’m now convinced that I have to have!), to heat embossing, to glitter and shimmer.  But none of the layers is elaborate or particularly fussy.  So, you could make these at home in no time at all!  Got to love that.

    I’m still trying to figure out how to get the best lighting with my new photo tent, so sorry if some of the details are hard to see; but let me say these are all striking in person.  Hope you got some fun ideas to try!  If you have any questions about how any of these cards were made, just let me know!


    On a side note, I’ve had some folks ask me in the past about what was the standard card size and how to cut their paper for a typical card base.  So, I’ve thrown together a photo-walkthrough to answer just that question.  So, if you are interested, you can check it out here  – http://www.nwstamper.com/how-to-cut-a-standard-card-base/ and I’d love to hear if you have any feedback on how it could be better or more useful!

    Shop now and start earning your free stamps with NW Stamper rewards!

  • Fun with Pennant Parade and the New Pennant Punch!

    I don’t know about you, but I LOVE stamp sets that go with punches.  See I love my punches (you can never have enough punches), but when you can stamp cute images in different colors and textures and then can punch them out instead of cutting them out by hand – Brilliant!  That is why I was so excited to see Stampin’ Up! come out with this Pennant Parade stamp set and the matching Petite Pennant builder punch.

    If you haven’t seen them, this is what the stamp set looks like and the shapes the punch cuts out:

    image  image

    So, when you look at the stamp set, you think… that is cool, it matches the punch so there must be cute stuff you can do with it.  But what?  Let me say, convention was FULL of inspiration with this stamp set courtesy of some awesome stamper’s swap cards.   Check out all these fun things people came up with!


    card by Krissie O’Donnell

    card by Jessi Mann
    card by Jackie Tucker
    card by Jackie White

    Totally adorable, right?  I know I’m super inspired and can’t wait to get my stamps inky!  Have you used this stamp set or punch yet?  Leave a comment and let me know what you think!

    Shop now and start earning your free stamps with NW Stamper rewards!