Northwest Stamper

Tag: card candy

  • Quick Nuts About You Card Candy Share

    Quick Nuts About You Card Candy Share

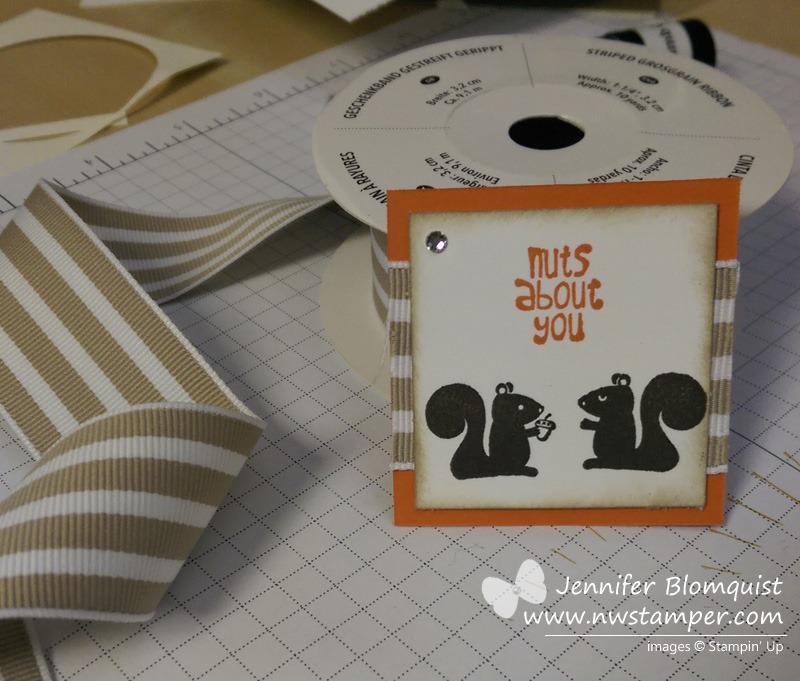
    I had really grand plans for getting all my photos edited and blog posts written for this week so that when I was going crazy trying to get everything in line before heading to the Stampin’ Up convention tomorrow, they would be up for you…..

    So, uh, yeah… that didn’t happen.

    But I’ve at least had a couple posts to Instagram and Facebook.  But I wanted to get a quick post up for you today and then while I’m on the plane tomorrow morning, I’ll be editing photos like a mad women so not only will you have all the photos from the Convention activities, but you’ll have even more blog posts all ready and waiting for when I get back.  Seriously, I’ve had too many fun display board projects that I haven’t been able to share until after convention starts, that I CAN’T WAIT to start sharing them!

    nuts about you card candy

    In the meantime, I thought I would share with you the final swap I created for convention this year.  This is for a “Card Candy” swap I’m in. 

    What is card candy you ask?  Basically it is small hand crafted embellishments (like those layered stickers you see in big box stores).  In this case, we each started with a 2”x2” square and using only the new 2014 In Colors and Neutrals came up with some embellishment that could be used on a future project.  I just loved those cute squirrels from the Hostess Set Nuts About You that I had to give them a go!

    image

    Nuts About You Stamp Set

    Alright, I’m off to finish packing… but be sure to come back by the rest of the week to see all the Convention adventures!!

    Oh, and for those of you who love a good deal, here are this week’s weekly deals:’

    10505623_10202670411504814_8232241282340185792_n


    spaced shop now sig bar

    July Online Stamp Club Hostess Code – 7RDHVEKR
    Use this code to get free exclusive tutorials & project kit! 
    Learn more

  • Some Northern Hearts Card Candy

    I realized recently that while most people know what Blog Candy is (fun giveaways on a blog), that one of the things I gave away in my recent blog candy was “card candy” and that term may not be as familiar to some people.  Well, I wanted to share what I mean and the fun card candy I sent to Penny.

    I first heard the term “card candy” in reference to a swap at convention and when I read more, I learned that it means treats and embellishments for your cards.  In other words, the layered embellishments that you can put on simple card bases and layouts to add a fun touch.  So, in keeping with the theme I used for the box on the Royal Blog Tour, I did some more playing with the stamp set and other punches and embellishments to create some pieces that can be used on a card later.

    It was fun to play with the stamps, punches, and other elements to see what I could come up with that would be cute and could be used incorporated into another project.  I also tried out some new stuff and really liked how they turned out and so I wanted to share with you.

    First, I thought it would be fun to use the Northern Flurries embossing folder but once I had embossed the Bashful Blue paper it looked a bit plain.  I suddenly thought of my Stampin’ Pastels (chalks) that I hadn’t pulled out in ages and started experimenting with them.  Then I decided to add some bling to the center and then a little more Dazzling Diamonds glitter just to make sure there was some extra sparkle.  I really liked using chalks with the embossing folder and will have to play more with this.


    Then I started playing with the snowflakes as background images and wanted to add a little pop, so I stamped the snowflakes on Whisper White, punched out the centers, and added them to the edges of the paper, trimming what hung over the edge.  Then I punched two holes in the top to make a faux bow.  I LOVE how this ribbon looks when you make this bow.  The satin center shows in the middle and you still get the organza showing on the bits that hang out the side.  I’m definitely going to have to do this again.

    Finally, the last one I thought I’d talk about specifically is my little tag.  It was so cool to me when I realized that the birds fit perfectly in the Extra Large Tag punch.  So, I used my markers to only color in the birds and part of the vine on the bottom.  Then, I wanted to try something different with the ribbon and so grabbed the Whisper White Organza and this time colored the center part only using my Always Artichoke marker.  It went really fast and turned out so much nicer than I expected!

    I hope Penny enjoys using these in her projects!  And now you know what I mean when I say “card candy” too. Smile 

    Just a note that if you’ve been enjoying these Northern Hearts projects, this is a hostess set that is only going to be available while the Holiday Mini is here (so until mid-January.  So, if you are enjoying these projects and this set, I’d be happy to help you earn this set for free.  Just send me a note at jennifer@nwstamper.com and I’ll see what we can do!