Northwest Stamper

Tag: baby scrapbook page

  • Stampin’ Up! Leadership 2015- Day 1 Recap

    Stampin’ Up! Leadership 2015- Day 1 Recap

    So, after going to bed Wednesday night/Thursday morning at 3:30am and then getting up at 7:30, I told myself I was going to go to bed by midnight tonight.  (I couldn’t really go to bed earlier than that because I had an event that didn’t get me home until 11pm)…. so, it is now 12:45am and I’m still wrapping up everything.  Seriously, someone teach me how to travel and actually GET sleep! Smile

    Today was the first day of the Leadership Conference here in Orlando for Stampin’ Up and it was FULL of information, tummy cramping laughter, great friends, and amazing project ideas!  I hope you don’t mind indulging me as I relive the day a little.  (and you can see ALL my pictures from today over on my Facebook page – Leadership Day 1 photo album)

    ———————————————————

    So after getting a late start we headed to the convention center to get our bag and say hello to new and old friends around the convention center!

    2015-01-29 08.30.21

    I was a total slacker, but my sweet friend Karina Chin gave me this amazing bag tag and notebook!

    2015-01-29 08.48.35

    I was so glad to have a few of my Fun n’ Crafty stampers and downline here with me, it made it so much fun to be able to share this with them!

    IMG_3814

    Even though we spent literally all morning and early afternoon going over compensation plan changes for demonstrators that are coming up in October.  I don’t mind math… but being tired and trying to do math is way harder! Smile

    We got a nice lunch

    2015-01-29 12.11.55

    Had an (unintentionally) hilarious stamping presentation by Shelli Gardner…

    2015-01-29 15.56.53

    2015-01-29 15.38.56

    IMG_3844

    2015-01-29 16.07.49

    2015-01-29 15.44.58

    See, when she was showing how to make these feathers using the new Cotton Twine and Washi Tape… she didn’t tell us she was making a feather at first and with the white stringy tail it looked like something a little different that had us all dying of laughter including Shelli when she realized  (think feminine product with a string ha ha)

    They even gave us ALL a stamp set she was using! Smile

    2015-01-29 16.12.12

    I participated in a great card swap (so many cute samples to share later)

    2015-01-29 12.55.102015-01-29 12.33.11

    and loved seeing some old friends!  Including the adorable Andrea Withers2015-01-29 09.29.16

    Brandy Cox

    2015-01-29 11.48.11

    and my Stampin’ twin (when I cut my hair again) Julie Davison

    2015-01-29 22.17.46

    Then in the evening it was time to head to Manager’s Reception!  A fun night out for any demonstrator with the title Manager or above.  So Karina and I were ready to grab the bus and go!

    IMG_3953

    This year they rented out part of Disney’s Hollywood Studios and though it was a bit chilly, we had a chance to mingle….IMG_7268

    You know, me and my buddy Shelli Gardner Winking smile

    We also had a private showing of Fantasmic

    IMG_7277

    Photo ops with the Mickey Mouse and friends…

    IMG_7311

    Yummy desserts! Isn’t that cake pop adorable???

    IMG_7302

    And even a hot chocolate bar… care to guess how many scoops of marshmallows went into my cup? Don’t stop at just one! Smile

    IMG_7308

    So all in all, a great first day! Next up, more great sharing of business ideas from demonstrator speakers, more stamping demonstrations, more samples, and more playing with the latest products!

    See Even MORE Pictures and Samples from Day 1 here

    While you are visiting my Facebook page, make sure you have liked it so you can get updates as they come throughout the day tomorrow!


    Don’t Forget!  Get Double Your Rewards Points through Sunday!

    And while I’m away, get 2x the rewards through Sunday! My gift to you while I’m playing in Orlando.

    1. For every $40 you order = 1 punch 2 punches!, $80 = 2 punches 4 punches AND a Sale-a-Bration freebie…and so on!
    2. Any purchase from me in the last year counts towards accruing rewards punches!
    3. Got 10?  Email me and let me know what stamp set you want. Easy Peasy!

    Shop online with hostess code S7A2HN9W (enter it on the shopping cart page) and you are all set or email me at jennifer@nwstamper.com with your order.


    NWstamper signature_thumb[9]

    order online button for sig 3_thumb[4]

  • Scrapbook Sunday: Going Vintage Sweet for a Baby Girl Layout with Kinda Eclectic

    I’m back with another Scrapbook Sunday project share for you.  I put together this layout for the Stampin’ Up convention display boards last year and it was the project that I was most sad about not being able to get back!  I think it is one of my favorite layouts in a long time –and I even came up with it all by myself!

    Now, I normally scrapbook in 12×12 sizes but I decided to try something different and go for an 8-1/2” x 11” layout.  Turns out it is a great size if you have a 4”x6” photo that you want to highlight.  Plus the smaller size means you can add a few touches and fill up the space more quickly so you can move on to your next set of photos.  I’m sure I’ll still do lots of 12×12 pages still, but I may have to mix in more of these smaller layouts too.

    Embellishing Ideas for your Scrapbook Page:

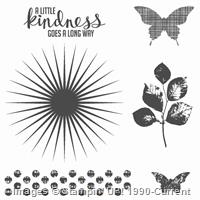
    • Grab a nice multipurpose stamp set – like in this case, the Kinda Eclectic stamp set – and use it to accessorize your page and POP your photo.  I used the sunburst behind one corner and the vintage dots under the opposite corner.
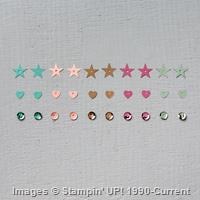
    • To add extra sparkle (or to cover up an imperfectly stamped circle Winking smile ) Use the In Color sequins as dots in your stamped area.

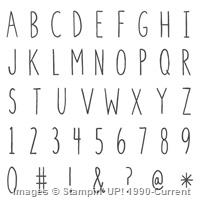
    • and yes, that title is stamped as well using the Skinny Mini alphabet stamps.
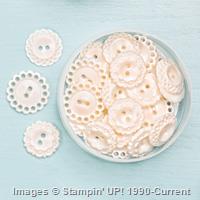
    • In sticking with my vintage feel, I layered stamped images and accessories for a cluster (clustering is a great way to add some dimension and wow to your pages).  I have Burlap ribbon, stamped and fussy cut leaves, a vintage button, stamped and punched butterfly, and a sequin with a mini-brad through the middle all layered together.

    • You will notice the two-tone look to the leaves and butterfly… that is because I used the Rock n’ Roll technique to ink them.  Ink the stamp with one color (usually the lighter color) and then roll the edges of the stamped image in a darker color ink BEFORE you stamp.
    • I didn’t want to leave the upper corner blank, so I stamped with a very light color some extra butterflies so there was subtle balance.  It’s kind of like making your own background paper!

    Leadership 2015 Updates!

    I’m getting my bags packed and swaps finished as I head off to Orlando on Wednesday for the final Leadership Convention from Stampin’ Up (they have announced they are changing what events they run and this will be the last “leadership” they put on… I’m hoping while I’m there they fill us in on what they will be doing in it’s place in the future!).  I always love going and getting more great creative ideas, hear the latest announcements and news from Stampin’ Up, and connect with so many of my stamping friends.

    I will be sharing frequently through the week, so make sure you are plugged in to follow along with me!

    1. Daily Updates on my Facebook Page! – follow me
    2. Specials from me and extra sneak peeks on my newsletter mailing list – get on the list
    3. Summaries each morning on this Blog – get posts by email by using the subscription box on the right side of the blog

      image

    NWstamper signature_thumb[9]

    order online button for sig 3_thumb[4]

    Stampin’ Up Supplies Used:
    Click on any of the pictures below to see more details or to purchase your favorites online!

    Supply List

    Built for Free Using:  My Stampin Blog

  • Scrapbooking Sunday: Using Stamps as Accents on a Baby Page!

    I know it is St. Patrick’s Day and so I should be posting something green, but I finished this scrapbook page for my daughter and just had to share it with everyone for this week’s Scrapbooking Sunday!  So, you can virtually pinch me but I hope you enjoy the ideas for this weeks layout.

    I’ve been trying to get through some of the recent backlog of photos I printed opportunistically and then never got scrapped.  Smile  This is one of the photos from right before we left the hospital after she was born.  I may not look my best, but it is one of the few pictures of I have of her and me and so I’ll love it no matter how I look.

    This whole layout actually started with me wanting to use the elephant from the Patterned Occasions stamp set exclusively available during Sale-a-Bration but to use it for a baby scrapbook page.  So I grabbed my Pink Pirouette marker and started coloring the elephant and making an elephant parade.

    One thing I noticed is that the markers are so juicy and the pattern of the elephant is so intricate that extra ink gets caught in the spaces so it wasn’t as crisp of an image.  But I didn’t care and couldn’t be bothered to try again using a post-it note to mask the stamp itself.

    But then I tried again using a mix of colors for one more fun elephant accent.  This time I left the flower in the image and cut it all out.  I accented it with a 1 1/4” scallop circle punched out of Pink Pirouette cardstock.

    Finally, I needed a little more something at the top of my page and my Hearts a Flutter stamp set and framelits was exactly what I needed.  I just adhered my baker’s twine across the top of the page and tucked my banners under the twine where I wanted them.

    I even like the Summer Starfruit designer paper from the Sale-a-Bration flyer (Sycamore Street designer paper) as my background even though initially I was not a fan at all of this pattern. Smile

    Don’t Miss the Start of Sale-a-Bration Send Off Week! Giveaways and more!

    Don’t forget that this is the last week to get your free stamps and accessories as part of Sale-a-Bration.  To remind you (and me!) of the fun ideas and projects you can make with the different stamps and accessories, I’ll be holding a send off celebration here on my blog all week capped off with a Sale-a-Bration Send Off Party on Friday.

    All week you can get entries for prizes and drawings!

    So, come back tomorrow when it all kicks off and you can start celebrating and winning with me!


    To Order Stampin’ Up! Products Anytime, click here!

    Are you earning your Northwest Stamper Rewards?

    Every order gets you closer to your FREE stamp set! Click here to learn more!

    Patterned Occasions Baby Scrapbook Page Recipe:
    Stamps:
    Patterned Occasions*, Hearts a Flutter
    Ink: Soft Suede, Summer Starfruit, Rich Razzleberry, Markers: Pink Pirouette, Rich Razzleberry, Soft Suede, Gumball Green
    Paper: Pink Pirouette, Rich Razzleberry, Soft Suede, Very Vanilla, Primrose Petals core’dinations cardstock, Sycamore Street designer paper *
    Accessories: Sycamore Street ribbon & button pack*, Big Shot, Junior Timeless Type sizzlits, Hearts a Flutter framelits, Square Lattice embossing folder, Glue Dots, Stampin’ Dimensionals, Crochet Lace trim, Early Espresso baker’s twine, stapler, Sanding Block, 1 1/4” scallop circle punch

    * item that is available for free with a $50 order through 3/22/2013

  • Happy Birthday to my Baby Girl!

    Its been a busy week all leading up to today which is my little girls 1 yr birthday. Smile  So, I hope you don’t mind if I share my proud mama moment with you!

    I can’t believe how a year ago today, a cutie patootie joined our family…. see, isn’t she cute?

    Caitlin Baby scrapbook layout

    And over the last year she has grown to a cute and fun almost toddler!

    2012-12-08 12.17.38-13

    I am so grateful for today and for my husband and Stampin’ Up! for allowing me to stay home with my kids!

    To Order Stampin’ Up! Products Anytime, click here!

    Its INK-REDIBLE December!
    Get a FREE set of 10 ink pads with a qualifying order or party; or get them free when you join the Stampin’ Up! family! Learn more

    Are you earning your Northwest Stamper Rewards?
    Every order gets you closer to your FREE stamp set! Click here to learn more!

  • Scrapbooking Sunday: Mixed Bunch Color-blocked Page

    So, this is my last weekend to prep before the big Northwest Women’s Show here in Seattle.  I’m grateful to have the opportunity to present a crafting demonstration on their Home Style stage on each of the 3 days; so I’ve been trying to square away exactly what I’m going to demo.  Well, this is one of the projects I’m planning on showing on Sunday (please forgive the awful photo):

    I saw a layout by a crafty friend of mine named Brettaney Q, who is a super talented scrapbooker, and was inspired to scraplift from it for the show this coming weekend.  She was so nice to give me permission and I love how my version turned out thanks to her inspiration.

    I changed things up because I was using all Stampin’ Up! supplies and it was fun to get to pull out and play with all my tools!

    This layout ended up being all about texture as I cut my strips for the color-blocked bottom of the layout and ran them through my Big Shot using the Perfect Polka Dots embossing folder.  And on the top half of the layout I stamped with the Mixed Bunch stamp set with Versamark and embossed using clear embossing powder.  I added some Wisteria Wonder bakers twine along the middle which softens it all a bit.  And then I played with my Mixed Bunch stamp set and the matching Blossom punch to make the flower next to my photo.

    Oh, and the last thing I did was add a simple title to my page.  I again reached for my Big Shot and grabbed my Timeless Type alphabet sizzlets, and cut it out of Rich Razzleberry cardstock.

    I love how it turned out and I hope the visitors to the Women’s show enjoy it too!  I’ll be showing them this project on Sunday along with a matching card using the same layout for those of you who aren’t scrapbookers. 🙂
    If you’d like to come visit me at the show – I’ll be presenting at the following times:

    • Friday 3/2 at 3:30pm on the Home Style Stage
    • Saturday 3/3 at 3:00pm on the Home Style Stage
    • Sunday 3/4 at 11:30am on the Home Style Stage

    I’ll be demo’ing for about 30 minutes and have a display table next to the stage with more samples, information, and of course a show special!  I still have a lot to do but I think the show will be a lot of fun.  Hope you can come say hello if you are local!


    To Order Stampin’ Up! Products Anytime, click here!

    First Tooth Scrapbook Page Recipe:
    Stamps: 
    Mixed Bunch
    Ink:  Wisteria Wonder classic, So Saffron classic, Versamark
    Paper: Chocolate Chip textured cardstock, Whisper White cs, Wisteria Wonder cs, Pink Pirouette cs, Rich Razzleberry cs, Lucky Limeade cs, So Saffron cs, Island Indigo cs, Crumb Cake cs, Concord Crush cs, Very Vanilla cs
    Accessories:  Blossom punch, Scallop Trim border punch, Scallop edge punch, 1” circle punch, Wisteria Wonder bakers twine, Big Shot, Perfect Polka Dots embossing folder, Heat gun, Clear embossing folder, Timeless Type Junior Alphabet, Stampin’ Dimensionals

  • Scrapbooking Sunday & A Superbowl Special!!

    As I mentioned last week, I’ve been getting back into scrapbooking recently and so I’m hoping to be able to share with you some ideas for how to use your different Stampin’ Up! supplies to make some fun layouts.  So, today is week 2 of Scrapbooking Sunday and stick around to the bottom of the post for my Superbowl Special!

    But first, can I share with you some photos of my littlest stamper? Smile

    This layout was based on a sketch by my friend Charity Becker.  I don’t know why I hadn’t thought of collaging photos into one single block before, but I love the look.  And it was perfect for me to put together those multiple “sleeping baby” pictures from when we were still in the hospital after Caitlin was born.  Plus it was the perfect opportunity for me to pull out the Love Impressions specialty paper I scored from the Clearance Rack!

    Since the sketch itself was pretty simple, I had fun pulling out some of my new toys and adding some fun touches.  First up…. Framelits labels!

    Since you get 6 different sizes of the same shape, I could make 3 different sized but coordinating labels for the bubble border at the top of my pictures.  Plus, I LOVE the fact that you can see what exactly you are cutting out with your framelit and so I could center the grey “LOVE” where I wanted when I went to cut it out.  And just to keep it fun, I used my embossing folders on two of the labels.

    And then to balance the bottom of my pictures, I ran a row of the Blushing Bride pleated ribbon.  I really don’t think I can get enough of this ribbon! Color in the XOXO from the designer paper with my waterbrush for a subtitle.  And then one of my favorite touches – I pierced holes at the corners of my photo frame and ran Cherry Cobbler Bakers Twine to make a subtle outline of my centerpiece.  It was so easy and really made a bigger impact than I expected for such a small amount of material.

    Do you love this stuff as much I do?  So much fun to use!  Ready for a special to help you add these to your stash for a deal?

    Superbowl Sunday Stampin’ Special!

    Alright, the Superbowl is a big day for many folks – whether you are watching for the game or for the commercials.  So, lets have a little stamping fun along with it!

    • Order discount
      • Call or email me your order at anytime on Sunday and once the game is over, I will total up the final score and the last digit of that number will be the discount for everyone’s orders!
      • So, if the final score is 31-7… add them together to get 38… so the last digit is ‘8’ and so everyone gets 8% off their purchase.
    • Bonus drawing!
      • Everyone who gets me their order prior to the end of the game will be entered in a drawing for a free spool of Pleated Ribbon in the color of your choice!

    Contact me at jennifer@nwstamper.com or 425-307-1646 to place your order.

    Online orders will be entered into the bonus drawing and discounts will be applied in the form of a reimbursement check.

    Alright everyone, GAME ON!  Enjoy your Sunday and I’ll see you back here soon!

    To Order Stampin’ Up! Products Anytime, click here!

    Love Impressions Scrapbook Layout Recipe:
    Ink: 
    Basic Grey, Real Red, Blushing Bride
    Paper: Love Impressions designer paper (CLEARANCE RACK), Real Red cardstock, Basic Grey CS, Whisper White CS
    Accessories:  Big Shot, Polkadot embossing folder, Lattice embossing folder, Framelits – Labels, Blushing Bride pleated ribbon, Cherry Cobbler bakers twine, Paper Piercer, Mat Pack, Glue dots, Water brush, Sponge Daubers

  • A Baby Girl’s First Scrapbook Page

    While cutting the paper for my designer paper share, I got a chance to really take in the different designs and was surprised to find myself drawn to the Beau Chateau pack.  See, normally I think vintage is pretty and all, but it isn’t usually my style.  Then I saw the pink patterns and since we had learned we are having a girl in December, I just had to make a scrapbook page with these papers.  So, here is our baby girl’s first scrapbook page:

    I had seen this layout on the ScrapbookSteals blog and I thought it would be perfect.  The only problem was that I liked the bracket shape at the top of the page but I didn’t have anything I could trace to make that design.  But boy did I luck out since the back of the patterned paper was lined!   I laid out where I wanted my photo(s) to be and then drew a rough outline and used my ruler to space out where I wanted the curves to go.

    Then once I was done cutting out my shape, I realized that the lines would make a cute background and because my shape was pretty symmetric I could actually just flip over and glue the left over paper (from where I cut out the bracket shape) up underneath my cutout and it fit great!  So no waste. 🙂

    I also noticed that one of the other paper designs in the Beau Chateau had a pattern that included this bigger frame.  I thought it would be perfect to cut out and use as a journaling space.

          Finally, I had to show you my title – which was when it really hit me that we are having a baby girl! I used the Letter It alphabet, since it seemed to ft the feel of this page.  This was my easy method for using them but I like the effect.

    I put all the letters together for a given word (I don’t have the biggest rectangle block so I had to squish them together on a smaller block) on one block and stamped them together.  Then I just trimmed around the letters for a quickie title.  Easy and Fun!

    Alright, I know this post is getting long, so thanks for sticking with me.  This is my first detailed scrapbook in a while and I love how it turned out; especially with paper I didn’t think I would even like! :)  Tomorrow I’ll share a baby shower invite I created to match this page (based on a request from one of my facebook fans).  Hope you’ll come back and check it out!

    And don’t forget, there is still the Buy 3, Get 1 Free designer paper promotion happening now, so you could get this paper free if you have your own vintage projects to make. 🙂

    Click here to shop online 24/7 and start earning your NW Stamper rewards!

    My Girl scrapbook page recipe:
    Stamps: 
    Letter It Alphabet
    Ink:  Soft Suede, Crumb Cake (for sponging)
    Paper:  Beau Chateau designer paper, Very Vanilla CS, Soft Suede CS, Pink Pirouette CS
    Accessories:  Island Indigo ruffled ribbon, Adhesive Pearls, Fabric Daisy (from retired pretties kit), Antique Brads, Vintage Trinkets, Chantilly Lace ribbon, Stampin’ Dimensionals

  • Using Ice Cream Parlor Quick Accents for Scrapbooking

    So, here is my story, to which I think a number of you can relate.  Smile 

    Many months ago, I printed out a ton of pictures of my son because I was going to create a baby album for him.  I have a stack of at least 40 pictures from his first month alone, plus baby shower pictures and maternity pictures.  I even went so far as to figure out how to layout about 6 pages of these pictures a while back (though do I have any idea what those layouts were at this point? Nope!) but then the pictures went back into the stack.  And there they still sit…in a stack…on a shelf.

    But I had an epiphany today!  I was avoiding scrapping those pictures because, aside from being busy, I was wanting to make “the just right” layout with the images including the perfect paper, embellishments, etc.  But I realized, its way more important to get the information written down and the pictures in a place they might actually be looked at, then having the perfect layout.  Especially in this world of digital photography, just put some layout together and you can always print the pictures again if you want to make it "perfect” later!

    So, with that in mind, I put together this layout yesterday afternoon during Nicholas’ nap.  I was challenging myself to use the Ice Cream Parlor Designer Paper and Quick Accent die cut stickers in a layout and I actually think they turned out rather well!

    With the exception of some cardstock and the BigShot Alphabet dies, everything comes from the Ice Cream Parlor Designer Paper and Quick Accents bundle from the Sale-a-bration catalog.  Because the quick accents are stickers, it made it really easy to put this page together!  There are still a few days left to earn them with your order or enter my color challenge and you’ll have a chance to win some Quick Accents to play with.

    Now, if only I dare to pull down my wedding pictures from 10 years ago and get started with them too… I guess one step at a time!


    Shop now and get your FREE Sale-a-Bration goodies

    Only 4 days left of Sale-a-Bration!  Did you get your FREE stamps?

    View the Sale-a-Bration catalog here

    Going Home Scrapbook Recipe
    Ink: 
    Early Espresso (to sponge the title letters)
    Paper:  Ice Cream Parlor designer paper (SAB), Early Espresso cardstock, Certainly Celery cardstock, River Rock cardstock
    Accessories:  Ice Cream Parlor Quick Accent stickers, 2 1/2” Circle Punch, Sponge Daubers, Sizzix Simple Letters Alphabet bigz die