I never get sick… my kids are usually extremely healthy. Which I’ve been so grateful for over the last few years. Unfortunately, this year… a cold ran through our household… right before Christmas! I was the last to get it and it hit the week of Christmas and between that an multiple family festivities, I’ve been away from my computer most of the time. I’m getting back on my feet now and there were a few projects I really wanted to share, so even though they were supposed to be posted last week, I’m going to share them now – like this adorable Rudolf the Reindeer gift card holder!

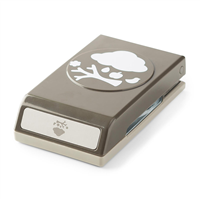
I saw this cute reindeer by Dena Renkow and I had to make it myself and share it with my stamp club gals. It is a super fun punch art piece, but there are lots of little bits to it, so I made them a chart for what pieces they needed.

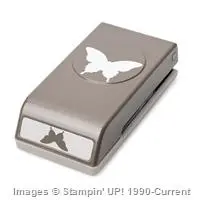
If you can’t read the punch names very well, this is what we used:
- Extra Large Oval Punch – body
- Owl Builder Punch – head, hooves, nose, eyes
- Tree Builder Punch – antlers, ears
- Fun Flower Punch – white tummy patch
- 3/4” Circle Punch – muzzle
Then we started by assembling our reindeer! We trimmed the pieces as I showed in the picture above and glued together using a dimensional to pop up his head and then again to pop up his nose. And of course, we used red glimmer paper for the nose to make him extra festive!

We made the card base by cutting a 4 1/4” x 11” strip of Sahara Sand cardstock and cutting off 1/2” from one end. Then score at 4 1/4 and 8 1/2” so that you have a 4 1/4” square card with an extra flap you can adhere to the inside to hold the gift card. Stamp the small flap with one of the snowflakes from the Flurry of Wishes stamp set and Sahara sand ink and then use the Extra-Large oval punch to punch an easy-grab space for the gift card. Adhere the flap to the inside of the cards using Tear Tape so you don’t have to worry about it coming apart once the gift card is inside!

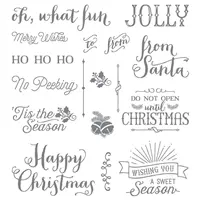
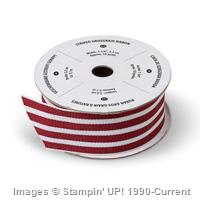
We decorated the front by stamping more snowflakes on the top of the card front and then wrapping some of the Cherry Cobbler wide-striped ribbon. And a little sentiment from the Oh, What Fun stamp set in the Holiday Catalog.

It is a super cute project and though the reindeer takes some punching and assembly time… he is so cute and oh so worth it for any project. Maybe some cute Thank You cards for all those fun gifts you got this year? ![]() Give it a try and let me know what you think!
Give it a try and let me know what you think!
PS – Don’t forget that there is one week left before the Holiday Catalog & the Year-End Sale are over and gone! Check out the saving here
![NWstamper signature_thumb[9]](https://i0.wp.com/www.nwstamper.com/wp-content/uploads/ad87b4046c1e_C9F6/NWstamper-signature_thumb9_thumb.png?resize=322%2C118 "NWstamper signature_thumb[9]")
![]()
Use Hostess Code BEFX37ZS at check out to get a special thank you from me!
NEW ITEMS ADDED – BIG Year-End Clearance Sale! See what is on sale here.
See all the tutorials & classes by mail here
Check out the Holiday Catalog Retiring List & Sold Out Updates
Save 25% on the Latest Weekly Deals


Built for Free Using: My Stampin Blog


![NWstamper signature_thumb[9]](https://i0.wp.com/www.nwstamper.com/wp-content/uploads/ad87b4046c1e_C9F6/NWstamper-signature_thumb9.png "NWstamper signature_thumb[9]")


 NORTHWEST STAMPER CONVENTION SPECIAL


 Shellie G. of
